Is your MacBook running out of storage? It’s a common problem that can slow down your computer and limit what you can do. Freeing up space on your MacBook is easy when you know which files to remove and which tools to use. You don’t need to be a tech expert to get more room on your hard drive.
Many Mac users don’t realize how quickly photos, videos, and downloaded files can fill up space. Your MacBook has built-in tools to help you see what’s taking up storage and manage it better. With a few simple steps, you can delete unused apps, clear system junk, and move files to cloud storage.
Getting rid of clutter on your MacBook not only gives you more space but also helps your computer run faster. Taking time to clean up your storage regularly keeps your Mac in top shape for work, school, or fun.
1. Use macOS Storage Management
macOS includes a built-in Storage Management tool that identifies what’s taking up space and offers recommendations.
How to access it:
- Click Apple Menu → System Settings → General → Storage (on macOS Ventura or later).
- On older versions: Apple Menu → About This Mac → Storage → Manage
- Review Apple’s recommendations, such as:
- Store in iCloud – Move photos, documents, and messages to iCloud.
- Optimize Storage – Remove Apple TV movies and email attachments you’ve already watched or opened.
- Empty Trash Automatically – Delete Trash items older than 30 days.
- Reduce Clutter – Review large files and downloads manually.
(Source: Apple Support)
🗑️ 2. Empty the Trash and Downloads Folder
Files in the Trash still occupy disk space until permanently deleted.
- Right-click the Trash icon in the Dock → Empty Trash.
- Also, check the Downloads folder for old installers, PDFs, or ZIP files you no longer need.
(Source: SimplyMac)
📸 3. Clean Up Photos and Videos
Photos and videos can take up gigabytes of storage.
- Open the Photos app → Settings → iCloud → Optimize Mac Storage to store smaller versions locally.
- Delete duplicates or unnecessary media.
- Move large video files to an external drive or cloud storage (iCloud Drive, Google Drive, or Dropbox).
🧹 4. Remove System and Cache Files
System caches, logs, and temporary files can accumulate over time.
To clear them manually:
- Open Finder → Go → Go to Folder
- Enter:
~/Library/Caches - Delete unnecessary folders (avoid deleting app-critical files).
Or use Terminal commands for advanced cleanup (recommended only for experienced users).
(Source: OSXHub)
🧩 5. Uninstall Unused Applications
Applications often store large support files even after deletion.
- Use Finder → Applications, then drag unused apps to the Trash.
- For a deeper cleanup, use tools like AppCleaner or CleanMyMac X to remove hidden support files.
📚 6. Manage Mail and Attachments
Mail attachments can consume significant space.
- In the Mail app → Settings → Accounts, uncheck “Download Attachments” or choose “Recent.”
- Delete old mail or empty the Junk and Sent folders.
☁️ 7. Move Large Files to External or Cloud Storage
- Use iCloud Drive, Google Drive, or Dropbox for documents and media.
- For offline backups, connect an external SSD or HDD and move large files manually.
🔍 8. Analyze Disk Usage
To see what’s taking up space:
- Open Finder → Apple Menu → About This Mac → Storage → Manage → Review Files
- Or use third-party tools like:
- DaisyDisk
- GrandPerspective
- OmniDiskSweeper
These tools visualize your storage usage and help identify large, hidden files.
(Source: 9to5Mac)
⚙️ 9. Optimize System Storage (macOS Sequoia & Later)
macOS 15 Sequoia introduces improved System Data Management, which automatically clears temporary files and app caches.
You can also manually refresh Spotlight and Time Machine snapshots to reclaim space.
(Source: Tech2Geek)
📊 Quick Summary Table
| Task | Description | Estimated Space Saved |
|---|---|---|
| Empty Trash & Downloads | Permanently delete junk files | 1–10 GB |
| Optimize Storage | Use macOS recommendations | 2–20 GB |
| Remove Cache Files | Delete system and app caches | 1–5 GB |
| Uninstall Unused Apps | Remove old or large apps | 5–30 GB |
| Clean Photos & Videos | Optimize or move media | 10–50+ GB |
| Use Cloud Storage | Offload large files | Variable |
| Analyze Disk Usage | Find hidden space hogs | Variable |
✅ Final Thoughts
Regular maintenance keeps your MacBook fast and clutter-free.
Make it a habit to:
- Empty the Trash weekly
- Review large files monthly
- Use iCloud or external drives for backups
By following these steps, you can reclaim dozens of gigabytes and keep your MacBook running smoothly for years.
Key Takeaways
- Check your storage in System Settings to find what’s using the most space on your MacBook Pro.
- Empty trash, delete unused apps, and move large files to cloud storage to quickly free up space.
- Use built-in macOS tools and storage optimization features to maintain your Mac’s performance long-term.
Understanding Your MacBook’s Storage
Knowing what takes up space on your MacBook helps you make smart decisions about what to keep or remove. Your MacBook offers several built-in tools to help you see and manage your storage effectively.
Analyze Storage Space
To check your storage, go to Apple menu > System Settings > General > Storage. Here you’ll see a color-coded bar graph showing what’s using your disk space. Each color represents a different category like Apps, Documents, and System.
The light gray area shows your free space. If this area looks small, it’s time to clean up.
You can hover over each section to see exact numbers for how much space each category uses. This quick overview helps you spot which areas need attention first.
For a more detailed view, click the “i” button next to any category to see specific files and their sizes.
Types of Files Consuming Space
Apps often take up a big chunk of storage. Check for large apps you rarely use – these are prime candidates for removal.
Photos and videos are usually the biggest space hogs. Your Mac can store these in iCloud while keeping smaller versions on your computer.
Documents might seem small, but they add up quickly. Old downloads, duplicates, and attachments can fill your drive.
System files are necessary but can grow large. After updates, temporary files might remain that you don’t need.
Cache files store temporary data to make apps run faster, but they can grow very large over time.
Storage Management Tools
Your Mac has built-in tools to free up disk space. In the Storage settings, click “Optimize” to enable automatic space-saving features.
The “Store in iCloud” option moves files to cloud storage while keeping them accessible. “Optimize Storage” removes TV shows and movies you’ve already watched.
“Empty Trash Automatically” deletes items that have been in the trash for over 30 days.
Finder offers additional help. Use the search feature with “File Size” as a filter to find large files. Sort by size to quickly identify space-wasters.
Third-party apps can offer more detailed analysis, but Apple’s built-in tools handle most needs.
Optimizing iCloud Usage
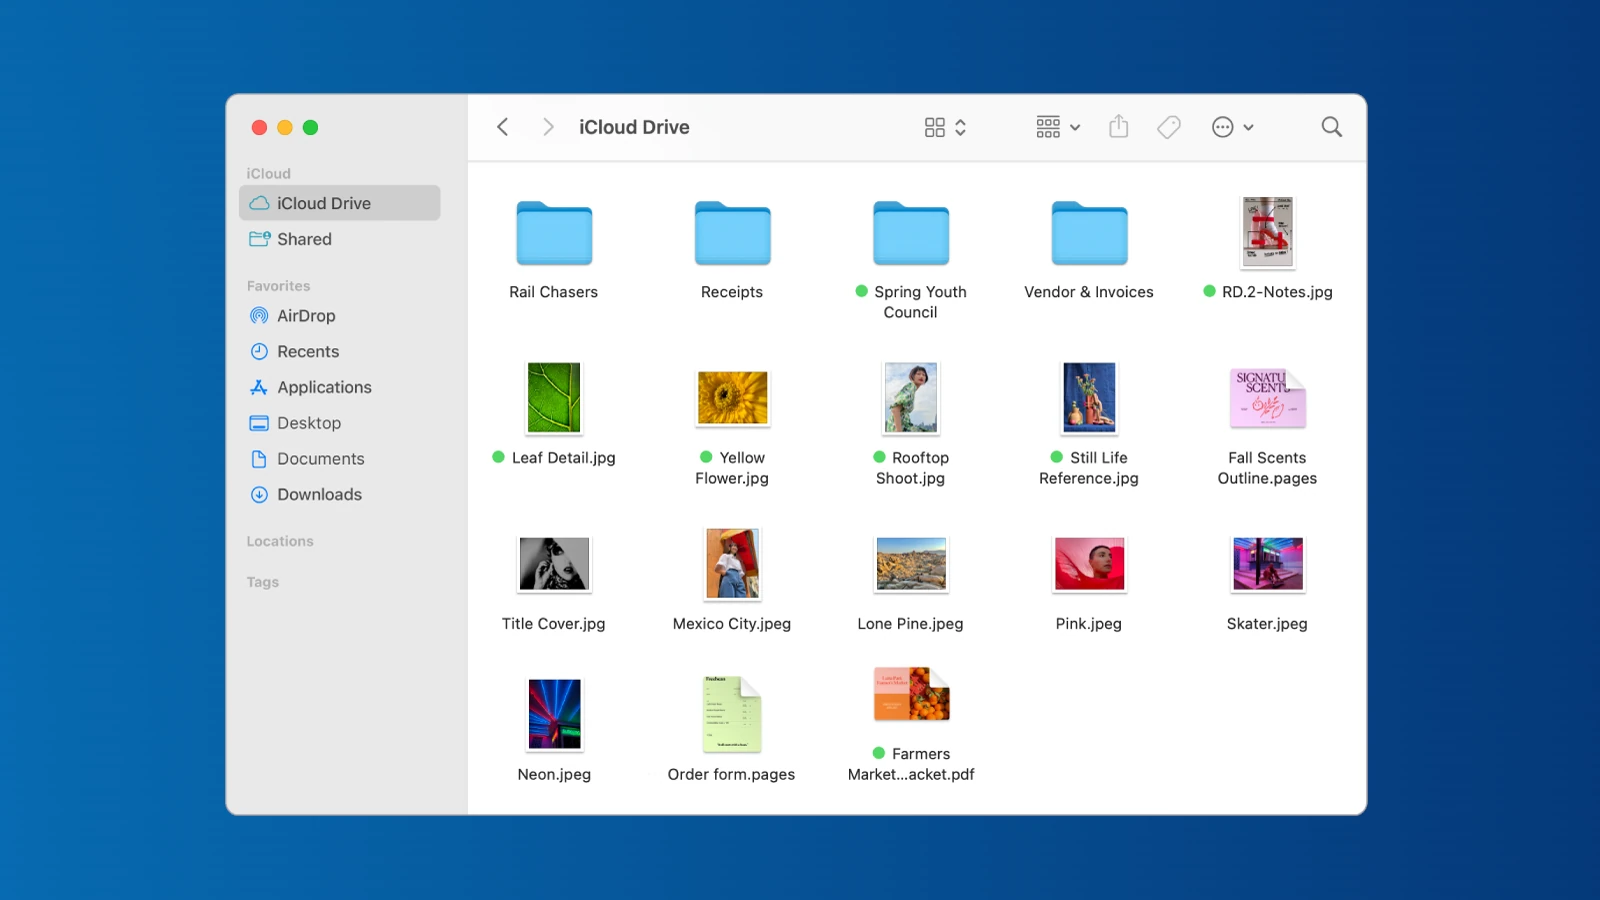
Using iCloud effectively can free up valuable space on your MacBook. The right settings can help your Mac automatically manage storage while keeping your files accessible.
Store in iCloud
iCloud Drive helps you save space by storing files in the cloud instead of on your Mac. You can optimize Mac storage through your system preferences. This feature keeps recent files locally while moving older, less-used items to the cloud.
To enable this feature:
- Click the Apple menu → System Preferences → Apple ID
- Select iCloud in the sidebar
- Click Options next to iCloud Drive
- Check “Optimize Mac Storage”
This setting works with Documents, Desktop, and Photos. When enabled, full-resolution photos and videos are stored in iCloud while smaller versions remain on your Mac. You’ll still see all your files, but they download only when needed.
Manage iCloud Storage
Regular management of your iCloud account prevents storage issues. Start by checking what’s using your space in System Preferences → Apple ID → iCloud → Manage.
Photos often consume the most space. If Photos is filling your drive, consider creating a separate volume with a set size limit using Disk Utility. This prevents Photos from taking over your entire drive.
Other tips to manage iCloud storage:
- Delete large attachments in Mail
- Remove old backups of devices you no longer use
- Uncheck apps that don’t need iCloud syncing
- Consider upgrading your storage plan if you regularly run out of space
Review your storage usage monthly to prevent unexpected “disk full” messages.
Leveraging Cloud Storage Services
Cloud storage offers a smart way to free up space on your MacBook. By moving files to online services, you can access them from anywhere while keeping your hard drive clean.
Google Drive Integration
Google Drive works well with MacBooks and gives you 15GB of free storage. To start using it, download the Drive app and sign in with your Google account.
After installation, you can easily move large files from your MacBook to Drive. Simply drag and drop files into the Drive folder on your Mac. The files will upload automatically.
For best results, use selective sync. This feature lets you choose which folders appear on your computer. Go to Drive preferences and select only the folders you need daily.
Google Drive also works with Google Docs, Sheets, and Slides. These apps create documents that don’t take up space on your MacBook. They save automatically to Drive instead.
Dropbox as an Alternative
Dropbox offers another strong option for moving files off your MacBook. The basic free plan includes 2GB of storage, with paid plans offering more space.
Setting up is simple. Install the Dropbox app, create an account, and a Dropbox folder appears on your Mac. Files you place in this folder sync to the cloud automatically.
Dropbox’s Smart Sync feature works well for saving space. It keeps file icons visible on your Mac but stores the actual content in the cloud until you need it. This frees up disk space while maintaining easy access.
Photos and videos take up lots of space. Moving these to Dropbox can quickly free up gigabytes on your MacBook. The Dropbox mobile app can even automatically back up your phone’s photos.
Business users appreciate Dropbox’s reliable sharing features. You can share large files without emailing attachments, keeping your MacBook’s storage clear.
Cleaning Up Your Drive
Freeing up space on your MacBook involves targeting the biggest space hogs on your system. These typically include large files you no longer need, duplicate files that waste space, and applications you’ve installed but rarely use.
Remove Large Files
Finding and removing large files can quickly free up gigabytes of storage space on your MacBook. Start by checking your Downloads folder, which often collects large installation files you no longer need.
To find large files systematically, you can use the built-in storage management tool. Go to Apple menu > About This Mac > Storage > Manage. This shows categories of files taking up space.
DaisyDisk is a helpful tool that creates a visual map of your storage. It shows exactly which folders contain the largest files, making it easier to decide what to remove.
Look for these common space hogs:
- Video files and movies
- Old backup files
- Disk images (.dmg files)
- Downloaded installers
Remember to empty your Trash after deleting files to actually free up the space.
Delete Duplicate Files
Duplicate files silently eat up valuable storage space. Photos, documents, and downloads often get copied multiple times on your system without you noticing.
You can find duplicates manually by sorting folders by name or size, but this becomes tedious for large collections. Consider using specialized tools that can scan your drive and identify exact duplicates.
These tools compare file content rather than just names, ensuring you don’t lose unique files. They typically group duplicates together and let you choose which copies to keep.
Common places to check for duplicates:
- Photo libraries
- Music collections
- Document folders
- Downloaded files
After removing duplicates, you may free up significant disk space that was previously wasted.
Uninstall Unused Apps
Applications can take up substantial space, especially creative software, games, and productivity suites. Removing apps you no longer use quickly recovers storage.
To properly uninstall apps, don’t just drag them to the Trash. This often leaves behind support files, preferences, and caches. Instead, use the Launchpad by clicking and holding an app until it jiggles, then click the (X) that appears.
For more thorough removal, consider a dedicated uninstaller. CleanMyMac and similar tools can remove all associated files when uninstalling apps.
Check these locations for forgotten apps:
- Applications folder
- Utilities folder
- Downloads folder
- Desktop
Don’t forget to empty the Trash after uninstalling apps to complete the space recovery process.
Maintaining System Health
Keeping your Mac running smoothly requires regular maintenance to clear out unnecessary files that accumulate over time. A clean system runs faster and has more available storage for your important files.
Clear Temporary Files
Mac computers store many temporary files that can take up valuable space. These files include application caches, log files, and other system data that builds up during normal use.
To access and clear system cache files:
- Open Finder
- Click on “Go” in the menu bar
- Select “Go to Folder”
- Type
~/Library/Cachesand press Enter - Select folders and delete their contents (not the folders themselves)
Your Mac also stores temporary files in other locations. Using Storage Management can help identify these space-wasters.
In newer macOS versions, you can use the built-in storage optimizer. Access Storage Management by choosing Apple menu > System Settings > General > Storage (for macOS Ventura 13 or later).
Clear Browser Cache
Browsers store large amounts of data to improve your web browsing experience. This cached data can take up significant space over time.
For Safari:
- Open Safari
- Click Safari in the menu bar
- Select “Clear History…”
- Choose a time range and click “Clear History”
For Chrome:
- Open Chrome
- Press Command+Shift+Delete
- Select “All time” from the time range
- Check boxes for cached images and files
- Click “Clear Data”
Experts recommend clearing browser cache monthly. This practice not only frees up space but can also fix website loading issues and improve privacy.
External Tools for Cleaning
Several third-party applications can streamline the cleaning process beyond built-in options. These tools offer one-click solutions to find and remove unnecessary files.
MacCleaner Pro provides comprehensive cleaning with features like duplicate file detection and application uninstaller. It shows what’s taking up space and lets you decide what to remove.
Parallels Toolbox offers a collection of useful utilities including a disk cleaner. This tool analyzes your storage and identifies junk files that can be safely removed.
CleanMyMac is another popular option that cleans system junk and removes large hidden files. It also monitors your Mac’s health with alerts for high memory usage or overheating.
Regular maintenance with these tools helps ensure your Mac maintains at least 80-100 GB of free space for optimal performance.
Automating Clean-Up Processes
Setting up automatic clean-up routines on your MacBook saves time and keeps your system running smoothly. These automated solutions work quietly in the background, freeing up valuable storage space without requiring constant attention.
Time Machine Backups
Time Machine is Apple’s built-in backup solution that can sometimes consume significant disk space. You can control how Time Machine uses storage space on your Mac:
- Limit backup size: Open Terminal and type
sudo defaults write /Library/Preferences/com.apple.TimeMachine MaxSize -integer SIZE_IN_MBto set a maximum size (replace SIZE_IN_MB with your preferred limit) - Delete old backups: Time Machine automatically removes older backups when space is needed, but you can manually remove them through Time Machine interface
- Exclude folders: Right-click any folder in Finder and select “Exclude from Time Machine backup” for items you don’t need backed up
You can also schedule Time Machine backups to run at specific times when you’re not using your Mac actively.
Optimize Storage Automatically
MacOS includes built-in tools to automatically manage storage space:
- Go to Apple menu > System Settings > General > Storage
- Click “Optimize Storage” to enable automatic features
- Toggle on “Store in iCloud” to keep only recent files locally
- Enable “Optimize Storage” to remove watched iTunes and TV shows
These settings help your Mac free up space automatically by moving older, less-used files to iCloud. The “Reduce Clutter” option also identifies large files and downloads that you might want to remove.
Some apps like Avast Cleanup for Mac can automate this process further by scanning for junk files regularly.
Empty Trash Automatically
Having your Mac automatically empty the Trash can prevent forgotten files from piling up:
Enable automatic Trash emptying:
- Open Finder
- Click Finder in the menu bar
- Select Preferences > Advanced
- Check “Remove items from the Trash after 30 days”
For more thorough cleaning, you can set up smart folders that collect files based on age or type. These folders identify files you might want to delete before they even reach the Trash.
You can also use simple Terminal commands to automatically clean system caches and temporary files periodically by creating a scheduled task with the macOS Automator app.
Dealing with Multimedia Files
Multimedia files often take up significant space on your MacBook. Photos, music production files, and device backups can quickly fill your hard drive if not managed properly.
Managing the iPhoto Library
The iPhoto Library can grow very large over time. To free up space, start by removing duplicate or unwanted photos from your library.
You can use the built-in Photos app to find and delete similar images. Click on “Recently Deleted” and then “Delete All” to permanently remove these files.
Consider using iCloud Photos to store your full-resolution photos online while keeping smaller versions on your Mac. Turn this on in Photos > Preferences > iCloud.
For older photos you rarely access, create external backups on an external hard drive. After backing up, you can safely delete them from your Mac.
Quick Tip: Sort photos by size in Photos app (View > Sort > File Size) to quickly identify and remove the largest files first.
Reducing Apple Loops in GarageBand
GarageBand includes many Apple Loops that take up space even if you don’t use them. These preset audio files can consume several gigabytes of storage.
To remove unused loops:
- Open GarageBand
- Go to GarageBand > Preferences > Advanced
- Click “Reset Sound Library”
- Select “Remove Unused Loops”
This action removes loops you haven’t used in your projects, saving valuable space.
For more aggressive space saving, you can delete entire loop categories you never use. Back up your projects first to avoid losing work.
Advanced users can move the Loop Library to an external drive while maintaining access to these sounds when needed.
iOS Backups Management
iOS backups can consume enormous amounts of space on your MacBook. Old iPhone and iPad backups might be sitting unused on your system.
To find and remove old backups:
- Go to Apple menu > About This Mac > Storage > Manage
- Click on “iOS Files” in the sidebar
- Review the list of device backups
- Remove outdated or unnecessary backups
Consider switching to iCloud backups instead of storing them locally. This moves your iPhone and iPad backups to Apple’s servers.
For essential local backups, store them on an external drive instead. Use Finder to create and manage backups on external storage.
Remember: Always keep at least one recent backup of your devices before deleting old ones.
Advanced Storage Options
When your MacBook starts running low on space, you have several powerful options beyond basic cleanup. These methods help manage large files and create more room for important data.
Using an External Hard Drive
External hard drives offer a simple way to extend your MacBook’s storage. You can move large files that you don’t use daily but still want to keep. Photos, videos, and old documents work well for external storage.
To set up an external drive:
- Connect the drive to your MacBook
- Format it using Disk Utility if needed
- Create folders to organize your content
- Drag and drop files to transfer them
Time Machine also works with external drives. It backs up your Mac automatically while freeing up space. Many users choose drives with 1TB or more capacity to ensure plenty of room for backups and file storage.
Reducing Clutter with Third-Party Apps
Several apps can help you find and remove unnecessary files more effectively than manual searching. These tools scan your Mac to find:
- Duplicate files taking up double space
- Large files you forgot about
- Old applications you no longer use
- Hidden cache files
Popular cleaning apps include CleanMyMac, DaisyDisk, and Gemini. These programs visualize your storage so you can see what’s using space. Some offer automatic cleanup features that safely remove junk files.
Many apps can find duplicates of photos and documents that waste space. Users often discover gigabytes of redundant files they didn’t know existed.
Innovative Solutions for Freeing Space
Modern Macs offer several clever ways to manage storage that many users don’t know about. These approaches can help you reclaim valuable disk space without sacrificing functionality.
Freeing Space through YouTube
YouTube can be a surprising storage hog on your MacBook. Many users don’t realize that their browser stores cache files from watched videos, taking up precious space.
To clear YouTube cache in Chrome, open Chrome and press Shift+Command+Delete. Select “All time” for time range and check “Cached images and files” before clicking “Clear data”. This simple step can free up hundreds of megabytes.
For Safari users, go to Safari menu > “Clear History and Website Data” to remove YouTube cache files. You can also be more selective by choosing Safari > Preferences > Advanced, then checking “Show Develop menu” and using that to empty caches.
Another smart approach is using YouTube’s web version instead of the app. The web version doesn’t store as much data locally, keeping your MacBook lighter. For frequent YouTube watchers, this small change makes a big difference.
Consider using browser extensions that prevent YouTube from automatically playing videos. Auto-play not only consumes bandwidth but also fills cache storage.
Frequently Asked Questions
MacBook users often struggle with storage issues. These practical solutions can help you identify space hogs, remove unnecessary files, and manage your disk space more efficiently.
What are the steps to check available storage on a MacBook?
To check your MacBook storage, click the Apple menu in the top-left corner and select “About This Mac.”
Click on the “Storage” tab to see a color-coded bar showing what’s using your disk space. Each category (Apps, Documents, System, etc.) shows how much space it takes up.
For a more detailed breakdown, click “Manage” to open the Storage Management window. This tool helps you identify what’s taking up space on your Mac.
How can one clear system cache to free up storage on a MacBook?
Clearing cache files can free up significant space. First, open Finder and press Shift+Command+G.
Type ~/Library/Caches in the box and click Go. You’ll see folders containing cache files from various apps.
Select the cache folders for apps you don’t need cached data for, then move them to the Trash. Empty the Trash afterward to permanently delete these files and free up the space.
In what ways can unused applications be removed to save disk space on macOS?
The simplest way to remove unused apps is through Finder. Open the Applications folder and drag unwanted apps to the Trash.
For a more thorough removal, consider using the app’s uninstaller if available. Some apps come with their own uninstaller program that removes all associated files.
You can also use the Launchpad by clicking and holding an app icon until it jiggles, then clicking the X that appears. This method helps you delete unused apps quickly.
What is the process for locating and deleting large files taking up space on a MacBook?
Use Finder’s search function to locate large files. Click on Finder, then press Command+F to open search.
Click on “Kind” and change it to “File Size.” Set it to “is greater than” and type a size like 500 MB to find large files.
Another option is using the Storage Management tool (Apple menu > About This Mac > Storage > Manage). The “Large Files” section shows files taking up significant space, letting you identify and remove space hogs.
How can a user manage storage effectively when the Mac indicates there is not enough disk space?
Enable the “Optimize Storage” feature by going to Apple menu > About This Mac > Storage > Manage > Optimize Storage. This automatically removes watched iTunes movies and TV shows.
Empty your Trash regularly by right-clicking the Trash icon in the Dock and selecting “Empty Trash.” Consider storing documents and photos in iCloud by enabling iCloud Drive.
Review the “Store in iCloud” option in Storage Management to automatically save space by moving files to the cloud when needed.
What options are available for external storage or cloud services to manage MacBook disk space?
External hard drives offer affordable large storage capacity. USB flash drives provide portable storage for files you need on the go.
Cloud storage services like iCloud Drive, Google Drive, and Dropbox let you store files online. iCloud integrates best with macOS, offering 5GB free storage and paid plans for more.
Network Attached Storage (NAS) devices work well for home or office networks, allowing multiple devices to access stored files without using MacBook space.


