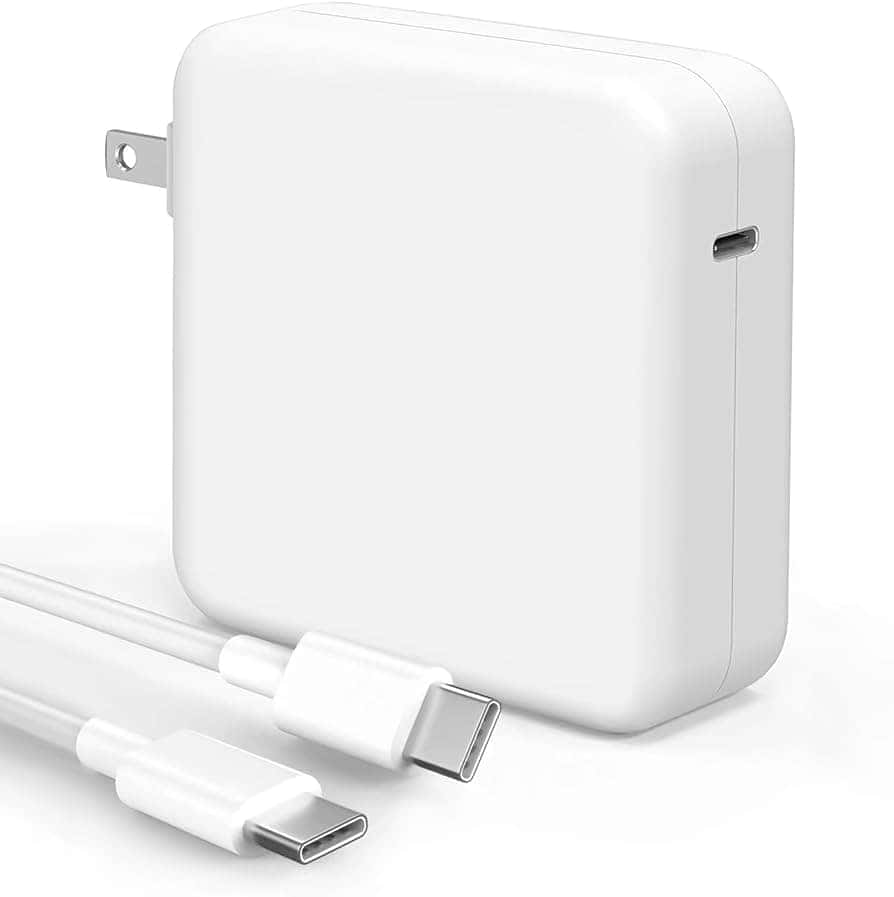
Is your MacBook charger broken? Don’t rush to buy a new one just yet. Many common charger problems can be fixed at home with a few simple tools and some basic knowledge. You can repair frayed cables, broken duckheads, and connection issues by carefully identifying the problem area and following proper repair techniques to restore your charger to working condition.
MacBook chargers can break in several ways – the cable might fray near the connector, the duckhead (wall plug adapter) could crack, or internal wiring might fail. If your cable is frayed, you can repair it using electrical tape or heat shrink tubing. For a broken duckhead, the solution is even simpler – just remove the damaged part and replace it with a new one rather than risking electrical shorts.
For more complex issues like internal wire damage, some brave souls might attempt to open the charger and resolder connections, but this requires soldering skills and comes with risks. Sometimes the problem isn’t with the charger at all – your MacBook might have software issues preventing charging that can be fixed with simple resets.
⚠️ Before You Start
Important:
If your charger is frayed, melted, or sparking, do not use it — it can be a fire hazard. In that case, skip to the “When to Replace Your Charger” section below.
🧰 What You’ll Need
- A clean, dry cloth or soft brush
- A working power outlet
- A second MacBook or charger (for testing)
- Optional: Isopropyl alcohol and a cotton swab
🪫 Step 1: Check the Power Source
Sometimes the issue isn’t the charger — it’s the outlet.
- Plug another device (like a phone charger or lamp) into the same outlet.
- If it doesn’t work, try a different wall outlet or power strip.
- Avoid daisy‑chaining through surge protectors or extension cords — plug directly into the wall when testing.
🔌 Step 2: Inspect the Charger and Cable
Look closely at your MagSafe or USB‑C cable:
- Check for frays, bends, or discoloration near the ends.
- Examine the connector tip for dirt or burn marks.
- Ensure the power brick isn’t swollen or making buzzing sounds.
If you see physical damage, stop using it immediately.
🧼 Step 3: Clean the Charging Port and Connector
Dust or lint can block the connection.
- Turn off your MacBook.
- Use a soft brush or dry cotton swab to gently clean the charging port.
- For stubborn grime, lightly dampen the swab with isopropyl alcohol (never water).
- Clean the charger connector as well — especially the metallic pins.
(Source: SimplyMac)
⚙️ Step 4: Reset the SMC (System Management Controller)
The SMC controls power functions on your MacBook. If it’s misbehaving, your charger might not respond.
For MacBooks with Apple Silicon (M1, M2, M3)
- Shut down your MacBook.
- Wait 30 seconds, then turn it back on — the SMC resets automatically.
For Intel‑based MacBooks
- Shut down the MacBook.
- Press and hold Shift + Control + Option + Power for 10 seconds.
- Release all keys and press Power again to restart.
(Source: Macworld)
🔄 Step 5: Test with Another Charger or Device
If you have access to another MacBook or charger:
- Try your charger on a different MacBook.
- Or try a known working charger on your MacBook.
This helps determine whether the issue is with the charger or the laptop’s charging port.
💡 Step 6: Update macOS
Sometimes, macOS updates include firmware fixes for charging issues.
- Go to System Settings → General → Software Update.
- Install any available updates.
- Restart your MacBook and test charging again.
🧯 Step 7: When to Replace Your Charger
If none of the above steps work, or if you notice:
- Frayed or exposed wires
- Overheating or burning smell
- Loose or bent connectors
- The LED indicator (MagSafe) doesn’t light up
…it’s time to replace your charger.
Recommended Replacements:
- Buy official Apple chargers or Apple‑certified (MFi) replacements.
- Avoid cheap third‑party options — they can damage your MacBook or battery.
(Source: Asurion)
🧩 Optional: Temporary Fixes (Use with Caution)
If your cable is slightly loose or bent:
- You can adjust the angle of the connector gently to find a stable connection.
- Use electrical tape to secure the position temporarily — but this is not a long‑term solution.
- Never attempt to open the power brick — it contains high voltage components.
🧑🔧 When to Visit Apple Support
If your charger and MacBook are both under warranty or AppleCare+, Apple may replace the charger for free.
Visit: Apple Support – Mac Power Adapter Service
✅ Summary
| Problem | Possible Fix |
|---|---|
| Charger not powering | Check outlet and cable |
| Connector dirty | Clean with dry brush or alcohol |
| MacBook not recognizing charger | Reset SMC |
| Still not charging | Test another charger or update macOS |
| Physical damage | Replace charger immediately |
In short:
Most MacBook charger issues come down to dirty connectors, faulty cables, or SMC glitches. Start with cleaning and resets, and if that fails, replace the charger with a genuine Apple model to avoid further damage.
Key Takeaways
- Frayed cables can be fixed with electrical tape or heat shrink tubing while broken duckheads should be replaced rather than repaired.
- Check both the charger and MacBook itself when troubleshooting power issues since software problems can sometimes prevent charging.
- Complex internal repairs require soldering skills and proper safety precautions to avoid electrical shocks.
Identifying the Issue
Before attempting to fix a MacBook charger, you need to find out what’s wrong with it. This means looking at the physical cord, checking your computer’s software, and examining your battery health.
Inspecting the Charger for Physical Damage
Start by looking at your charger cord. Unplug it and check for any visible damage. Look for:
- Frayed wires
- Exposed inner cables
- Bent or damaged connectors
- Discoloration near the adapter
Broken MacBook charger cables often show wear near the connection points. These spots can be dangerous if inner wires are exposed.
Feel along the entire length of the cable. Bent or kinked areas might have internal damage you can’t see. Check if your power adapter feels unusually hot or has burn marks.
The magnetic connector (MagSafe) or USB-C connector should attach firmly to your MacBook. If it’s loose or wobbly, this could be your problem.
Checking for Software Updates
Outdated software can sometimes cause charging issues. Check if your MacBook needs updates:
- Click the Apple menu in the top left corner
- Select “System Settings” or “System Preferences”
- Look for “Software Update”
- Install any available updates
Restart your MacBook after updates. This can reset the charging system and fix minor glitches that prevent proper charging.
Sometimes your MacBook needs an SMC reset (System Management Controller). This controls power functions on your Apple laptop. Look up the specific steps for your model if other fixes don’t work.
Assessing Battery Condition
Check your battery’s health status through your system:
- Hold the Option key and click the battery icon in the menu bar
- Look for “Battery Condition” (should say “Normal”)
- Note the cycle count if shown
Your MacBook might not charge if the battery is extremely old or damaged. Most batteries last 3-5 years or 500-1000 charge cycles.
Try testing a different power outlet to rule out electrical issues. Sometimes the problem isn’t your charger but the outlet itself. Also check if your charger is overheating and needs to cool down.
Watch for any unusual behavior when plugging in the charger. The charging light should come on, and your battery icon should show it’s charging.
Troubleshooting Power Connectivity
When a MacBook charger stops working, the problem could be anywhere in the charging system. Checking each component methodically helps identify the exact issue before attempting repairs or replacements.
Examining the Power Outlet and Power Strip
Start by testing your power outlet. Plug another device into the same outlet to confirm it works properly. Sometimes outlets fail or circuit breakers trip without obvious signs.
Try connecting your charger to a different wall outlet. Line noise issues can sometimes prevent proper charging. In this case, unplugging the adapter for about one minute before reconnecting may solve the problem.
If using a power strip, test it with other devices. Power strips can wear out over time or have damaged surge protectors. Connect your charger directly to a wall outlet to eliminate the power strip as a potential issue.
Check your home’s electrical circuit by testing multiple outlets. A broader electrical problem might require professional attention.
Assessing the Performance of the Removable AC Plug and USB-C Cable
Inspect the removable AC plug for damage. Look for bent prongs, burn marks, or loose connections. Try swapping it with a compatible plug if available.
Examine the entire length of the USB-C cable for:
- Fraying or cuts
- Bent connectors
- Discoloration near connection points
Bent cables often develop internal breaks that aren’t visible from outside. Gently flex the cable while connected to see if charging starts and stops, indicating a break.
Some MacBook chargers have detachable cables. If yours does, try another compatible USB-C cable. This test helps determine whether the issue is with the cable or the power adapter itself.
Testing the Charging Port for Issues
Inspect your MacBook’s charging port carefully. Look for:
- Lint or debris blocking connections
- Bent pins
- Signs of moisture damage
Use a flashlight to see inside the port. Gently clean any debris with compressed air or a soft brush. Never insert metal objects into the port.
Try connecting your charger to another Mac if possible. This test helps determine if the problem is with your MacBook’s charging system rather than the charger.
If your Mac shows no signs of power, you might need to reset the SMC (System Management Controller). This often resolves charging issues. For most newer MacBooks, shut down the computer, then press and hold the power button for 10 seconds.
Understanding MacBook’s Internal Components
When fixing a broken MacBook charger, understanding the internal components that interact with the charging system can help you diagnose problems more effectively. These core components work together to manage power, control system functions, and maintain optimal operating temperatures.
The Role of the Logic Board
The logic board is the main circuit board in your Mac notebook. It houses the CPU, GPU, and other critical components that need power to function. When your charger connects to your MacBook, the power flows through specific pathways on the logic board.
The logic board contains power management circuits that regulate voltage from your charger before it reaches the battery. These circuits help protect your MacBook from power surges that could damage sensitive components.
If your charger isn’t working, the logic board might not be receiving proper voltage signals. This can happen if the charging port has loose connections or if there’s damage to the power input components on the board itself.
Some MacBooks have built-in diagnostic LEDs on the logic board that can help identify charging problems.
Functionality of the System Management Controller (SMC)
The SMC is a specialized chip that controls power functions in your MacBook. It manages battery charging, thermal management, and various sensors throughout your device.
When charging issues occur, resetting the SMC often helps solve the problem. The SMC controls how power flows from your charger to your battery and determines charging status.
Signs of SMC problems related to charging include:
- Battery not charging despite being connected
- Charger LED not lighting up when connected
- Erratic battery behavior
- MacBook not recognizing the power adapter
The SMC communicates with your charger to verify it’s an appropriate power source for your Mac. This is why using the correct charger is important for proper charging function.
Importance of Cooling Systems, Heat Sink, and Fan
Charging generates heat in both your MacBook and the charger itself. The cooling system prevents overheating during this process.
Heat sinks in your MacBook absorb heat from the CPU and other components. They work alongside fans to disperse this heat. Poor cooling can cause your Mac to throttle performance or shut down unexpectedly during charging.
Your charger also contains components to manage heat. Inside the adapter are complex circuits and transformers that generate heat while converting AC to DC power.
If your MacBook overheats while charging, check that vents aren’t blocked and fans are working properly. Dust buildup in cooling systems can prevent proper heat dissipation and cause charging problems over time.
Advanced Charging and Electrical Safeguards
Proper electrical protection can extend the life of your MacBook charger and prevent damage from power fluctuations. These safeguards not only protect your charging equipment but also your laptop from potential electrical damage.
Protecting Against Voltage Surges with UPS
A Uninterruptible Power Supply (UPS) provides crucial protection for your MacBook and charger during power outages and voltage spikes. These devices offer temporary battery backup power and protect against damaging electrical surges.
When selecting a UPS for your MacBook:
- Choose one with at least 350-500VA capacity
- Look for models with USB ports for direct connection
- Ensure it has surge protection built-in
A good UPS will maintain stable power when electricity fluctuates. This prevents the stress that can damage your MacBook charger’s internal components.
During storms or in areas with unstable power, always connect your MacBook charger to a UPS rather than directly to a wall outlet. This simple step can prevent many common charger failures.
Understanding AC Power and Voltage Regulators
Your MacBook power adapter works with AC power but converts it to the DC power your laptop needs. This conversion process is sensitive to power quality issues. Voltage regulators help manage these problems.
Voltage regulators stabilize incoming electricity before it reaches your charger. They work by:
- Detecting voltage changes
- Adjusting output to maintain a steady level
- Filtering out electrical noise
In countries with inconsistent power supplies, a quality voltage regulator is essential. It prevents the under-voltage and over-voltage conditions that can burn out your MacBook charger’s components.
Many users don’t realize that even minor voltage fluctuations gradually damage charging equipment. A basic voltage regulator costs far less than replacing a damaged MacBook charger and is a worthwhile investment.
Resolving Software-Related Charging Issues
Sometimes your MacBook charging problems aren’t related to the physical charger but instead stem from software glitches. These issues can prevent proper communication between your Mac and its power system, even when your charger is working perfectly.
Performing an SMC Reset
The System Management Controller (SMC) manages many hardware functions on your Mac, including battery and power management. When your MacBook won’t charge despite having a working power adapter, resetting the SMC often solves the problem.
To reset the SMC on newer MacBooks with the T2 security chip:
- Shut down your Mac completely
- Press and hold Control + Option + Shift for 7 seconds
- While still holding these keys, press and hold the Power button for another 7 seconds
- Release all keys, then wait 5 seconds
- Press the power button to turn on your Mac
For older MacBooks with removable batteries, shut down your Mac, remove the battery, press the power button for 5 seconds, reinstall the battery, and restart.
After an SMC reset, plug your adapter back in and check if charging begins. This process fixes most software-related charging issues.
Seeking Professional Repairs
When DIY fixes aren’t working for your MacBook charger, getting expert help is often the best solution. Professional repairs can ensure your charging equipment works safely and effectively.
Contacting an Apple Authorized Service Provider or Apple Retail Store
You can take your damaged MacBook charger to an Apple Authorized Service Provider or Apple Retail Store for evaluation. These professionals have the proper tools and genuine parts to fix or replace your charger correctly.
The technicians will first examine your charger to determine if it can be repaired. They’ll check the:
- Cable condition
- Power port damage
- Adaptor functionality
- Internal components
Most Apple Stores offer walk-in appointments at their Genius Bar. For faster service, you can book an appointment online through Apple’s website before visiting.
Service providers typically stock original replacement parts. This ensures your MacBook receives the proper voltage and current for safe charging.
Considering Repairs Under AppleCare
If your MacBook is covered by AppleCare+, your charger repairs or replacement might cost nothing. The warranty often covers charging equipment that came with your device.
AppleCare+ typically includes:
- Two incidents of accidental damage coverage per year
- Battery service coverage
- Priority access to Apple experts
To check if your charger is covered, have your device serial number ready. You can find this information in the “About This Mac” menu or on the original packaging.
Even with physical damage to the charger cable, AppleCare+ may cover the replacement. Contact Apple Support by phone or chat to verify your coverage before visiting a store.
If your warranty has expired, Apple offers out-of-warranty replacement options at fixed prices. These are often cheaper than buying a completely new charger.
Frequently Asked Questions
MacBook charger issues can be frustrating but many common problems have simple solutions. Here are answers to the most common questions about fixing MacBook charger problems.
How can I repair the pins on my MacBook charger?
Bent or damaged pins on your MacBook charger can be carefully straightened using fine-tipped pliers or tweezers. Make sure the charger is unplugged first.
Work slowly and gently to avoid breaking the pins completely. If the pins are severely damaged or corroded, it’s safer to replace the adapter rather than risk further damage.
What are the steps to fix a MacBook charger that is not showing any light?
First, check if your wall outlet works by testing it with another device. Then inspect the entire cable for damage or fraying.
Next, disconnect the charger and let it cool down completely if it seems hot. Sometimes the adapter’s thermal protection activates when overheating occurs.
Try using a different power cord (the part from wall to brick) if available. Also, check for system updates as some charging issues are software-related.
Where can one find professional MacBook charger repair services?
Apple offers repair services through their Apple Retail Stores and Authorized Service Providers. These locations can evaluate your charger and replace it if needed.
Many electronics repair shops also fix MacBook chargers. Look for shops with good reviews and experience with Apple products.
Some online services specialize in MacBook charger repairs, but shipping costs and turnaround time should be considered.
Is it possible to open and repair a MacBook charger casing?
Opening a MacBook charger is not recommended for safety reasons. The internal components carry high voltage even when unplugged.
The charger casing is typically sealed and not designed to be opened by users. Breaking the seal voids any warranty and creates safety hazards.
For minor casing damage, electrical tape or heat shrink tubing can safely cover exposed areas without opening the unit.
Can a MacBook charger that won’t charge be fixed, and what might the issue be?
A non-charging MacBook charger might have several fixable issues. The cable might be frayed or damaged, which can sometimes be repaired with electrical tape for minor cases.
The issue might be with the MagSafe connector. Check for debris in the connector and clean it carefully with a dry cotton swab.
Sometimes the problem is with the MacBook itself, not the charger. Try resetting the SMC (System Management Controller) by following Apple’s instructions online.
What are my options if the charging port on my MacBook is not functioning?
Clean the charging port gently using compressed air or a soft brush. Debris often blocks proper connections.
Visit an Apple Store or Authorized Service Provider for port repairs. This is usually not a DIY fix as it involves internal components.
Consider using external battery packs as a temporary solution while arranging repairs. Some models also allow charging through USB-C ports if available.

