Resetting your iPad to factory settings can solve many problems and prepare your device for a fresh start or new owner. Whether you’re dealing with a frozen screen, software issues, or just want to wipe your personal data before selling, knowing how to properly reset your iPad is essential. To reset your iPad to factory settings, go to Settings > General > Transfer or Reset iPad > Reset, then select “Erase All Content and Settings” and confirm your choice by entering your passcode or Apple Account password when prompted.
Many iPad users put off resetting their devices because they worry about losing data or not knowing how to set everything up again. But the process is actually quite simple when you follow the right steps. Just remember that factory resetting your iPad will erase everything on it, so backing up your data first is crucial to avoid permanent loss of photos, contacts, and other important information.
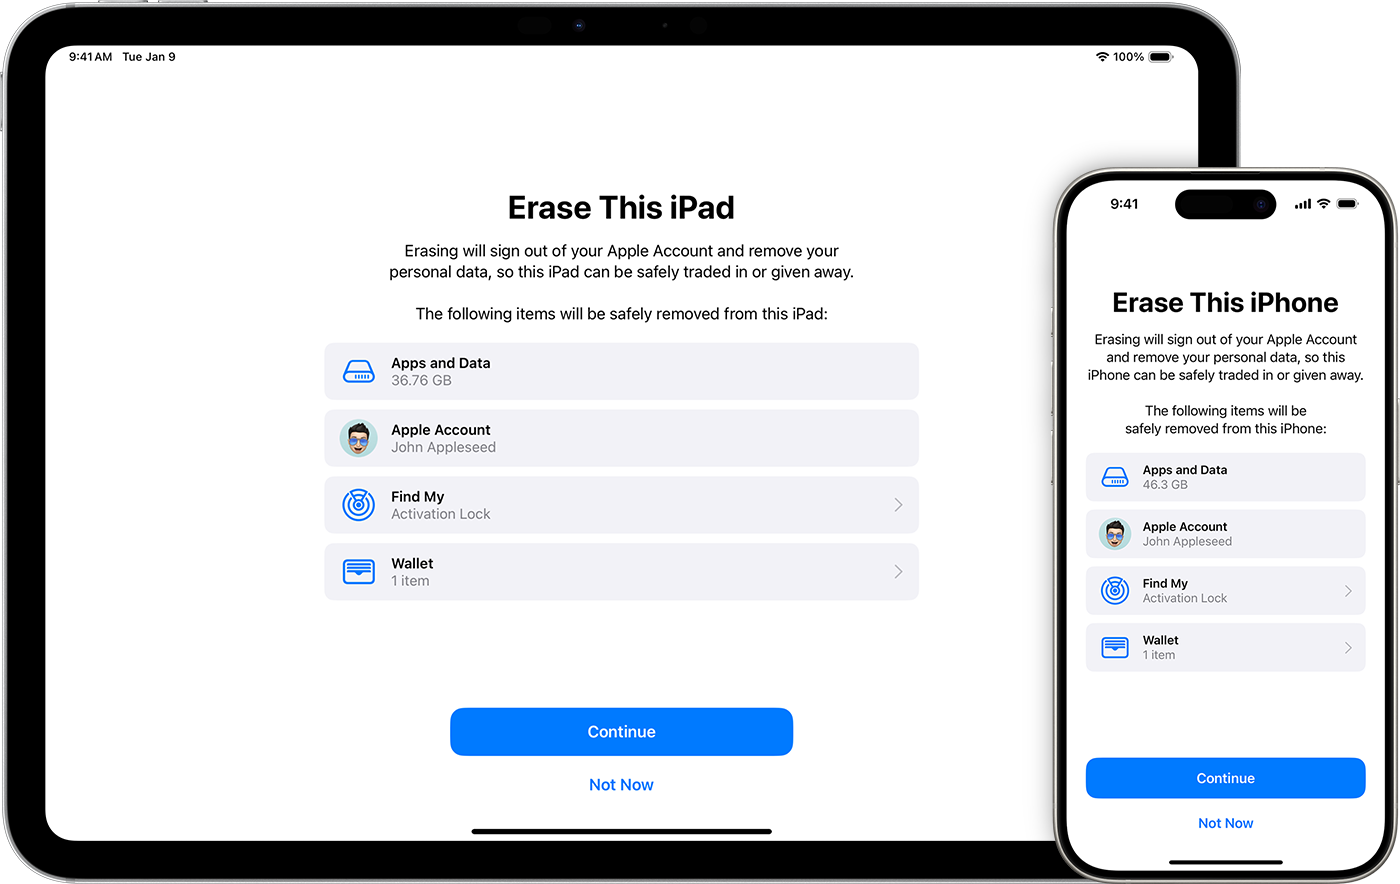
Resetting your iPad to factory settings can be useful if you’re selling it, giving it away, or troubleshooting persistent issues. A factory reset will erase all your personal data, apps, and settings, returning the iPad to the same state it was in when you first unboxed it.
⚠️ Important: Before you reset, make sure to back up your data to iCloud or a computer if you want to keep your photos, files, or app data.
Method 1: Reset Directly on Your iPad
- Open Settings → Tap the Settings app.
- Go to General → Scroll down and select General.
- Find Transfer or Reset iPad → Tap Transfer or Reset iPad.
- Erase All Content and Settings → Tap it, then enter your passcode or Apple ID password if prompted.
- Confirm Erase → Tap Erase iPad.
- The iPad will restart, wipe all data, and return to the setup screen.
Method 2: Reset Using a Computer (Mac or Windows)
If your iPad is unresponsive or you can’t access Settings, you can reset it with a computer.
- Connect your iPad to a computer with a USB cable.
- Open Finder (Mac) or iTunes (Windows).
- Put your iPad into Recovery Mode:
- Face ID models: Press and quickly release Volume Up, then Volume Down, then hold the Top button until the recovery screen appears.
- Home button models: Hold the Home button + Top button together until the recovery screen appears.
- On your computer, select Restore iPad.
- The software will erase your iPad and install the latest iPadOS.
Method 3: Reset Remotely via iCloud
If you don’t have the iPad in hand but it’s still linked to your Apple ID:
- Go to iCloud.com and sign in.
- Open Find My iPhone (works for iPad too).
- Select your iPad from the list of devices.
- Click Erase iPad.
- The iPad will erase itself the next time it connects to the internet.
Troubleshooting: Common Problems
🔑 Forgot Your Apple ID or Password?
- You’ll need your Apple ID and password to disable Activation Lock.
- If you don’t remember them, go to Apple’s iForgot page to reset your credentials.
🔒 Forgot Your iPad Passcode?
- You cannot factory reset without the passcode.
- Use Recovery Mode (Method 2 above) to erase the device and set it up again.
📶 iPad Stuck During Reset?
- Force restart the iPad:
- Face ID models: Press and quickly release Volume Up, then Volume Down, then hold the Top button until you see the Apple logo.
- Home button models: Hold Home button + Top button until the Apple logo appears.
🛠 Still Having Trouble?
- Visit Apple Support or make a Genius Bar appointment if your iPad won’t reset or restore.
After the Reset
When the reset is complete, your iPad will restart and display the Hello setup screen. From here, you can:
- Set it up as a new device, or
- Restore your data from an iCloud or computer backup.
✅ With these steps and troubleshooting tips, you can safely reset your iPad back to its original factory settings.
Key Takeaways
- Always back up your iPad to iCloud or your computer before resetting to save your personal data.
- Reset your iPad by going to Settings > General > Transfer or Reset iPad > Erase All Content and Settings.
- If you can’t access settings, connect to a computer with iTunes to perform a forced reset as an alternative method.
Understanding the Importance of Backing Up Your iPad
Backing up your iPad protects your photos, messages, and apps from accidental loss. Regular backups create a safety net that can save you time and stress if your device gets damaged or lost.
What Is iCloud Backup?
iCloud backup is Apple’s cloud storage solution that automatically saves your iPad data. It works by creating a copy of your information and storing it securely online.
The backup process happens when your iPad is:
- Connected to Wi-Fi
- Plugged into power
- Locked
- Connected to the internet
To set up iCloud backup, go to Settings > [your name] > iCloud > iCloud Backup and toggle it on. Your iPad will back up automatically when the conditions above are met.
iCloud gives you 5GB of free storage. If you need more space, you can upgrade your storage plan for a monthly fee.
The best part? You don’t have to remember to do anything. Once set up, iCloud backup works silently in the background.
How to Back Up Your iPad with iTunes
iTunes provides an alternative way to back up your iPad directly to your computer. This method works well when you have limited iCloud storage or prefer keeping your data locally.
To back up with iTunes:
- Connect your iPad to your computer with a cable
- Open iTunes (or Finder on newer Macs)
- Select your iPad when it appears
- Click Back Up Now under the Backups section
You can choose to encrypt your backup by selecting “Encrypt local backup” and creating a password. This stores sensitive information like passwords and health data.
iTunes backups are stored on your computer, not in the cloud. This means you need physical access to your computer to restore your data if needed.
Benefits of Regular Backups to Prevent Data Loss
Regular backups protect against many common problems. If your iPad breaks, gets stolen, or experiences software issues, a recent backup can be a lifesaver.
With a good backup, you can:
- Restore all your apps with their data intact
- Keep your photos and videos safe from device failure
- Maintain your messages and contacts even if you lose your iPad
- Transfer data easily when upgrading to a new device
Many people only realize the value of backups after losing important data. Don’t make this mistake! Performing regular backups takes little effort but provides huge peace of mind.
If you need to factory reset your iPad, having a recent backup ensures you can quickly restore everything afterward. This makes troubleshooting issues much less stressful.
Preparing to Reset Your iPad
Before resetting your iPad to factory settings, you need to take several important steps to protect your data and properly disconnect your accounts. These preparations will help ensure a smooth reset process and prevent loss of valuable information.
Ensuring Your Data Is Backed Up
Making a complete backup of your iPad is a critical first step. You have two main options for backing up your data:
iCloud Backup:
- Connect your iPad to Wi-Fi
- Go to Settings > [your name] > iCloud > iCloud Backup
- Turn on iCloud Backup if it’s not already on
- Tap “Back Up Now” and wait for the process to complete
Computer Backup:
- Connect your iPad to your computer using a cable
- Open iTunes (on Windows or older Macs) or Finder (on newer Macs)
- Select your iPad when it appears
- Click “Back Up Now”
Once completed, verify your backup was successful by checking the date and time of the last backup. This ensures you won’t lose photos, messages, and other important content.
Signing Out of Your Apple ID and iCloud
Disconnecting your Apple ID is necessary to prevent activation lock issues later. This step removes the connection between your device and your personal accounts.
First, go to Settings and tap on your name at the top of the screen. Scroll to the bottom and tap “Sign Out.” The system will ask for your Apple ID password to disable Find My iPad.
When prompted, choose whether to keep a copy of your data on the iPad. For a complete reset, select “No” for each item. Confirm by tapping “Sign Out” again.
This process removes your payment methods, prevents unauthorized purchases, and disconnects your iPad from services like iMessage and FaceTime.
Turning Off Find My iPad
Disabling Find My iPad is essential before resetting. If this feature remains active, you might face activation lock issues when setting up the device later.
To turn it off:
- Open Settings on your iPad
- Tap your name at the top
- Tap “Find My”
- Tap “Find My iPad”
- Toggle the switch to OFF
When prompted, enter your Apple ID password to confirm. This step removes your iPad from the Find My app tracking system across all your devices.
If you’ve already signed out of your Apple ID in the previous step, Find My iPad should already be disabled. Double-check this before proceeding with the reset to avoid complications.
Resetting Your iPad to Factory Settings
Resetting your iPad to factory settings removes all your data and returns it to its original state. This process is helpful when you want to sell your device, fix major issues, or start fresh.
Using the Settings App to Erase All Content and Settings
The easiest way to reset your iPad is through the Settings app. This built-in method works for most situations when your iPad is functioning normally.
First, make sure to back up your iPad to save your data. Then open the Settings app and tap on “General.” Scroll down and select “Transfer or Reset iPad.”
Tap “Reset” and choose “Erase All Content and Settings.” If prompted, enter your passcode.
You’ll see a warning about erasing all media and data. Tap “Erase” to confirm. Your iPad will show a progress bar while it erases everything.
The process takes a few minutes. Once complete, your iPad will restart and display the setup screen, just like when it was new.
Factory Reset iPad Using iTunes
When your iPad has issues that prevent using the Settings app, iTunes offers an alternative reset method.
Start by connecting your iPad to a computer with iTunes or Finder (for macOS Catalina or newer). Make sure iTunes is updated to the latest version.
Once connected, select your iPad when it appears in iTunes. Look for the “Summary” tab in the sidebar.
Click on “Restore iPad” in the right panel. A popup will appear asking you to confirm. iTunes will download the latest iOS and install it on your device.
Your iPad will restart several times during this process. When finished, it will be completely wiped and restored to factory settings.
Entering Recovery Mode for a Hard Reset
Recovery mode is the last resort when your iPad won’t respond to normal reset methods. This works even for locked or severely malfunctioning devices.
For iPads with a Home button: Connect to a computer, then press and hold both the Home and Top buttons. Keep holding until you see the recovery mode screen.
For iPads without a Home button: Press and quickly release the Volume Up button, then Volume Down button. Then press and hold the Top button until the recovery mode screen appears.
Once in recovery mode, iTunes or Finder will detect your iPad and offer to restore it. Click “Restore” to erase everything and reinstall iOS.
This method completely wipes your iPad and installs a fresh copy of the operating system.
Troubleshooting Common Reset Issues
Sometimes resetting your iPad isn’t as simple as following the standard steps. You might face password issues or a locked device that prevents the reset process from working properly.
Resolving Forgotten Apple ID Password
If you can’t remember your Apple ID password, you won’t be able to fully reset your iPad. Apple has built-in recovery options to help. First, try the “Forgot Apple ID or Password” option on the sign-in screen. You can also visit appleid.apple.com from another device to reset your password.
For faster recovery, try these methods:
- Use your phone number to receive a reset code
- Answer security questions you set up previously
- Use a trusted device to reset your password
- Contact Apple Support if all else fails
Two-factor authentication users can generate a new password from a trusted device. Remember that without your Apple ID password, you can’t turn off Find My iPad, which is needed for a complete reset.
Dealing with an Unavailable iPad or Security Lockout
When your iPad shows “iPad unavailable” or “Security Lockout” messages, you’ve likely entered the wrong passcode too many times. Your iPad is now temporarily or permanently locked for security.
For a temporarily locked iPad, simply wait for the timeout to expire. If your iPad is completely locked, you’ll need to:
- Connect to a computer with iTunes or Finder
- Put the iPad in recovery mode by pressing and quickly releasing the Volume Up button, pressing and quickly releasing the Volume Down button, then pressing and holding the Top button
- When the recovery screen appears, choose Restore
Recovery mode works even when your iPad is disabled or unavailable. This process will erase all content but allows you to set up the device again.
Actions for a Disabled iPad or Lost Password
When your iPad is disabled or you’ve lost your password, you can reset your iPad without a password using recovery mode. This method works for all current iPad models.
To use recovery mode:
- Disconnect all cables from your iPad
- Press and hold the Top button and either Volume button until the power off slider appears
- Drag the slider to turn off your iPad
- Connect your iPad to a computer while holding the Top button
- Keep holding until you see the recovery mode screen
Another option is using Find My iPad through iCloud:
- Visit iCloud.com and sign in with your Apple ID
- Click Find iPhone and select your iPad
- Click “Erase iPad” to reset it remotely
Remember that both methods will erase all data on your iPad. If you have a backup, you can restore your data after the reset process is complete.
Post-Reset Setup and Restoration
After resetting your iPad to factory settings, you’ll need to set it up again and restore your personal data. The process is straightforward but requires a few important steps to get your device back to how you had it before.
Restoring Data from an iCloud Backup
When you turn on your iPad after the reset, you’ll see the Hello screen. Follow these steps to restore your data:
- Select your language and region
- Connect to Wi-Fi – A stable connection is essential for the restoration process
- Choose “Restore from iCloud Backup“ when asked how you want to set up your iPad
- Sign in with your Apple ID that was used to create the backup
- Select the most recent backup (check the date and size to confirm it’s the correct one)
Your iPad will begin downloading apps and data from the iCloud backup. This may take some time depending on your internet speed and the size of your backup.
Keep your iPad connected to power during this process to prevent interruptions. Your apps will download in order of importance, with the most frequently used ones appearing first.
Logging In with Your Apple ID and Re-enabling Services
Once your basic data is restored, you’ll need to sign back into various services:
App Store and iTunes: Your iPad will prompt you to enter your Apple ID password to restore your purchases.
iCloud Services: Go to Settings > (your name) at the top to make sure all iCloud services are turned on. This includes:
- iCloud Drive
- Photos
- Contacts
- Calendar
- Notes
Third-party apps: Many apps will require you to log in again. Check important apps like email, banking, and social media.
Some services might send verification codes to confirm it’s really you. This is normal after a reset and helps keep your accounts secure.
Setting Up Touch ID or Face ID
To secure your iPad and make unlocking easier, set up biometric authentication:
For Touch ID devices:
- Go to Settings > Touch ID & Passcode
- Enter your passcode
- Tap “Add a Fingerprint”
- Follow the on-screen instructions to scan your finger
- Add multiple fingerprints for convenience
For Face ID devices:
- Go to Settings > Face ID & Passcode
- Enter your passcode
- Tap “Set Up Face ID”
- Hold your iPad at eye level and position your face in the frame
- Slowly move your head in a circle to complete the scan
You can also adjust which features Touch ID or Face ID can be used for, like App Store purchases, Apple Pay, and password autofill. For best results, consider setting up Face ID in different lighting conditions.
Understanding Advanced Reset Features and Techniques
When standard reset methods don’t solve your iPad issues, advanced techniques can help. These specialized approaches address more complex problems and work with different iPad models.
How to Use DFU Mode for a Deeper Reset
DFU (Device Firmware Update) mode is the deepest type of reset available for iPads. It’s more thorough than a regular factory reset because it reloads the firmware completely.
To enter DFU mode on most iPad models:
- Connect your iPad to a computer with iTunes or Finder open
- Press and quickly release the Volume Up button
- Press and quickly release the Volume Down button
- Press and hold the Power button until the screen goes black
- While still holding the Power button, press and hold the Volume Down button for 5 seconds
- Release the Power button but continue holding Volume Down
The screen should stay completely black when in DFU mode. If you see the Apple logo, try again.
DFU mode works when your iPad won’t turn on or respond normally. It’s particularly helpful for fixing serious software issues that regular resets can’t fix.
Third-Party Solutions: When and How to Use Them
Third-party reset tools can help when Apple’s built-in methods fail. Programs like iPad unlockers work for forgotten passcodes or Apple ID issues.
When to consider third-party solutions:
- You’re locked out of your device
- Standard reset methods have failed
- You can’t access your Apple ID
- Your iPad is stuck in a boot loop
Popular options include Dr.Fone, iMyFone LockWiper, and Tenorshare 4uKey. These programs can bypass locks and reset devices without needing your passcode.
Be careful when choosing third-party tools. Only download from trusted websites and read reviews first. Many free options contain malware or don’t work properly.
Remember that using these tools may void your warranty. They should be a last resort after trying Apple’s official methods.
Resetting iPad Models with Special Requirements
Different iPad models sometimes need special reset approaches. The newest models like the iPad Pro use Face ID and have no Home button, changing the reset process.
For iPad Pro and newer models without Home buttons:
- Press and quickly release Volume Up
- Press and quickly release Volume Down
- Hold the Top button until the device restarts
Older iPad models with Home buttons use a different method:
- Hold the Home and Power buttons together
- Keep holding until you see the Apple logo
iPads with cellular connectivity need extra steps to protect your data. Remove your SIM card before resetting to prevent potential carrier issues.
For very old iPad models (first and second generation), you might need to use iTunes recovery mode instead of the standard reset process. These devices often don’t work well with newer reset methods.
Getting Help from Apple Support and Verified Experts
When factory resetting your iPad becomes challenging, professional help is available through official channels and third-party expert services. These resources provide personalized guidance for your specific situation.
Contacting Apple Tech Support
Apple offers multiple ways to get help with your iPad factory reset. You can contact Apple Support directly through their website or the Apple Support app. Both options let you explain your problem and connect with a specialist.
For immediate assistance, visit an Apple Store and speak with a Genius Bar technician. Schedule an appointment ahead of time to avoid long waits.
Apple also provides detailed online guides for restoring devices to factory settings using a computer. These step-by-step instructions cover both Mac and PC methods.
Phone support is available in most countries. Apple’s support team can walk you through the reset process while you’re performing it.
Advantages of a JustAnswer Membership
JustAnswer connects users with verified experts who can help with iPad reset issues. Their platform offers personalized solutions when facing problems like Apple ID access after factory reset.
Members get priority access to technical experts with proven experience in Apple products. This means faster response times when you’re stuck in the middle of a reset.
One major benefit is the ability to ask follow-up questions. If the first solution doesn’t work, you can continue the conversation until your problem is resolved.
JustAnswer experts can provide alternative recovery mode methods when standard reset procedures fail. This is especially helpful for older iPad models.
Membership also includes access to experts across various fields beyond tech support.
Leveraging a Multi-Step Expert Quality Process
Professional tech support services utilize a structured approach to troubleshooting iPad reset problems. This ensures comprehensive solutions rather than quick fixes.
The process typically begins with identifying your specific iPad model and iOS version. This information is crucial as reset procedures vary slightly between different generations.
Experts then determine why you need a factory reset. Whether it’s preparing your device for sale or fixing software issues affects the recommended approach.
Next, they’ll check if you’ve backed up your data to iCloud or your computer. This step is essential since a factory reset erases all content.
If standard reset methods fail, qualified experts will guide you through alternative approaches like recovery mode or Device Firmware Update (DFU) mode. These advanced techniques can resolve complex issues not fixable through settings.
Frequently Encountered Topics and Questions
When resetting an iPad, several common issues often arise that can complicate the process. These include forgotten passcodes, concerns about system updates, and questions about device tracking features.
How to Bypass Screen Time Passcode
If you’ve forgotten your Screen Time passcode, you don’t have to stay locked out of certain features. Apple provides solutions for this common problem.
For devices running iPadOS 13.4 or later, you can reset the Screen Time passcode using your Apple ID. Go to Settings > Screen Time > Change Screen Time Passcode > Forgot Passcode, then enter your Apple ID credentials.
For older iPadOS versions, the process may require more steps:
- Try using Face ID or Touch ID if enabled
- Attempt to recall security questions
- As a last resort, you might need to erase all content and settings and set up your device again
Remember that repeatedly entering incorrect passcodes will temporarily lock your device.
Addressing Questions Related to IPadOS Updates
Many users wonder if they should update their iPadOS before resetting their device. Here’s what you need to know:
iPadOS 17 and later versions offer a more streamlined reset process. The reset option is now found under Settings > General > Transfer or Reset iPad, making it easier to find than in previous versions.
In iPadOS 15.2, Apple introduced additional verification steps to protect your data during resets. This update requires confirmation through Apple ID before wiping the device.
Before resetting your iPad:
- Back up your data to iCloud or computer
- Make note of your Apple ID password
- Ensure your iPad has sufficient battery (at least 50%) or connect it to power
Updates often fix bugs that might interfere with the reset process, so updating first is usually a good idea.
Understanding ‘Find My iPhone’ and Its Role in Resetting Devices
The Find My service (formerly Find My iPhone) plays a crucial role when resetting iPads. This feature protects your device from unauthorized resets.
Before performing a factory reset, you should turn off Find My iPad. Go to Settings > your name > Find My > Find My iPad and toggle it off. You’ll need your Apple ID password to do this.
If you don’t disable Find My iPad:
- Activation Lock remains active
- The next user will need your Apple ID to set up the device
- Your device will still appear in your Find My list
If you’re selling or giving away your iPad, disabling Find My is essential. Otherwise, the new owner won’t be able to use it.
For lost devices, you can remotely erase your iPad through the Find My app on another device or at iCloud.com.
Frequently Asked Questions
Resetting your iPad can solve many issues, but the exact process depends on your situation and what you’re trying to accomplish. Here are answers to common questions about different reset methods.
What are the steps to perform a factory reset on an iPad using hardware buttons?
If your iPad is frozen or you can’t access the Settings app, you can use the hardware buttons to reset it.
First, press and hold both the Top (or Side) button and either volume button until the power off slider appears. Then, force restart the iPad by quickly pressing and releasing the volume up button, followed by the volume down button, and then press and hold the Top button until the Apple logo appears.
For older iPads with a Home button, press and hold both the Home and Top buttons at the same time until you see the Apple logo.
How can one reset an iPad to factory settings without the Apple ID password?
Resetting an iPad without the Apple ID password can be tricky due to Apple’s security features.
You’ll need to use Recovery Mode by connecting the iPad to a computer with iTunes installed. Hold the appropriate buttons to enter Recovery Mode (depends on your iPad model), then select “Restore” in iTunes.
Remember that you may still need the Apple ID password to reactivate the iPad after resetting. This security measure helps prevent theft.
What is the procedure for conducting a hard reset on an iPad without using a computer?
You can perform a factory reset directly on your iPad without a computer.
Go to the Settings app, then tap General and scroll down to “Transfer or Reset iPad.” Select “Erase All Content and Settings” and confirm your choice.
You’ll need to enter your passcode if prompted, and the process will begin. This method works when your iPad is functioning normally.
Is it possible to factory reset an iPad without losing any data?
No, a true factory reset will erase all data on your iPad. That’s the purpose of the reset.
However, you can back up your iPad before resetting it. Use iCloud or iTunes to create a backup, then restore from that backup after the reset is complete.
This way, you can keep your photos, contacts, apps, and other data while still getting the benefits of a fresh system.
How can one carry out an iPad factory reset if they have forgotten their password?
If you’ve forgotten your iPad passcode, you’ll need to use Recovery Mode.
Connect your iPad to a computer with iTunes installed (or Finder on newer Macs). Follow the force restart steps for your specific iPad model while it’s connected. When prompted, choose the “Restore” option.
This will erase your device and install the latest iOS version. You can then restore from a backup if you have one.
Will all personal data be completely erased from an iPad after a factory reset?
Yes, erasing all content and settings will remove all personal data from your iPad.
The reset process uses encryption to make recovered data unreadable. Your photos, messages, contacts, apps, and settings will all be removed from the device.
If you’re selling or giving away your iPad, doing a factory reset is essential to protect your privacy. Apple’s security measures make it very difficult for anyone to recover your personal information after a proper reset.


