Recording incoming calls on iPhone can be a challenge due to the lack of built-in recording features. While many users resort to third-party apps, there are actually several effective methods to record iPhone calls without downloading additional software. You can record iPhone incoming calls using your voicemail, another device, or by using conference call features that connect to recording services.
Apple prioritizes privacy, which explains why direct call recording isn’t integrated into iOS. However, workarounds exist that utilize existing iPhone features. One simple method involves using the iPhone’s voicemail system by merging calls and directing them to voicemail, where the recording can later be accessed and saved.
Another approach uses the conference call feature to connect your conversation to a recording service. For those preferring physical solutions, placing your call on speaker and recording with a separate device offers a straightforward option that doesn’t require any special settings or services.
Why You Might Want to Record Calls
Recording calls can be useful for interviews, business meetings, or keeping a record of important conversations.
However, before you start — always check local laws. In many places, you must inform the other party before recording a phone call.
⚠️ Legal Reminder
Call recording laws vary by country and state:
- One-party consent states (like New York, Texas): Only one person (you) needs to know about the recording.
- Two-party consent states (like California, Florida): Everyone on the call must agree to be recorded.
To stay safe, always say something like:
“I’d like to record this call for my notes. Is that okay with you?”
🧭 Option 1: Use iPhone’s Built-In Call Recording (iOS 18 and Later)
Starting with iOS 18, Apple introduced a native call recording feature (available in select regions). It allows you to record both incoming and outgoing calls directly from the Phone app.
Steps:
- Open the Phone app and answer the incoming call.
- Tap the Record button that appears on the call screen (if available in your region).
- A small indicator will show that the call is being recorded.
- When finished, tap Stop Recording.
- The recording will be saved in the Phone app → Recents → Call Details → Recordings or in the Voice Memos app.
✅ Pros: Built-in, simple, secure, and automatic transcription available.
⚠️ Cons: May not be available in all countries due to privacy laws.
(Source: SlashGear – How to Record a Phone Call on iPhone Without Installing Any Apps)
🎙️ Option 2: Use the Voicemail Trick
If your iPhone doesn’t have the built-in recording option, you can use your voicemail inbox to record calls.
Steps:
- Call your contact and merge in your voicemail during the call.
- While on the call, tap Add Call → dial your own phone number.
- Wait for your voicemail greeting to start, then tap Merge Calls.
- The conversation will be recorded as a voicemail message.
- After the call ends, go to the Phone app → Voicemail tab to listen, save, or share the recording.
✅ Pros: No external devices or apps needed.
⚠️ Cons: Some carriers disable voicemail merging; limited recording length.
(Source: WikiHow – Record a Call on iPhone Without an App)
🔊 Option 3: Use Another Device to Record
You can record the call using another phone, computer, or voice recorder — completely offline.
Steps:
- Place your iPhone on speakerphone during the call.
- On another device (like a second phone, iPad, or digital recorder), open a voice recording app.
- Start recording and keep the devices close together for clear audio.
- Save the recording on the second device.
✅ Pros: Works with any iPhone model or iOS version.
⚠️ Cons: Audio quality depends on environment; can pick up background noise.
(Source: TechPP – Record Calls on iPhone Without an App)
☁️ Option 4: Use Google Voice (Free Method)
Google Voice allows you to record incoming calls only — and it’s free.
Steps:
- Go to voice.google.com on your computer and sign in.
- Set up a Google Voice number and link it to your iPhone.
- In Google Voice → Settings → Calls, turn on “Call Recording.”
- When you receive a call via your Google Voice number, press 4 on your keypad to start recording.
- Press 4 again to stop recording.
- The recording will appear in your Google Voice inbox online.
✅ Pros: Free, cloud-based, and easy to access.
⚠️ Cons: Only works for incoming calls through your Google Voice number; not available in all regions.
(Source: HowTo.Ping.fm – Record Incoming Calls on iPhone Without Apps)
🧩 Summary Table
| Method | iCloud Needed? | Extra Device? | Works for Incoming Calls? | Notes |
|---|---|---|---|---|
| iOS 18 Built-In Recording | ❌ | ❌ | ✅ | Region-dependent |
| Voicemail Trick | ❌ | ❌ | ✅ | Some carriers block merging |
| Another Device | ❌ | ✅ | ✅ | Works universally |
| Google Voice | ❌ | ❌ | ✅ | Requires Google Voice number |
✅ Final Tips
- Test your chosen method with a short call first.
- Always get consent before recording.
- Store recordings securely — especially if they contain sensitive information.
- For best sound quality, use quiet environments and speaker mode when recording externally.
In short:
You can record incoming calls on your iPhone without an app using iOS 18’s built-in call recorder, the voicemail merge trick, a second recording device, or Google Voice. Each method works without iCloud and requires no third-party installation.
Key Takeaways
- iPhone calls can be recorded without apps by using built-in features like voicemail and conference calling.
- Using a separate device to record speaker calls offers a simple solution that works in any situation.
- Always inform all parties that the call is being recorded to comply with legal requirements in many jurisdictions.
Understanding iPhone’s Built-In Features
iPhones offer several native capabilities for recording calls without third-party applications. Apple has significantly improved these features with recent iOS updates, making call recording more accessible to users.
Voice Memos App
The Voice Memos app comes pre-installed on all iPhones and provides a simple way to record audio. Though not directly integrated with the Phone app, it can be used for call recording through the speakerphone method.
To use this method:
- Place your call on speakerphone
- Open the Voice Memos app
- Tap the red record button to start recording
- End the recording after the call concludes
This approach has limitations including reduced audio quality and potential background noise interference. The speakerphone must be loud enough for the iPhone microphone to pick up both sides of the conversation.
Voice Memos automatically saves recordings with timestamps, making them easy to locate later. Users can rename, trim, and share these recordings directly from the app.
Call Waiting
While not a recording feature itself, Call Waiting plays an important role in managing calls that might need recording. iPhone’s Call Waiting feature allows users to:
- Place the current call on hold when a new call comes in
- Switch between active calls
- Merge calls for conference purposes
When planning to record an incoming call, users should ensure Call Waiting is properly configured. This prevents important calls from being missed while setting up recording functions.
To access Call Waiting settings:
- Open Settings
- Tap Phone
- Select Call Waiting
- Toggle the switch to enable/disable
Call Recording Capabilities
With iOS 18.1 and later, Apple introduced native call recording functionality to iPhones. This long-awaited feature eliminates the need for third-party apps or complex workarounds.
The built-in call recording feature:
- Works with regular phone calls and FaceTime audio calls
- Stores recordings securely in the Notes app
- Creates automatic transcripts of recorded conversations
- Generates summaries using Apple Intelligence (on supported devices)
To record a call using this feature:
- During an active call, tap the recording button
- Both parties will hear an announcement that recording has begun
- Access recordings later in the Notes app
This feature prioritizes privacy by notifying all participants when recording begins. The recording automatically ends when the call is disconnected.
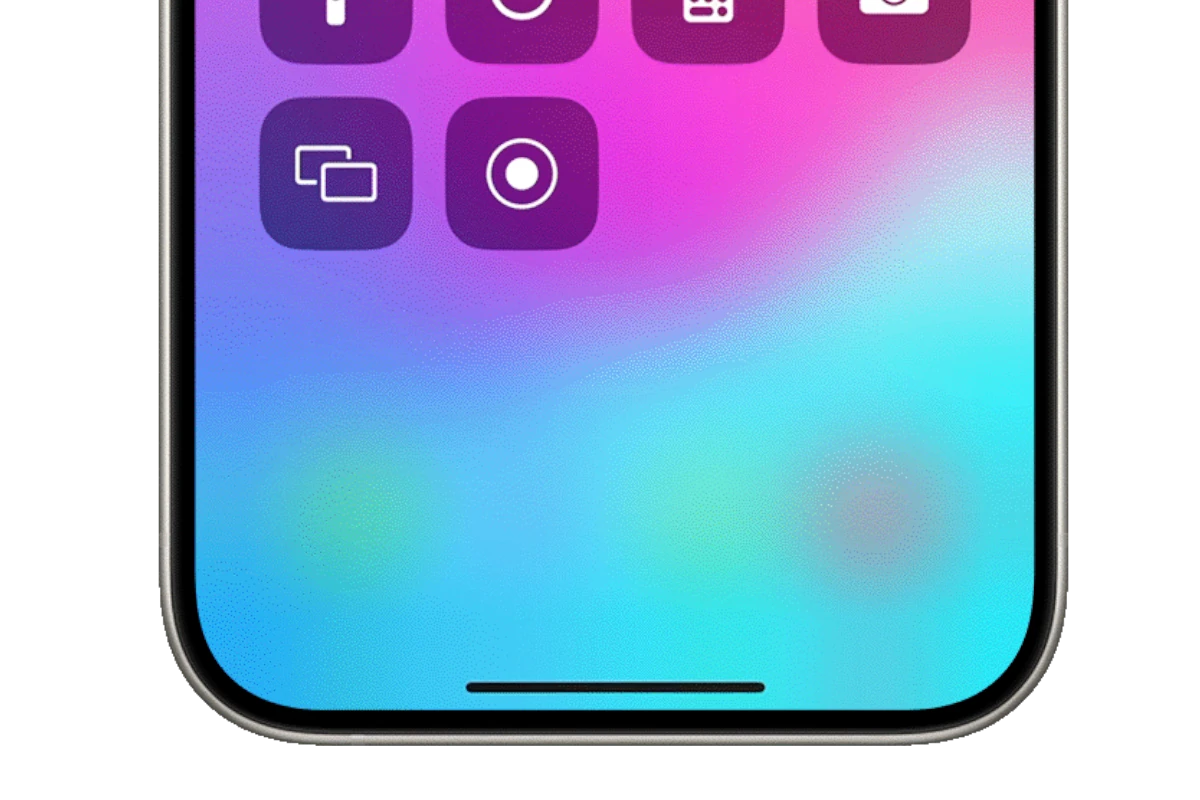
For iPhone users with iOS versions before 18.1, the Screen Recording feature in Control Center can be used as an alternative, though it won’t capture audio from regular phone calls due to system limitations.
Preparation for Recording Calls
Before recording incoming calls on an iPhone without an app, proper preparation is essential. This ensures compliance with legal requirements, optimal device settings, and clear audio quality for usable recordings.
Checking Legal Requirements
Recording phone calls involves important legal considerations that vary by location. In the United States, laws fall into two categories: one-party consent and two-party consent states.
In one-party consent states, only one person in the conversation (the recorder) needs to know about the recording. However, in two-party (or all-party) consent states like California, Florida, and Washington, all participants must be informed and agree to be recorded.
International laws vary significantly. The UK, for example, generally allows recording for personal use but restricts sharing without consent.
To avoid legal issues:
- Research local laws before recording any call
- Inform all parties at the beginning of the call
- Get verbal consent on the recording itself
- Never record confidential business conversations without permission
Failure to comply with these laws could result in civil penalties or criminal charges in some jurisdictions.
Configuring iPhone Settings
While iPhones don’t have built-in call recording features in most regions, proper device configuration can improve alternative recording methods.
First, ensure your iPhone has adequate storage space for audio files. Each minute of recording typically uses 0.5-1MB of storage depending on quality settings. Navigate to Settings > General > iPhone Storage to check available space.
For speakerphone recording methods:
- Adjust volume settings to maximum for clear capture
- Disable notification sounds temporarily (Settings > Sounds & Haptics)
- Enable Do Not Disturb mode to prevent interruptions
- Turn off low power mode for uninterrupted recording
With iOS 18.1, Apple introduced native call recording in some regions. Users should:
- Update to the latest iOS version
- Check for the recording feature in the call interface
- Review privacy settings related to call functions
Remember that iPhone privacy policies restrict third-party app access to call functions, which explains why direct recording options are limited.
Ensuring Audio Quality
Good audio quality is crucial for usable call recordings. Poor recordings with background noise or low volume might be worthless for important documentation purposes.
When using an external device to record:
- Position it 6-8 inches from your iPhone’s speaker
- Choose a quiet environment with minimal background noise
- Place both devices on a soft surface to reduce vibration
- Test the setup with a short call before important recordings
If using speakerphone method:
- Set iPhone volume to 70-80% (100% may cause distortion)
- Speak clearly and at a consistent distance from the phone
- Ask the other party to do the same
For voicemail recording methods, ensure your carrier’s voicemail system is properly set up and that you understand how to access and save recordings.
Test your chosen recording method before any important calls. This allows you to adjust settings and positioning for optimal clarity and comprehension in the final recording.
Native Methods to Record Calls
iPhone users have several built-in options to record phone conversations without downloading third-party apps. These methods utilize existing iPhone features and services that many users already have access to.
Utilizing Voicemail
The voicemail method is one of the simplest ways to record calls on an iPhone. This technique leverages the existing voicemail system built into every iPhone.
To use this method, first call the person you want to record. Once connected, press the “add call” button to start a second call. Dial your own phone number, which will go to voicemail. Merge the calls using the “merge” option that appears on the screen.
Your conversation will now be recorded in your voicemail. After the call ends, you can access the recording by opening the Phone app and tapping on the Voicemail tab. Look for the most recent voicemail entry.
This method has limitations – recordings may be capped at 3-5 minutes depending on your carrier’s voicemail settings, and sound quality might not be ideal.
Recording Through a Conference Call
Conference calling offers another native approach to record iPhone calls without extra apps. This method works by creating a three-way call with a recording service.
First, make or receive the call you want to record. Tell the other person you’ll be recording the conversation to comply with legal requirements. Next, tap the “add call” button and dial a recording service like Google Voice.
Once the recording service answers, tap “merge calls” to create a conference. Some services begin recording automatically when connected, while others require pressing a specific key to start.
After ending the call, access your recording through the service you used. With Google Voice, recordings appear in your inbox after the call concludes.
This method provides better quality than voicemail recordings but requires setting up an account with a compatible recording service beforehand.
Leveraging Siri for Recording Tasks
With iOS 18.1, Apple introduced a native call recording feature that can be activated using Siri. This official method eliminates the need for workarounds.
To use this feature, start by ensuring your iPhone is updated to iOS 18.1 or newer. During an active call, activate Siri by saying “Hey Siri” or pressing and holding the side button. Then simply say “Record this call.”
Siri will announce to both parties that the call is being recorded. This automatic notification helps comply with consent laws in many jurisdictions.
The recording is saved directly to your iPhone and can be accessed through the Phone app after the call ends. To stop recording before the call finishes, ask Siri to “stop recording this call.”
This method provides the best audio quality of all native options since it’s built directly into iOS and doesn’t rely on external services or conference calling.
Alternative Ways Without Third-Party Apps
Recording iPhone calls doesn’t always require downloading applications. Several built-in features and external methods can help you capture conversations when needed.
Using Google Voice
Google Voice offers a free and straightforward way to record incoming calls on an iPhone. First, users need to set up a Google Voice account and phone number. Once configured, they can enable call recording through the settings menu.
To record a call with Google Voice:
- Open the Google Voice app
- Go to Settings
- Select Calls
- Toggle on “Incoming call options”
When receiving a call through Google Voice, users can press “4” on the keypad during the conversation to start recording. An automated voice announces that recording has begun, ensuring all parties are aware of the recording.
One important limitation is that Google Voice only allows recording of incoming calls, not outgoing ones. The service automatically saves recordings to your Google Voice account, where they can be accessed and downloaded later.
External Recording Devices
Using a secondary recording device is one of the most reliable methods for capturing iPhone conversations. This approach works regardless of iOS restrictions.
Common external recording options include:
- Digital voice recorders: Dedicated devices with excellent microphones
- Another smartphone: Using the voice memo app on a second phone
- Computer with recording software: Placing the iPhone on speaker near a laptop
For best results, place the iPhone on speaker mode and position the recording device nearby in a quiet environment. Testing the setup before important calls ensures optimal audio quality.
Some specialized recorders can connect directly to iPhones via the lightning port or through Bluetooth, offering clearer recordings than ambient methods.
This method has the advantage of working regardless of iOS updates or restrictions Apple might implement on call recording apps.
Saving Conversations as Voice Memos
The built-in Voice Memos app provides a creative workaround for call recording. While it can’t directly record calls, users can employ a specific technique.
Steps for the Voice Memos method:
- Put your call on speaker
- Open the Voice Memos app on your iPhone
- Tap the red record button to start capturing audio
- Place the phone on a flat surface with the microphone unobstructed
This approach works best in quiet environments to minimize background noise. The quality depends on your iPhone model and surrounding acoustics.
Users should note that this method captures audio through the iPhone’s microphone, not directly from the call signal. This results in lower quality than dedicated recording apps but requires no additional downloads.
For important calls, testing this method beforehand helps determine optimal phone placement and environmental conditions for the clearest recording.
Post-Recording Process
After successfully recording a call on your iPhone without using an app, you’ll need to manage these recordings effectively. The following steps will help you organize, convert, and store your call recordings for future reference or sharing purposes.
Saving Recorded Calls
Once you’ve recorded a call using methods like the Voice Memos app or speakerphone with another device, saving the recording properly is crucial. For recordings made with Voice Memos, they automatically save within the app under a date and time stamp. Users should rename these files immediately for easier identification.
To rename a recording in Voice Memos:
- Tap on the recording
- Tap the title
- Type a new descriptive name
- Press Done
For recordings made on external devices or computers, transfer them to the iPhone using AirDrop, email, or a cloud service like iCloud Drive. Many iPhone models (especially iPhone 12 and newer) handle audio files efficiently due to improved processors. Users should create a dedicated folder in the Files app for organizing call recordings by date, contact, or purpose.
Converting Recordings to MP3
Most iPhone recordings are saved in M4A format by default, but converting them to MP3 can improve compatibility with other devices and platforms. Several options exist for this conversion process.
Built-in method:
- Open the recording in Voice Memos
- Tap the Share icon
- Select “Save to Files”
- Choose a location and save
Using third-party services:
- Online converters like Recordator provide conversion capabilities without installing apps
- Desktop applications like iTunes can convert audio formats when importing recordings
For large or multiple recordings, batch conversion tools save time. Users should note that MP3 files are typically smaller than original recordings but may have slightly reduced audio quality. This tradeoff is usually acceptable for voice recordings where perfect fidelity isn’t critical.
Managing Recorded Files
Effective file management ensures recorded calls remain accessible when needed. Creating a logical organization system helps prevent important recordings from getting lost among other files.
Storage options:
- iCloud Drive (5GB free with option to purchase more)
- Google Drive (15GB free storage)
- Dropbox (2GB free storage)
Best practices:
- Back up important recordings to multiple locations
- Delete unnecessary recordings to save space
- Use descriptive file naming conventions (e.g., “Call_with_[Name]_[Date]”)
For iPhone users with limited storage, regularly transferring recordings to a computer prevents device slowdown. Setting up automatic cloud backups provides additional security against data loss. Some users prefer creating playlists of important recordings for quick access or sharing collections with colleagues when collaborating on projects that require reference to previous conversations.
Troubleshooting
When recording incoming calls on iPhone without apps, users often encounter technical difficulties that can affect recording quality or functionality. These issues typically have straightforward solutions that require minimal technical knowledge.
Common Issues and Solutions
If recordings fail to start, users should check their iPhone’s microphone permissions in Settings. Sometimes, simply toggling permissions off and then on again resolves recording problems.
Network connectivity issues can interrupt recordings. Using a stable Wi-Fi connection rather than cellular data often provides more reliable results. If using voicemail methods, users should verify their carrier supports visual voicemail functionality.
For Google Voice users experiencing problems, signing out of the account and signing back in frequently resolves syncing issues. Additionally, ensuring the Google Voice app has the latest update can prevent recording failures.
Storage space limitations often cause unexpected recording stops. Users should regularly check available storage in Settings > General > iPhone Storage and delete unnecessary files.
Quality and Volume Concerns
Low recording volume is a common complaint. Users can improve audio clarity by using iPhone’s speakerphone mode during calls. This allows the microphone to capture both sides of the conversation more clearly.
Background noise significantly impacts recording quality. Finding a quiet environment before starting important call recordings helps produce clearer audio.
When using external devices for recording, proper positioning matters. For optimal results, place the recording device within 6-12 inches of the iPhone speaker.
Voice distortion sometimes occurs with certain methods. Adjusting the iPhone’s volume to 70-80% (rather than maximum) can reduce distortion while maintaining audible levels.
Bluetooth headsets may cause quality issues. For critical recordings, using the iPhone’s built-in speaker and microphone typically produces more consistent results.
Dealing With Call Waiting
Call waiting notifications can disrupt recordings by creating audible beeps in the audio file. Users should temporarily disable call waiting before recording important conversations by going to Settings > Phone > Call Waiting and toggling it off.
If a second call comes in during recording, answering it will typically end the current recording session. Users should inform callers beforehand about recording important calls to minimize interruptions.
Some third-party services handle call waiting differently. When using Google Voice, the service may automatically record both conversations if the user switches between calls, creating potential privacy concerns.
For conference calls with multiple participants, recording quality may decrease as more voices join. In these situations, using speakerphone and placing the iPhone in a central location improves clarity for all participants.
Frequently Asked Questions
Recording iPhone calls without apps raises several common questions. These FAQs address the methods, legality, and technical aspects of call recording on iPhones without third-party software.
What are the steps to record an incoming call on an iPhone for free?
To record an incoming call on an iPhone for free, users can utilize the voicemail method. When receiving a call, tap the add call button to make a conference call with your own voicemail.
Once voicemail answers, merge the calls using the merge option. The conversation will be recorded in the voicemail system and can be accessed later.
Users should ensure their voicemail has enough storage space before attempting this method.
Is there a built-in method to record calls on the iPhone without using any third-party applications?
Yes, with iOS 18.1, Apple introduced a native call recording feature. This built-in functionality allows users to record calls directly through the Phone app interface.
To use it, simply tap the record button during an active call. The system automatically notifies all parties that recording has begun, complying with legal requirements.
Before iOS 18.1, Apple did not provide any official built-in call recording capabilities.
Can I use Voice Memo to record a phone call directly on my iPhone?
Voice Memo cannot directly record phone calls on an iPhone due to system limitations. The app automatically stops recording when a call comes in.
A workaround involves using another device with Voice Memo open, placing your iPhone on speaker, and recording the conversation externally.
This method may result in lower audio quality but serves as a simple solution when other options aren’t available.
How can I record a call on my iPhone without the other party hearing an announcement?
Recording calls without notification is generally not possible on iOS devices due to legal and ethical considerations. Most methods, including the built-in iOS 18.1 feature, automatically notify all parties.
Using external recording devices or specialized hardware might bypass notifications, but such practices may violate laws in many jurisdictions.
The speakerphone method with another device recording doesn’t generate notifications but sacrifices call privacy and audio quality.
What is the procedure for recording incoming calls on the latest iOS version without an external app?
On iOS 18.1 and newer, users can record calls using the native recording feature. During a call, tap the recording icon in the call interface to start recording.
The system stores recordings in a dedicated section of the Phone app for easy access. Both parties will hear an announcement when recording begins.
For those using older iOS versions, the conference call with voicemail method remains the most straightforward built-in option.
Are there any legal considerations to be aware of when recording a call on an iPhone?
Call recording laws vary significantly by location, with many jurisdictions requiring consent from at least one party (one-party consent) or all parties (two-party consent).
In two-party consent states like California, Florida, and Washington, recording without notifying all participants is illegal and could result in criminal charges or civil liability.
Always inform all parties before recording and obtain explicit consent to avoid legal complications. This is not just ethical practice but essential for legal compliance.