Seeing “SOS Only” on your iPhone can be alarming, especially when you need to make an important call or access data. This status indicates your iPhone has lost its cellular network connection and can only make emergency calls to services like 911. Don’t worry—this common issue usually has simple solutions that can get you reconnected quickly.
The “SOS Only” message appears when your iPhone cannot connect to your carrier’s network due to various factors including poor signal areas, network outages, or settings problems. Your device automatically enters this emergency mode to ensure you can still call for help if needed, even without normal service.
Several fixes can resolve this issue, from basic steps like restarting your iPhone to checking for carrier setting updates. In many cases, toggling Airplane Mode on and off can reset your connection, while other situations might require checking your SIM card or contacting your service provider for assistance.
What “SOS” or “SOS Only” Means
When your iPhone shows “SOS” or “SOS Only” in the status bar, it means:
- Your iPhone can still make emergency calls (911 or local equivalents).
- But it can’t connect to your carrier’s network for regular calls, texts, or data.
This usually happens when there’s a network outage, SIM issue, or software glitch.
(Source: Apple Support)
🧩 Common Causes
- Temporary carrier network outage
- SIM card not detected or damaged
- Airplane Mode accidentally left on
- Cellular settings misconfigured
- Software bug after an iOS update
- Account or billing issue with your carrier
⚙️ Quick Fixes for “SOS Only” on iPhone
1. Check Coverage and Outages
- Make sure you’re in an area with cellular coverage.
- If others nearby on the same carrier have no signal, your carrier network may be down.
- You can check for outages on your carrier’s website or via Downdetector.
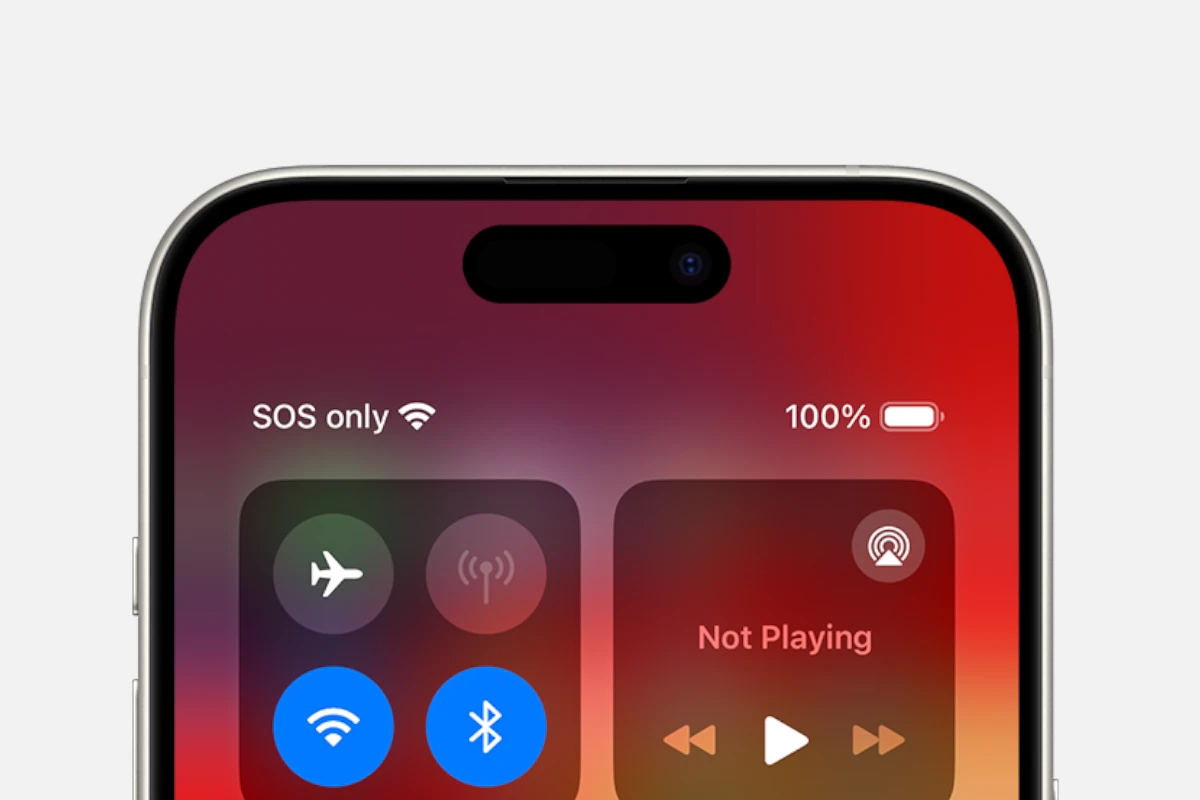
2. Toggle Airplane Mode
This resets your phone’s connection to the cellular network.
- Swipe down to open Control Center.
- Tap Airplane Mode on.
- Wait 10 seconds, then turn it off again.
Check if your signal returns.
3. Restart Your iPhone
A simple reboot can fix temporary network or SIM glitches.
- Press and hold the Side button + Volume button, then slide to power off.
- Wait 30 seconds, then turn it back on.
4. Check Cellular Settings
- Go to Settings → Cellular (or Mobile Data).
- Make sure Cellular Data is turned on.
- If you’re using Dual SIM, ensure the correct line is active.
5. Reinsert or Replace SIM Card
If your SIM is loose or damaged, the phone can’t connect to the carrier.
- Power off your iPhone.
- Remove the SIM tray using a SIM ejector tool or paperclip.
- Gently clean the SIM and reinsert it.
- Power the phone back on.
💡 Tip: If you use an eSIM, go to Settings → Cellular → Your Plan → Remove eSIM, then re-add it by scanning your carrier’s QR code.
6. Update Carrier Settings
Sometimes your carrier releases network updates that improve connectivity.
- Go to Settings → General → About.
- Wait a few seconds — if an update is available, you’ll see a prompt.
- Tap Update.
7. Update iOS
Apple regularly fixes network-related bugs in iOS updates.
- Go to Settings → General → Software Update.
- Download and install the latest version of iOS.
8. Reset Network Settings
If the problem persists, reset your network configuration:
- Go to Settings → General → Transfer or Reset iPhone → Reset → Reset Network Settings.
- Enter your passcode and confirm.
⚠️ This will erase saved Wi-Fi networks, VPNs, and Bluetooth connections — but not your data.
9. Check Carrier Account and Plan
If your bill is overdue or your plan has expired, your carrier may suspend service.
- Log in to your carrier account or contact customer support to confirm your line is active.
10. Contact Your Carrier or Apple Support
If none of the above steps work:
- There may be a SIM provisioning issue or hardware fault.
- Contact your carrier for SIM replacement or network troubleshooting.
- If the SIM and account are fine, contact Apple Support.
🧠 Extra Tips
- If you just switched carriers, make sure your iPhone is unlocked.
- For iPhones with eSIM, ensure your plan is properly activated.
- If you’re traveling, check Roaming settings under Settings → Cellular → Cellular Data Options.
🧾 Quick Summary
| Problem | Solution |
|---|---|
| Temporary signal loss | Toggle Airplane Mode |
| SIM not detected | Reinsert or replace SIM |
| Carrier settings outdated | Update carrier settings |
| iOS bug | Update iOS |
| Corrupt network settings | Reset network settings |
| Account issue | Contact carrier |
✅ Final Thoughts
The “SOS Only” message usually points to a connection or SIM issue, not a major hardware failure.
Start with Airplane Mode, SIM check, and network reset — these fix most cases.
If your iPhone still shows “SOS Only” after trying all steps, contact your carrier or Apple Support for further help.
Key Takeaways
- “SOS Only” means your iPhone can only make emergency calls due to lost cellular connectivity.
- Restarting your device, toggling Airplane Mode, or checking your SIM card can often resolve the issue.
- Contact your carrier if problems persist as network outages or account issues may require their assistance.
Understanding ‘SOS Only’ on iPhone
When an iPhone displays “SOS Only” in the status bar, it indicates a specific connection state that affects how you can use your device. This status appears when your iPhone loses connection to your cellular network but retains the ability to make emergency calls through available networks.
Definition of SOS Only
The “SOS Only” message appears when your iPhone cannot connect to your cellular carrier’s network. This doesn’t mean your phone is completely disconnected—it maintains the ability to make emergency calls through other available carrier networks. This feature is specifically designed as a safety measure, ensuring users can still call for help in critical situations.
This status typically appears for two main reasons: either you’re in an area with poor or no cellular coverage from your provider, or there’s an issue with your SIM card. When “SOS Only” appears, regular calls, texts, and mobile data services become unavailable until connection to your carrier is restored.
How Emergency SOS Works
Emergency SOS is a critical iPhone feature that allows users to quickly contact emergency services. When your iPhone displays “SOS Only,” you can still access this functionality despite lacking regular cellular service.
To activate Emergency SOS manually, users can either press the side button five times in quick succession or press and hold both the side button and either volume button simultaneously. This triggers a countdown and alarm before connecting to emergency services.
The feature works by attempting to connect through any available cellular network—not just your provider’s. This is possible because emergency calls are prioritized across all carrier networks by law in many countries, including Australia, Canada, and the United States.
Differences Between Physical SIM and eSIM
iPhones support two types of SIM technologies: traditional physical SIM cards and eSIM (embedded SIM). These differences can affect how “SOS Only” issues present and are resolved.
Physical SIM cards are removable chips that can be physically inserted or removed from your device. If your iPhone with a physical SIM shows “SOS Only,” the issue might be related to an improperly inserted SIM card, SIM card damage, or activation problems.
eSIM technology is built directly into your iPhone without requiring a physical card. eSIMs store your carrier information digitally and can sometimes experience different connectivity issues than physical SIMs. The advantage of dual-SIM capability in newer iPhones is that you can subscribe to multiple carriers, potentially reducing “SOS Only” occurrences by having backup network access.
Both SIM types might display “SOS Only” when traveling internationally without proper roaming plans or when network coverage is inadequate.
Immediate Steps to Resolve ‘SOS Only’
When your iPhone displays “SOS Only” in the status bar, it indicates you’re disconnected from your cellular network but can still make emergency calls. There are several quick troubleshooting steps you can take to restore normal service.
Enabling and Disabling Airplane Mode
Toggling Airplane Mode is often the simplest and most effective fix for network connectivity issues. This action refreshes your iPhone’s connection to cellular towers.
- Swipe down from the top-right corner of your screen to open Control Center
- Tap the airplane icon to enable Airplane Mode
- Wait 30 seconds while all wireless connections are disabled
- Tap the airplane icon again to disable Airplane Mode
This process forces your iPhone to search for and reconnect to available networks. Many users find this solves the problem immediately as it clears temporary connection glitches without requiring more complex steps.
If your phone doesn’t reconnect properly after the first attempt, try repeating the process once more. The cellular icon should replace the “SOS Only” indicator within a minute if successful.
Performing a Force Restart
When toggling Airplane Mode doesn’t work, a force restart can resolve system-level issues affecting network connectivity. This doesn’t delete any data but refreshes core system processes.
For iPhone 8 or newer models:
- Press and quickly release the Volume Up button
- Press and quickly release the Volume Down button
- Press and hold the Side button until the Apple logo appears
For iPhone 7:
- Press and hold both the Side and Volume Down buttons together
- Release when the Apple logo appears
This restart method is more thorough than a regular power cycle. It clears the system memory and restarts all services that manage cellular connections. After restarting, your iPhone will attempt to establish a fresh connection to your carrier’s network.
Checking for Carrier Issues or Outages
Sometimes the “SOS Only” message appears due to problems with your carrier’s network rather than your device.
Check carrier settings:
- Go to Settings > General > About
- If a carrier settings update is available, you’ll be prompted to update
Verify network coverage:
- Visit your carrier’s website or social media for announced outages
- Use outage tracking websites like Downdetector
- Contact your carrier’s customer service
Try manual network selection:
- Go to Settings > Cellular > Network Selection
- Turn off Automatic selection
- Wait for the list of available networks to appear
- Select your carrier manually
Poor signal areas, temporary network maintenance, or damaged towers can cause service interruptions. Sometimes simply moving to a different location can resolve the issue if it’s related to weak signal coverage.
Network and Carrier Settings Troubleshooting
When your iPhone displays “SOS Only,” adjusting network settings often resolves the issue. These solutions focus on reconnecting to your cellular network through manual selection, updating carrier settings, or performing a complete network reset.
Manual Network Selection
The “SOS Only” message typically appears when your iPhone cannot connect to your carrier’s network automatically. Manually selecting your network can bypass this issue. To do this:
- Go to Settings > Cellular > Network Selection
- Toggle off “Automatic” selection
- Wait for the list of available networks to appear
- Select your carrier’s network from the list
If your carrier doesn’t appear in the list, you might be outside their coverage area. In this case, try moving to a different location with better coverage. Some buildings with thick walls or metal structures can block cellular signals.
After manually selecting your network, your iPhone should connect and the “SOS Only” message should disappear. If it doesn’t work immediately, toggle Airplane Mode on and off to refresh the connection.
Updating Carrier Settings
Outdated carrier settings can cause connectivity problems. Carriers regularly release updates that improve network performance and fix known issues.
To check for and install carrier setting updates:
- Connect your iPhone to a Wi-Fi network
- Go to Settings > General > About
- If an update is available, you’ll see a prompt to update carrier settings
- Tap “Update” when prompted
You can verify your current carrier settings version by checking the “Carrier” entry in the About section. If no update appears automatically, but you’re still experiencing problems, contact your carrier directly. They might provide specific instructions for updating settings on their network.
Resetting Network Settings
When other methods fail, resetting network settings often resolves persistent connectivity issues. This option clears all saved Wi-Fi networks, Bluetooth connections, VPN configurations, and cellular settings.
- Go to Settings > General > Transfer or Reset iPhone
- Tap “Reset”
- Select “Reset Network Settings”
- Enter your passcode if prompted
- Confirm the reset
After the reset completes, your iPhone will restart. You’ll need to reconnect to Wi-Fi networks and pair Bluetooth devices again. Your iPhone will attempt to reconnect to your cellular network automatically.
This solution is particularly effective for fixing misconfigured network settings that might cause the “SOS Only” message to appear.
Advanced Solutions for Cellular Connectivity Issues
When standard fixes don’t resolve the “SOS Only” issue on your iPhone, more technical approaches may be necessary. These solutions target specific connectivity problems related to network settings, hardware components, and carrier connections.
Resolving Issues with Data Roaming
Data roaming settings can sometimes interfere with normal cellular connectivity. To adjust these settings, go to Settings > Cellular > Cellular Data Options, then toggle Data Roaming on or off. This can help establish a connection when traveling internationally or in areas with limited coverage from your primary carrier.
If toggling doesn’t work, try resetting your network settings completely. Go to Settings > General > Transfer or Reset iPhone > Reset > Reset Network Settings. This will erase all saved Wi-Fi networks and passwords, but can fix stubborn connectivity issues.
For persistent problems, contact your carrier to verify your roaming agreements and ensure your account is properly set up for roaming services. Some carriers require specific plans or add-ons for international roaming to function correctly.
Identifying and Fixing Hardware Issues
Hardware problems often cause persistent “SOS Only” errors. Start by examining your SIM card for damage or wear. Remove it using the SIM ejector tool, clean it gently with a soft cloth, and reinsert it properly.
If SIM issues persist, try testing your iPhone with a different SIM card. This helps determine if the problem lies with your card or the phone itself. Borrowing a friend’s SIM (from the same carrier) can be a quick diagnostic test.
For iPhone models with eSIM capabilities, you might need to delete and re-add your eSIM profile. Go to Settings > Cellular > [Your Cellular Plan] > Remove Cellular Plan, then set up the eSIM again following your carrier’s instructions.
Physical damage to the antenna or water exposure can also cause connectivity issues. If your iPhone has been dropped or exposed to moisture, professional repair may be necessary.
Establishing a Network Connection
Manual carrier selection can sometimes overcome “SOS Only” errors. Navigate to Settings > Cellular > Network Selection and turn off Automatic. Wait for the list of available networks to appear and select your carrier manually.
Field Test Mode provides detailed signal information:
- For newer iPhones: Dial 3001#12345#
- Check signal strength (higher numbers closer to 0 are better)
- Look for network band information
A full device restore can resolve persistent software issues affecting cellular connectivity. Back up your iPhone, then go to Settings > General > Transfer or Reset iPhone > Erase All Content and Settings. After setup, restore from your backup to regain your data while potentially fixing the cellular issues.
Updating carrier settings is also crucial. These small but important updates optimize how your iPhone connects to cellular networks. Check for updates in Settings > General > About and wait a few seconds to see if an update prompt appears.
Contacting Apple Support for SOS Issues
When persistent SOS issues can’t be resolved through basic troubleshooting, reaching out to Apple Support becomes necessary. Professional assistance can often diagnose and fix problems that aren’t solvable through standard methods.
When to Seek Professional Assistance
Users should contact Apple Support when their iPhone remains stuck in “SOS Only” mode after trying all basic fixes. These include restarting the device, checking for carrier updates, toggling Airplane Mode, and resetting network settings.
If the iPhone shows “SOS Only” in areas with known good coverage or if multiple devices from the same carrier work fine in the same location, this indicates a device-specific problem.
Persistent issues following a recent iOS update may require expert intervention, as they could stem from software conflicts that need specialized attention.
Support is also necessary if the SOS mode appears after physical damage or exposure to water, as these may cause hardware malfunctions beyond self-repair capabilities.
How to Contact Support
Users can reach Apple Support through multiple channels. The Apple Support app, available on the App Store, offers the most direct method to connect with a support representative about iPhone network issues.
The support.apple.com website provides options to chat with a support agent or schedule a call at a convenient time. For those who prefer speaking directly with a technician, calling 1-800-MY-APPLE (1-800-692-7753) is available.
Apple Store appointments through the Genius Bar offer face-to-face assistance. Users can schedule these through the Apple website or Support app by selecting “iPhone,” then “Connectivity,” and following the prompts.
For complex network issues, noting the case number provided during initial contact helps track the support process through multiple interactions.
Preparing Your iPhone for Support Inspection
Before contacting Apple Support, users should gather essential information to expedite troubleshooting. This includes noting when the SOS issue began and any events that might have triggered it, such as dropping the phone or updating iOS.
Taking screenshots of the SOS message and related error messages provides visual evidence for the support team. Having the iPhone’s serial number ready (found in Settings > General > About) is also helpful.
Backing up the iPhone to iCloud or a computer ensures no data loss during potential diagnostic resets. Support may ask for this confirmation before proceeding with certain fixes.
Users should also prepare to share their carrier details and account information, as network-related issues often require coordination between Apple and the cellular provider for resolution.
Prevention and Maintenance Strategies
Taking proactive steps can significantly reduce the chances of encountering the frustrating “SOS Only” message on your iPhone. Regular maintenance of your device settings and understanding network behavior are key to maintaining consistent cellular connectivity.
Regular iOS and Carrier Settings Updates
Keeping your iPhone’s software current plays a crucial role in preventing connectivity issues. Apple regularly releases iOS updates that fix bugs and improve network compatibility. Users should check for updates by going to Settings > General > Software Update.
Carrier settings updates are equally important but often overlooked. These small updates optimize how your iPhone communicates with your mobile network. When available, these updates appear as notifications or can be manually checked in Settings > General > About.
iOS 18 is expected to bring significant improvements to cellular connectivity management. Early reports suggest enhanced network switching algorithms that could reduce “SOS Only” situations when moving between coverage areas.
Users should enable automatic updates for both iOS and carrier settings to ensure they’re always running the most stable version. This simple habit can prevent many connectivity problems before they occur.
Understanding Network Coverage and Connectivity
Network coverage varies significantly by location and carrier. Understanding your carrier’s coverage map can help you anticipate potential dead zones where “SOS Only” might appear.
Different network technologies offer varying levels of reliability:
- 5G: Fastest but limited coverage in many areas
- 4G/LTE: Good balance of speed and coverage
- 3G: Wider coverage but being phased out by many carriers
iPhones automatically switch between these technologies based on availability. In Cellular settings, users can see which network type (5G, LTE, etc.) they’re currently using and can also disable 5G to potentially improve connectivity in areas with spotty 5G coverage.
Rural areas, buildings with thick walls, underground locations, and remote regions typically have weaker signals. Knowing these limitations helps set realistic expectations about connectivity and prepare alternative communication methods when needed.
Best Practices to Avoid ‘SOS Only’ Scenarios
Toggle Airplane Mode on and off when experiencing connectivity issues. This simple trick often reestablishes connection to available networks by forcing your iPhone to scan again.
Keep your SIM card clean and properly seated. Dust or improper installation can cause connection problems. Remove the SIM using the ejector tool, clean it gently with a dry cloth, and reinsert it.
In Cellular Settings, enable “Data Roaming” when traveling to ensure your phone can connect to partner networks. While this may incur additional charges, it significantly reduces “SOS Only” occurrences.
Consider these signal-boosting techniques:
- Move to higher ground or near windows
- Remove phone cases that might block signals
- Hold your phone differently, as hand position can affect reception
For areas with known poor coverage, enable Wi-Fi Calling in Settings > Phone > Wi-Fi Calling. This allows calls and texts over Wi-Fi networks when cellular service is unavailable, effectively bypassing the “SOS Only” limitation.
Exploring Future iPhone Models’ SOS Features
Apple continues to enhance emergency features on iPhones with each new generation. These improvements focus on connectivity during crisis situations and expand the ways users can reach help when traditional cellular networks are unavailable.
Emergency SOS via Satellite on iPhone 14
The iPhone 14 series marked a significant advancement in emergency communication with the introduction of Emergency SOS via Satellite. This feature allows users to connect to emergency services even in remote areas without cellular coverage.
When activated, the phone guides users through pointing their device toward a satellite. The interface displays simple directional arrows to help maintain the connection.
The system uses compressed messages to communicate efficiently through limited bandwidth. Users can send their location, medical ID information, and brief descriptions of their emergency situation.
This feature is free for two years with iPhone 14 purchase. It works in the US, Canada, UK, France, Germany, Ireland, and several other countries with ongoing expansion.
Apple designed a custom component integration with existing antennas to enable this communication without bulky satellite hardware.
Predicted SOS Capabilities in iPhone 15 and 16
The iPhone 15 builds on satellite capabilities with faster connection times and expanded country coverage. Reports indicate Apple has improved the compression algorithms, allowing for more detailed emergency messages.
Battery efficiency during satellite connections has also improved, extending the usable time in emergency situations. The iPhone 15 Pro models feature titanium frames that may provide better signal penetration.
Industry analysts predict iPhone 16 will introduce two-way satellite messaging for limited communication beyond just emergency services. This could include basic text updates to family members during emergencies.
Rumored improvements include satellite connectivity for location sharing through Find My when off-grid. Apple is also reportedly working with more international emergency response centers to expand global coverage.
Battery-saving emergency modes might automatically activate when SOS features are used, preserving power for critical communications.
Frequently Asked Questions
iPhone users frequently encounter the “SOS Only” status, which indicates their device can only make emergency calls. This issue can stem from various network issues, carrier problems, or device settings that need adjustment.
What steps can I take to resolve the ‘SOS Only’ status on my iPhone?
To fix the “SOS Only” status, first toggle Airplane Mode on and off. This simple reset often reconnects the iPhone to the network.
Next, check carrier settings by going to Settings > General > About. If an update is available, a prompt will appear.
Restarting the iPhone can also resolve connection issues. Hold the power button and volume button simultaneously until the power off slider appears.
If these steps don’t work, try resetting network settings through Settings > General > Reset > Reset Network Settings. This will erase saved Wi-Fi networks and passwords.
How can I deactivate the SOS mode on my iPhone 13?
The “SOS Only” status isn’t an active mode but rather indicates lack of cellular connection. To restore normal service, ensure your SIM card is properly inserted.
Check if your account is active with your carrier. Call customer service to verify there are no account issues or outages in your area.
Update your iPhone to the latest iOS version through Settings > General > Software Update. Outdated software can sometimes cause connectivity problems.
What might be causing my iPhone to display an ‘SOS Only’ signal?
The most common cause is being outside your carrier’s coverage area. Moving to a location with better signal strength may resolve the issue.
Network congestion during busy times or in crowded areas can trigger the “SOS Only” status temporarily. Waiting or moving to a less congested area might help.
SIM card issues like damage or improper installation can prevent normal network connection. Remove and reinsert your SIM card using the SIM ejector tool.
Carrier outages or maintenance in your area might be responsible. Check your carrier’s website or social media for service status updates.
How do you troubleshoot an iPhone that is stuck in SOS mode?
Force restart your iPhone by quickly pressing and releasing the volume up button, then the volume down button, and finally holding the side button until the Apple logo appears.
Check for carrier settings updates. Your carrier occasionally releases updates that improve network connectivity and performance.
Reset your iPhone’s network settings if the issue persists. This will clear all saved network information and might resolve stubborn connectivity issues.
If all else fails, contact Apple Support or visit an Apple Store. Hardware issues might be causing the persistent SOS status.
What should I do if my iPhone shows ‘No Service’ instead of a network connection?
Check if Airplane Mode is accidentally enabled. Look for the airplane icon in the status bar and disable it through Control Center or Settings.
Verify that your iPhone isn’t set to “Wi-Fi only” mode in cellular settings. Go to Settings > Cellular and ensure Cellular Data is enabled.
Try a manual carrier selection by going to Settings > Cellular > Network Selection and turn off Automatic. Select your carrier manually from the list.
Update your carrier settings and iOS version. Outdated software can cause network connectivity issues on your iPhone.
What are common solutions for an iPhone displaying ‘SOS Only’ in areas with normally strong signal like with Verizon?
Contact Verizon customer support to check if there are account issues or local outages. Sometimes service interruptions aren’t widely reported.
Remove and reinsert your SIM card or try another SIM card if available. A faulty SIM card can cause connectivity issues even in areas with strong coverage.
Reset network settings as a troubleshooting step. This often resolves carrier-specific connection problems with Verizon and other providers.
Check if your iPhone needs a network settings update. Verizon occasionally pushes carrier-specific updates that require manual installation through Settings > General > About.


