Backing up an iPhone is a simple yet crucial process for protecting data. Anyone who relies on their device for daily communication, work, or personal memories should understand the importance of regular backups. Whether it’s photos, contacts, or documents, the information stored on an iPhone is often irreplaceable. A backup ensures that in the event of a mishap such as a lost or damaged phone, all data can be retrieved.
There are two main methods for backing up an iPhone: using iCloud for a cloud-based backup or utilizing a computer for a local backup. iCloud backups are convenient and automatic once setup, while local backups through a computer can offer more control and potentially more storage space. Both methods safeguard user privacy and data integrity, and users should choose the method that fits their needs and storage options.
Why Backing Up Your iPhone is Essential
Backing up your iPhone creates a copy of your important data, settings, and information. If your device is ever lost, damaged, or needs to be replaced, you can use your backup to restore everything to a new device (source: Apple Support). Without a backup process in place, you risk losing sensitive data permanently (source: Apple Device Support Tutorials).
Choose Your Backup Method
Before getting started, it’s important to understand the difference between the two main backup methods (source: Apple Support):
iCloud Backup vs. Computer Backup:
iCloud Backup:
- Automatic and wireless
- Accessible from anywhere
- Limited by iCloud storage space
- Requires internet connection
Computer Backup:
- More comprehensive data backup
- Uses your computer’s storage space
- Can be encrypted for additional security
- Works offline
Method 1: Back Up iPhone Using iCloud
Setting Up Automatic iCloud Backup:
- Connect to Wi-Fi
- Ensure your iPhone is connected to a Wi-Fi network
- Open Settings
- Tap the Settings app on your iPhone
- Access iCloud Settings
- Tap your name at the top of Settings
- Select “iCloud”
- Enable iCloud Backup
- Tap “iCloud Backup”
- Toggle “Back Up This iPhone” to ON
- Your iPhone will now automatically back up daily when connected to Wi-Fi, plugged in, and locked (source: Apple Support)
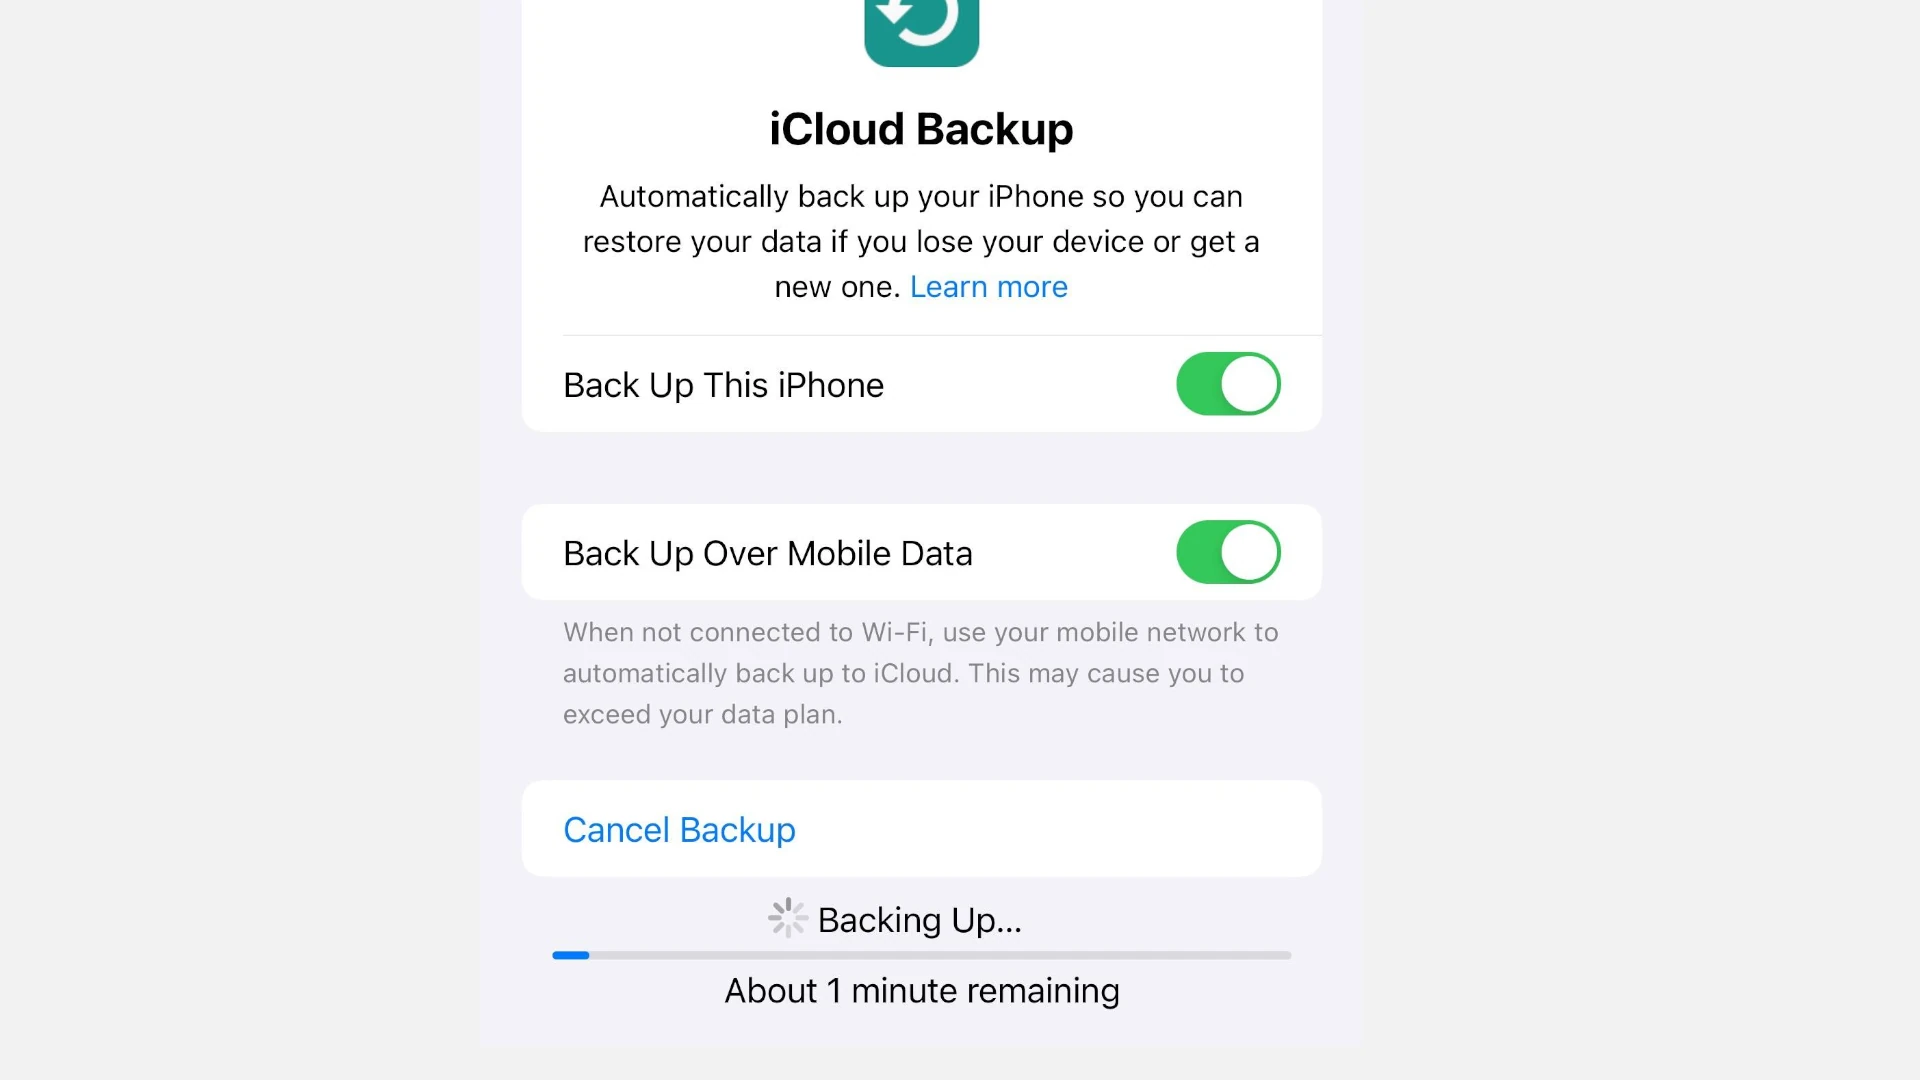
Manual iCloud Backup:
- Follow steps 1-4 above
- Start Manual Backup
- In the iCloud Backup settings, tap “Back Up Now”
- Keep your device connected to Wi-Fi until the process completes
- You can monitor progress in the same settings menu
What’s Included in iCloud Backup:
- App data and settings
- Apple Watch backups
- Device settings
- HomeKit configuration
- Keychain data (passwords and credit card information)
- Photos and videos (if not using iCloud Photos)
- Purchase history
- Ringtones
- SMS and MMS messages
Method 2: Back Up iPhone Using a Computer (Mac)
For macOS Catalina 10.15 and Later:
- Connect Your iPhone
- Use a USB cable to connect your iPhone to your Mac
- Open Finder
- Launch Finder and look for your iPhone in the sidebar
- Select Your Device
- Click on your iPhone in the Finder sidebar
- Choose Backup Options
- Select “Back up all of the data on your iPhone to this Mac”
- For additional security, check “Encrypt local backup” (this saves passwords, Health data, and HomeKit data)
- Start Backup
- Click “Back Up Now”
- Wait for the backup process to complete
For macOS Mojave 10.14 and Earlier:
- Open iTunes
- Launch iTunes on your Mac
- Connect and Select Device
- Connect your iPhone via USB
- Click the iPhone icon when it appears in iTunes
- Configure Backup Settings
- In the “Backups” section, select “This computer”
- Check “Encrypt iPhone backup” for complete data protection
- Create Backup
- Click “Back Up Now”
Method 3: Back Up iPhone Using Windows PC
Using iTunes on Windows:
- Install iTunes
- Download and install the latest version of iTunes from Apple’s website
- Connect Your iPhone
- Use a USB cable to connect your iPhone to your PC
- Trust the computer when prompted on your iPhone
- Select Your Device
- Open iTunes and click the iPhone icon in the upper-left corner
- Configure Backup
- In the “Backups” section, select “This computer”
- Check “Encrypt iPhone backup” for complete backup including passwords and Health data (source: Apple Support)
- Start Backup
- Click “Back Up Now” and wait for completion
Managing and Verifying Your Backups
Check iCloud Backup Status:
- Go to Settings > [Your Name] > iCloud > iCloud Backup
- View the date and time of your last backup
- See estimated time for next backup
Check Computer Backup:
- Mac (Finder): Select your device in Finder and view backup information
- Mac (iTunes): iTunes > Preferences > Devices
- Windows: iTunes > Edit > Preferences > Devices
What’s Backed Up vs. What’s Not:
Included in all backups:
- App data and settings
- Messages and call history
- Device settings and preferences
- Photos and videos (unless using iCloud Photos)
- Ringtones and wallpapers
Not included in backups:
- Content from iTunes and App Store (re-downloaded automatically)
- Apple Pay information
- Activity data
- Touch ID and Face ID settings
- Data already stored in iCloud (when using iCloud services)
Best Practices for iPhone Backups
Regular Backup Schedule:
- iCloud users: Enable automatic daily backups
- Computer users: Backup weekly or before major iOS updates
- Before device repair: Always backup before taking your iPhone for service
Storage Management:
- iCloud: Regularly review and manage your iCloud storage
- Computer: Ensure adequate free space for backups (backups can be several GB)
Security Considerations:
- Use encrypted backups for complete data protection
- Keep your backup passwords secure and memorable
- Consider using both iCloud and computer backups for redundancy
Troubleshooting Common Backup Issues
iCloud Backup Problems:
- Insufficient storage: Upgrade iCloud plan or delete old backups
- Slow backup: Ensure strong Wi-Fi connection and adequate power
- Backup won’t start: Sign out and back into iCloud, restart device
Computer Backup Issues:
- Device not recognized: Update iTunes/Finder, try different USB cable
- Backup interrupted: Ensure stable connection, disable antivirus temporarily
- Not enough space: Free up computer storage space
Backing up your iPhone is one of the most important maintenance tasks you can perform (source: Apple Support). Whether you choose iCloud or computer backups, having a recent backup ensures your data is protected and can be easily transferred to a new device when needed.
Key Takeaways
- Regular iPhone backups protect valuable data.
- Users can choose between cloud-based and local backups.
- The backup process prioritizes data security and user privacy.
Preparing for Backup
Before backing up your iPhone, it’s essential to know your options and ensure your device and storage are ready. This preparation guarantees a smooth backup process.
Understanding Backup Options
Two primary methods exist for iPhone backups: iCloud and iTunes. iCloud backups store your data in the cloud, allowing access from any device with internet. To back up using iCloud, sign in to your Apple ID and toggle on iCloud Backup under the iCloud settings. iTunes backups save data locally on a computer. They require you to connect your device to the computer and use the iTunes app to start the backup.
Ensuring Device Readiness
First, connect to a stable Wi-Fi or 5G network to avoid interruptions. Make sure your iPhone’s screen is unlocked and that you have entered your password if prompted. Check that your Apple ID is active, as it is necessary for accessing iCloud services. If using iTunes, ensure the latest version is installed on your PC or Mac for a smooth backup experience.
Managing Storage Requirements
When using iCloud backup, confirm that you have sufficient iCloud storage. To see your storage, go to “Settings,” tap your Apple ID, and select “iCloud.” Here, you can manage your account’s storage. For local backups with iTunes, confirm that your computer has enough space to accommodate the backup file. Always maintain free space to prevent any backup issues.
Executing the Backup
Backing up your iPhone is a straightforward process that can save you from losing your important data. Whether using iCloud or your computer, the process is secure and can restore your phone’s information if needed.
Using iCloud for Backup
To back up with iCloud, you need a Wi-Fi connection and enough iCloud storage. Go to Settings, tap your Apple ID, then select iCloud. Under iCloud Backup, switch it on and tap Back Up Now. This saves your photos, contacts, and messages to your Apple ID account. Remember, the first backup might take a while, especially if your iPhone holds lots of data.
Using iTunes and Finder for Local Backups
For a local backup using macOS Catalina or later, connect your iPhone to your Mac with a cable. Open Finder and select your iPhone from the sidebar. Click on General, then click Back Up Now under the Backups heading. For macOS Mojave or earlier, or on a Windows PC, use iTunes to connect to your iPhone. Click the device icon, select Summary, and click Back Up Now. Opting for an encrypted backup by checking “Encrypt local backup” will secure your data with a password.
Additional Backup Solutions
Besides iCloud and Finder or iTunes, you can use third-party apps or other cloud storage like Google Photos. When choosing a third-party service, ensure it’s compatible with iOS and suits your needs regarding storage space and features. Backup regularly, and especially before updating iOS or performing any system restoration, to keep your data safe.


