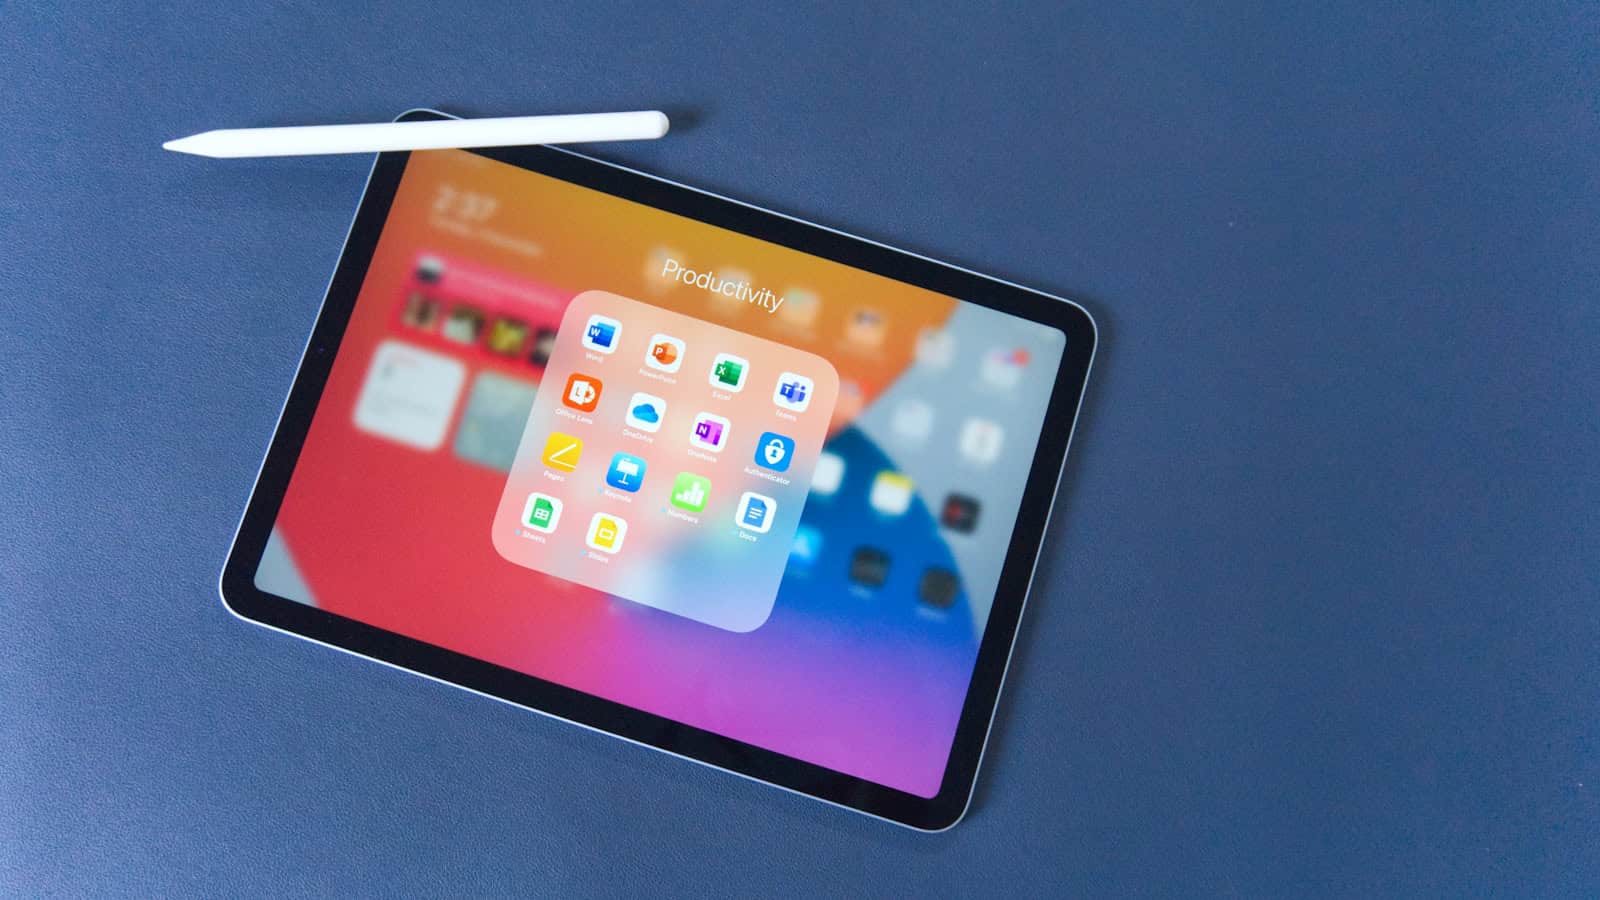
The Apple Pencil remains one of the most refined digital styluses available today, and in 2025, it’s more versatile than ever. Whether it’s the new Apple Pencil Pro with next-level features or the more budget-friendly USB-C and 2nd Gen models, the Apple Pencil lineup covers a wide range of users—from professional creatives to students and casual note-takers. But is it actually worth your money in 2025? That depends on your needs, iPad model, and what you plan to do with it.
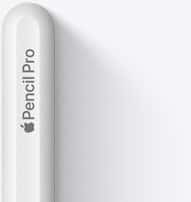
Apple Pencil Pro: Designed for Creative Professionals
Released in May 2024, the Apple Pencil Pro is Apple’s most advanced stylus to date. It builds on everything that made the previous generations useful while introducing innovative features that redefine precision input:
- Squeeze Gesture: A new way to summon tool palettes and shortcuts without touching the screen.
- Barrel Roll: Leverages a built-in gyroscope to dynamically rotate brush tips—especially useful for shading and calligraphy.
- Haptic Feedback: A first for the Apple Pencil, providing tactile confirmation for interactions, like tool switching.
- Find My Support: Integration with Apple’s Find My network means you can now locate a lost Pencil.
- Hover Support: Lets you preview strokes or UI elements before committing, adding a layer of precision previously only found in graphic tablets.
The Apple Pencil Pro is only compatible with the M4 iPad Pro and M2/M3 iPad Air models. That exclusivity limits its accessibility but also ensures it’s tightly integrated with Apple’s top-end hardware, especially useful for apps like Procreate, Affinity Designer, and Final Cut Pro on iPadOS.
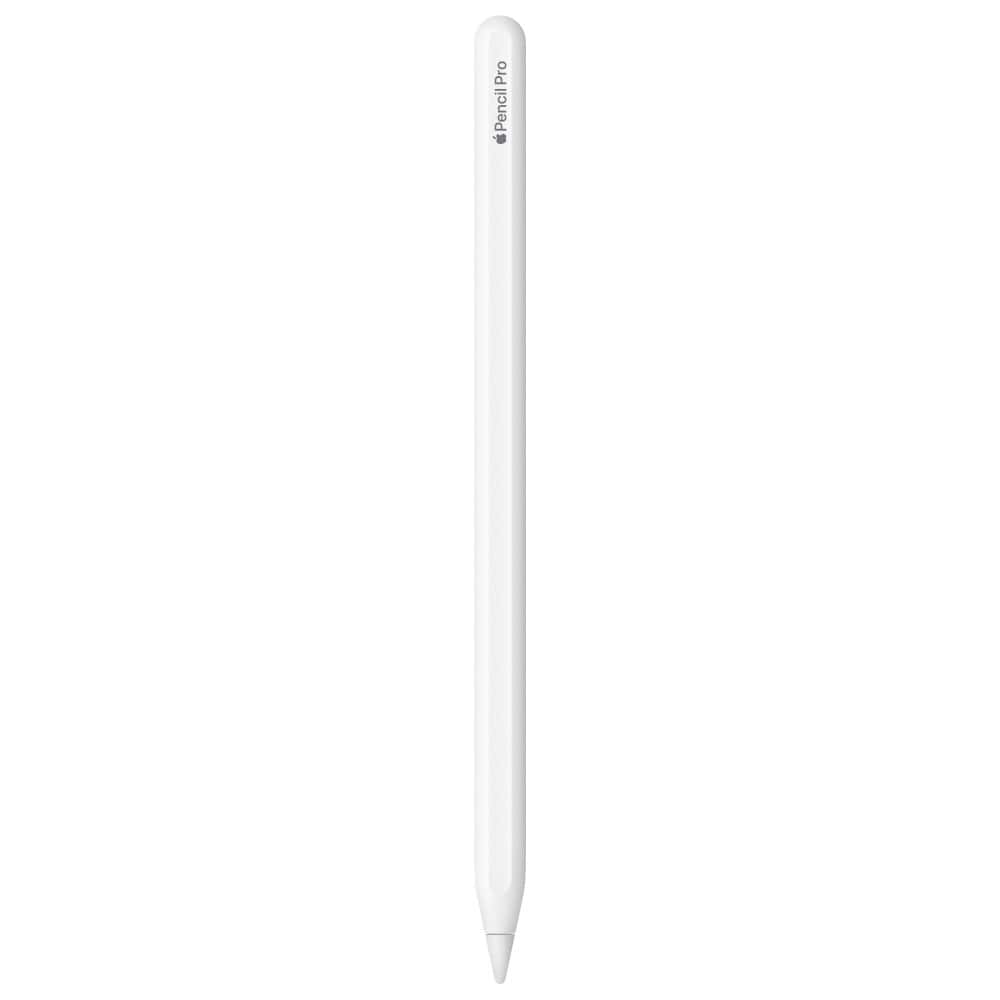
Apple Pencil (2nd Gen) and USB-C Model: Solid Tools for Most People
If you’re not working on a bleeding-edge iPad, don’t worry—the older Apple Pencil models are still excellent in 2025.
Apple Pencil (2nd Generation)
- Key Features: Pressure sensitivity, tilt detection, magnetic charging, and double-tap tool switching.
- Best For: Artists, students, and professionals who want precision without the Pro’s advanced features.
- Compatibility: iPad Pro (2018 and later), iPad Air (4th Gen and later), and iPad mini (6th Gen).
Apple Pencil (USB-C Model)
- Key Features: Simplified design with USB-C charging and pairing, but lacks pressure sensitivity and wireless features.
- Best For: Note-taking, markup, basic sketches, and those new to digital styluses.
- Compatibility: Works with all USB-C iPads, including the standard 10th-gen iPad.
For casual users, the USB-C model offers unbeatable value. However, artists and creatives will likely find its limitations frustrating, especially the lack of pressure sensitivity.
Real-World Feedback: What Users Are Saying
- Creative Pros rave about the Pro model’s accuracy and responsiveness, especially the new barrel roll and hover features, which feel game-changing in digital art workflows.
- Students and Professionals consistently praise the 2nd Gen Apple Pencil for its reliable performance during lectures, document markup, and productivity use.
- Budget-Conscious Users appreciate the USB-C model’s lower price but sometimes lament its lack of advanced features.
On Reddit, many iPad owners say the Pencil feels like an essential tool once you’ve used it long enough—especially for handwriting, document annotation, and sketching. However, casual users admit that if you’re only browsing or watching videos, the Pencil tends to collect dust.
Pricing in 2025
As of May 2025, here’s how the Apple Pencil lineup is priced:
| Apple Pencil Model | Price | Notable Features | Best For |
|---|---|---|---|
| Apple Pencil Pro | $129 | Squeeze gesture, barrel roll, Find My, haptics | Artists, professionals |
| Apple Pencil (2nd Gen) | $129 (often $80 on sale) | Pressure sensitivity, tilt, wireless charging | Students, casual artists |
| Apple Pencil (USB-C) | $79 | USB-C charging, basic functionality | Entry-level users |
Apple frequently runs deals through retailers like Amazon, Best Buy, and even its own education discounts, often bringing prices down by $20–$40.
Is the Apple Pencil Worth It?
Yes, if…
- You draw, design, or write by hand regularly.
- You use apps like Notability, GoodNotes, Procreate, or Final Cut Pro.
- You want to replace paper with a digital workflow that feels natural and fluid.
- You have a compatible iPad and value productivity, precision, or creativity.
Maybe not, if…
- Your iPad use is limited to watching Netflix, browsing Safari, or reading.
- You don’t enjoy handwriting or drawing on screens.
- You don’t have a compatible iPad or prefer using your fingers for touch input.
In short: the Apple Pencil, especially in its latest Pro form, is more than a luxury stylus—it’s an extension of the iPad itself. For creative professionals, students, and anyone who prefers handwriting over typing, it’s an investment that still makes sense in 2025. But for casual users, that money might be better spent elsewhere.
How to Connect Apple Pencil to iPad
Using an Apple Pencil with your iPad opens up a world of note-taking, drawing, and creative possibilities. Getting your Apple Pencil to connect properly is the first step to enjoying these features. To connect your Apple Pencil to your iPad, you need to identify your Pencil generation, make sure your iPad is compatible, and then follow the specific pairing steps for your model.
If you have the first-generation Apple Pencil, you’ll need to remove the cap and plug it directly into your iPad’s Lightning port. A pairing prompt should appear on screen within a few seconds. For the second-generation Apple Pencil, simply attach it to the magnetic connector on the right side of your compatible iPad. The pencil will automatically pair and begin charging.
Sometimes pairing doesn’t work on the first try. If you experience issues, make sure Bluetooth is turned on in your iPad settings. You might also need to wait a few minutes for your Apple Pencil to charge before it can successfully pair. If problems persist, try restarting your iPad while keeping the Apple Pencil connected.
Connecting your Apple Pencil to your iPad depends on which generation of Apple Pencil you have, as the pairing methods differ. Here’s a guide for each model:
Apple Pencil (1st Generation)
This model has a Lightning connector under a removable cap.
- For iPads with a Lightning port (older models, or iPad 9th Gen and earlier):
- Remove the cap from your Apple Pencil to reveal the Lightning connector.
- Plug your Apple Pencil directly into the Lightning port on your iPad.
- A “Bluetooth Pairing Request” pop-up should appear on your iPad’s screen. Tap Pair.
- Once paired, you can unplug your Apple Pencil. It will remain connected via Bluetooth until you restart your iPad, turn off Bluetooth, or pair it with another iPad.
- For iPad (10th Generation) which has a USB-C port:
- You will need the USB-C to Apple Pencil Adapter (sold separately or included with some newer 1st-gen Pencils).
- Remove the cap from your Apple Pencil and plug it into one end of the USB-C to Apple Pencil Adapter.
- Connect a USB-C cable (the one that came with your iPad) into the other end of the adapter.
- Plug the other end of the USB-C cable into your iPad’s USB-C port.
- A “Bluetooth Pairing Request” pop-up should appear. Tap Pair.
- Once paired, you can unplug the adapter and cable.
Apple Pencil (2nd Generation) and Apple Pencil Pro
These models pair and charge magnetically.
- Ensure Bluetooth is enabled on your iPad (Settings > Bluetooth).
- Attach your Apple Pencil to the magnetic connector on the flat side of your compatible iPad (usually the right edge).
- A pairing notification will pop up on your iPad’s screen. Tap Connect (or it may pair automatically).
- Your Apple Pencil will now be paired and will also charge wirelessly while attached.
Apple Pencil (USB-C)
This model has a USB-C port under a sliding cap.
- Ensure Bluetooth is enabled on your iPad (Settings > Bluetooth).
- Slide open the cover on the back of the Apple Pencil to reveal the USB-C port.
- Use a USB-C cable (the one that came with your iPad): Plug one end into your Apple Pencil’s USB-C port.
- Plug the other end of the USB-C cable into your iPad’s USB-C port.
- Wait for the “Tap to Connect” or “Pair” prompt on your iPad, then tap it.
- Once paired, you can unplug the cable. The Apple Pencil (USB-C) stays paired until you restart your iPad, turn off Bluetooth, or pair it with another iPad. It charges via the USB-C connection when plugged in.
Troubleshooting Tips:
- Compatibility: Ensure your Apple Pencil model is compatible with your iPad model. Not all Pencils work with all iPads.
- Charge: Make sure your Apple Pencil has enough charge.
- Bluetooth: Confirm that Bluetooth is turned on in your iPad’s settings.
- Restart: Try restarting your iPad and then attempting to pair again.
- Forget Device: If your Apple Pencil was previously paired with another iPad (or if you’re having trouble reconnecting), go to Settings > Bluetooth, tap the “i” icon next to your Apple Pencil, and select “Forget This Device.” Then try the pairing steps again.
- Software Update: Ensure your iPad is running the latest version of iPadOS.
- Clean Ports/Connectors: For 1st-gen Pencils, ensure the Lightning/USB-C port on your iPad and the Pencil’s connector are clean and free of debris.
Key Takeaways
- First-generation Apple Pencils connect via the Lightning port while second-generation models attach magnetically to compatible iPads.
- Always ensure Bluetooth is enabled on your iPad before attempting to pair your Apple Pencil.
- If connection problems occur, try charging your pencil for at least 20 minutes or restart your iPad with the pencil attached.
Identifying Your Apple Pencil and iPad Model
Before connecting your Apple Pencil to your iPad, you need to know which Apple Pencil and iPad model you have. Different Apple Pencil generations work with specific iPad models, so identifying them correctly is the first step to successful pairing.
Determining Apple Pencil Compatibility
Apple offers two main generations of Apple Pencil with distinct physical features that make them easy to identify:
1st Generation Apple Pencil:
- Has a removable cap with a chrome ring and Lightning connector underneath
- Perfectly round and smooth body design
- Charges by plugging directly into iPad’s Lightning port
- Compatible with older iPad models
2nd Generation Apple Pencil:
- No removable cap (completely sealed unit)
- Has a flat edge on one side
- Attaches and charges magnetically to the side of compatible iPads
- Supports double-tap feature to change tools
Still unsure? Look at the packaging or check your purchase receipt, which should specify the Apple Pencil generation.
Understanding Different iPad Models
Your iPad model determines which Apple Pencil you can use:
1st Generation Apple Pencil works with:
- iPad (6th, 7th, 8th, 9th generations)
- iPad mini (5th generation)
- iPad Air (3rd generation)
- iPad Pro 9.7-inch and 10.5-inch
- iPad Pro 12.9-inch (1st and 2nd generations)
2nd Generation Apple Pencil works with:
- iPad Pro 11-inch (all generations)
- iPad Pro 12.9-inch (3rd generation and later)
- iPad Air (4th generation and later)
- iPad mini (6th generation)
- iPad (10th generation) with adapter
To identify your iPad model, go to Settings > General > About and look for the Model Name. If you’re not sure about compatibility, try the Apple Pencil Compatibility guide on Apple’s website.
Preparing to Connect
Before you can use your Apple Pencil with your iPad, you need to make sure both devices are ready to pair. This involves ensuring your pencil has enough power and your iPad’s Bluetooth is active.
Charging Your Apple Pencil
Different Apple Pencil models require different charging methods. Check which model you have before attempting to charge it.
For the Apple Pencil (1st generation), remove the cap to reveal the Lightning connector. Plug this directly into your iPad’s Lightning port. The pencil will begin charging immediately.
The Apple Pencil (2nd generation) charges wirelessly. Simply attach it to the magnetic connector on the side of your iPad Pro or iPad Air. The pencil will connect magnetically and start charging.
For the Apple Pencil (USB-C), use the USB-C to USB-C cable that came with your pencil. Connect one end to the pencil and the other to your iPad’s USB-C port.
A quick 15-second charge gives you about 30 minutes of use. For best results, charge your pencil fully before first use.
Verifying iPad Bluetooth Settings
Your iPad must have Bluetooth turned on to connect with your Apple Pencil. This is essential for all Apple Pencil models.
To check your Bluetooth settings:
- Open the Settings app on your iPad
- Tap Bluetooth in the left sidebar
- Make sure the Bluetooth toggle is switched to ON (it will appear green)
If Bluetooth is off, simply tap the toggle to turn it on. Your iPad will automatically begin searching for nearby devices, including your Apple Pencil.
If you’re having trouble with the connection, try turning Bluetooth off and on again. This often fixes common connectivity issues.
Make sure there are no obstructions between your pencil and iPad when attempting to pair them.
Pairing Your Apple Pencil
Connecting your Apple Pencil to your iPad involves different steps depending on which generation of Apple Pencil you own. The process is quick and only needs to be done once for each iPad you use.
Pairing 1st Generation Apple Pencil
The 1st Generation Apple Pencil connects to your iPad using the Lightning connector. To pair it:
- Remove the cap from your Apple Pencil to reveal the Lightning connector.
- Plug the Lightning connector into the charging port at the bottom of your compatible iPad.
- When prompted, tap Pair on the screen.
Your Apple Pencil is now ready to use! If you don’t see a pairing request, check that your iPad is running the latest version of iPadOS. You may need to restart your iPad if problems persist.
To check if your Apple Pencil is connected, swipe down from the top-right corner to open Control Center. You should see the Apple Pencil battery level when it’s paired correctly.
Pairing 2nd Generation Apple Pencil
The 2nd Generation Apple Pencil uses a more elegant approach to pairing. To connect it:
- Place your Apple Pencil on the magnetic connector on the right side of your iPad.
- Your iPad will automatically detect and pair with the Pencil.
- A pairing animation will appear on screen when successful.
The magnetic connector serves two purposes – it both pairs and charges your Apple Pencil at the same time. If pairing doesn’t work, make sure your iPad is running iPadOS 17 or later and that your iPad model is compatible with the 2nd Generation Apple Pencil.
You can check your connection status by looking for the small Apple Pencil icon in your iPad’s battery widget.
Ensuring Connectivity and Troubleshooting
Sometimes Apple Pencil connections can fail even when you follow all the right steps. Getting your Apple Pencil working properly might require a few additional checks and fixes.
Checking for Successful Connection
When you’ve paired your Apple Pencil with your iPad, you should see confirmation on your screen. For Apple Pencil 2nd generation, a small notification will appear showing the battery level when it’s attached to the magnetic side of your iPad.
For 1st generation Apple Pencil, check the Bluetooth settings. Open Settings, tap Bluetooth, and look for “Apple Pencil” in your list of connected devices. If it appears there, your pencil is properly connected.
You can also test connectivity by writing or drawing in Notes. The pencil should write smoothly without lag or disconnection issues. If there’s no response, the connection may have failed.
Try writing in different apps to confirm the connection is stable across your iPad. Some third-party apps may behave differently with Apple Pencil.
Resolving Common Pairing Issues
If your Apple Pencil won’t pair, first check that your iPad model is compatible with your Apple Pencil. Not all iPads work with all pencil versions.
Make sure Bluetooth is turned on in Settings. Apple Pencil relies on Bluetooth to connect to your iPad.
Check your pencil’s battery. For 1st generation, plug it into your iPad’s Lightning port. For 2nd generation, attach it to the magnetic connector and wait a few moments.
If the “Pair” button doesn’t appear, try these steps:
- Ensure your iPad is updated to the latest iOS version
- Clean the connector on both the pencil and iPad
- Remove any case that might block the connection
- Wait 30 seconds before trying again
Restarting and Resetting Connections
When basic troubleshooting fails, try restarting your devices. Turn off your iPad completely, wait 10 seconds, then turn it back on. This often clears temporary software glitches.
If restarting doesn’t work, reset the connection. Go to Settings > Bluetooth, tap the “i” icon next to Apple Pencil, and select “Forget This Device.” Then try pairing again from scratch.
For persistent problems, try this extended reset method:
- Forget the Apple Pencil in Bluetooth settings
- Restart your iPad
- Turn Bluetooth off and on
- Attempt to pair the pencil again
Some users report success by keeping the pencil attached during the iPad restart process. If problems continue, contact Apple Support for further assistance, as there might be a hardware issue with either device.
Maximizing Apple Pencil Utility
Your Apple Pencil can do much more than just basic drawing. Learning to use all its features will help you get the most value from this versatile tool.
Writing and Drawing with Apple Pencil
The Apple Pencil offers precision that makes writing and drawing feel natural. When using note-taking apps, you’ll notice pressure sensitivity allows for varying line thickness based on how hard you press.
For artists and designers, try these techniques:
- Tilt the pencil for shading effects
- Use quick, light strokes for sketching
- Apply firm pressure for bold lines
- Double-tap to switch between tools (on Apple Pencil 2)
Most drawing apps support palm rejection, so you can rest your hand on the screen while you work. This makes long drawing or writing sessions more comfortable.
To improve your handwriting, use apps with ruled lines as guides. Many note apps can also convert your handwriting to text automatically.
Using Apple Pencil for Navigation and Gestures
The Apple Pencil works as an excellent navigation tool beyond creative tasks. You can use it to:
Scroll and swipe through pages with greater precision than your finger. This is especially helpful when reading documents or browsing photos.
Select text by pressing and dragging over words – much easier than trying to position your finger exactly right. For editing documents, this precision saves time.
Take screenshots by swiping up from the bottom corner with your Pencil, then markup the image immediately.
Some iPad models support special gestures with Apple Pencil. You can swipe from the corner to create quick notes without unlocking your device.
Exploring Apple Pencil Features in Apps
Many apps are specifically designed to work with Apple Pencil’s unique capabilities. Productivity apps like Notability and GoodNotes offer special writing tools.
Drawing apps like Procreate provide:
- Custom brushes that respond to pressure
- Layers for complex artwork
- Tools that mimic real art supplies
Markup tools in the Photos app let you add notes or highlight details in images. In PDF apps, you can sign documents, fill forms, or annotate text.
Microsoft Office apps support Apple Pencil for editing documents and creating presentations. You can write formulas in Excel or mark up Word documents with ease.
Try using the Pencil in unexpected apps – many games support drawing controls, and even photo editing apps allow precise adjustments with the Pencil tip.
Using Apple Pencil Accessories
Apple Pencil accessories expand your iPad’s drawing and writing capabilities. The right adapters ensure your Apple Pencil stays connected and charged regardless of which iPad model you own.
Connecting with USB-C and Lightning Adapters
If you have a newer iPad with a USB-C port but an older Apple Pencil, you’ll need the USB-C to Apple Pencil adapter. This small white adapter lets first-generation Apple Pencils work with USB-C iPads.
To use the adapter, plug the Apple Pencil into the Lightning end of the adapter. Then connect the USB-C end to your iPad. Your iPad should recognize the pencil within seconds.
For iPad models with Lightning ports, no extra adapter is needed. The first-generation Apple Pencil plugs directly into the Lightning connector at the bottom of these iPads.
Some third-party charging stands also work with both Apple Pencil generations. These stands can be helpful for people who use their pencil often and want to keep it charged without plugging it into the iPad.
When buying adapters, make sure to get official Apple products or certified third-party options. Non-certified adapters might damage your Apple Pencil or iPad, or they might not work correctly.
Maintaining Your Apple Pencil
Proper maintenance keeps your Apple Pencil working smoothly and extends its lifespan. Regular charging and tip care are essential for optimal performance with your iPad.
Charging Best Practices
The charging method for your Apple Pencil depends on which generation you own. For the second-generation Apple Pencil, simply attach it to the magnetic connector on the side of your iPad. This both charges and pairs your pencil simultaneously.
First-generation Apple Pencil owners need to remove the cap and plug it directly into the iPad’s Lightning port. A quick 15-second charge provides about 30 minutes of use.
To check your pencil’s battery level, swipe down from the top-right corner of your iPad to open Control Center, or check the Batteries widget on your home screen.
Avoid letting your Apple Pencil battery drain completely. Regular partial charges help maintain battery health better than full discharge cycles.
Replacing Tips and Troubleshooting
Apple Pencil tips wear down with regular use. Look for signs of wear such as scratching on the screen or decreased sensitivity. Tips typically last 6-12 months depending on use.
To replace a tip:
- Hold the pencil firmly
- Unscrew the old tip counterclockwise
- Screw in the new tip clockwise until snug
- Test on iPad to ensure proper function
If your Apple Pencil stops connecting, try these fixes:
- Restart your iPad
- Turn Bluetooth off and on in Settings
- For persistent issues, try “forgetting” the device in Bluetooth settings before re-pairing
Clean your Apple Pencil with a soft, slightly damp, lint-free cloth. Never use harsh chemicals or submerge it in water. Keep away from extreme temperatures that could damage internal components.
Understanding Apple Pencil Features
The Apple Pencil offers several helpful features that make it more than just a writing tool. These features can improve how you work with your iPad through customizable settings, quick access to tools, and ways to find your pencil if it gets lost.
Accessing the Control Center and Widgets
The Apple Pencil works with your iPad’s Control Center to give you fast access to tools. To use this feature, swipe down from the top-right corner of your iPad screen. This opens the Control Center where you can access Apple Pencil functions.
In newer iPadOS versions, you can add Apple Pencil widgets to Control Center. These widgets let you quickly switch between drawing tools or change pencil settings without opening an app. To add these widgets:
- Go to Settings > Control Center
- Find the Apple Pencil widget in the list
- Tap the + button to add it to Control Center
This setup helps artists and note-takers switch between tools without breaking their flow. The Control Center also shows your pencil’s battery level at a glance.
Utilizing Find My to Locate Your Apple Pencil
Losing an Apple Pencil can be frustrating, but newer models work with the Find My app. This feature helps track down your pencil when it goes missing.
To set up Find My for your Apple Pencil:
- Make sure your Apple Pencil is paired with your iPad
- Open the Find My app on your iPad
- Tap “Devices” and look for your Apple Pencil in the list
If your pencil is nearby but hidden, you can make it play a sound to help locate it. The app will also show its last known location on a map if it’s not currently connected.
Remember that Find My works best with newer Apple Pencil models. The feature requires the pencil to be charged and have been connected to your iPad recently.
Customizing Apple Pencil Settings for Optimal Use
Your Apple Pencil has several settings you can adjust to match your preferences. These options help tailor how the pencil works with your iPad.
To access Apple Pencil settings:
- Open Settings on your iPad
- Scroll down and tap Apple Pencil
Here you can adjust key settings like double-tap functionality, which lets you switch between tools by tapping twice on the pencil. You can set this to:
- Switch between current tool and eraser
- Switch between current tool and last used
- Show color palette
- Turn off completely
You can also adjust pressure sensitivity and palm rejection to match your drawing style. These settings make a big difference in how natural writing and drawing feels.
For optimal battery life, you can view your pencil’s battery percentage in this menu. The Apple Pencil charges whenever it’s attached to the magnetic connector on compatible iPad models.
Apple Pencil Integration with iPadOS and Apps
The Apple Pencil transforms your iPad into a powerful creative tool through deep integration with iPadOS features and specialized apps. These integrations enable precision drawing, note-taking, and document markup that feel natural and responsive.
Compatibility with Latest iPadOS Updates
iPadOS 17 brings several new features that enhance Apple Pencil 2 functionality. The Pencil hover feature shows a preview of your mark before touching the screen, making drawing more precise. This works in apps like Procreate, Notes, and Markup.
Quick Notes got smarter too. You can now start a note from any screen by swiping from the bottom corner with your Apple Pencil. iPadOS 17 also improved handwriting recognition, making your scribbles convert to text more accurately.
The new Scribble feature lets you write in any text field, and your iPad converts it to typed text automatically. This works across the system—from Safari search bars to Messages.
Drawing features received updates too. The shape recognition tool now identifies more complex shapes and straightens them instantly when you pause after drawing.
Exploring Advanced Drawing and Note-taking Apps
Many apps take full advantage of Apple Pencil capabilities. Procreate stands out with pressure sensitivity, tilt recognition, and zero lag. It offers hundreds of brushes and a powerful layer system that professional artists love.
For note-taking, GoodNotes and Notability shine. Both apps let you:
- Write naturally with different pen styles
- Add photos and drawings to notes
- Search through handwritten text
- Record audio while taking notes
Markup tools in Files and Photos apps let you quickly annotate documents and images. Just tap the Markup icon, and you can add text, signatures, magnification, and drawings directly on PDFs.
Adobe apps like Fresco and Illustrator for iPad were built specifically for Apple Pencil. They recognize subtle pressure changes and tilt angles, mimicking real artistic tools like watercolors and pencils.
Frequently Asked Questions
Here are answers to common questions about connecting your Apple Pencil to your iPad. These tips will help you pair different Apple Pencil models and solve connection problems.
How do I pair the first generation Apple Pencil with my iPad?
To pair a first generation Apple Pencil with your iPad, you need to connect it directly to your device.
Remove the cap from the end of your Apple Pencil to reveal the Lightning connector. Plug your Apple Pencil into your iPad’s Lightning port.
A pairing request will appear on your screen after a few seconds. Tap “Pair” to connect your devices. If the prompt doesn’t show up right away, wait a moment and it should appear.
What are the steps to connect the second generation Apple Pencil with my iPad?
Connecting a second generation Apple Pencil is simpler than the first generation.
Simply attach your Apple Pencil to the magnetic connector on the side of your iPad. You’ll find this magnetic area below the volume buttons.
Your iPad will automatically detect the Pencil and display a pairing request. Tap “Pair” to connect the devices. The connection process usually takes just a few seconds.
Can I charge my Apple Pencil without plugging it into the iPad?
Yes, but the charging method depends on which Apple Pencil model you have.
For the first generation Apple Pencil, you can use the included adapter. This adapter allows you to charge your Pencil with a standard Lightning cable and power source.
The second generation Apple Pencil charges wirelessly when attached to the magnetic connector on your iPad. No separate charger is needed – it powers up while connected to the iPad’s side.
Is it possible to use an Apple Pencil with an iPad that has a USB-C port?
Yes, but you need to make sure you have the right Apple Pencil model for your iPad.
The Apple Pencil USB-C is designed specifically for iPads with USB-C ports. You can connect your Apple Pencil USB-C to your iPad with the built-in USB-C port.
Some newer iPad models only work with certain Apple Pencil versions. Check Apple’s compatibility list for your specific iPad model before purchasing a Pencil.
What should I do if my Apple Pencil won’t connect to my iPad?
If your Apple Pencil isn’t connecting, try these troubleshooting steps.
First, make sure Bluetooth is turned on in your iPad settings. Then check that your Apple Pencil has enough battery power to connect properly.
Try to re-pair your Apple Pencil by disconnecting it completely and going through the pairing process again. Restart your iPad if connection problems continue.
How do I troubleshoot Apple Pencil connection issues with the 9th or 10th generation iPad?
For 9th or 10th generation iPads, follow these specific steps for connection problems.
Make sure you’re using a compatible Apple Pencil model with your iPad generation. If the Pair button doesn’t appear when connecting, wait a moment longer as it sometimes takes time.
Check that both your iPad and Apple Pencil have sufficient battery power. Try restarting your iPad and make sure the latest iPadOS is installed for the best compatibility.

