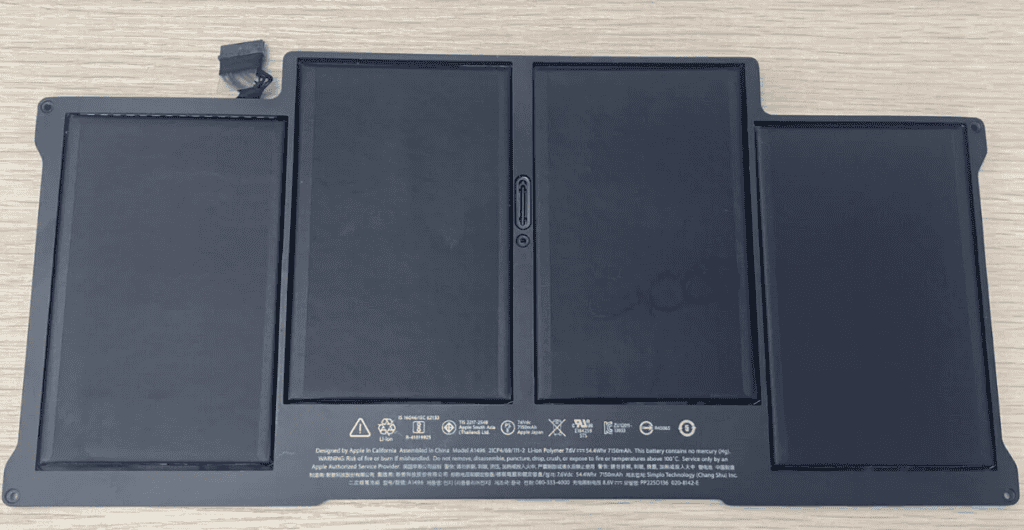
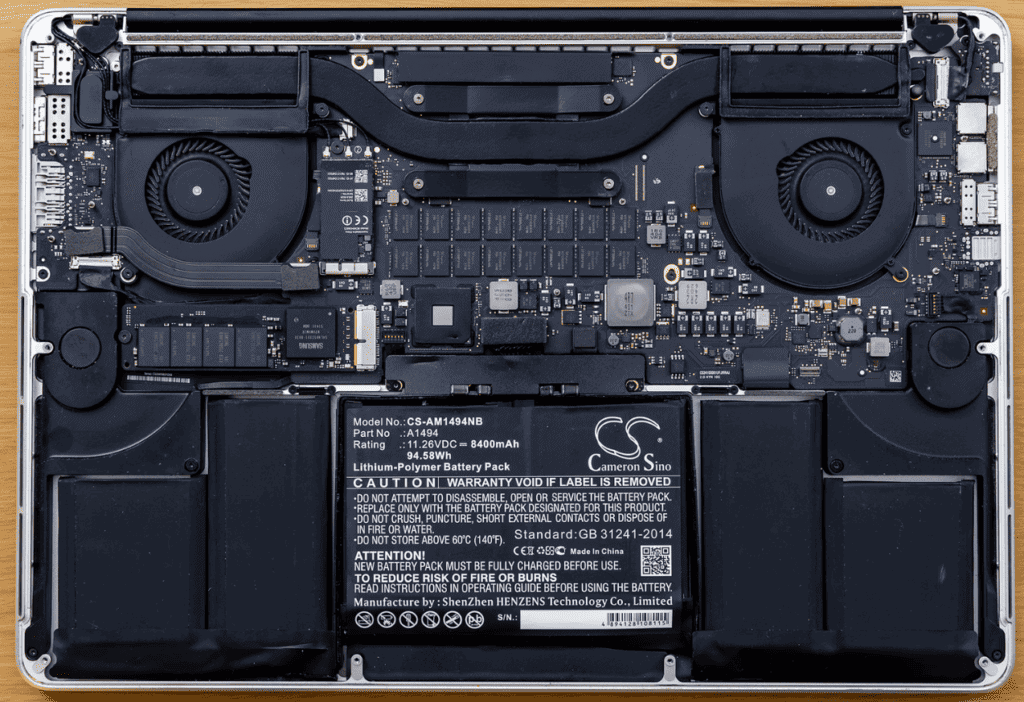
Is your MacBook Air feeling slow and constantly running out of battery? It might be time for a new battery. If you’ve noticed that your MacBook Air isn’t lasting as long as it used to, suddenly shutting down, or struggling to hold a charge, then it’s time for a new battery. Getting a new battery can boost your laptop’s performance and extend its lifespan. Plus, replacing the battery yourself can save you a trip to the Apple Store and some cash. Don’t worry, replacing the battery is easier than you think! This step-by-step guide will take you through the process of safely installing a new battery, giving your MacBook Air a fresh start.
Upgrading Your MacBook Air’s Battery Life: A DIY Guide

Tools You’ll Need
Before you start, gather these essential tools:
- Pentalobe Screwdriver: This special screwdriver is needed to open the MacBook Air’s case.
- Spudger Tool: This helps to carefully pry open components and disconnect cables.
- New Battery: Make sure you get the right battery model for your specific MacBook Air.
Step-by-Step Replacement Guide
- Power Down & Disconnect: Shut down your MacBook Air and unplug it from any power source.
- Remove the Back Cover: Use the pentalobe screwdriver to unscrew the ten screws on the back cover. Gently lift the cover off.
- Disconnect the Battery: Locate the battery connector and use the spudger tool to carefully pry it up and disconnect it from the logic board.
- Unscrew the Old Battery: Unscrew the five screws holding the old battery in place.
- Remove the Old Battery: Gently lift the old battery out of the MacBook Air.
- Install the New Battery: Place the new battery into the MacBook Air and screw it in.
- Reconnect the Battery: Reconnect the battery connector to the logic board.
- Reattach the Back Cover: Replace the back cover and secure it with the ten screws.
Table of MacBook Air Models and Battery Life
| MacBook Air Model | Average Battery Life (New) |
|---|---|
| Early 2014 | Up to 12 hours |
| Early 2015 | Up to 12 hours |
| 2017 | Up to 12 hours |
| 2018 | Up to 12 hours |
| 2019 | Up to 11 hours |
| 2020 | Up to 11 hours |
| M1, 2020 | Up to 15 hours |
| M2, 2022 | Up to 18 hours |

After the Replacement
Once you’ve replaced the battery, power on your MacBook Air and check the battery status. You should see a significant improvement in battery life.
Disclaimer: Replacing your MacBook Air’s battery is a DIY project. Proceed with caution and follow the instructions carefully. If you are uncomfortable with the process, consider seeking professional help.
Overview of MacBook Air Battery Replacement
Replacing the battery in a MacBook Air can breathe new life into the device, ensuring continued portability and convenience. Over time, the battery in a MacBook Air may experience reduced performance. When the battery’s life diminishes, users could notice a significant decrease in usage time off the charger.
Battery Life and Health Check: Before deciding to replace the battery, users should check its health. This can be done by holding the Option key and clicking the battery icon on the menu bar to see the battery condition. If it states “Service Battery,” this indicates the battery is not functioning optimally and could require replacement.
Apple Warranty Coverage: Under Apple’s warranty, a MacBook Air battery that has worn down from normal use isn’t typically covered. However, if users have AppleCare+ and the battery holds less than 80% of its original capacity, they might be eligible for a no-cost replacement.
Service Options: Replacing the battery can be done through official Apple service channels or via self-service for those who are technically savvy. Apple recommends that users provide their MacBook Air to a professional for service to avoid potential issues and preserve its functionality. DIY guides are available for users preferring self-service and typically list the necessary tools and parts; however, this route requires caution, as batteries are sensitive components and mishandling them can be dangerous.
In conclusion, whether through professional service or a self-replacement journey, managing the MacBook Air’s battery requires consideration of safety, warranty status, and the precise steps involved in the replacement process.
Before You Begin the Replacement Process
Replacing the MacBook Air battery is a task that requires careful preparation. The following steps will ensure that the process is smooth and safe for both the user and the device.
Identifying Your MacBook Air Model
To get the correct replacement battery, one must first identify the specific MacBook Air model they own. The model can be found by checking the serial number on the bottom of the MacBook or by selecting “About This Mac” from the Apple menu. Different models have various types of batteries and may require different tools for replacement.
Understanding Battery Health Indicators
MacBook Air tracks its battery’s health, indicating its condition under the battery settings. If the status shows “Service Recommended,” it means the battery’s capacity has significantly decreased, and it may be time for a replacement. “Optimized Battery Charging” settings help extend battery life, but they do not repair existing battery wear.
Checking Apple Warranty and AppleCare Status
Before replacing the battery, check if the MacBook Air is still under Apple warranty or qualified for AppleCare services. Apple warranty and consumer law might cover a free replacement depending on the battery’s condition. Checking warranty status can be done by entering the device’s serial number on Apple’s warranty status website.
Preparation and Safety Instructions
When preparing to replace the MacBook Air battery:
- Ensure the device is powered off and unplugged from any power source.
- Work in a clean, static-free area to avoid damaging internal components.
- Discharge the MacBook Air battery completely to reduce the risk of a short circuit during removal.
- Gather the necessary tools, such as the correct screwdrivers and replacement adhesive, if applicable.
- Use caution, as puncturing the lithium-ion battery can pose safety hazards.
Tools and Materials Required
When replacing the battery in a MacBook Air, it’s essential to have the right tools on hand, along with a compatible replacement battery. Ensuring that you use the proper materials will help prevent damage to your device during the replacement process.
List of Required Tools
To effectively replace the MacBook Air battery, the following tools are essential:
- Screwdrivers: A P5 Pentalobe screwdriver is needed to open the MacBook case.
- Torx Drivers: T3, T4, and T5 Torx screwdrivers are useful for various internal screws.
- Tweezers: These help in handling small parts and connectors.
- Spudger: A tool to safely manipulate wires and pry components.
- iOpener or Heat Gun: Used to soften adhesive during the removal process.
Choosing the Right Replacement Battery
An important part of the battery replacement is selecting the correct battery. MacBook Air models usually require specific batteries:
- Lithium-ion Batteries: All MacBook Air models have lithium-ion batteries, known for their longevity and charge efficiency.
- Genuine Apple Parts: It is advisable to use genuine Apple parts or high-quality third-party batteries designed for the specific MacBook Air model to ensure compatibility and safety.
Understanding Battery Types
MacBook Air batteries are built to last, but when they do wear out, it’s important to understand the battery type before attempting a replacement:
- Integrated Batteries: These are built into the device and are not meant for easy swapping. MacBook Air utilizes integrated batteries.
- Adhesives: MacBook Air batteries are secured with adhesives which typically require replacement after removal. Stretch-release adhesive strips are often recommended for ease of battery removal and replacement.
Disassembling Your MacBook Air for Battery Replacement
Before embarking on the journey of replacing the MacBook Air’s battery, it’s important to have the right tools and a steady hand. The process involves several steps and proper handling of sensitive components.
Removing the MacBook Air Lower Case
First, gather a P5 Pentalobe screwdriver to remove the ten screws securing the lower case of the MacBook Air. Keep track of these screws as they are different lengths and must be reassembled correctly. Carefully lift the lower case and set it aside.
Detaching the Battery Connector
To prevent any electrical mishap, disconnecting the battery connector is crucial. Use a plastic tool to gently pry up and disconnect the connector. Some models may have a metal tray over the connector; if present, remove it using the appropriate screwdriver.
Unfastening the Battery Screws
After the connector is detached, locate T5 Torx screws holding the battery in place. There could be up to six of these screws, and removing them is necessary to free the battery from its compartment.
Separating the Battery from the Assembly
Finally, it’s time to tackle the adhesive securing the battery. Slowly and carefully separate the battery using a plastic card or tool. Be cautious around sensitive areas like the trackpad cable underneath. Once detached, the battery is ready for replacement.
Remember, if at any point this process seems daunting, assistance from an Apple Store or certified technician is recommended to avoid any potential damage to your MacBook Air.
Installing the New Battery
Replacing your MacBook Air’s battery involves careful preparation and precision. It’s crucial to handle the battery safely and secure it properly to ensure your MacBook Air operates as expected.
Positioning the Replacement Battery
The new battery should be aligned with the MacBook Air’s battery compartment with care. Before placing it, ensure no cables are obstructed or underneath the battery area. The battery should sit flush within its designated space without forcing or bending.
Securing the Battery with Screws
Once the battery is correctly positioned, it needs to be secured using the appropriate screws. Utilizing a Torx screwdriver, usually a T5 or T8 depending on your MacBook Air model, attach the battery with screws at the designated points. Don’t over-tighten the screws as this might damage the battery or the screw threads.
Connecting the Battery and Reassembly
Finally, gently connect the battery’s cable to the MacBook Air’s logic board. Ensure the connection is firm and the cable is not pinched. After this, reattach any brackets or covers that were removed during disassembly. Use stretch-release adhesive strips if your model requires them for the battery installation. They help keep the battery in place and allow for easier removal in the future. Reassemble the remaining parts in reverse order of how you took them apart, making sure every component fits back into its original spot.
Post-Replacement Steps
Following a battery replacement in a MacBook Air, there are several crucial steps to ensure the device is functioning correctly. These post-replacement checks are essential for verifying a successful installation and maintaining the health of your new battery.
Ensuring the MacBook Air Powers On
After installing a new battery, the first check is to make certain the MacBook Air turns on. Pressing the power button should wake the device. If the MacBook Air does not power on, double-check the battery connections and ensure that Auto Boot is not disabled. Auto Boot allows the MacBook Air to turn on when the lid is opened.
Checking the Battery Status
Once the MacBook Air boots successfully, inspect the battery status. This can be done by clicking the battery icon in the top right corner of the screen. A new battery should be labeled as “Normal” or “Good.” If the status indicates any issues or if the battery is not recognized, revisit the installation steps to confirm everything is properly connected.
Calibrating the New Battery
Battery calibration is the process to ensure accurate battery level readings. Here’s how to calibrate your new battery:
- Charge the MacBook Air to 100%.
- Keep the charger plugged in for an additional two hours.
- Disconnect the charger and use the MacBook Air until it automatically sleeps due to low battery.
- Turn off the MacBook Air and let it rest for at least five hours.
- Charge the MacBook Air uninterrupted to 100%.
Calibrating your MacBook, whether it’s the latest M1 model or an older version, can help with battery longevity and performance. After these steps, your MacBook Air should be ready for regular use with its new battery.
Troubleshooting Common Issues After Replacement
When you replace the battery in your MacBook Air, you might come across a few hiccups that can often be resolved with simple checks. If you notice a “Service Battery” alert or if the battery life isn’t what you expected, don’t worry—there are steps you can take to diagnose and potentially fix the problem.
Battery Not Charging: If your new battery isn’t charging, try calibrating it. This process can help the system read the battery’s state of charge more accurately.
Short Battery Life: Sometimes, a fresh battery might drain quicker than expected. If it’s not holding a charge as long as it should, check the number of cycles it has. A cycle count over 900 could mean it’s time for another replacement.
MacBook Performance: Post-replacement, your MacBook should run smoothly. If it’s lagging or if you encounter issues with components like speakers, make sure all connections were re-established properly during the battery swap.
| Step | Action |
|---|---|
| 1 | Confirm the MacBook Air recognizes the new battery by checking the system report. |
| 2 | Recalibrate the battery if the MacBook isn’t properly showing charge levels. |
| 3 | Look for any unusual behavior in other hardware, such as speakers, to ensure no accidental disconnections occurred during battery replacement. |
In some cases, allowing the battery to fully discharge and then recharge can help set things right. Remember, careful handling during installation is crucial to avoid damage, not just to the battery, but to your MacBook Air as a whole. If you’ve tried these steps and still see a “Service Recommended” message or continue to have issues, seek professional support. They can take a more in-depth look to ensure everything is in top shape.
Professional Services and Support
When your MacBook Air’s battery isn’t what it used to be, knowing where to turn for reliable service is key. Professional support options offer a range of solutions to get your device back in top shape.
When to Seek Help from an Apple Authorized Service Provider
An Apple Authorized Service Provider (AASP) should be your first stop when you’re noticing significant battery issues with your MacBook Air. Here’s when to reach out:
- Your MacBook Air’s battery life has significantly decreased.
- The battery holds less than 80% of its original capacity and it’s covered by AppleCare+.
- The performance of the device is noticeably impaired due to battery problems.
Options for Service Under Consumer Law
Should your MacBook Air’s battery fail and it’s not covered by warranty or AppleCare+, you still have rights under consumer law. You may be entitled to receive a replacement or repair if the battery:
- Was faulty at the time of purchase.
- Has not lasted a reasonable amount of time based on the original description of the product.
Finding an Independent Repair Provider
If you’re out of warranty and looking for cost-effective options:
- Search for local independent repair providers.
- Verify they use genuine Apple parts to ensure quality and compatibility.
- Compare prices with official Apple service rates to ensure you’re getting a fair deal.
Choose a path that best suits your needs, whether it’s through an Apple Authorized Service Provider, utilizing consumer law protections, or finding a trusted independent repair shop. With genuine parts and knowledgeable technicians, you can breathe new life into your MacBook Air.
Frequently Asked Questions
When looking to replace your MacBook Air battery, you may have a number of questions from cost to service providers. This section addresses some of the most common inquiries to help you navigate the process.
How can I find an authorized service provider for MacBook Air battery replacement?
Authorized service providers for MacBook Air battery replacement can be located through Apple’s support website. By entering your zip code or location details, the site will display a list of verified outlets where you can get your battery replaced by professionals.
What is the estimated cost to replace a MacBook Air battery at an authorized service center?
The cost of battery replacement for a MacBook Air at an authorized service center typically ranges from $129 to $199. Prices may vary depending on the model and whether or not the device is covered by warranty or AppleCare+.
What are the benefits of having my MacBook Air battery replaced by an Apple-certified technician?
Choosing an Apple-certified technician ensures that your MacBook Air battery is replaced with a genuine Apple battery. This not only maintains the integrity of your device but also prevents potential issues that can arise from using non-genuine parts, such as reduced battery life or damage to the device.
How long does it typically take to complete a battery replacement on a MacBook Air?
A battery replacement on a MacBook Air can take anywhere from 60 to 90 minutes. The exact time can vary based on the specific model and the workload of the service provider at the time of replacement.
Are older MacBook Air models eligible for battery replacement service, and how does it affect their performance?
Yes, older MacBook Air models are generally eligible for battery replacement service. Replacing an old battery with a new one can significantly improve the device’s performance, often restoring battery life much closer to the original capacity when it was new.
Can the battery life of a MacBook Air be extended through any service options before needing complete replacement?
Before opting for a complete battery replacement, MacBook Air users can seek a battery service, which includes diagnostic tests and potential calibration to extend the battery’s life. However, once the battery has reached a certain age or cycle count, replacement might be the most effective solution.


