Transferring photos from your iPhone to your computer doesn’t have to be complicated. Whether you want to free up storage space or simply back up precious memories, moving your pictures is a task worth knowing how to do properly. You can transfer photos from your iPhone to your computer using a USB cable, iCloud, or third-party apps in just a few minutes without losing any image quality.
Most iPhones take amazing photos that deserve to be saved in multiple places. By moving them to your computer, you protect these memories from being lost if something happens to your phone. Plus, viewing and editing photos on a larger screen gives you more options to perfect your favorite shots.
How to Transfer Photos from iPhone to Computer (Windows & Mac Guide)
Transferring photos from your iPhone to a computer is one of the best ways to free up storage, create backups, and organize your pictures safely.
Whether you use a Mac or Windows PC, there are multiple easy ways to move your photos. Here’s a complete step‑by‑step guide.
✅ Method 1: Transfer Photos from iPhone to Mac (Using Photos App)
If you use a Mac, this is the easiest method.
Step 1:
Connect your iPhone to your Mac using a Lightning or USB‑C cable.
Step 2:
Unlock your iPhone and tap Trust This Computer (if prompted).
Step 3:
Open the Photos app on your Mac.
Step 4:
Select your iPhone under “Devices” in the sidebar.
Step 5:
Click Import All New Items
—or select specific photos and click Import Selected.
✅ Your photos will now be saved to your Mac’s Photos library.
✅ Method 2: Transfer Photos from iPhone to Windows PC (Using File Explorer)
No iTunes required for this basic method.
Step 1:
Connect your iPhone to your PC with a USB cable.
Step 2:
Unlock your iPhone and tap Trust This Computer.
Step 3:
Open File Explorer on your PC.
Step 4:
Click This PC → Apple iPhone → Internal Storage → DCIM.
Step 5:
Open folders and copy photos to your computer.
✅ Drag and drop them into a folder on your PC.
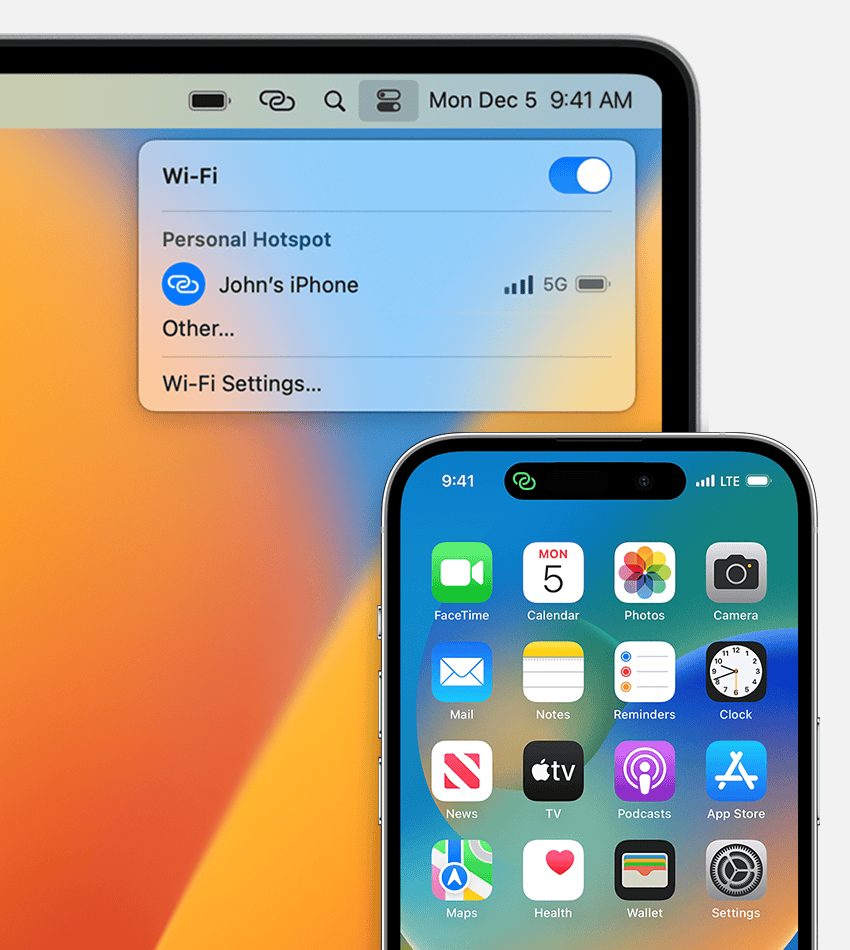
✅ Method 3: Use iCloud Photos (Wireless Method)
If you prefer transferring wirelessly, iCloud is convenient.
On Your iPhone:
- Go to Settings → [Your Name] → iCloud → Photos
- Turn on Sync This iPhone
On Mac:
- Open Photos app
- Make sure you’re signed in with the same Apple ID
- Photos will sync automatically
On Windows:
- Download and install iCloud for Windows
- Sign in with your Apple ID
- Enable Photos
- Access synced photos in File Explorer
Or visit:
👉 https://icloud.com/photos
Download photos directly from your browser.
✅ Method 4: Use AirDrop (Mac Only)
If you only need to transfer a few photos:
- Select photos on your iPhone
- Tap the Share icon
- Tap AirDrop
- Select your Mac
- Accept the transfer on your Mac
✅ Fast and wireless.
✅ Method 5: Use Third-Party Software
Some apps offer easier management:
- iMazing
- AnyTrans
- CopyTrans
- Google Photos (cloud backup)
These are helpful for bulk transfers and organizing albums.
Why You Should Transfer Photos Regularly
- Free up iPhone storage
- Create backup copies
- Prevent accidental data loss
- Organize photos more easily
- Prepare for phone upgrades
Troubleshooting Tips
If your computer doesn’t recognize your iPhone:
✅ Make sure your iPhone is unlocked
✅ Tap “Trust This Computer”
✅ Try a different USB cable
✅ Update iTunes (Windows users)
✅ Restart both devices
If photos aren’t appearing:
- Check that iCloud Photos is fully downloaded to your device
- Go to Settings → Photos → Download and Keep Originals
Quick Comparison
| Method | Best For | Requires Cable? |
|---|---|---|
| Photos App (Mac) | Full library transfer | Yes |
| File Explorer (Windows) | Manual copy | Yes |
| iCloud | Automatic syncing | No |
| AirDrop | Small transfers | No |
| Third-party apps | Advanced management | Usually |
Final Thoughts
Transferring photos from iPhone to a computer is simple once you know your options.
- ✅ Mac users → Use the Photos app or AirDrop
- ✅ Windows users → Use File Explorer or iCloud
- ✅ Wireless preference → Use iCloud
Regular backups ensure your memories stay safe — even if your phone is lost, damaged, or replaced.
Key Takeaways
- Connect your iPhone with a USB cable for the fastest and most reliable photo transfer to your computer.
- Use iCloud Photos to wirelessly sync all your pictures across your devices automatically.
- Back up your photos regularly to prevent losing memories if your phone gets damaged or lost.
Understanding the Basics
Transferring photos from your iPhone to your computer involves several methods, each with its own advantages depending on your specific devices and needs. The basic process connects your Apple ecosystem with your computer’s storage system.
The Role of iOS in Photo Transfer
iOS plays a crucial part in how your iPhone handles photo transfers. The operating system is designed to work with both Apple’s Photos app and Windows computers.
When connecting your iPhone to a computer, iOS will automatically prepare your photos for transfer. This happens in the background without much user input.
You need to “trust” the computer when prompted on your iPhone screen. This security feature prevents unauthorized access to your photos.
iOS organizes photos in a specific folder structure that both Mac and Windows can read. This makes finding and sorting your pictures easier after transfer.
Recent iOS updates have improved transfer speeds and compatibility with different computer systems. These improvements help users move large photo libraries more efficiently.
Differences Between Windows and Mac Systems
Mac computers offer a more seamless experience with iPhones because both are Apple products. The Photos app on Mac automatically detects your iPhone when connected via USB cable.
Windows requires a few extra steps. After connecting your iPhone, you’ll need to find it under “This PC” in File Explorer. Some Windows users may need to install iTunes to help with recognition.
The Windows Photos app can import photos directly from an iPhone. This offers a more user-friendly experience similar to Mac.
Windows 10 and 11 have improved iPhone compatibility. These newer versions recognize iPhones more quickly and handle photo transfers more reliably than older Windows versions.
File formats sometimes differ between systems. Mac handles Apple’s HEIC photo format natively, while Windows might convert these to JPG during transfer.
Importance of iCloud in Photo Storage
iCloud offers a wireless way to sync photos between your iPhone and computer. This removes the need for cables entirely in many cases.
When iCloud Photos is turned on, every picture you take appears on all your Apple devices automatically. This makes transferring unnecessary for many users.
For Windows users, the iCloud for Windows app creates a special folder that shows all your iPhone photos. Pictures can be copied directly from this folder to any location on your PC.
iCloud offers only 5GB of free storage. This fills up quickly with photos, making paid plans necessary for many users.
Using iCloud as a transfer method requires good internet speed. Large photo libraries might take hours to download depending on your connection.
One benefit of iCloud is automatic backup. Your photos remain safe even if you lose your iPhone or computer.
Preparation for Photo Transfer
Before moving photos from your iPhone to your computer, you need to make sure everything is ready. This includes checking device compatibility, having the right cables, and making sure your software is up to date.
Checking iPhone and Computer Compatibility
Most iPhones work with both Windows PCs and Mac computers, but it’s good to verify your specific setup. iPhones connect to Macs more seamlessly through Apple’s ecosystem. For Windows computers, you’ll need to install the Apple Devices app from the Microsoft Store for newer versions of Windows.
Older Windows systems might use File Explorer or Windows Photos app to access iPhone content. Mac users can use the Photos app, Image Capture, or Finder (on macOS Catalina or newer).
Check that your computer has enough storage space for your photos. The average iPhone user might have several gigabytes of photos to transfer.
Ensuring Availability of USB Cable and Internet Connection
A working USB cable is essential for direct transfers. Use the cable that came with your iPhone or a certified replacement.
Cable options include:
- Lightning to USB-A (for older computers)
- Lightning to USB-C (for newer computers)
- USB-C to USB-C (for iPhone 15 and newer models)
Test your cable before starting the transfer process. A faulty cable can interrupt transfers and potentially damage files.
An internet connection isn’t always required for direct USB transfers, but it’s helpful for:
- Cloud-based transfers through iCloud
- Software updates during the process
- Using third-party transfer apps
Updating iOS and Computer Software
Outdated software can cause compatibility issues during photo transfers. Make sure both devices are running current versions.
For your iPhone:
- Go to Settings > General > Software Update
- Download and install any available updates
- Restart your iPhone after updating
For your computer:
- Windows: Check for updates in Settings > Update & Security
- Mac: Go to Apple menu > System Preferences > Software Update
Also, check your photo settings on iPhone. Go to Settings > Photos and set “Transfer to Mac or PC” to “Keep Originals” to ensure full-quality transfers. Using “Automatic” may convert HEIC images to JPEGs during transfer.
Methods to Transfer Photos
Moving photos from your iPhone to your computer doesn’t have to be difficult. There are several reliable methods that work with both Mac and Windows computers to keep your memories safe.
Using the Photos App on Mac
The Photos app on Mac provides a simple way to transfer images from your iPhone. To begin, connect your iPhone to your Mac using a USB cable. Once connected, the Photos app should open automatically.
If it doesn’t open, launch it manually from your Applications folder. Your iPhone will appear in the sidebar under “Devices.” Click on it to see all the photos on your phone.
You can select specific photos or click “Import All New Photos” to transfer everything. The app will show you which photos are new to your Mac.
After importing, you’ll have the option to delete the photos from your iPhone to save space. Your photos will now be safely stored in your Mac’s Photos library.
Transferring via Windows Photos App
Windows users can use the built-in Photos app to import iPhone pictures. First, connect your iPhone with your USB cable. If prompted on your iPhone, tap “Trust This Computer” and enter your passcode.
Open the Photos app on your Windows PC. Click “Import” in the top-right corner, then select “From a USB device.”
Windows will detect your iPhone and scan for photos. You can choose to import all photos or select specific ones. Check the “Delete imported items” option if you want to free up space on your iPhone.
The Photos app organizes imports by date, making it easy to find your photos later. This method works well for transferring several thousand photos without using cloud services.
Leveraging iCloud Photos for Synchronization
iCloud Photos offers a wireless solution for transferring photos. On your iPhone, go to Settings > [your name] > iCloud > Photos and turn on “iCloud Photos.”
When enabled, your photos automatically upload to iCloud when connected to Wi-Fi. You can access these photos on any device signed in with your Apple ID.
On a Mac, open the Photos app and sign in with your Apple ID. On Windows, download the iCloud for Windows app from the Microsoft Store and sign in.
Benefits of iCloud Photos:
- No cables needed
- Automatic synchronization
- Access from multiple devices
- Original quality preserved
The free iCloud plan includes 5GB of storage. For larger photo collections, you might need to purchase additional storage.
Utilizing File Explorer in Windows
For a more direct approach, Windows File Explorer allows you to browse your iPhone like any other external drive. Connect your iPhone to your PC using a USB cable and unlock your phone.
When prompted on your iPhone, tap “Trust This Computer.” In File Explorer, find your iPhone under “This PC” or “Computer.” Open it and navigate to the DCIM folder, which contains all your photos.
You can select photos and drag them to a folder on your computer. Create a dedicated photos folder for better organization. Sort by date to find recent photos more easily.
This method gives you more control over where your photos go on your computer. It works well when you want to put photos in specific project folders rather than a general photo library.
Step-by-Step Guides
Transferring photos from your iPhone to a computer can be done in several ways depending on your device. Each method offers a simple process that takes just minutes to complete.
Importing Photos to Mac with Photos App
To transfer photos from your iPhone to a Mac, the built-in Photos app offers the easiest solution.
First, connect your iPhone to your Mac using a Lightning to USB cable. Your Mac might automatically open the Photos app. If not, open it manually.
When you connect your iPhone for the first time, you may need to tap “Trust This Computer” on your iPhone screen.
Once connected, the Photos app will show your iPhone under the “Devices” section in the sidebar. Click on your iPhone name to see all your photos.
Select which photos you want to import. You can choose individual photos or click “Import All New Photos” at the top right.
After selecting, click “Import Selected” or “Import All.” Your photos will transfer to your Mac and organize by date.
The Photos app also lets you delete the imported photos from your iPhone after transfer if you want to free up space.
Downloading Photos on Windows via USB
Transferring photos from iPhone to Windows is straightforward with a USB cable connection.
First, connect your iPhone to your Windows computer using a USB cable. When prompted on your iPhone, tap “Trust This Computer” to allow access.
Open the Windows Photos app on your PC. You can find this in your Start menu or search for it in the search bar.
In the Photos app, click the “Import” button in the top-right corner. The app will detect your iPhone and show available photos.
Select the photos you want to transfer. You can choose individual photos or select them all.
Click “Import” and choose where to save the photos. Windows usually saves them in your Pictures folder by default.
Wait for the transfer to complete. This might take a few minutes depending on how many photos you’re importing.
After the transfer finishes, you can safely disconnect your iPhone from your PC.
Syncing Photos through iCloud
iCloud offers a wireless way to keep your photos in sync across all your devices.
First, ensure your iPhone has iCloud Photos turned on. Go to Settings > (your name) > iCloud > Photos and toggle on “iCloud Photos.”
Make sure your iPhone is connected to Wi-Fi for the initial upload of photos to iCloud.
On a Mac, open System Preferences > Apple ID > iCloud and check the box next to Photos.
For Windows computers, download and install iCloud for Windows from Apple’s website.
After installing, sign in with your Apple ID and password. Check the option for “Photos” during setup.
Open iCloud for Windows on your PC and make sure the Photos option is enabled. Click “Options” next to Photos to customize your sync settings.
Your photos will automatically download to your computer in the background. This might take time depending on your internet speed and photo library size.
iCloud keeps your photos updated across all devices, so any new photos you take will appear on your computer too.
Troubleshooting Common Issues
When transferring photos from iPhone to computer, several problems can pop up that prevent a smooth transfer. These issues often relate to connection problems, cloud syncing, or software glitches.
Dealing with USB Connectivity Problems
USB connection issues are common when transferring photos from iPhone to PC. If your computer doesn’t recognize your iPhone, try these fixes:
- Use the original Apple cable or a certified alternative
- Try different USB ports on your computer
- Restart both your iPhone and computer
- Check if your iPhone needs to “Trust” your computer
When you connect your iPhone, make sure to unlock it and tap “Trust” or “Allow” when prompted. This permission is needed for file access.
If transfers stop midway or show errors, check for outdated iTunes versions or software conflicts. Sometimes Windows needs to reinstall iPhone drivers correctly after connecting.
Solving iCloud Syncing Errors
iCloud sync issues can prevent photos from appearing on your computer. First, check your iCloud settings on your iPhone:
- Go to Settings > [your name] > iCloud > Photos
- Make sure “iCloud Photos” is turned on
- Check your available iCloud storage (you may need more space)
On Windows, install the latest iCloud for Windows app from the Microsoft Store. Sign in with your Apple ID and select “Photos” when choosing what to sync.
For Mac users, open Photos app preferences and ensure iCloud Photos is enabled. Photos might take time to download, especially with large libraries or slow internet.
If photos aren’t syncing, try signing out of iCloud on all devices, then signing back in. This often fixes weird syncing bugs.
Resolving Photos App Glitches on Windows and Mac
The Photos app on both platforms can sometimes cause transfer headaches. On Windows 10, reinstalling drivers often helps when the Photos app won’t import properly.
For Windows issues:
- Open Device Manager and uninstall Apple devices
- Disconnect iPhone, restart computer, reconnect
- Try the Windows Photos import tool instead of drag-and-drop
Mac users facing problems should:
- Update to the latest macOS version
- Reset the Photos app by holding Option+Command while opening it
- Try Image Capture app as an alternative to Photos
If iOS 17 users can’t move photos properly, check for iOS updates. Recent updates often fix transfer bugs. As a last resort, use third-party transfer apps like iMazing or Wondershare MobileTrans to bypass Photos app limitations.
Advanced Transfer Options
Beyond basic cable connections, you can explore specialized methods for moving your iPhone photos to your computer. These options offer more control and automation to make transfers easier.
Using Third-Party Software for Photo Transfers
If you need more features than built-in options provide, third-party software can help. Apps like MobileTrans offer specialized tools for large transfers from iPhone to PC.
These programs often include:
- Batch processing for thousands of photos
- Selective transfers by date or album
- Automatic duplicate detection
- Format conversion options
Many third-party tools work with both iPhone and iPad. They can sort photos into folders automatically based on date taken or location tags.
Before starting a big transfer, users should check their computer’s storage space. Large photo collections may require external drives for backup.
Automating Photo Transfer with Autoplay
Windows computers can be set up to automatically import photos when an iPhone is connected. This feature uses Autoplay to start the process without manual steps.
To set up Autoplay for photo imports:
- Connect the iPhone to the PC with a USB cable
- When the Autoplay window appears, select “Import pictures and videos”
- Choose “Always do this for this device” to make it automatic
This method works well for regular transfers between devices. Users with multiple mobile devices can create separate import rules for each one.
For best results, users should ensure their iPhones are set to “Keep Originals” in the Photos settings. This preserves full-quality images during the transfer process.
Best Practices for Photo Management
After transferring photos from your iPhone to your computer, it’s important to organize them properly and create backups to protect your memories. Good photo management saves time and ensures your photos are safe.
Organizing Photos Post-Transfer
Create a folder system that works for you. Many people organize by date (year/month) or by event (vacations, birthdays). This makes finding specific photos much easier later.
Rename files with descriptive names instead of using the default IMG numbers. This helps when searching for specific images.
Use tags and ratings to mark your favorites or photos that need editing. Most photo management software lets you add these labels.
Delete duplicates and blurry photos right away. This saves storage space and makes browsing through your collection more enjoyable.
Consider using photo management software like Adobe Lightroom, Google Photos, or Apple Photos to help sort and find images quickly.
Maintaining Backups and Cloud Storage
Always follow the 3-2-1 backup rule: keep 3 copies of your photos, on 2 different types of storage, with 1 copy stored off-site.
Cloud storage services like iCloud, Google Drive, or Dropbox automatically sync your photos and provide access from any device.
Set up automatic backups to an external hard drive. Schedule weekly or monthly backups depending on how often you take photos.
Check your backups regularly to make sure they’re working properly. Recovery tests ensure your system works when you need it.
Consider using specialized photo backup services like Backblaze or Carbonite for extra protection of your precious memories.
Frequently Asked Questions
Transferring photos from an iPhone to a computer requires specific steps depending on your operating system and connection method. Here are answers to common questions about moving your precious images safely.
What steps are needed to move pictures from an iPhone to a Windows 10 computer?
To transfer photos from your iPhone to a Windows 10 PC, first connect your iPhone using a USB cable. When prompted, unlock your iPhone and tap “Trust” if asked.
On your Windows 10 computer, open File Explorer and find your iPhone listed as a device. Right-click on the Apple iPhone and select the import option.
You can also use the Photos app in Windows 10. Open the app, click Import, and then select your iPhone. Choose which photos to transfer and where to save them.
How can I import photos from an iPhone to a Mac?
Connecting your iPhone to a Mac is straightforward with either a USB cable or wireless options. Connect your iPhone to your Mac with a USB cable and make sure to click “Allow” if prompted.
Your Mac will typically open the Photos app automatically. If not, launch Photos manually. Select the images you want to import and click “Import Selected” or “Import All New Photos.”
AirDrop offers a quick wireless alternative for transferring smaller batches of photos. Simply select photos on your iPhone, tap Share, and choose your Mac from the AirDrop options.
What is the process for transferring images from an iPhone to a computer via USB?
The USB method works reliably across different devices. Connect your iPhone to your computer using a USB cable that can transfer files.
Unlock your iPhone and tap “Trust This Computer” when prompted. On Windows, open File Explorer or Photos app to access your device. On Mac, the Photos app should launch automatically.
Select the photos you want to transfer and use the import function. You can usually choose where to save the photos and whether to delete them from your iPhone after importing.
What methods are available for transferring photos from an iPhone to a PC using Windows 11?
Windows 11 offers several ways to import iPhone photos. The simplest is connecting via USB cable and using the Photos app, which works similarly to Windows 10.
You can also use iCloud for Windows. Download the app from the Microsoft Store, sign in with your Apple ID, and enable Photos syncing. Your iPhone photos will download to your PC automatically.
Third-party apps like OneDrive can help with large transfers. OneDrive allows selecting up to 15 images at a time for reliable transfers of large photo collections.
How can I wirelessly send photos from my iPhone to my PC?
iCloud is the easiest wireless method. Set up iCloud Photos on your iPhone and download iCloud for Windows on your PC. Sign in with the same Apple ID on both devices.
Email works well for sending a few photos. Select the photos on your iPhone, tap the share icon, and choose Mail. Send them to yourself and download them on your PC.
Third-party apps like Dropbox, Google Photos, or Microsoft OneDrive sync photos across devices. Install the app on your iPhone, enable automatic uploads, and access your photos on your PC through the web or desktop app.
What is the procedure for exporting photos from an iPhone directly to an external hard drive with a Mac?
Start by connecting both your iPhone and external hard drive to your Mac. Ensure iTunes is running the latest version if needed for device recognition.
Open the Photos app on your Mac when your iPhone connects. Select the photos you want to transfer, but don’t click Import yet. Instead, hold the Option key while clicking Import.
Choose your external hard drive as the destination. You can create a new folder on the drive to keep your photos organized. After importing, verify that all photos transferred correctly before removing them from your iPhone.


