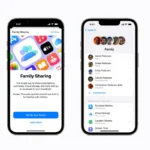
Apple’s Hide My Email feature offers a simple way to protect your privacy online. You can create unique, random email addresses that forward to your personal inbox, keeping your real email address hidden from apps and websites. This service, part of iCloud+, helps reduce spam and safeguard your personal information.
Hide My Email works seamlessly across Apple devices. You can generate and manage these temporary addresses directly from your iPhone, iPad, or Mac settings. When signing up for new services or accounts, you’ll have the option to use a Hide My Email address instead of your actual email.
The feature integrates with Sign in with Apple and Apple Pay, extending privacy protection across your online activities. You can create, deactivate, or change these random email addresses as needed, giving you full control over your digital footprint.
| Hide My Email Benefits | Description |
|---|---|
| Privacy Protection | Masks your real email address |
| Spam Reduction | Limits unwanted messages |
| Easy Management | Create and delete addresses as needed |
| Cross-Device Support | Works on iPhone, iPad, and Mac |
Apple Hide My Email Feature
Email is the backbone of your digital identity — from shopping accounts to social media logins and app subscriptions. But sharing your real email address everywhere increases spam, tracking, and the risk of data breaches.
That’s where Apple’s Hide My Email comes in.
Here’s a complete 2026 guide to how it works, why it matters, and how to use it effectively.
What Is Hide My Email?
Hide My Email is a privacy feature included with iCloud+ that lets you generate random, unique email addresses that forward messages to your real inbox.
Instead of giving a website your personal email, you share an automatically generated alias like:
codeCopy
randomname@icloud.com
Messages sent to that alias are securely forwarded to your real Apple ID email — without revealing it to the sender.
Why Hide Your Email?
Your email address is often used to:
- Track your activity across websites
- Send spam and marketing messages
- Target you with ads
- Link data across multiple platforms
- Launch phishing attacks
- Exploit data breaches
By using a unique email alias for every service, you can:
✅ Prevent companies from tracking you across platforms
✅ Identify which company leaked your email
✅ Instantly disable spam sources
✅ Protect your real inbox
In 2026, email privacy is more important than ever — especially with growing data leaks and AI-powered phishing scams.
How Hide My Email Works
When you create a Hide My Email alias:
- Apple generates a random email address.
- Emails sent to that address are encrypted and forwarded to your real inbox.
- You can reply directly — your real email remains hidden.
- You can disable or delete the alias at any time.
Each alias is tied to a specific service or purpose.
How to Use Hide My Email
✅ Method 1: When Signing Up for a Website (Safari / Apps)
On iPhone or iPad:
- Tap an email field during signup.
- Select “Hide My Email.”
- Apple generates a new random address.
- Tap Continue.
On Mac:
- Works in Safari and supported apps.
- You’ll see a Hide My Email suggestion in email fields.
This is the easiest and most common method.
✅ Method 2: Using Apple Pay
When purchasing online:
- Open the Apple Pay checkout sheet.
- Tap the Contact section.
- Choose Hide My Email.
- Apple generates a unique address for that merchant.
Important:
If you’ve already used Hide My Email with a specific merchant, future purchases use the same alias.
✅ Method 3: Create Aliases Manually
You can create email aliases anytime:
On iPhone/iPad:
- Go to Settings
- Tap your Apple ID
- Select iCloud
- Tap Hide My Email
- Choose Create New Address
On Mac:
- Open System Settings
- Click your Apple ID
- Select iCloud > Hide My Email
On Web:
- Visit iCloud.com
- Go to Account Settings
- Manage Hide My Email addresses
You can label each alias (e.g., “Amazon,” “Newsletter,” “Travel Booking”).
Managing Your Aliases
One of the most powerful features is control.
You can:
- ✅ Deactivate an alias (stops email forwarding)
- ✅ Delete it permanently
- ✅ Change the forwarding address
- ✅ Add notes for organization
If a company starts spamming you, simply turn off that alias — no need to unsubscribe.
Hide My Email vs. Email Aliases
Hide My Email is different from traditional email aliases because:
- It automatically generates randomized addresses
- Each alias is unique and isolated
- It integrates directly into Safari and iOS
- It works seamlessly with Apple Pay and Sign in with Apple
It’s also built into the Apple ecosystem, making it effortless for iPhone, iPad, and Mac users.
Hide My Email and Sign in with Apple
When using Sign in with Apple, you’ll often see:
“Share My Email”
“Hide My Email”
If you choose Hide My Email:
- The app receives a unique forwarding address.
- Your real email remains private.
- You can disable it anytime from iCloud settings.
This is one of the safest ways to create new app accounts.
Who Should Use Hide My Email?
It’s especially useful for:
- 🛍️ Online shoppers
- 📰 Newsletter signups
- 📱 App testing and downloads
- 🧑💻 Freelancers managing multiple accounts
- 🔐 Privacy-conscious users
If you’ve ever experienced email spam after signing up for something once — this feature is for you.
Limitations to Know
While powerful, there are a few considerations:
- Requires an iCloud+ subscription
- Works best within the Apple ecosystem
- Some websites may block certain forwarded email formats
- If you lose access to your Apple ID, you lose access to aliases
Still, for most users, the benefits outweigh the limitations.
Best Practices for Maximum Privacy
To get the most protection:
✅ Use a different alias for every website
✅ Label each alias clearly
✅ Disable unused aliases regularly
✅ Combine with strong passwords and two-factor authentication
✅ Use “Sign in with Apple” whenever available
Final Thoughts
Apple’s Hide My Email is one of the simplest and most effective privacy tools available in 2026.
It turns your email address from a permanent digital identifier into something disposable and controllable. Instead of companies owning your contact information, you stay in control.
In a world of constant data tracking and breaches, that’s a powerful advantage — and one of the easiest privacy upgrades you can make today.
Understanding Hide My Email
Hide My Email is a privacy feature that generates unique email addresses to protect your personal information. It forwards messages to your main inbox while keeping your real email private.
Concept and Functionality
Hide My Email creates random email addresses that act as a shield for your personal email. When you sign up for services or websites, you can use these temporary addresses instead of your real one.
Messages sent to these random addresses are automatically forwarded to your main inbox. You can reply directly from your personal email, and the recipient only sees the random address.
To use Hide My Email, go to Settings > [your name] > iCloud > Hide My Email on your iPhone. You can create new addresses or manage existing ones from this menu.
Benefits of Hide My Email
Privacy is the primary advantage of Hide My Email. It keeps your personal email address hidden from marketers and potential spammers. This reduces the risk of your main inbox being flooded with unwanted messages.
You can create multiple addresses for different purposes. For example, use one for online shopping and another for newsletter subscriptions. If an address starts receiving spam, you can easily deactivate it without affecting your main email.
| Feature | Benefit |
|---|---|
| Random addresses | Protects your real email |
| Easy deactivation | Control over unwanted messages |
| Automatic forwarding | Convenience of single inbox |
Hide My Email is included with iCloud+ subscriptions, offering a seamless integration with Apple devices and services.
Setting Up Hide My Email
Hide My Email is a privacy feature that lets you create unique email addresses to use with apps and websites. This protects your personal email from spam and unwanted messages.
Requirements and Availability
Hide My Email requires an iCloud+ subscription and a compatible Apple device. It works on iOS 15 or later, iPadOS 15 or later, and macOS Monterey or later. You need an Apple ID signed in to iCloud on your device.
Make sure your device is updated to the latest operating system version. Check for updates in Settings > General > Software Update on iOS/iPadOS or System Preferences > Software Update on Mac.
| Device | Minimum OS Version |
|---|---|
| iPhone/iPad | iOS/iPadOS 15 |
| Mac | macOS Monterey |
Step-by-Step Setup Process
To set up Hide My Email:
- Open the Settings app on your device
- Tap your name at the top
- Select iCloud
- Tap Hide My Email
- Choose “Create New Address”
- Apple generates a random email address
- Add a label to remember its purpose
- Tap “Use” to confirm
You can create multiple Hide My Email addresses for different services. Each forwards messages to your real email address.
Using Hide My Email with iCloud+
iCloud+ integrates Hide My Email across Apple’s ecosystem. In Safari, tap an email field and select Hide My Email above the keyboard. This generates a new address on the spot.
For Mail app, tap the From field when composing and pick Hide My Email. With Apple Pay on iOS 17+, you can use it during checkout for extra privacy.
Manage your Hide My Email addresses in iCloud settings. Deactivate unused ones or update labels as needed. iCloud+ keeps your real email private while giving you control over your online identity.
Integrating Hide My Email with Apple Devices
Hide My Email seamlessly integrates across Apple devices and apps. It offers enhanced privacy protection while simplifying email management.
Usage in Mail App
Hide My Email in Mail lets you create unique, random email addresses for enhanced privacy. To use this feature:
- Open a new email in the Mail app
- Tap the From field
- Select Hide My Email from the pop-up menu
A random address will be generated automatically. You can customize the label for easy identification. All replies sent to this address will forward to your personal inbox.
This feature works on iOS, iPadOS, and macOS devices. It’s particularly useful when signing up for newsletters or online services.
Usage in Safari Browser
Safari integration makes Hide My Email even more convenient. When filling out online forms:
- Tap an email field on a website
- Look for Hide My Email above the keyboard
- Choose to generate a new address or use an existing one
This method works seamlessly on iPhone and iPad Safari browsers. It’s ideal for quick signups without exposing your real email address.
Use on iPhone and iPad
Hide My Email offers broader functionality on iOS and iPadOS devices. Here’s a quick guide:
- Go to Settings > [Your Name] > iCloud
- Tap Hide My Email
- Select Create New Address
You can manage all your Hide My Email addresses from this menu. Deactivate unused addresses or update labels as needed.
| Feature | iPhone | iPad |
|---|---|---|
| Create Address | Yes | Yes |
| Manage Addresses | Yes | Yes |
| Safari Integration | Yes | Yes |
| Mail App Use | Yes | Yes |
This central management makes it easy to keep track of your virtual email addresses across all your Apple devices.
Managing and Protecting Your Emails
Hide My Email offers tools to control your email privacy and security. You can manage active addresses, deactivate unwanted ones, and follow best practices to protect your information.
Managing Active Addresses
You can easily create and manage Hide My Email addresses through your iPhone settings. To view your active addresses, go to Settings > [your name] > iCloud > Hide My Email. Here you’ll see a list of all your current addresses.
Each address shows the associated website or app. This helps you track where you’ve used them. You can also add notes to remember why you created specific addresses.
To organize your addresses, use labels. Group them by purpose like “Shopping” or “Newsletters”. This makes finding and managing them easier.
Deactivating and Deleting Addresses
When you no longer need an address, you can deactivate it. This stops new emails from coming through but keeps the address in your list. To deactivate:
- Go to your Hide My Email settings
- Select the address you want to deactivate
- Tap “Deactivate Email Address”
If you’re sure you won’t need the address again, you can delete it completely. This action is permanent, so be careful. To delete:
- Choose the deactivated address
- Tap “Delete Address”
- Confirm your choice
Security Considerations and Best Practices
To maximize the security of Hide My Email:
- Use strong, unique passwords for your Apple ID and email accounts
- Enable two-factor authentication on your Apple ID
- Regularly review your active addresses and deactivate unused ones
- Be cautious when using Hide My Email with third-party apps
Consider using Sign in with Apple when available. It integrates with Hide My Email for extra privacy.
| Feature | Benefit |
|---|---|
| Random address generation | Prevents email tracking |
| Easy deactivation | Control over who contacts you |
| iCloud+ integration | Seamless use across Apple devices |
By following these practices, you’ll enhance your email privacy and security.
Frequently Asked Questions
Apple’s Hide My Email feature offers privacy protection and convenience for users. It generates unique email addresses to keep your personal email private. Let’s explore some common questions about this service.
How do I enable ‘Hide My Email’ on my iPhone?
To enable Hide My Email on your iPhone, go to Settings. Tap your name, then iCloud, and select Hide My Email. Follow the prompts to create a new address.
You can manage your Hide My Email addresses in this menu. Deactivate old addresses or create new ones as needed.
What is the purpose of ‘Hide My Email’ by Apple?
Hide My Email protects your personal email address. It creates random email addresses that forward to your inbox. This keeps your real email private when signing up for services.
You can still read and reply to messages sent to these addresses. It’s a simple way to enhance your online privacy.
Is it possible to trace an email sent using Apple’s ‘Hide My Email’?
Emails sent through Hide My Email are difficult to trace back to you. The feature uses random addresses that forward to your inbox.
However, remember that no online system is completely untraceable. Always use caution when sharing sensitive information online.
How does ‘Hide My Email’ function within iCloud?
Hide My Email is part of iCloud+. It generates and manages your random email addresses. These addresses automatically forward messages to your personal inbox.
You can create, use, and delete these addresses through your iCloud settings. The service integrates seamlessly with your Apple devices.
What are the benefits of using ‘Hide My Email’ for Apple ID users?
Hide My Email offers several benefits:
- Enhanced privacy
- Reduced spam
- Easy management of online accounts
- Seamless integration with Apple devices
It helps you control who has access to your personal email address.
Are there any alternatives to ‘Hide My Email’ provided by Apple?
While Hide My Email is an Apple-specific service, alternatives exist:
| Alternative | Key Feature |
|---|---|
| Temp-Mail | Temporary email addresses |
| SimpleLogin | Open-source email alias service |
| AnonAddy | Unlimited email aliases |
These services offer similar functionality but may lack Apple’s ecosystem integration.