Keeping track of all your Apple devices’ battery levels can be a real timesaver. Adding a battery widget to your iPhone lets you see how much power is left on your MacBook or iPad without having to check each device. You can easily add a battery widget to your iPhone that shows the charge levels of your connected Apple devices through the widget menu.
The process is simple and only takes a few taps. Your iPhone can display battery information for your iPad, MacBook, and other Apple devices that are signed into the same Apple ID. This feature works with most newer iPhones running iOS 14 or later.
Many iPhone users don’t know about this handy feature. It’s perfect for making sure your iPad has enough charge before a meeting or checking if your MacBook needs to be plugged in while you’re away from your desk. The battery widget comes in different sizes and can show multiple devices at once.
Steps To Add Battery Widget
While iPhones can show the battery level of connected Bluetooth accessories (like AirPods, Apple Watch, or some Bluetooth headphones) directly in the native Batteries widget, they cannot natively show the battery level of an iPad or MacBook unless it’s connected via a third-party app.
Apple’s built-in battery widget relies on direct Bluetooth connections. iPads and MacBooks don’t directly pair with an iPhone via Bluetooth in the way accessories do for sharing battery information in the native widget.
However, there are third-party apps designed to do exactly this by syncing battery information across your iCloud devices.
Here’s how to generally add a battery widget to your iPhone, and then how to achieve cross-device battery monitoring using a third-party app:
Part 1: How to Add the Native Batteries Widget to Your iPhone (for iPhone, Apple Watch, AirPods, etc.)
- Go to your Home Screen: Swipe right until you reach a blank space, or find a spot on an existing Home Screen page where you want to add the widget.
- Enter Jiggle Mode: Touch and hold an empty area on your Home Screen until all the app icons begin to jiggle.
- Tap the Add Button: Tap the + (plus sign) button in the top-left corner of the screen.
- Find Batteries Widget:
- Scroll down the list of widgets or use the search bar at the top to type “Batteries.”
- Tap on “Batteries.”
- Choose Widget Size:
- Swipe left and right to see the different sizes and styles of the Batteries widget (small, medium, large). The larger widgets usually show more devices.
- Select the size you prefer.
- Add Widget: Tap the “Add Widget” button.
- Exit Jiggle Mode: Tap “Done” in the top-right corner or press the Home button (on iPhones with a Home button) to exit jiggle mode.
The widget will now appear on your Home Screen and show the battery percentage of your iPhone and any directly connected Bluetooth accessories (like your Apple Watch or AirPods when they are connected or recently used near your iPhone).
Part 2: How to Add MacBook or iPad Battery Widget to iPhone (Requires Third-Party App)
Since Apple doesn’t offer a native way to do this for MacBooks and iPads, you’ll need a third-party application. Many users recommend apps like “Cloud Battery” or “Batteries” (by Pawan Kumar Dixit) from the App Store. The steps below are general, and specific app interfaces may vary slightly.
General Steps for a Third-Party Battery Sync App:
- Download the App on All Devices:
- On your iPhone: Go to the App Store, search for “Cloud Battery” or “Batteries” (look for apps specifically designed for cross-device battery monitoring). Download and install it.
- On your iPad: Download and install the same app from the App Store.
- On your MacBook: Download and install the companion app from the Mac App Store (if available) or the developer’s website. These apps often require a macOS counterpart to send battery data.
- Set Up the App (Follow On-Screen Instructions):
- Sign in: Most of these apps will require you to sign in with your iCloud account (or create their own account) to sync battery data across your devices. Ensure you use the same account on all your Apple devices.
- Grant Permissions: The app will likely ask for permissions (e.g., Bluetooth, Notifications, Background App Refresh, access to your iCloud Drive for syncing). Grant these permissions to ensure proper functionality.
- Add Devices (if necessary): Some apps might automatically detect your other Apple devices once you’ve installed the app on them and signed in. Others might have an “Add Device” option within the app where you can manually link them.
- Add the App’s Widget to Your iPhone Home Screen:
- Enter Jiggle Mode: Touch and hold an empty area on your iPhone Home Screen until the apps jiggle.
- Tap the Add Button: Tap the + (plus sign) in the top-left corner.
- Find the Third-Party App’s Widget: Scroll down and look for the name of the battery app you just installed (e.g., “Cloud Battery” or “Batteries”).
- Choose Widget Size and Add: Select the desired widget size and tap “Add Widget.”
- Exit Jiggle Mode: Tap “Done” or press the Home button.
Now, this third-party widget should display the battery levels of your MacBook and iPad, as long as the app is running (even in the background) on those devices and syncing correctly. Keep in mind that for non-Bluetooth connected devices, the battery updates might not be instant and may rely on periodic syncing over Wi-Fi/iCloud.
Key Takeaways
- The battery widget shows power levels for all your Apple devices on one iPhone screen.
- Your devices must be linked to the same Apple ID and have Bluetooth enabled to work properly.
- Adding the widget takes just a few seconds through the Edit Home Screen menu on your iPhone.
Understanding Widgets on iPhone
Widgets on iPhone provide quick access to important information without opening apps. They show useful data like weather, calendar events, battery levels, and more with just a glance at your screen.
What Are Widgets
Widgets are mini-versions of apps that display live information on your iPhone’s Home Screen or Today View. They give you easy access to current information like weather updates, calendar appointments, reminders, and battery levels without opening the full app.
Widgets come in different sizes (small, medium, and large) to fit your needs. The small widgets show basic info, while larger ones offer more details and functionality.
You can add widgets to your Home Screen by pressing and holding on an empty area until the apps jiggle. Then tap the “+” button in the top corner and choose from available widgets.
The Today View also holds widgets, which you can access by swiping right from your Home Screen or Lock Screen.
Different Types of Widgets
iOS offers a wide range of built-in widgets for Apple apps like:
- Weather: Shows current conditions and forecasts
- Calendar: Displays upcoming events
- Batteries: Monitors power levels of connected devices
- Clock: Shows multiple time zones
- Photos: Displays memories from your photo library
- Reminders: Shows upcoming tasks
Third-party apps also provide widgets with useful functions. News apps show headlines, fitness apps track activity, and smart home apps offer quick controls.
The Battery widget is especially useful as it can display levels for your iPhone and connected devices like AirPods. However, some users find that it doesn’t always show all Apple devices as expected.
Evolution of Widgets in iOS
Widgets have changed significantly over iOS versions. They first appeared as simple information boxes in the Notification Center on earlier iOS versions.
With iOS 14, Apple made a big change by allowing widgets directly on the Home Screen. This update let users customize their iPhone interface with different-sized widgets mixed among app icons.
iOS 16 brought widgets to the Lock Screen, making it possible to view information at a glance without unlocking your phone. Users could add widgets showing temperature, air quality, or battery levels right on their Lock Screen.
iOS 17 introduced interactive widgets, allowing users to complete simple tasks directly from the widget without opening the app. For example, checking off reminders or controlling music playback with a tap.
Each update has made widgets more useful and customizable, turning them into essential tools for quick information access.
Compatibility and Requirements
Before adding a battery widget to your iPhone, make sure your devices meet certain requirements. Your iPhone needs to be compatible with widget features, and there are specific prerequisites to follow.
Supported iOS Versions
The battery widget feature works with iPhones running iOS 14 or later. Apple introduced widgets with iOS 14 in 2020, allowing users to add a battery widget to their Home Screen.
iOS 16 improved widget functionality with better refresh rates and more reliable battery level readings. This means your battery widgets update more quickly and accurately.
iOS 17 brought enhanced widget design and interaction features. Users can now see battery levels for more connected devices in a single widget view.
To check your iOS version, go to Settings > General > About. If you’re running an older version, update your iPhone to access these features.
Supported iPhone Models
All iPhone models that can run iOS 14 or later support battery widgets. This includes:
- iPhone 6s and newer
- iPhone SE (all generations)
- iPhone 12, 13, 14, and 15 series
Newer iPhone models display battery widgets with better graphics and animations. The iPhone 12 and newer models show more detailed battery information.
To get the best experience, use an iPhone with an OLED display like the iPhone X or newer. These screens show richer colors and clearer battery level indicators.
Prerequisites for Adding Widgets
Before setting up a battery widget, make sure:
Your devices are linked to the same Apple ID. This is essential for your iPhone to display battery levels of your Mac, iPad, and other Apple devices.
Bluetooth is turned on on all devices. Battery information transfers through Bluetooth connections.
Wi-Fi is enabled for real-time updates. Some battery widgets sync over the internet for more reliable readings.
Handoff is enabled on your devices (Settings > General > AirPlay & Handoff).
Your devices should be physically near each other when first setting up the widget. This helps establish a strong connection between them.
Adding the Battery Widget to Your iPhone
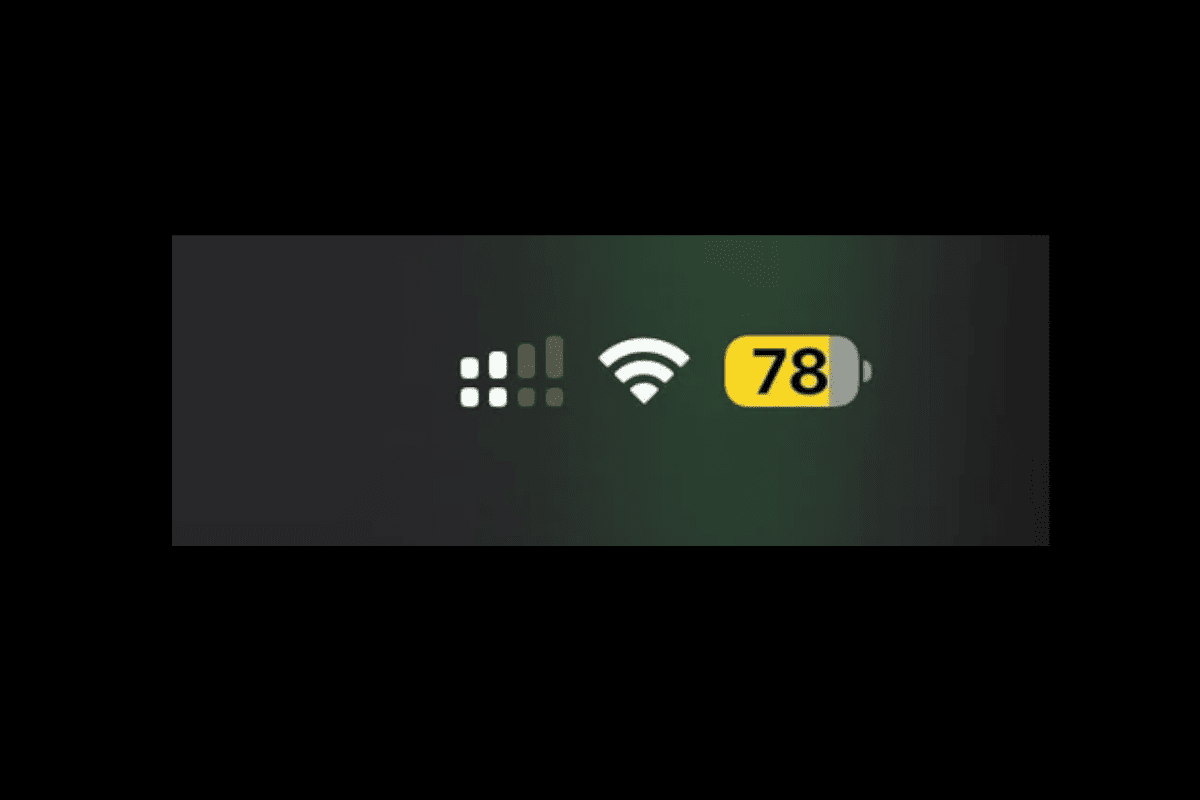
The battery widget helps you keep track of your iPhone, MacBook, iPad, and other Apple device power levels all in one place. Adding this useful feature to your Home Screen or Lock Screen takes just a few simple steps.
Accessing the Widget Gallery
To start adding a battery widget, press and hold any empty area on your iPhone’s Home Screen until the apps begin to jiggle. Look for the small plus (+) icon in the top-left corner and tap Add Widget. This opens the Widget Gallery where you’ll find all available widgets.
You can also access the Widget Gallery while your screen is locked. Simply wake your iPhone and swipe right on the Lock Screen. Then press and hold any empty space until the customization menu appears.
If you’re using iOS 16 or newer, you can add widgets directly to your Lock Screen by pressing and holding on it until the customization mode appears.
Selecting the Batteries Widget
Scroll through the Widget Gallery or use the search bar at the top to find the “Batteries” widget. This widget shows power levels for your iPhone and connected Apple devices like MacBooks, iPads, and other accessories.
Tap on the Batteries widget to see the different size options. You can choose from:
- Small (shows one device)
- Medium (shows up to 4 devices)
- Large (shows up to 8 devices)
Select the size that works best for your needs by tapping on it. Then tap “Add Widget” to place it on your Home Screen or Lock Screen.
Customizing Battery Widget Appearance
After adding the widget, you can still make changes to how it looks and works. To move the widget, press and hold until it starts to jiggle, then drag it to your preferred spot on the screen.
Want to remove or change the widget? Press and hold the widget and select “Edit Widget” from the menu. From here, you can:
- Choose which devices appear first
- Toggle the battery percentage feature on or off
- Switch between different widget sizes
Note that the Batteries widget will only show devices that are connected to the same Apple ID and are powered on. If your MacBook or iPad isn’t showing up, check that they’re turned on and signed in with the same Apple ID as your iPhone.
Monitoring Battery Levels of Connected Devices
Keeping track of your Apple devices’ battery levels is easy with the right widgets. You can check your iPhone, iPad, and MacBook battery percentages all in one place.
Adding iPad Battery Stats
To add your iPad’s battery stats to your iPhone, you need to set up the Batteries widget. First, make sure both devices use the same Apple ID and have Bluetooth turned on.
Here’s how to add the widget:
- On your iPhone, press and hold any empty area on the Home Screen
- Tap the “+” icon in the top left corner
- Search for “Batteries” in the widget gallery
- Choose your preferred widget size (small, medium, or large)
- Tap “Add Widget”
Your iPad should now appear in the Batteries widget along with its battery percentage. If it doesn’t show up, check that both devices are connected to the same Wi-Fi network and have Bluetooth enabled.
The widget updates in real-time, so you’ll always know when your iPad needs charging.
Adding MacBook Battery Stats
Adding your MacBook’s battery information to your iPhone works similarly to the iPad process. Your MacBook needs to be running macOS and signed into the same Apple ID.
Follow these steps:
- Ensure your MacBook has Bluetooth turned on
- On your iPhone, add the Batteries widget as explained above
- Your MacBook should appear automatically in the widget
Unfortunately, some users report that MacBook battery levels don’t always appear consistently in the widget. According to MacRumors forums, this functionality can be unreliable.
For better reliability, consider third-party apps that can display MacBook battery levels more consistently, especially if you’re using older macOS versions.
Displaying Multiple Device Batteries
The standard Batteries widget can show multiple devices at once, including your iPhone, iPad, MacBook, Apple Watch, and AirPods.
To maximize visibility of all your devices:
- Choose the medium or large widget size when adding the Batteries widget
- This allows you to see more devices at once without scrolling
Some users find that the widget doesn’t always show all their devices. As noted in Apple Support Communities, there are limitations to what the Battery Widget can display.
If you want more control, you can try third-party apps from the App Store that offer enhanced battery widgets with additional customization options.
The medium-sized widget typically works best for most users with 3-4 Apple devices.
Managing Widgets on Your iPhone
iPhone widgets help you see information at a glance and quickly access your favorite apps. Proper management of these widgets can make your iPhone experience smoother and more efficient.
Rearranging Widgets for Optimal Convenience
To rearrange widgets on your iPhone, press and hold any empty area on your Home Screen until the apps start to jiggle. Then you can move widgets around by dragging them to your preferred location.
You can place widgets in different sizes by adding a new widget and selecting the size option that works best for you. Small widgets take up four app spaces, medium widgets take up eight, and large widgets take up sixteen.
For better organization, consider grouping similar widgets together. Put all your battery widgets in one area to easily track your iPhone, MacBook, and iPad battery levels at once.
The best spots for frequently used widgets are at the top of your Home Screen or on the Today View (swipe right from the Home Screen). This keeps important info like device batteries just a glance away.
Removing Unwanted Widgets
When you no longer need a widget, removing it is simple. Touch and hold the widget until a menu appears, then tap “Remove Widget.” Confirm your choice when prompted.
This action doesn’t delete the app—it only removes the widget from your screen. You can always add it back later if needed.
If you want to remove the Batteries widget specifically, follow the same steps. Press and hold until the menu appears, then select “Remove Widget.”
iOS 14 and newer versions also support Lock Screen widgets. To remove these, unlock your phone, then press and hold on the Lock Screen. Tap “Customize” and select the Lock Screen you want to edit. Tap the widget you want to remove, then hit the minus (-) button.
Remember that removing widgets helps reduce screen clutter and can slightly improve battery life by eliminating background refreshes.
Other Useful Widgets to Consider
Your iPhone Home Screen can be enhanced with more than just battery widgets. These additional widgets provide quick access to information you need throughout the day without opening apps.
Weather Widget for Daily Forecasts
The Weather widget shows you current conditions and forecasts at a glance. You can add this widget to your Home Screen in different sizes.
The smallest size shows the current temperature and conditions. Medium-sized widgets display more details like hourly forecasts. The large widget offers a full-day view with high and low temperatures.
To add it:
- Press and hold an empty area on your Home Screen
- Tap the “+” icon in the top corner
- Find and select “Weather” from the list
- Choose your preferred size
- Tap “Add Widget”
You can set up multiple Weather widgets for different locations. This is helpful for checking conditions at home and work or when planning trips.
Clock Widget for Time Management
The Clock widget helps you keep track of time in various ways. It can show different time zones, set alarms, or provide a stopwatch.
Different Clock Widget Options:
- World Clock – Track time in multiple cities
- Alarm – See upcoming alarms without opening the app
- Timer – Start countdown timers quickly
- Stopwatch – Track elapsed time
For people who work with teams across the globe, the World Clock feature is especially useful. You can see at a glance if it’s a good time to call colleagues in other countries.
The widget also allows quick access to your morning alarms. You can check if they’re set properly without opening the Clock app.
Calendar Widget for Scheduling
The Calendar widget puts your schedule front and center. This makes it easier to stay on top of appointments and deadlines.
You can choose between several sizes:
- Small: Shows your next upcoming event
- Medium: Displays several upcoming events
- Large: Shows a mini monthly calendar with dots for days with events
The widget highlights meetings, birthdays, and other events. Color coding makes it easy to distinguish between personal and work commitments.
You can tap any event to open it for more details. This quick access saves time when checking meeting locations or call details.
For busy professionals, the Calendar widget pairs well with the Reminders widget. Together they create a complete organizational system right on your Home Screen.
Troubleshooting Common Widget Issues
Sometimes your battery widget may not show all your devices. If your iPad or MacBook isn’t showing up, try these simple fixes.
First, check that all devices are signed into the same Apple ID. This is the most common reason devices don’t appear in the widget.
Restart both devices. This quick fix often updates the battery widget when it’s stuck or not showing current levels.
Make sure all devices are on the same Wi-Fi network. The battery widget needs this connection to display your iPad or other devices properly.
Try these quick steps if your widget isn’t working:
- Remove and re-add the widget
- Update iOS on all devices
- Toggle Bluetooth off and on
- Check for system updates
If your iPad still doesn’t appear in the widget, try turning off Battery Optimization. This feature sometimes interferes with the widget’s function.
For stubborn issues, ReiBoot can help fix system problems that prevent widgets from working correctly. This repair tool fixes iOS issues without data loss.
Battery widgets work differently from desktop widgets. They need Bluetooth connections to show accurate readings.
Check that Background App Refresh is enabled for better widget performance. Go to Settings > General > Background App Refresh and make sure it’s turned on.
If nothing works, set up the widget again from scratch. Remove it completely, restart your phone, and add it back to your home screen.
Frequently Asked Questions
Keeping track of your Apple devices’ battery levels from your iPhone is simple with the right setup. Many common issues can be fixed quickly.
How can I display my MacBook’s battery status on my iPhone’s widget area?
To show your MacBook’s battery on your iPhone, make sure both devices are signed into the same Apple ID. Then, add the battery widget to your iPhone’s home screen by long-pressing the home screen and tapping the “+” icon in the top corner.
Select the “Batteries” widget from the list and choose your preferred size. The widget will automatically display all compatible Apple devices, including your MacBook.
Both devices need Bluetooth turned on and should be within range of each other for this to work properly.
What steps are needed to include an iPad’s battery level in the iPhone’s battery widget?
Adding your iPad’s battery level to your iPhone widget requires a few simple steps. First, check that both your iPhone and iPad use the same Apple ID in iCloud settings.
Next, add the Batteries widget to your iPhone by long-pressing the home screen, tapping “+”, and selecting the Batteries widget. Your iPad should appear in the widget automatically.
Make sure Bluetooth is enabled on both devices and they’re near each other. Your iPad will now show up in the battery widget on your iPhone.
Why is my MacBook’s battery indicator not appearing on my iPhone’s widget?
If your MacBook isn’t showing up in your iPhone’s battery widget, first check that both devices use the same Apple ID. This is the most common reason for connection problems.
Verify that Bluetooth is turned on for both devices and they’re close enough to connect. Sometimes toggling Bluetooth off and on again fixes the issue.
Restart both your iPhone and MacBook if the problem continues. In some cases, you may need to remove and re-add the battery widget to refresh the connection.
Can the iPhone battery widget be personalized to show the battery levels of other devices?
The iPhone battery widget automatically shows all Apple devices signed into your Apple ID. You can’t manually add or remove specific devices from the widget.
The widget displays your iPhone first, followed by other devices like MacBooks, iPads, and accessories like AirPods or Apple Watch. If a device doesn’t appear, it’s usually because it isn’t properly connected.
Unfortunately, there’s no way to customize which specific devices appear in the battery widget beyond ensuring they’re all connected to the same Apple ID.
What should I do if my iPad battery percentage isn’t visible on my iPhone battery widget?
If your iPad’s battery percentage isn’t showing up, first check that both devices are signed into the same Apple ID. Then verify that Bluetooth is enabled on both devices.
Try putting the devices closer together. Sometimes distance can affect the Bluetooth connection. Restarting both devices often resolves connection issues.
If these steps don’t work, try removing and re-adding the battery widget to your iPhone’s home screen. This often refreshes the connection and displays all devices correctly.
How can I ensure my iPhone battery widget reflects the battery status for both iPhone and iPad?
To keep your iPhone and iPad battery levels synced in the widget, make sure both devices stay connected to the same Apple ID. Check this in Settings > Apple ID on both devices.
Enable Bluetooth on both devices and keep them within range of each other. The batteries widget should show all your iCloud connected devices automatically.
Occasionally refresh the connection by turning Bluetooth off and on again. If problems persist, restarting both devices usually gets everything working properly again.

