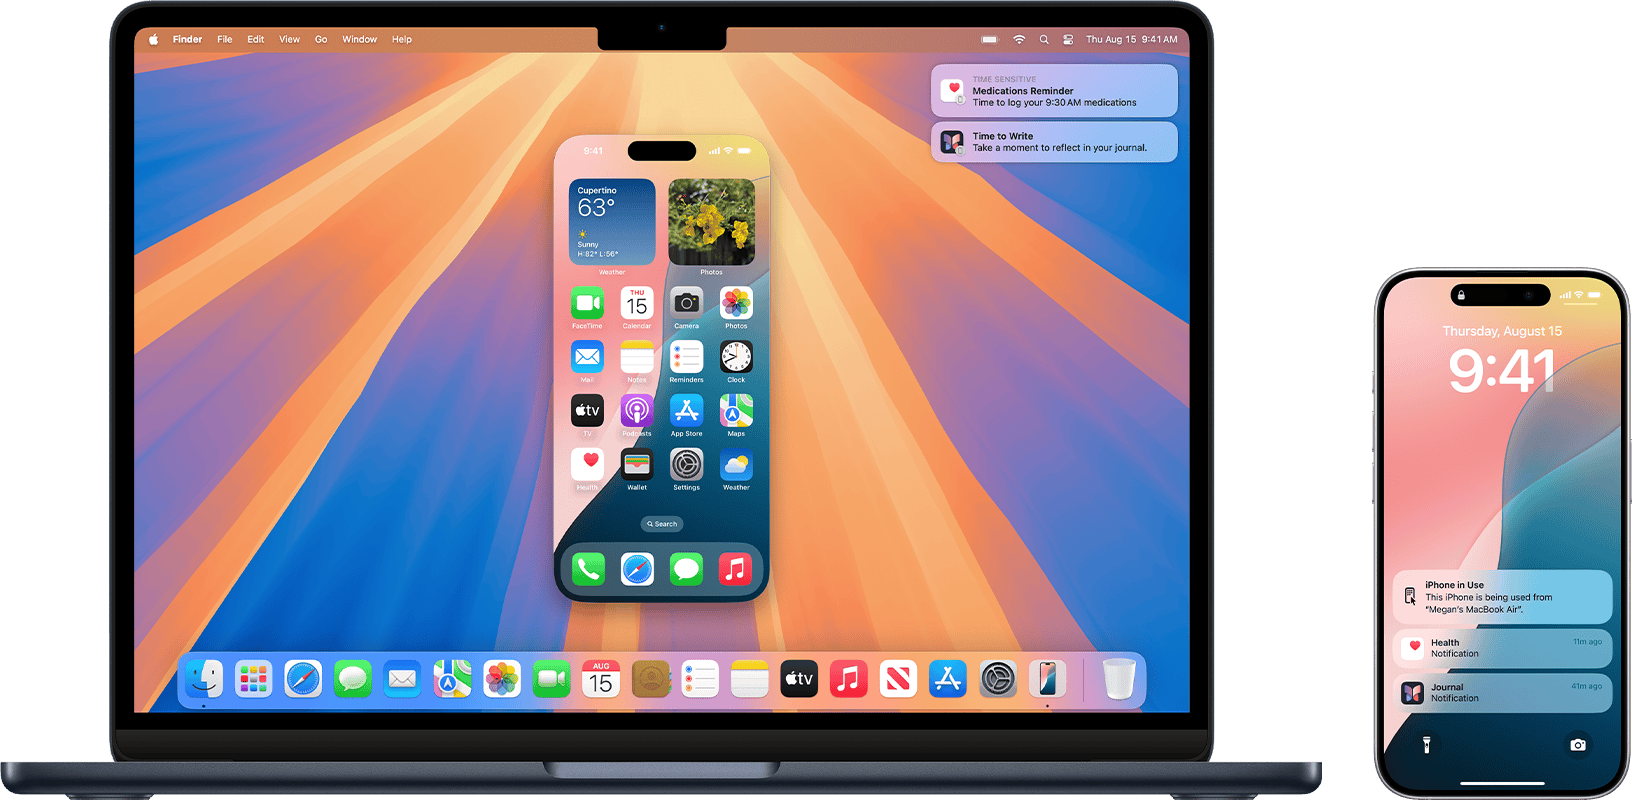
Are you tired of your MacBook constantly pinging with text messages while you’re working? It’s a common issue for Apple users who have their devices synced. To stop text messages on your MacBook, open the Messages app, click on Messages in the menu bar, select Settings (or Preferences in older versions), click the iMessage tab, and then click Sign Out. This simple process disconnects your Mac from the iMessage service, giving you the peace and focus you need.
Many people don’t realize how easy it is to control which devices receive their messages. When you set up iMessage on multiple Apple devices, they all get the same texts by default. This feature is great for convenience but can quickly become distracting when you’re trying to concentrate on work or studies on your MacBook.
Taking control of your notifications doesn’t mean giving up the benefits of Apple’s ecosystem. You can always sign back into iMessage whenever you want to restore the connection between your devices. The process takes just seconds, putting you in complete control of when and where you receive your messages.
Steps To Stop Text Messages
Text messages showing up on your MacBook is usually due to a feature called “Text Message Forwarding” or “Messages in iCloud.” Here’s how to stop them, depending on whether you want to disable all messages or just change notifications:
Option 1: Stop all text messages (iMessage and SMS) from appearing on your Mac (Recommended for full privacy):
This is the most comprehensive way to stop messages from showing up. You’ll need to adjust settings on both your iPhone and your MacBook.
On your iPhone:
- Open Settings: Tap the “Settings” app icon.
- Go to Messages: Scroll down and tap “Messages.”
- Turn off iMessage (Optional but recommended for full separation): If you want to stop receiving iMessages on your Mac, toggle off “iMessage.” Keep in mind this will stop iMessages from going to all your Apple devices (Mac, iPad, etc.) and will make all your messages send as green SMS texts from your iPhone.
- Disable Text Message Forwarding:
- Still in “Messages” settings, scroll down and tap “Text Message Forwarding.”
- You’ll see a list of your other Apple devices (like your MacBook). Toggle off the switch next to your MacBook’s name. This will prevent regular SMS (green bubble) texts from being forwarded to your Mac.
- Disable Messages in iCloud (If enabled):
- Go back to the main “Settings” menu on your iPhone.
- Tap your Apple ID (your name) at the very top.
- Tap “iCloud.”
- Scroll down and tap “Messages.”
- Toggle off “Sync this iPhone” or “Messages in iCloud” (the wording might vary slightly depending on your iOS version). Confirm your choice if prompted. This ensures messages aren’t synced via iCloud to your Mac.
On your MacBook:
- Open the Messages app: Click on the green speech bubble icon in your Dock or find it in your Applications folder.
- Open Messages Settings/Preferences:
- In the menu bar at the top of your screen, click “Messages.”
- Select “Settings…” (or “Preferences…” on older macOS versions).
- Go to iMessage tab: In the settings window, click on the “iMessage” tab.
- Sign Out of iMessage:
- Next to your Apple ID, click the “Sign Out” button.
- Confirm your choice in the pop-up window.
- This will sign you out of iMessage on your Mac, preventing both iMessages and forwarded SMS messages from appearing there.
Option 2: Stop Notifications, but keep messages in the Messages app on your Mac (If you still want access to messages but no alerts):
This method lets you keep your message history on your Mac, but prevents disruptive pop-up notifications or sounds.
- Open System Settings (or System Preferences):
- Click the Apple menu () in the top-left corner of your screen.
- Select “System Settings…” (macOS Ventura and later) or “System Preferences…” (older macOS).
- Go to Notifications: In the sidebar, click on “Notifications” (or “Notifications & Focus”).
- Find Messages: Scroll down the list of applications on the left and click on “Messages.”
- Adjust Notification Settings:
- Toggle off “Allow Notifications” entirely if you don’t want any alerts from Messages.
- Alternatively, you can customize:
- Alert style: Change from “Banners” or “Alerts” to “None.”
- Sounds: Uncheck “Play sound for notifications.”
- Badges: Uncheck “Show badges on app icon” if you don’t want the red notification count.
- You can also choose whether to show notifications on the lock screen or in Notification Center.
After following these steps, your MacBook should no longer display text messages or provide notifications, depending on which option you chose.
Key Takeaways
- Opening Messages app and signing out from the iMessage tab stops all text messages from appearing on your MacBook.
- You can selectively choose which conversations or contacts sync to your Mac in the Messages settings.
- Your changes only affect your MacBook and won’t stop messages on your other Apple devices.
Understanding Messages on macOS
The Messages app on macOS serves as a central hub for your text communications across Apple devices. It offers powerful features that let you send texts, photos, videos, and more through Apple’s iMessage service or standard SMS.
The Role of iMessage and the Messages App
The Messages app on macOS is Apple’s platform for text communication. It handles both iMessage (Apple’s messaging service) and standard SMS texts when connected to your iPhone.
iMessage works over the internet, letting you send unlimited messages to other Apple users without carrier charges. You can easily identify iMessage texts by their blue bubbles, while green bubbles indicate SMS messages.
The app supports rich features like message effects, tapbacks, and Digital Touch. You can also send photos, videos, and documents directly from your MacBook.
Messages on macOS also supports group chats, allowing you to communicate with multiple people at once. These groups can include both iMessage users and SMS contacts.
How Messages Syncs Across Apple Devices
Messages uses iCloud to sync conversations across your Apple devices. When you sign in with the same Apple ID on your MacBook, iPhone, and iPad, your messages appear everywhere.
This sync happens automatically. Send a text from your MacBook, and it shows up in your message history on your iPhone and iPad too.
Your message history, attachments, and even unread status stay in sync. This means you can start a conversation on your iPhone and continue it seamlessly on your MacBook.
To control this syncing, you can manage your iCloud settings. If you want to stop messages from appearing on your Mac, you can disable Messages in iCloud or sign out of your Apple ID in the Messages app.
Differences Between iMessage and SMS
iMessage and SMS represent two different messaging technologies that work through the Messages app on macOS.
iMessage (Blue Bubbles):
- Works over internet connection, not cell service
- Free to send and receive (uses data)
- Supports read receipts and typing indicators
- Allows high-quality photo and video sharing
- End-to-end encryption for privacy
SMS/MMS (Green Bubbles):
- Uses cellular networks
- May incur carrier charges
- No read receipts or typing indicators
- Limited media sharing capabilities
- No encryption between devices
Your MacBook can send and receive iMessages directly but needs iPhone connection for SMS. This feature, called Text Message Forwarding, requires both devices to use the same Apple ID and have the setting enabled.
Setting Up Messages on Mac
Properly configuring the Messages app on your Mac ensures you can send and receive texts seamlessly. The setup process involves signing in with your Apple ID, adjusting your preferences, and managing how you receive notifications.
Signing in With Your Apple ID
To start using Messages on your Mac, you’ll need to sign in with your Apple ID. Open the Messages app from your dock or Applications folder. If this is your first time opening the app, you’ll see a sign-in screen.
Enter your Apple ID and password when prompted. This should be the same account you use on your iPhone if you want to sync messages between devices.
If you’re already signed in but want to switch accounts, you can sign out first. Open Messages, click on “Messages” in the menu bar, then select “Settings” (or “Preferences” in older macOS versions), click the “iMessage” tab, and click “Sign Out.”
After signing out, you can sign back in with a different Apple ID if needed.
Adjusting Preferences in the Messages App
The Messages app offers several customization options to improve your texting experience. To access these settings, open Messages and click “Messages” in the menu bar, then select “Settings”.
In the iMessage tab, you can:
- Choose which phone number or email addresses people can reach you at
- Enable or disable read receipts
- Set up text message forwarding from your iPhone
- Decide whether to save received attachments automatically
You can also adjust the appearance of your message bubbles and background by clicking on the “General” tab in Settings.
To stop receiving messages on your Mac completely, simply sign out of your account in the iMessage settings.
Understanding Notifications and Alerts
Managing how Messages alerts you is crucial for maintaining focus while using your Mac. You can customize notifications through two different routes.
The first method uses the Messages app itself. Click “Messages” in the menu bar, then “Settings,” and select the “Notifications” tab. Here you can choose sounds, enable or disable banner alerts, and decide if you want to see message previews.
For more control, open System Preferences from the Apple menu. Click “Notifications & Focus” (or just “Notifications” in older systems). Find and select “Messages” in the app list.
From here, you can:
- Choose notification styles (none, banners, or alerts)
- Toggle sounds on or off
- Enable or disable badges on the Messages icon
- Set up Do Not Disturb schedules to pause notifications
These settings help prevent your Mac from constantly notifying you about new messages when you’re trying to work.
Managing Messages Across Devices
When using Apple’s messaging ecosystem, you can control how your messages appear across your iPhone, iPad, and Mac. Managing these settings properly helps prevent unwanted notifications and duplicate messages.
Using the Same Apple ID on Multiple Devices
Your Apple ID connects all your Apple devices through iMessage. This connection allows messages to appear on multiple devices at once.
To check which Apple ID you’re using:
- On Mac: Open Messages app → Messages menu → Settings → iMessage tab
- On iPhone/iPad: Go to Settings → Messages → Send & Receive
If you want different message histories on different devices, you need separate Apple IDs. This might be useful for work and personal separation.
Problems often happen when family members share an Apple ID. Text messages meant for one person show up for everyone. Apple designed the system for individual accounts, not sharing.
You can stay signed in with your Apple ID for other services while signing out of just Messages if needed.
Text Message Forwarding to Mac
Text message forwarding sends SMS messages (green bubbles) from your iPhone to your Mac. This feature needs to be turned on or off intentionally.
To disable forwarding to your Mac:
- On your iPhone, open Settings
- Tap Messages
- Select “SMS Forwarding“
- Toggle off your Mac
You can also disable forwarding completely by turning off “Text Message Forwarding” in iPhone Settings.
For a more direct approach, you can turn off iMessage entirely on your Mac:
- Open Messages app
- Go to Messages → Settings
- Select iMessage tab
- Sign out of your Apple ID
This stops all messages from appearing on your Mac while keeping them on your iPhone.
Customizing Send & Receive Options
You can control which phone numbers and email addresses receive messages on each device.
On your Mac:
- Open Messages app
- Click Messages in the menu bar
- Select Settings
- Click the iMessage tab
- Under “You can be reached for messages at,” uncheck any addresses you don’t want
On iPhone:
- Go to Settings
- Tap Messages
- Select “Send & Receive”
- Uncheck unwanted addresses
You can stop message sharing between devices by carefully selecting which addresses are active on each device. For example, use your phone number on your iPhone only and your email on your Mac.
Messages can be disabled on specific devices without affecting others. This gives you precise control over which conversations appear where.
Stopping Text Messages on MacBook
If your MacBook keeps showing unwanted messages, you have several options to control this. You can completely turn off iMessage, sign out of your account, stop forwarding from your iPhone, or just silence notifications temporarily.
Turning Off iMessage on Mac
To completely turn off iMessage on your MacBook, you need to access the Messages app settings.
First, open the Messages app from your dock or Applications folder. Look for the app with the blue text bubble icon.
Once the app is open, click on “Messages” in the top menu bar, then select “Settings” (or “Preferences” in older macOS versions).
In the settings window, click on the “iMessage” tab. This shows all your iMessage account options.
To turn off iMessage completely, click the “Sign Out” button. The app will ask you to confirm this choice. After signing out, you won’t receive any more messages on your MacBook.
This method stops all messages from appearing on your Mac until you sign back in.
Signing Out and Logging Out of iMessage
If you want to temporarily stop receiving messages on your MacBook without completely disabling iMessage, you can simply sign out.
Open the Messages app on your Mac. Click “Messages” in the top menu bar, then choose “Settings” or “Preferences.”
Select the “iMessage” tab in the window that appears. You’ll see your Apple ID information at the top of this screen.
Click the Sign Out button. Confirm your choice when prompted.
This logs you out of your Apple ID for messaging purposes only. Your other Apple services like iCloud and App Store will still work normally.
When you want to receive messages again, just return to this same screen and sign back in with your Apple ID and password.
Disabling Text Message Forwarding
If you still want to use iMessage on your Mac but don’t want texts from your iPhone appearing, you can disable text message forwarding.
This setting is actually controlled from your iPhone, not your Mac. On your iPhone, open the Settings app.
Tap “Messages,” then look for “Text Message Forwarding.” This shows a list of all devices linked to your Apple ID.
Toggle off the switch next to your MacBook’s name. This immediately stops text messages from appearing on your Mac while still allowing regular iMessages to come through.
The difference is important: regular SMS/text messages will stay on your iPhone only, while iMessages (blue bubbles) will still sync to all devices.
This option gives you more control over which types of messages appear on which devices.
Using Do Not Disturb Mode
For a temporary solution without signing out, MacBook’s Do Not Disturb mode can silence message notifications.
Click the Control Center icon in your Mac’s menu bar (it looks like two toggle switches). Find and click the “Do Not Disturb” or “Focus” option.
You can choose how long to silence notifications: for one hour, until evening, or until you leave your current location.
For more control, go to System Preferences (or System Settings) > Notifications & Focus. Here you can set schedules for when Do Not Disturb activates automatically.
You can also block specific contacts from messaging you. In the Messages app, go to Messages > Settings > iMessage > Blocked and add any contacts you want to block.
Do Not Disturb keeps messages arriving but prevents notifications from disturbing you, perfect for meetings or focused work.
Troubleshooting Common Issues
Even with proper setup, text messaging on MacBooks can sometimes run into problems. These issues typically fall into three categories that affect how messages are received, displayed, or synced across your devices.
Dealing With Connectivity Problems
Internet connection problems often cause message delivery failures on your MacBook. If messages aren’t sending or receiving, first check your Wi-Fi connection by clicking the Wi-Fi icon in the menu bar.
Try these quick fixes:
- Restart your Wi-Fi router
- Toggle Wi-Fi off and on again on your MacBook
- Reset your network settings through System Preferences
If problems persist, try signing out of your Apple ID in Messages preferences, then signing back in. This often fixes connection issues between your MacBook and Apple’s servers.
Sometimes switching to a different network helps identify if the problem is with your home internet or the Messages app itself. Public networks may block iMessage ports, so using your phone’s hotspot can be a good test.
Resolving Syncing Conflicts
When messages appear on your iPhone but not your MacBook (or vice versa), you’re experiencing syncing issues. These problems usually stem from account configuration problems.
To fix syncing issues:
- Check that you’re using the same Apple ID on all devices
- Ensure iMessage is enabled in Messages > Settings > iMessage on your Mac
- Make sure your phone number is selected in the “You can be reached” section
Outdated macOS versions sometimes cause syncing problems. Click the Apple logo in the top-left corner and select “About This Mac” to check for updates.
If messages still won’t sync, try signing out of iMessage on all devices, restarting them, and signing back in. This resets the connection between your devices and Apple’s messaging servers.
Identifying Notification Errors
Missing message notifications is frustrating but usually easy to fix. First, check your notification settings by going to System Preferences > Notifications > Messages.
Make sure:
- Alerts are enabled for Messages
- The alert style is set to “Banners” or “Alerts”
- “Play sound for notifications” is checked if you want audio alerts
If notifications still don’t work, try these solutions:
- Restart the Messages app
- Check for Focus/Do Not Disturb settings that might silence alerts
- Disable then re-enable notifications for Messages
For persistent problems, boot your Mac in Safe mode to rule out third-party software interference. Hold the Shift key while restarting to enter Safe mode, then test if notifications work properly.
Additional Considerations
When setting up message controls on your MacBook, keep these key points in mind. They affect how texts work across your Apple devices and impact your privacy.
Privacy and Security When Messaging
Your messages contain personal information that needs protection. Turn off iMessage in Settings if you want to stop receiving texts on your Mac completely.
For partial control, you can block specific contacts through Messages > Settings > iMessage > Blocked. This prevents unwanted messages without disabling the entire service.
Two-factor authentication adds another layer of security to your Apple ID. Enable it in System Preferences under Apple ID settings to prevent unauthorized access to your messages.
Regular software updates are essential. They patch security vulnerabilities in the Messages app that could compromise your conversations.
The Impact of Different Apple IDs
Using separate Apple IDs for different devices affects where messages appear. Many users experience confusion when they receive texts on their Mac because they’re signed in with the same Apple ID as their iPhone.
To manage this, check which Apple ID is active in Messages by going to Messages > Settings > iMessage. The email address and phone number settings here determine where messages are delivered.
If work and personal messages need separation, consider using different Apple IDs. However, this creates complications with shared purchases and Family Sharing features.
Remember that changing Apple IDs will affect all services including iCloud storage, app purchases, and media libraries—not just messaging.
Managing Contacts and Conversations
Organizing conversations helps control message flow between devices. Create contact groups to separate work and personal contacts for better message management.
The Messages app allows conversation pinning for important chats. Simply right-click any conversation and select “Pin” to keep it at the top of your list.
Turn off text message forwarding on your iPhone (Settings > Messages > Text Message Forwarding) to prevent SMS messages from appearing on your Mac while still receiving iMessages.
For temporary periods when you need focus, enable Do Not Disturb mode. This silences notifications without completely disconnecting your messaging.
To prevent all messages on your Mac, uncheck “Enable this account” in Messages Preferences under the Accounts tab for your iCloud account.
Advanced Features and Tips
Beyond basic message management, MacBook offers powerful tools to enhance your messaging experience. You can link different apps, use shortcuts, and combine communication methods for smoother workflows.
Utilizing Facetime Alongside Messages
You can easily switch between text and video during conversations with your contacts. When texting someone in Messages, click the video icon to start a FaceTime call instantly.
This integration works both ways. During a FaceTime call, you can send texts without ending your video chat. This proves useful when sharing links or information that needs to be typed out.
MacOS allows you to answer incoming iPhone calls directly on your MacBook when both devices are signed into the same Apple ID. You might start with a phone call and switch to Messages for sharing files.
For group conversations, you can mix chat types. Start in Messages and add FaceTime participants as needed, making family or team communications more flexible.
Integrating Messages With Other Apps
Messages works with other MacOS apps to save time. When browsing in Safari, you can share web pages directly to Messages without copying links. Just click the share button and select Messages.
The Photos app connects to Messages too. Select any picture, click share, and pick Messages to send images without leaving Photos. This keeps original photo quality better than other methods.
Calendar Integration Tips:
- Accept meeting invites directly from Messages
- Create new events from text conversations
- Share your availability with contacts
You can drag and drop files from Finder straight into message threads. This works for PDFs, images, videos, and other documents without using the attachment button.
The Messages app also connects with Notes. You can save important conversation details to Notes for later reference with just a few clicks.
Keyboard Shortcuts and Gestures
Keyboard shortcuts make messaging faster on MacBook. Press Command + N to start a new conversation or Command + F to search through your message history.
For quick replies, use Command + R on any message. To delete messages, select them and press Command + Delete. These shortcuts work in all Messages app versions.
MacBooks with Touch Bar show context-specific controls for Messages. These include emoji shortcuts, text formatting, and quick replies without clicking menus.
Trackpad gestures enhance messaging too. Use a two-finger swipe on a conversation to reveal options like delete or mute. Pinch to zoom on images sent in Messages.
Time-saving shortcuts:
- Option + Up/Down arrows to jump between conversations
- Command + Shift + T to show or hide the sidebar
- Control + Command + Space to open emoji picker
These advanced features transform Messages from a simple texting app into a communication hub on your MacBook.
Frequently Asked Questions
iMessage on a MacBook can sometimes overwhelm users with constant notifications. Here’s how to manage your messages and get more control over your digital communications.
What are the steps to disable iMessage on a MacBook?
To turn off iMessage on your MacBook, open the Messages app first.
Click on “Messages” in the top menu bar, then select “Settings” (or “Preferences” in older macOS versions).
Go to the “iMessage” tab and click “Sign Out”. This will stop all iMessages from coming to your Mac.
How can one unlink a phone number from Messages on a Mac computer?
Open the Messages app on your MacBook.
Click “Messages” in the menu bar, then click “Settings” and select the “iMessage” tab.
Under your Apple ID section, uncheck the phone number you want to unlink. This prevents messages sent to that number from appearing on your Mac.
Is there a method to selectively stop receiving text messages from certain contacts on macOS?
Yes, you can block specific contacts from messaging you on your Mac.
Open a conversation with the contact you want to block, then click on their name or photo at the top of the window.
Click the “i” info button, then select “Block this Person” to stop receiving their messages.
Can you instruct on adjusting notification settings for Messages on a MacBook to not display text message alerts?
Open System Preferences (or System Settings in newer macOS) from the Apple menu.
Click on “Notifications” and find “Messages” in the app list.
Turn off “Allow Notifications” completely or customize how notifications appear by disabling banners, sounds, and badges.
What is the procedure to log out of iCloud on a MacBook to stop receiving messages?
Open the Messages app on your Mac.
Click “Messages” in the menu bar, then select “Settings” (or “Preferences”).
Go to the “iMessage” tab, click “Settings”, then deselect “Enable Messages in iCloud”.
Confirm your choice when prompted. Your messages will no longer sync across devices.
How does one turn off message forwarding from an iPhone to a MacBook?
On your iPhone, open the Settings app.
Tap “Messages” and then “Text Message Forwarding.”
You’ll see a list of devices. Turn off the toggle next to your MacBook.
This stops your SMS messages from forwarding to your Mac while keeping iMessage active on both devices if desired.


