Getting your external hard drive to work with your Mac is easier than you might think. Many new drives come formatted for Windows computers, which can cause problems when you try to use them with your Mac. To format an external hard drive for Mac, use Disk Utility to erase the drive and select either APFS for SSDs or Mac OS Extended for traditional hard drives. This simple process takes just a few minutes and ensures your drive works perfectly with your Mac system.
Before you begin formatting, remember to back up any important files on your drive. Formatting erases all data on the drive completely. If you need to use the drive with both Mac and Windows computers, you can format it as exFAT, which works with both systems but has some limitations.
Apple’s Disk Utility makes the formatting process simple. The app comes pre-installed on all Macs, so there’s no need to download extra software. You can find it in the Applications folder under Utilities, or by searching for “Disk Utility” using Spotlight.
How To Format an External Hard Drive on Mac (Step‑by‑Step Guide)
Formatting an external hard drive on a Mac is useful when you want to erase data, fix errors, or change file systems for better compatibility. This guide walks you through the safest and easiest way to format an external hard drive using macOS Disk Utility, plus tips on choosing the right format.
Before You Format: Important Warnings
⚠️ Formatting erases everything on the drive.
Back up any important files before continuing.
Make sure:
- Your Mac is plugged into power (for long formats)
- The external drive is properly connected
- You know which file system you need
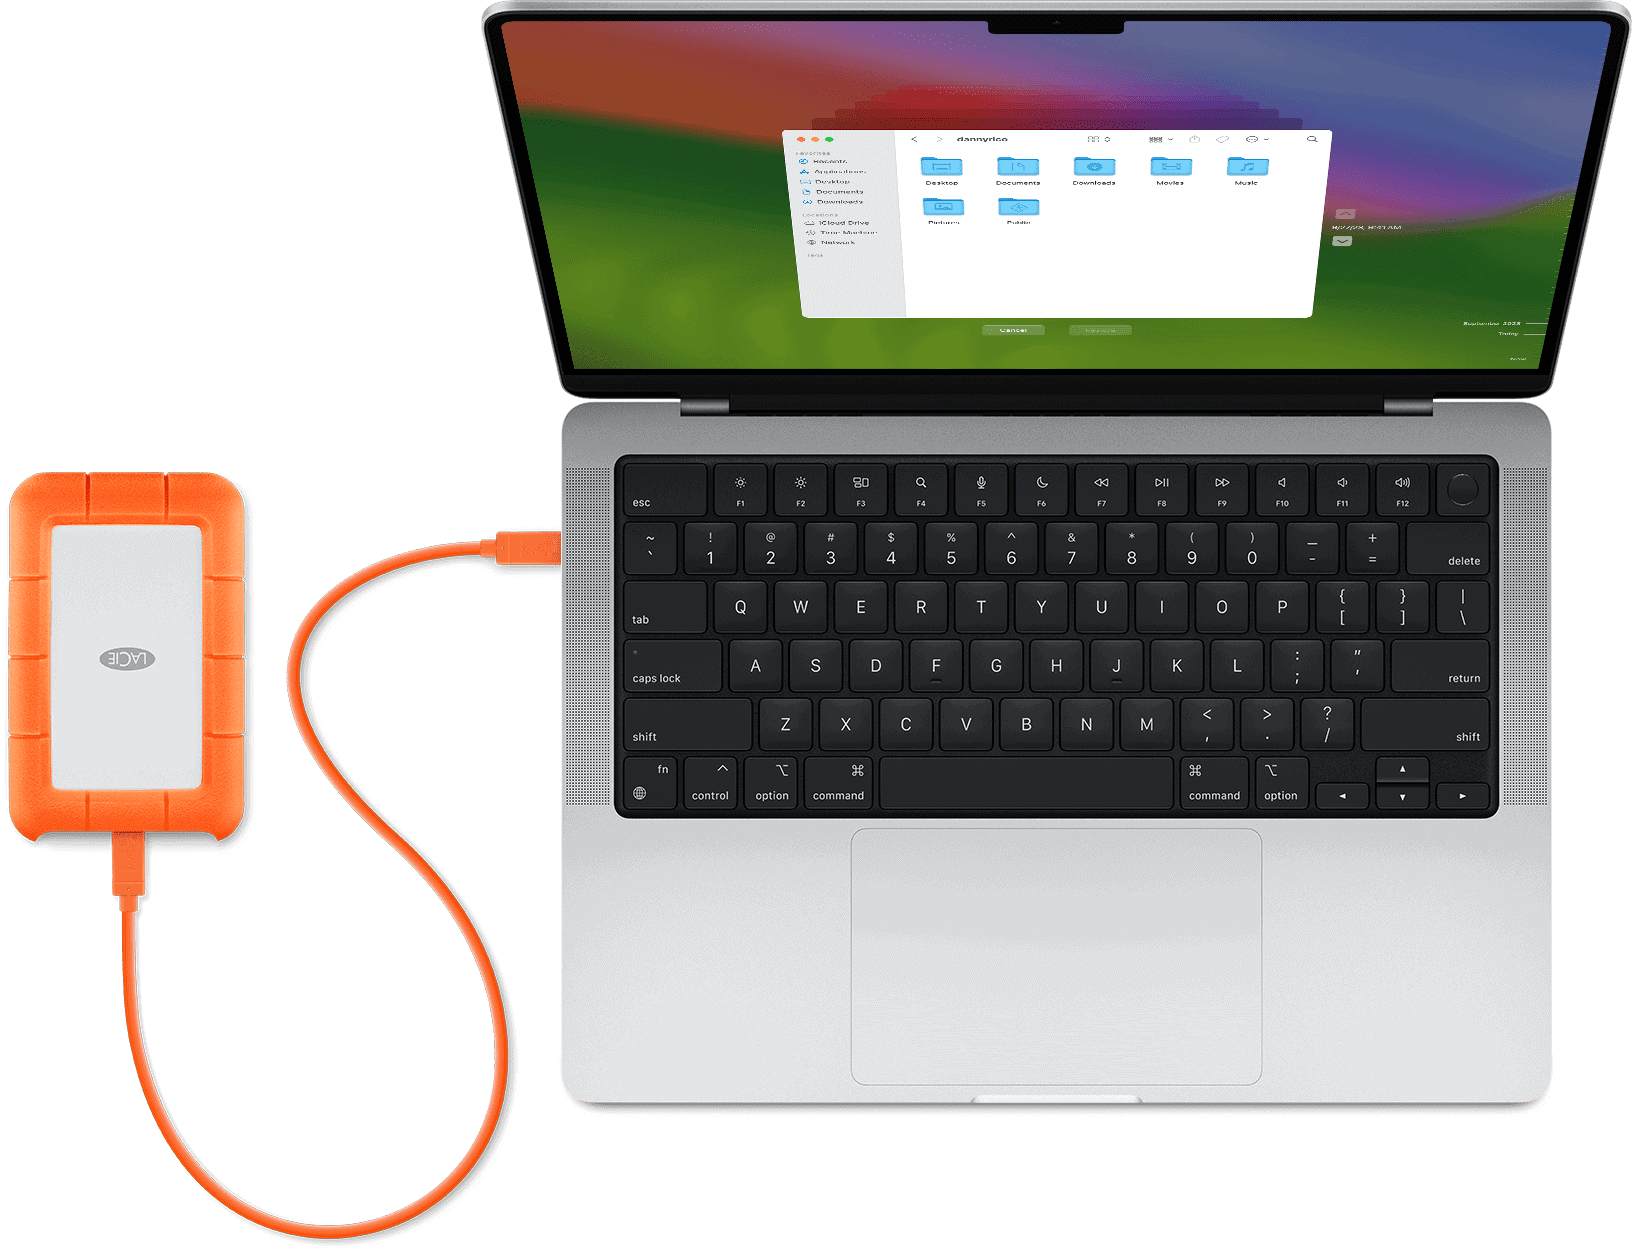
Step 1: Connect the External Hard Drive
- Plug the external hard drive into your Mac
- Wait for it to appear on your desktop or in Finder
- If it doesn’t appear, open Finder → Locations
Step 2: Open Disk Utility
- Click Spotlight Search (⌘ + Space)
- Type Disk Utility
- Press Enter
Disk Utility shows all connected drives and partitions.
Step 3: Show All Devices (Important)
By default, macOS may hide the full drive.
- In Disk Utility, click View
- Select Show All Devices
This ensures you format the entire drive, not just a partition.
Step 4: Select the Correct Drive
- Choose the top‑level external drive (not the indented volume)
- Double‑check the drive name and storage size
✅ This prevents formatting the wrong disk.
Step 5: Click “Erase”
- Click the Erase button at the top
- Enter a Name for the drive
- Choose a Format (see below)
- Choose a Scheme
- Click Erase to confirm
Step 6: Choose the Best Format for Your Needs
Best Formats Explained
✅ APFS (Apple File System)
- Best for macOS‑only use
- Required for modern SSDs
- Fast and secure Use if: You only use the drive on Macs
✅ Mac OS Extended (Journaled)
- Older Mac format
- Good for older macOS versions Use if: You need compatibility with older Macs
✅ exFAT (Most Compatible)
- Works with macOS and Windows
- Supports large files Use if: You share the drive between Mac and PC
❌ FAT32
- File size limit (4GB)
- Outdated Use only if: Required by older devices
Step 7: Choose the Correct Scheme
- GUID Partition Map ✅ (recommended)
- Master Boot Record (MBR) (older systems)
- Apple Partition Map (legacy Macs)
👉 Choose GUID Partition Map for modern Macs.
Step 8: Wait for Formatting to Finish
- Formatting usually takes seconds to a few minutes
- Click Done when finished
- The drive will mount automatically
Your external hard drive is now ready to use.
Troubleshooting Common Issues
Drive Won’t Format
- Try formatting the top‑level device
- Restart your Mac
- Try a different USB cable or port
Drive Not Showing Up
- Check View → Show All Devices
- Try another Mac or computer
- Verify the drive has power
“Erase Process Failed”
- Run First Aid in Disk Utility
- Try formatting in Safe Mode
- Use Terminal (advanced users)
How to Format Using Terminal (Advanced)
diskutil list
diskutil eraseDisk exFAT MyDrive /dev/diskX
Replace diskX with your actual disk number.
⚠️ Use with caution—Terminal formatting is irreversible.
Final Thoughts
Formatting an external hard drive on a Mac is simple when using Disk Utility. The most important steps are choosing the correct drive, selecting the right format, and backing up your data beforehand.
For most users:
- APFS → Mac‑only use
- exFAT → Mac + Windows compatibility
Once formatted, your drive will be clean, fast, and ready for storage, backups, or file transfers. 💾✅
Key Takeaways
- Format SSDs as APFS and traditional hard drives as Mac OS Extended for best performance with Mac systems.
- Back up all data before formatting since the process erases everything on the drive.
- Use exFAT format if you need the drive to work with both Mac and Windows computers.
Understanding File Systems for Mac
Mac computers work with several file systems that determine how data is stored on your drives. Choosing the right format for your external hard drive impacts compatibility with different devices and overall performance.
APFS vs HFS+
Apple File System (APFS) is the newest and default file system for Macs running macOS High Sierra or later. It’s especially optimized for SSDs and flash storage devices. APFS offers better performance with faster file copies, improved space allocation, and enhanced security features like built-in encryption.
HFS+ (Mac OS Extended) was the standard Mac format before APFS. It’s still useful for older Macs running macOS Sierra or earlier.
When choosing between them:
- Use APFS for any SSD or flash drive
- Use HFS+ for mechanical hard drives or if you need to boot older Macs
- APFS handles large files and numerous small files more efficiently
Both formats work seamlessly with Time Machine backups, but APFS is more future-proof.
FAT32 and exFAT
FAT32 is an older Windows format that works on almost any device—Macs, Windows PCs, gaming consoles, and many other gadgets. Its main limitations include:
- Cannot store files larger than 4GB
- Has a 2TB volume size limit
- No built-in file encryption
exFAT fixes many FAT32 limitations while maintaining excellent cross-platform compatibility. When formatting external drives, exFAT is often the best choice for drives that will be used across different operating systems.
ExFAT supports virtually unlimited file sizes and volume sizes up to 128 PB (petabytes). It works with all recent Mac and Windows computers without any extra software.
NTFS and Third-Party Support
NTFS is the native Windows file system. Macs can read NTFS drives by default but cannot write to them without additional software. This one-way compatibility creates problems when trying to save files to NTFS-formatted drives on a Mac.
To gain full read-write access to NTFS drives on your Mac, you have several options:
- Commercial software solutions like Paragon NTFS or Tuxera NTFS provide seamless integration
- Free open-source options such as NTFS-3G (requires technical setup)
- Terminal commands to enable experimental write support (not recommended for important data)
These third-party tools bridge the gap between operating systems, but they can sometimes affect performance. For maximum reliability when sharing drives between Mac and Windows, exFAT is generally recommended unless you need NTFS-specific features.
Preparing to Format Your External Hard Drive
Before you format an external drive for your Mac, you need to take some important steps to protect your data and choose the right format type. These preparations will help you avoid data loss and ensure your drive works properly with your Mac.
Backup Essentials
Always back up your data before formatting a drive. Formatting erases everything, and there’s no undo button.
You can back up your files by:
- Copying important files to another storage device
- Using Time Machine to create a system backup
- Saving files to cloud storage like iCloud Drive
Check that your backup is complete before proceeding. Open the backup location and verify that all files transferred correctly.
For large drives, the backup process might take several hours. Don’t rush this step. It’s better to wait than to lose valuable data forever.
Choosing the Right Format
Mac users have several format options, each with different benefits:
APFS (Apple File System):
- Best for SSDs and flash drives
- Optimized for newer Macs running macOS High Sierra or later
- Faster performance and better encryption
Mac OS Extended (HFS+):
- Works well with traditional hard drives
- Compatible with older Mac systems
- Good option if you need to boot from the drive
exFAT:
- Works with both Mac and Windows computers
- No file size limitations
- Good choice for drives you’ll share between different systems
Choose your format based on how you’ll use the drive. Consider compatibility needs and the type of files you’ll store.
Using Disk Utility to Format a Drive
Disk Utility is Apple’s built-in tool for managing storage devices on Mac computers. It allows you to erase, format, partition, and repair both internal and external drives with just a few clicks.
Accessing Disk Utility
You can open Disk Utility in several ways. The easiest method is through Finder:
- Click on the Finder icon in your dock
- Select Applications from the sidebar
- Open the Utilities folder
- Double-click on Disk Utility
For formatting a new drive, first connect your external hard drive to your Mac. Once connected, it should appear in the sidebar of Disk Utility.
If you need to completely erase a Mac’s startup disk, you’ll need to use Recovery Mode instead:
- Restart your Mac while holding Command+R
- Select Disk Utility from the recovery menu
- Click Continue
You’ll see all connected devices in the sidebar. Make sure to select the correct drive to avoid erasing important data.
Formatting Options
When formatting a drive on Mac, you have several file system options to choose from:
- APFS (Apple File System): Best for SSDs and flash drives used with macOS High Sierra or newer
- Mac OS Extended (HFS+): Good for older Macs or traditional hard drives
- exFAT: Works with both Mac and Windows, good for external drives
- MS-DOS (FAT): Compatible with most devices but has file size limitations
To format your drive:
- Select your drive in the sidebar
- Click the Erase button at the top
- Enter a name for your drive
- Choose a format from the dropdown menu
- Click Erase
You can also choose between a quick format or full format. Quick format is faster but full format is more thorough and can help identify bad sectors.
GUID Partition Map vs Master Boot Record
The partition scheme determines how data is organized on your drive. Mac users typically choose between:
GUID Partition Map (GPT):
- Apple’s recommended partition scheme for Macs
- Supports drives larger than 2TB
- Works with newer Intel-based Macs and Apple Silicon
- Better reliability and recovery options
Master Boot Record (MBR):
- Traditional scheme used by Windows
- Limited to 2TB drive size
- Better compatibility with older systems
- Required for booting Windows on some systems
Most Mac users should choose GUID Partition Map unless they specifically need Windows compatibility. For external drives that will be shared between Mac and Windows, MBR with exFAT formatting offers good compatibility.
To select your partition scheme, click the Options button in the Erase dialog before confirming the format.
Terminal Commands for Drive Formatting
For users comfortable with command-line interfaces, the Terminal offers powerful options to format external hard drives on Mac. These commands provide precise control and can sometimes work when Disk Utility fails.
Introduction to Diskutil
The diskutil command is Mac’s built-in tool for managing disks through Terminal. This utility handles all disk-related tasks including formatting, partitioning, and mounting drives.
To begin, you’ll need to identify your external drive by opening Terminal (found in Applications > Utilities) and typing:
diskutil list
This command displays all connected drives with their identifiers (like /dev/disk2). Look for your external drive by checking the size and name.
Never work with disk0 or disk1, as these are typically your internal Mac drives. Working with the wrong disk can result in data loss.
Command Line Formatting
Once you’ve identified your drive, you can format it using simple Terminal commands. First, unmount the disk with:
diskutil unmountDisk /dev/diskX
Replace “diskX” with your drive’s identifier (like disk2).
Next, format the drive with your chosen file system:
diskutil eraseDisk FORMAT NAME /dev/diskX
For example:
- APFS (Apple File System):
diskutil eraseDisk APFS "My Drive" /dev/disk2 - Mac OS Extended:
diskutil eraseDisk HFS+ "My Drive" /dev/disk2 - ExFAT (compatible with Windows):
diskutil eraseDisk ExFAT "My Drive" /dev/disk2
Terminal will show progress and confirm when formatting is complete. This method often works when Disk Utility fails to format properly.
Troubleshooting Common Formatting Issues
When formatting external hard drives for Mac, several problems can occur that prevent successful completion. These issues range from permission errors to hardware failures, but most can be resolved with the right approach.
Dealing with Read-Write Errors
Read-write errors often happen when your Mac can’t properly access the external drive. If you see a message that says your drive is “read-only” or “can’t be modified,” check the physical lock switch on your drive if it has one.
Permission issues are another common cause. Try these fixes:
- Check ownership settings – Open Get Info (⌘+I) on your drive and adjust permissions at the bottom
- Repair disk permissions – Use Disk Utility’s First Aid function to scan and fix permission problems
- Try a different USB port or cable – Faulty connections can cause read-write failures
If your drive was previously formatted for Windows, it might be using NTFS, which Mac can only read by default. You’ll need to format the drive using Disk Utility with Mac OS Extended or APFS format.
Sometimes drives become damaged and won’t format properly. In these cases, try using Terminal commands like diskutil eraseDisk for more direct control.
Recovery Options for Formatting Failures
If formatting fails completely, don’t panic. First, try restarting your Mac and attempting the format process again through Disk Utility.
For more serious issues, dedicated recovery tools can help:
- DiskWarrior – Excellent for repairing corrupted directories
- Donemax Data Recovery for Mac – Can recover files before reformatting
- Disk Drill – Offers both recovery and disk health monitoring
Before formatting a drive that contains important data, always back up files first. If you’ve already started formatting, stop the process immediately if you need the data.
For drives that show physical damage symptoms (clicking sounds, not spinning up), professional data recovery services may be your best option. These services, though expensive, have specialized equipment to recover data from physically damaged drives.
If your Mac simply isn’t recognizing the external drive, try connecting it to another computer to determine if the problem is with the drive or your Mac.
Maintaining Your External Hard Drive Post-Formatting
After formatting your external hard drive, proper maintenance ensures longevity and data safety. Regular checks and good backup habits will protect your valuable information from unexpected failures.
Routine Backups and Health Checks
Backing up your external drive regularly prevents data loss if the drive fails. Create a simple backup schedule—weekly for important files and monthly for everything else. Mark these dates on your calendar or set reminders on your phone.
Use Mac’s built-in Disk Utility to check drive health. Run First Aid by:
- Opening Disk Utility from Applications > Utilities
- Selecting your external drive
- Clicking the First Aid button
- Following the prompts to scan and repair
Watch for warning signs like unusual noises, slow performance, or frequent disconnections. These may indicate your drive is failing.
Keep your drive in a safe place away from liquids, extreme temperatures, and magnets. Avoid disconnecting it without properly ejecting first. Use the eject button in Finder or drag the drive icon to the Trash (which changes to an Eject symbol).
Leveraging Data Recovery Software
Even with good maintenance, drives can fail unexpectedly. Having data recovery software ready before problems occur is smart planning.
DoneMax Data Recovery is a popular option for Mac users. It can recover deleted files, repair corrupted drives, and rescue data from formatted volumes. Install it before emergencies happen—not after.
Free options like PhotoRec work well for basic recovery needs. For critical business data, consider paid solutions with better success rates and customer support.
Test your recovery software periodically with non-essential files. This ensures you know how to use it when a real emergency happens.
Store the recovery software on your main computer—not on the external drive you might need to recover. This seems obvious but is a common mistake many people make.
Advanced Formatting Techniques
Mac users have several powerful options for customizing external drives beyond basic formatting. These techniques help manage storage space more efficiently and protect sensitive data from unauthorized access.
Partitioning Your External Drive
Partitioning splits your external drive into multiple sections that work like separate drives. This helps organize different types of files or create backups.
To partition your drive on Mac:
- Open Disk Utility (find it in Applications > Utilities)
- Select your external drive from the sidebar
- Click the “Partition” button in the toolbar
- Click the “+” button to add partitions
- Adjust the size of each partition by dragging the divider or entering specific values
- Choose a format for each partition (APFS for newer Macs, Mac OS Extended for compatibility)
You can set different formats for each partition. For example, use APFS for Time Machine backups and ExFAT for sections that need Windows compatibility.
Remember that partitioning erases all data on the drive, so back up important files first!
Erase Hard Drive Securely
When disposing of a drive or removing sensitive data, standard formatting isn’t enough. Secure erasing overwrites your data multiple times to prevent recovery.
To securely erase your drive:
- Open Disk Utility and select your external drive
- Choose “View > Show All Devices” from the menu bar
- Select the drive (not just a volume)
- Click “Erase” in the toolbar
- Click “Security Options”
For most modern SSDs, a single pass is sufficient because of how data is stored. Traditional hard drives may benefit from multiple passes.
Newer Macs with T2 chips or Apple Silicon use hardware encryption. Simply formatting these drives makes the old data unreadable since the encryption keys are destroyed during formatting.
If your drive contains extremely sensitive information, consider physical destruction after erasing for complete security.
Frequently Asked Questions
Hard drive formatting on Mac devices involves specific steps and considerations. These questions address common concerns about formatting external drives for different uses and compatibility needs.
What steps are involved in reformatting an external hard drive on a Mac?
Reformatting an external hard drive requires using the Disk Utility app on your Mac. First, connect your external drive to your Mac.
Next, open Disk Utility by searching for it in Spotlight or finding it in Applications > Utilities folder.
Select your external drive from the sidebar, then click the “Erase” button at the top of the window. Name your drive, choose a format type, and click “Erase” to begin the process.
The Mac will format the drive according to your specifications. This process typically takes a few minutes to complete.
How do you completely wipe an external hard drive on a Mac?
Completely wiping an external hard drive goes beyond simple formatting. To start, open Disk Utility and select your drive from the sidebar.
Click the “Erase” button at the top. For a more secure erase, click the “Security Options” button before confirming the erase process.
Move the slider to the right for a more thorough wipe. More secure wipes take longer but make data recovery more difficult.
After selecting your security level, click “OK” and then “Erase” to begin the wiping process. The time required depends on the drive size and security level chosen.
What file system should be used when formatting an external hard drive for both Mac and PC compatibility?
For the best compatibility between Mac and Windows computers, format your external drive as exFAT or FAT32.
The exFAT format works well for most users since it handles larger files than FAT32. It allows files larger than 4GB and works with both operating systems without additional software.
FAT32 is another option but has a 4GB file size limit. This format works with virtually all computers but isn’t ideal for large video files or disk images.
NTFS and APFS formats generally work best with only one operating system (Windows or Mac respectively) and require special software for cross-platform use.
How can you securely erase an SSD on a Mac?
Securely erasing an SSD differs from erasing traditional hard drives. For SSDs, Mac’s Disk Utility uses a different process.
Connect your SSD to your Mac and open Disk Utility. Select the drive from the sidebar and click “Erase.”
Choose APFS format for newer Macs (running macOS High Sierra or later) or Mac OS Extended for older systems. Standard erase is typically sufficient for SSDs because of how they store data.
The secure erase options aren’t necessary for SSDs and may even reduce the drive’s lifespan. The standard erase effectively makes old data inaccessible.
What is the optimal format for an external hard drive intended for use with Time Machine?
For Time Machine backups, Apple recommends using Mac OS Extended (Journaled) format, also known as HFS+.
To set up a drive for Time Machine, connect it to your Mac and open Disk Utility. Select the drive and click “Erase.”
Choose “Mac OS Extended (Journaled)” from the format options. Once formatted, Time Machine will recognize the drive and ask if you want to use it for backups.
For newer Macs with SSDs, APFS can also work with Time Machine, though Mac OS Extended remains the traditional choice for backup drives.
Should an external hard drive be formatted differently before selling or disposing of a Mac?
Yes, external drives should be securely wiped before selling or giving them away. This protects personal information from potential recovery.
For traditional hard drives, use Disk Utility and select a secure erase option. For highest security, choose the multi-pass erase option, though it takes longer.
For SSDs, a standard erase in Disk Utility is usually sufficient due to how SSDs manage data. The TRIM command makes old data effectively irrecoverable.
After wiping, consider reformatting to a universally compatible format like exFAT if selling the drive, so the new owner can use it right away.


