Apple’s Mac Mini continues to be one of the most compact, powerful, and affordable desktop computers on the market. With the introduction of the M4 and M4 Pro models, the 2025 Mac Mini lineup brings significant performance gains, expanded connectivity, and broader appeal for users ranging from casual web browsers to video editors and software developers.
Whether you’re building a clean home office setup, a creative workstation, or even a budget-friendly development machine, the Mac Mini punches well above its size.

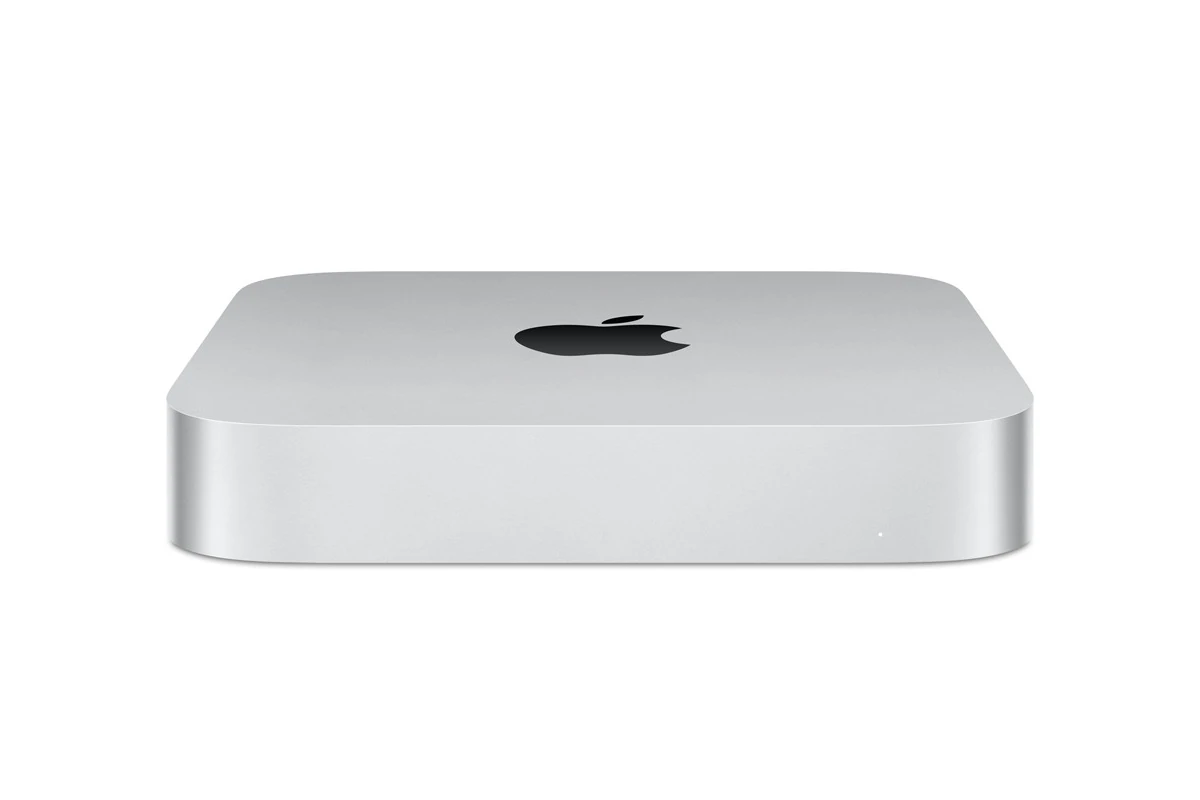
Design and Connectivity
Apple’s 2025 Mac Mini models feature a refined 5-by-5-inch chassis, which is slightly more compact than previous versions while maintaining a sleek aluminum finish. The front now includes easily accessible USB-C ports, making it more convenient for connecting accessories without reaching around to the back.
| Port | M4 Mac Mini | M4 Pro Mac Mini |
|---|---|---|
| Thunderbolt | 3x Thunderbolt 4 | 3x Thunderbolt 5 |
| USB-A | 2x | 2x |
| USB-C (Front) | Yes | Yes |
| HDMI | 1x | 1x |
| Ethernet | 1x Gigabit (upgradable to 10Gb) | 1x 10Gb standard |
| Audio Jack | 3.5mm | 3.5mm |
Thunderbolt 5 on the M4 Pro variant delivers faster transfer speeds (up to 80Gbps) and greater display and external GPU support, while both models support Wi-Fi 6E and Bluetooth 5.3 for wireless performance.
Performance and Specifications

Apple’s M4 silicon brings measurable performance improvements over the M2 and M3 series chips. The M4 Mac Mini is ideal for everyday computing, office tasks, and light creative workloads. The M4 Pro variant is engineered for developers, media producers, and anyone needing sustained performance under load.
| Feature | M4 Mac Mini | M4 Pro Mac Mini |
|---|---|---|
| CPU | 10-core | Up to 14-core |
| GPU | 10-core | Up to 20-core |
| Neural Engine | 16-core | 16-core |
| Memory | 16GB (up to 32GB) | 18GB base (up to 64GB) |
| Storage | 256GB–2TB SSD | 512GB–8TB SSD |
| External Display Support | Up to 2 | Up to 3 (including 8K) |
The M4 Pro model is built to handle Final Cut Pro, Logic Pro, Blender, Xcode, and machine learning workflows without breaking a sweat. Compared to the M2 Pro Mac Mini, the M4 Pro model delivers around 25% faster multi-core performance and up to 30% better GPU rendering speeds in pro applications.

Pricing and Availability
The Mac Mini remains Apple’s most affordable entry point into the Mac ecosystem, with prices depending on the chip and configuration:
| Model | Base Price | Common Sale Price |
|---|---|---|
| Mac Mini (M4, 256GB SSD) | $599 | ~$557 |
| Mac Mini (M4, 512GB SSD) | $799 | ~$749 |
| Mac Mini (M4 Pro, 512GB SSD) | $1,399 | ~$1,299 |
Retailers like Amazon and B&H often offer deals shortly after launch, especially around back-to-school and holiday seasons.
Setup Guide: Getting Started with Your Mac Mini
Setting up your Mac Mini is easy—but there are a few best practices to ensure a smooth experience.
What You Need
- A monitor with HDMI or USB-C input
- A USB-C or HDMI cable (depending on your display)
- A keyboard and mouse/trackpad (Bluetooth or USB)
- A stable Wi-Fi or Ethernet connection
Step-by-Step Setup
- Connect your peripherals: Attach your display, keyboard, mouse, and any other accessories.
- Power up: Press the small power button on the back right corner.
- Follow Setup Assistant: You’ll be guided through language selection, Wi-Fi setup, and Apple ID login.
- Migrate Data: Use Migration Assistant to transfer from another Mac or PC, or set up as new.
- Customize Settings:
- Choose between Light or Dark Mode
- Set up iCloud, Keychain, and Find My Mac
- Configure Touch ID if using a compatible Magic Keyboard
Advanced Setup Options and Use Cases
The Mac Mini’s flexibility means it can serve a variety of roles beyond a traditional desktop:
| Use Case | Setup Tips |
|---|---|
| Home Office Workstation | Add dual 4K monitors and a dock for accessories |
| Developer Rig | Use Terminal + VS Code + Docker; upgrade to 32GB RAM for smoother multitasking |
| Home Server / Plex | Use external storage and configure automatic backups via Time Machine |
| Portable Desktop (With iPad as Monitor) | Use Sidecar or third-party apps like Duet Display |
| Media Editing Suite | Pair with a calibrated display and external SSDs for scratch disks |
macOS Sonoma and beyond also allow integration with Shortcuts, Focus Modes, and automation tools that help tailor your Mac Mini to your daily flow—whether you’re coding, designing, or managing projects.
Key Takeaways
- Connect your display, keyboard, and mouse before pressing the power button to start the setup process.
- Follow the Setup Assistant to customize settings, enable features, and transfer data from other devices.
- Your Mac mini can be configured for both portable use or permanent desk setups depending on your needs.
Choosing the Right Mac Mini Configuration
Picking the best Mac Mini setup means balancing cost with performance needs. The right choices in processing power, memory, and storage will ensure your Mac Mini handles your workload without overspending on features you won’t use.
Understanding Mac Mini Specifications
The Mac Mini comes in several processor options, from the M1 to the newer M2 models with different configurations. When selecting a Mac Mini, focus first on the chip – M1, M2, or the anticipated M4 for 2025.
Base models work well for everyday tasks like web browsing, document editing, and video streaming. For more demanding work like video editing or programming, consider Pro or Max chip variants.
Ports matter too. Newer Mac Mini models have moved toward USB-C connections, so you might need adapters for older devices.
Connection options typically include Thunderbolt ports, USB, HDMI, and an audio jack. Check if your monitor, keyboard, and mouse are compatible or if you’ll need adapters.
Comparing Mac Mini to MacBook Pro
The Mac Mini offers similar performance to a MacBook Pro but at a lower price point. The main difference is portability – the Mac Mini needs a separate monitor, keyboard, and mouse.
Mac Mini shines as a desktop solution with its smaller footprint and better cooling. This allows it to maintain peak performance during intense tasks for longer periods compared to laptops.
Many users choose between a Mac Mini setup and a MacBook Pro based on whether they need mobility. If you already have quality accessories like monitors, the Mac Mini often provides better value.
Price is another factor. A well-configured Mac Mini with a good monitor can cost less than a similarly equipped MacBook Pro while offering comparable or better performance for desk-bound tasks.
RAM and SSD Options for Performance
RAM is crucial for smooth performance. Though Apple Silicon Macs handle memory differently than older computers, most experts still recommend 16GB RAM for future-proofing your setup.
8GB works for basic tasks, but users who multitask with memory-hungry applications should consider 16GB or more. Remember that RAM cannot be upgraded later in Apple Silicon Mac Minis.
For storage, SSDs offer speed but increase cost. Base models typically start at 256GB, which fills quickly with applications and files. Consider:
- 256GB: Good for cloud-based workflows
- 512GB: Balanced option for most users
- 1TB or more: Ideal for media work with large files
Don’t waste money on unnecessary upgrades. External SSDs can provide cost-effective additional storage for less frequently accessed files.
Setting Up Your Mac Mini
Setting up a new Mac Mini involves connecting it to essential peripherals, configuring the operating system, and ensuring all devices work together seamlessly. This process is straightforward but requires attention to a few key details for optimal performance.
Initial Setup Process
When you first unbox your Mac Mini, locate the power button on the back of the device. Connect a display, keyboard, and mouse before pressing the power button to turn it on.
The Mac will boot up and launch the Setup Assistant. This guided process will help you:
- Select your country and language preferences
- Connect to Wi-Fi
- Transfer data from another computer (if needed)
- Sign in with your Apple ID
- Set up Touch ID (on models that support it)
Creating a user account is essential. Choose a strong password that you’ll remember. You can also set up multiple user accounts if several people will share the Mac Mini.
The setup will ask about enabling location services and Siri. These are optional but can enhance your experience.
Installing and Updating MacOS
Your Mac Mini comes with the latest MacOS version, but you should check for updates immediately. Click the Apple icon in the top-left corner and select “System Settings” then “General” and “Software Update.”
Installing updates ensures you have:
- The latest security patches
- Bug fixes
- New features
- Improved compatibility with apps
Set your Mac to automatically download updates to stay current without manual checks. This option is found in Software Update settings.
Consider enabling the option to install macOS updates automatically for hassle-free maintenance. Critical security updates are particularly important to install promptly.
First-time users should explore the App Store to download essential applications. Many productivity apps come pre-installed, but you may want additional software.
Connecting External Devices and Displays
The Mac Mini’s compact design requires external peripherals. Modern Mac Minis have multiple ports including:
- USB-C/Thunderbolt ports
- HDMI port
- Standard USB ports
- Ethernet connection
- 3.5mm headphone jack
You can connect multiple displays to extend your workspace. The M-series Mac Mini models support up to two external displays through the Thunderbolt and HDMI ports.
For best performance, match your display’s resolution to its native settings. Access these by clicking the Apple icon, selecting “System Settings,” then “Displays.”
Wireless peripherals like Bluetooth keyboards, mice, and headphones can be paired through System Settings > Bluetooth. Simply put the device in pairing mode and select it when it appears on your Mac.
External storage drives can be connected for backup or additional space. Time Machine works well with external drives for automatic backups.
Optimizing Your Mac Mini’s Performance
Your Mac Mini can run even better with a few smart adjustments. Making some changes to settings, managing storage properly, and considering hardware upgrades can greatly improve speed and responsiveness.
Fine-Tuning System Settings
Start by checking which apps run at startup. Too many startup items can slow down your Mac. Go to System Preferences > Users & Groups > Login Items to remove unnecessary programs.
Reduce visual effects to improve performance. In System Settings, turn down transparency and motion effects. These eye-candy features use processing power that could be better used elsewhere.
Spotlight indexing can sometimes slow your Mac. You can adjust which folders Spotlight searches by going to System Preferences > Spotlight > Privacy. Add folders with large files you don’t need to search.
Regular maintenance matters too. Use Disk Utility’s First Aid to check for disk errors. Also, clear cache files periodically – this can free up RAM and improve system response time.
Managing Storage with SSD and HDD
Mac Minis with SSDs are faster than those with HDDs. If your Mini has both, store the operating system and apps on the SSD and media files on the HDD.
Use macOS’s built-in storage optimization tools to free up space. Go to Apple menu > About This Mac > Storage > Manage. This shows options to:
- Store files in iCloud
- Remove Apple TV downloads
- Empty Trash automatically
- Reduce clutter by finding large files
External drives can expand storage without slowing your system. Connect an external SSD via Thunderbolt for the best speed when working with large files.
Keep at least 15% of your SSD free. SSDs slow down when nearly full because they need space for wear-leveling operations.
Upgrade Possibilities for RAM and SSD
More RAM helps your Mac Mini run multiple programs smoothly. Newer M-series Mac Minis have RAM built into the chip, so upgrade at purchase time.
For Intel Mac Minis (2018 and earlier), RAM upgrades are possible. The 2018 model supports up to 64GB, while 2014 models can handle up to 16GB. RAM upgrades reduce system slowdowns when switching between apps.
SSD upgrades give the biggest performance boost for older Mac Minis with HDDs. For Intel models, you can replace the internal drive with a larger, faster SSD.
Tools needed for upgrades include:
- T6 and T8 Torx screwdrivers
- Plastic pry tools
- Thermal paste (for certain models)
Consider getting professional tech support for upgrades if you’re not comfortable opening your Mac Mini. Improper installation can damage components.
Networking and Remote Access
Mac mini offers powerful networking capabilities that let you access your device from anywhere. Getting your mini set up for remote work, file sharing, and cross-platform connectivity is simpler than you might think.
Setting Up Remote Access
To access your Mac mini from another location, you’ll need to configure a few settings first. Apple provides built-in tools that make this process straightforward.
Start by enabling Screen Sharing and Remote Login. Go to Apple menu > System Settings > General > Sharing and turn on Remote Management. This lets you control your Mac mini’s screen from another device.
For secure remote access outside your home network, you have several options:
- VNC Viewer: Download and install VNC Viewer on your local machine to connect to your Mac mini’s desktop.
- SSH Access: Enable Remote Login in Sharing settings for command-line access.
- Apple Remote Desktop: Offers more advanced remote management tools.
Remember to set up proper port forwarding on your router if you plan to access your Mac mini from outside your home network. This improves security while maintaining connectivity.
Integrating with Synology NAS
A Synology NAS pairs perfectly with your Mac mini for expanded storage and backup solutions. Setting up this integration takes just a few minutes.
First, ensure both your Mac mini and Synology NAS are on the same network. Open Finder on your Mac mini, then click “Network” in the sidebar. Your Synology device should appear here if properly configured.
To mount your NAS as a drive:
- Click on your Synology in the Network list
- Click “Connect As” and enter your NAS credentials
- Select volumes you want to access
For automatic connections, add your NAS to Login Items. Go to System Settings > General > Login Items and add the network location.
Time Machine can also back up to your Synology. Open Time Machine preferences, click “Select Disk,” and choose your NAS volume. This creates a reliable backup system that protects your Mac mini’s data.
Connecting to Windows Networks
Mac mini works well in mixed environments where Windows computers are present. File sharing between platforms is straightforward with a few adjustments.
To access Windows shared folders from your Mac mini:
- Open Finder and press ⌘+K
- Enter the server address as
smb://computernameorsmb://IP.address - Enter Windows username and password when prompted
For remote access from Windows PCs to your Mac mini, use Microsoft Remote Desktop or VNC viewers. These tools provide a seamless experience when working across platforms.
If you need to share files from your Mac mini to Windows users, enable File Sharing in System Settings > General > Sharing. Then click the info button to set permissions for specific folders.
SMB protocol works best for cross-platform file sharing. It ensures compatibility and decent transfer speeds between Mac and Windows systems.
Security and Maintenance
Keeping your Mac Mini secure and well-maintained ensures optimal performance and protects your valuable data. Regular attention to security settings, enrollment options, and maintenance routines can prevent most common problems.
Implementing Security Best Practices
Your Mac Mini comes with built-in security features that need proper setup. Enable FileVault to encrypt your data and protect it from unauthorized access.
Set up strong passwords for all user accounts. Avoid obvious choices like birthdays or names. Instead, use a mix of letters, numbers, and symbols.
Turn on the firewall by going to System Preferences > Security & Privacy > Firewall. This helps block unwanted connections from the internet.
Configure your Mac to lock automatically when not in use. Set this to happen after 5-10 minutes of inactivity for optimal security without inconvenience.
Install trusted antivirus software and scan regularly for malware. While Macs face fewer threats than Windows machines, they aren’t immune to all risks.
Device Enrollment Program (DEP) Benefits
DEP streamlines setup for businesses and schools using multiple Mac Minis. This Apple program automates device configuration during initial setup.
With DEP, IT teams can pre-configure settings before users ever turn on their Mac Minis. This ensures consistent security policies across all devices.
Users benefit from a smoother setup experience. Many complex steps happen automatically, reducing confusion and setup time.
DEP-enrolled Mac Minis can automatically install required apps and configure Wi-Fi, email, and VPN settings. This saves significant time during deployment.
The program also enables zero-touch deployment. IT staff can ship devices directly to users without manual configuration, knowing security settings will apply automatically during setup.
Routine Software Updates and Backups
Software Updates
- Check for updates weekly in System Preferences > Software Update
- Enable automatic updates to stay protected against security threats
- Restart your Mac Mini monthly to complete installations properly
Restarting occasionally helps clear temporary files and memory. This improves performance and stability over time.
Backup Strategy
- Use Time Machine with an external drive for automatic backups
- Consider cloud backup solutions for extra protection
- Test your backups periodically by trying to restore files
Empty your Trash regularly and remove unused apps and files. Your Mac Mini performs best when it has adequate free space on its drive.
When issues arise, contact Apple Tech Support through their website or visit an Apple Store. Most problems can be resolved quickly with professional help.
Frequently Asked Questions
Mac Mini users often have specific questions about setup requirements, alternative configurations, and practical considerations. Here are answers to common questions to help you get the most from your Mac Mini.
What components are required to complete a Mac Mini installation with a monitor?
A basic Mac Mini setup requires a monitor with an HDMI or Thunderbolt/USB-C connection. You’ll also need a keyboard and mouse, which can connect via Bluetooth or USB.
Power cables come with your Mac Mini, but you might need adapters depending on your monitor’s connection type. Some users add external storage or USB hubs for more ports.
How can one configure a Mac Mini when a keyboard is not available?
You can set up your Mac Mini without a physical keyboard using Remote Management tools. Apple’s Screen Sharing feature or third-party remote desktop applications allow setup from another computer.
Another option is using an iPhone or iPad with the Apple Remote Desktop app. Some users temporarily borrow a keyboard just for initial setup, then switch to remote control.
Where can one find inspiration or ideas for Mac Mini workstation setups?
Online communities like Reddit’s r/MacMini showcase user setups with photos and equipment lists. Apple’s website features customer stories with creative Mac Mini configurations.
Tech blogs regularly publish articles about minimal and elaborate Mac Mini workstations. YouTube has countless videos of Mac Mini setup tours that demonstrate real-world configurations.
What are the budget considerations when assembling a Mac Mini setup?
The Mac Mini itself starts at a lower price point than other Mac computers, but peripheral costs add up. Budget at least $200-300 for a decent monitor if you don’t already own one.
Keyboard and mouse combinations range from $30 for basic options to $200+ for premium Apple products. Don’t forget to factor in any adapters, USB hubs, or external storage you might need.
What are the potential drawbacks of utilizing a Mac Mini for computing needs?
The Mac Mini lacks upgrade options for RAM in newer models, so you must choose wisely at purchase. Graphics performance, while improved in M-series chips, still falls short of dedicated gaming or video editing machines.
Port limitations may require additional USB hubs for users with many peripherals. The Mac Mini also requires separate purchases of a monitor, keyboard, and mouse, unlike all-in-one solutions.
Is it possible to operate a Mac Mini without employing a mouse or a monitor?
Yes, the Mac Mini can run as a headless setup without a monitor using remote access tools. Screen sharing features built into macOS let you control it from another Mac or PC.
For mouseless operation, keyboard shortcuts can handle most functions. Server applications are particularly well-suited to headless Mac Mini setups, as they rarely need direct visual interaction.


