Every Mac user dreads the moment when their computer suddenly freezes or files mysteriously disappear. These might be warning signs that your Mac hard drive is failing. Recognizing the early symptoms of hard drive failure can save you from data loss and expensive repairs. Understanding what to look for helps you take action before a small problem turns into a complete breakdown.
Your Mac gives clues when its hard drive is in trouble. You might notice your computer running slower than usual or making strange clicking sounds. Apps might crash more often, files might become corrupt, or your Mac might freeze during startup. These signs shouldn’t be ignored, as they often point to underlying issues with your hard drive health.
Thankfully, macOS includes built-in tools like Disk Utility that help check your disk’s health. Regular checks can catch problems early, while backups protect your data if the worst happens. Taking just a few minutes to monitor your Mac’s performance could save you hours of headaches later.
How to Know if a Mac Hard Drive Is Failing
A failing hard drive can lead to data loss, system crashes, and slow performance. Detecting early signs of hard drive failure on your Mac can help you back up data and take action before it’s too late. Here are key signs and methods to check if your Mac’s hard drive is failing:
1. Listen for Unusual Noises
- Clicking, grinding, or whirring sounds coming from your Mac may indicate mechanical issues with the hard drive.
- SSDs are silent, so noises usually point to traditional HDD problems.
2. Check for Frequent Freezes or Crashes
- If your Mac frequently freezes, crashes, or displays the spinning beach ball, it could be a sign of hard drive trouble.
3. Slow Performance and File Access Issues
- Slow boot times, delayed file opening, or errors when saving files can indicate a failing drive.
4. Corrupted or Missing Files
- Files suddenly become corrupted or disappear without explanation.
5. Unexpected Disk Utility Errors
- Run Disk Utility (Finder > Applications > Utilities > Disk Utility).
- Select your hard drive and click First Aid.
- If errors appear that cannot be repaired, it may indicate drive failure.
6. Check SMART Status
- Macs monitor hard drive health using SMART (Self-Monitoring, Analysis, and Reporting Technology).
- In Disk Utility, select your drive and check the SMART Status at the bottom.
- Status showing “Failing” or “Verified” warnings means the drive is at risk.
7. Use Third-Party Diagnostic Tools
- Apps like DriveDx or TechTool Pro provide detailed health reports on your drive’s condition.
8. Look for Startup Problems
- Difficulty booting up or repeated restarts can be signs of a failing hard drive.
9. Check System Logs for Disk Errors
- Use the Console app (Finder > Applications > Utilities > Console) to look for disk-related error messages.
10. Backup Immediately
- If you notice any of these signs, back up your data immediately using Time Machine or another backup solution.
Key Takeaways
- Watch for warning signs like system crashes, slow performance, and strange noises that may indicate hard drive problems.
- Use Apple’s Disk Utility to check your hard drive health regularly by running First Aid and reviewing disk information.
- Back up your data consistently and consider replacing your drive when repair tools no longer fix persistent issues.
Identifying Hard Drive Failure Signs
Mac hard drives often show warning signs before they completely fail. Recognizing these indicators early can help you back up your data and replace the drive before losing important files.
Error Messages Related to Disk Failure
Mac computers display specific error messages when your hard drive starts failing. If you see messages like “The disk you inserted was not readable by this computer” or “Disk could not be repaired,” your drive might be in trouble.
You might also encounter an icon with a folder and question mark in the middle of your screen when turning on your Mac. This indicates your computer cannot find a working startup disk.
Many Mac disks include SMART technology (Self-Monitoring, Analysis, and Reporting Technology). You can check SMART status using Disk Utility:
- Open Finder
- Go to Applications > Utilities > Disk Utility
- Select your hard drive
- Look for “SMART Status” in the bottom section
If it says “Failing” instead of “Verified,” back up your data immediately.
Sudden and Frequent System Crashes
Unexpected crashes and freezes often point to hard drive issues. If your Mac frequently shows the spinning beach ball or suddenly restarts without warning, your drive might be failing.
Applications may quit unexpectedly or refuse to open at all. You might notice constantly bouncing icons in your dock that don’t respond when clicked.
The “kernel panic” screen (your Mac displays a black screen with text in multiple languages telling you to restart) can also indicate hard drive failure when it happens regularly.
If your Mac doesn’t complete the startup process or takes multiple attempts to boot, this suggests your drive is struggling to read the necessary files to operate.
Unusual Noises Indicating Mechanical Failure
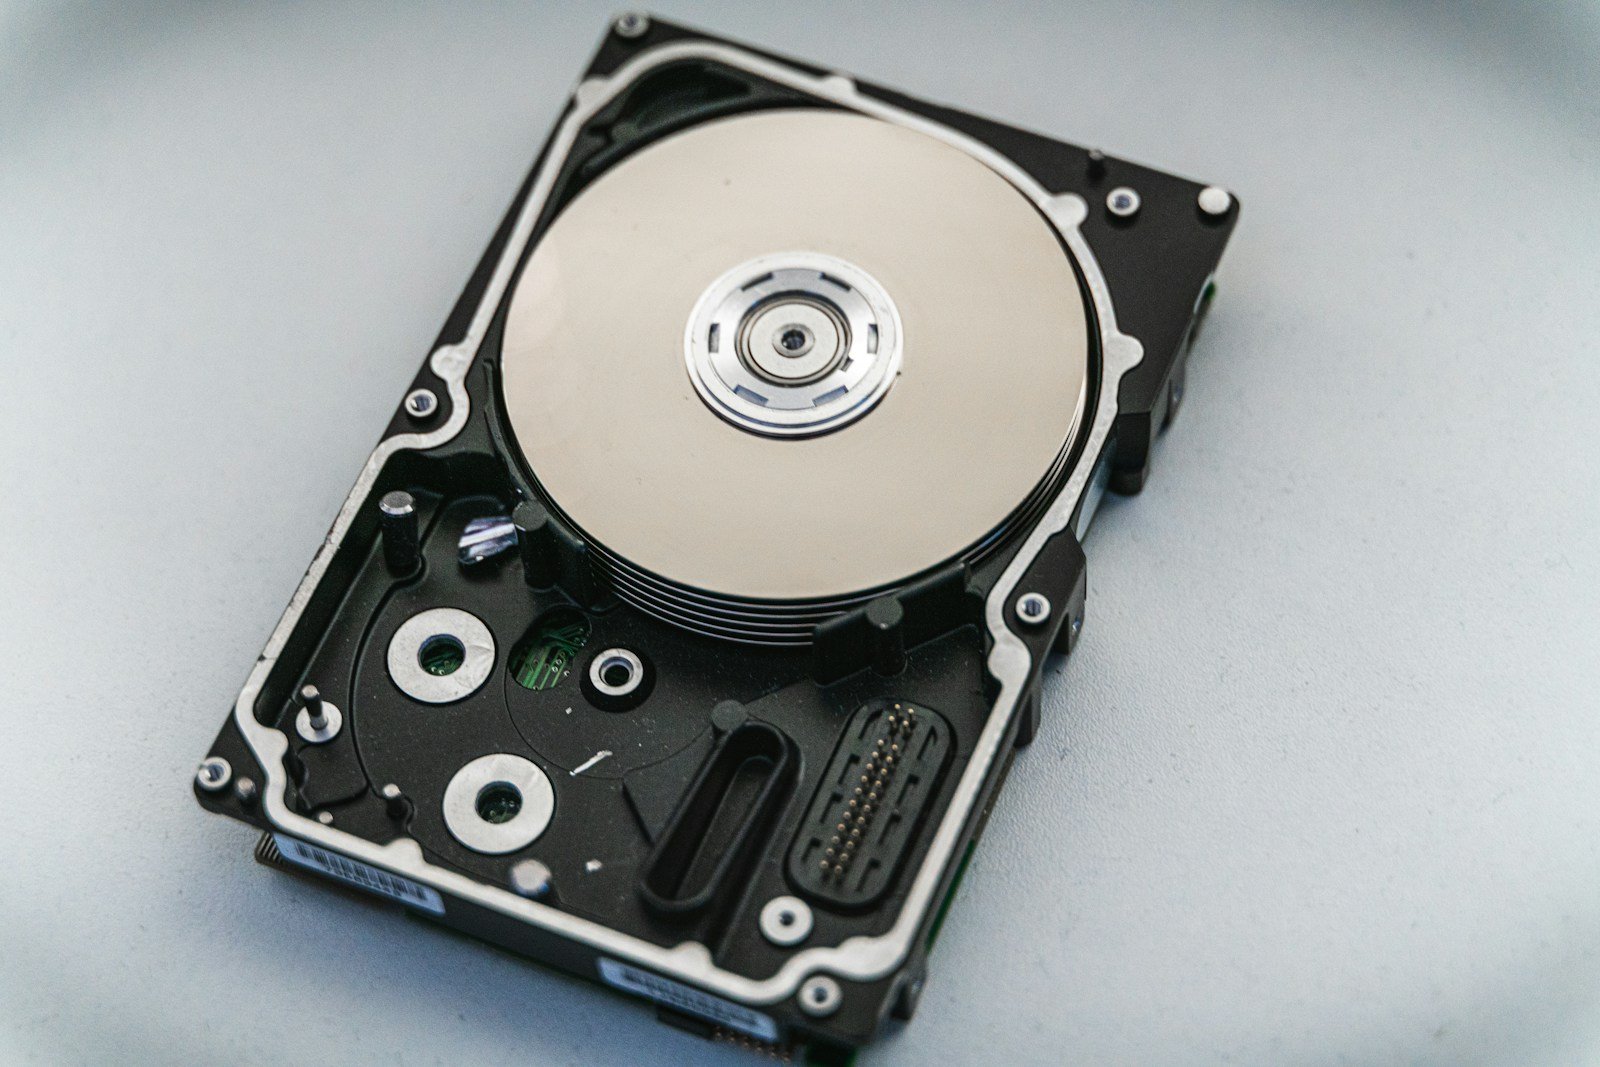
Strange sounds from your Mac often signal physical drive problems. Traditional hard disk drives (HDDs) contain moving parts that make distinct noises when failing.
Warning sounds to listen for:
- Clicking or ticking noises (often called the “click of death”)
- Grinding or scraping sounds
- Whirring followed by silence
- High-pitched whining
- Repetitive buzzing
These noises typically indicate mechanical parts breaking down inside the drive. When you hear these sounds, shut down your Mac immediately.
SSDs (Solid State Drives) don’t make these noises since they have no moving parts. However, unusual electrical buzzing from an SSD-equipped Mac might still indicate hardware problems.
Excessive Heat and Overheating Issues
Overheating can both cause and result from hard drive issues. A failing drive often works harder, generating more heat than normal.
Your Mac may feel unusually hot to touch, especially near the hard drive location. The cooling fan might run constantly at high speeds, creating more noise than usual.
Thermal issues can create a destructive cycle: heat damages the drive, causing it to work harder, which generates more heat. This cycle accelerates drive failure.
Check for blocked vents or dust buildup that might trap heat inside. While cleaning vents helps, persistent overheating despite good ventilation often points to drive problems.
Temperature monitoring apps can help you track if your Mac is running hotter than normal, giving you early warning of potential drive issues.
Inconsistent or Slow Performance
A dying hard drive often causes noticeable performance drops. Files may take much longer to open, save, or transfer than before. Your Mac might struggle with tasks it previously handled easily.
Degraded performance often appears as:
- Long delays when opening folders
- Extremely slow file copying
- Programs taking forever to launch
- System freezing during disk-intensive tasks
File corruption is another sign. Documents might open with missing data or strange characters. Photos and videos might appear glitchy or fail to open at all.
You might notice that running disk repair in Disk Utility takes an unusually long time or reports multiple errors. Repeated repair attempts that fail to fix issues strongly suggest a failing drive.
Using macOS Built-In Tools
Mac computers come with several powerful tools that can help you check if your hard drive is failing. These built-in utilities can identify problems before they lead to complete drive failure and data loss.
Utilizing Disk Utility for Health Checks
Disk Utility is the main tool Apple provides to manage and repair drives. You can find it in the Applications > Utilities folder or by searching in Spotlight. This app shows basic information about your drives and can identify common problems.
To check your drive’s health:
- Open Disk Utility
- Select your drive from the left sidebar
- Look at the information displayed at the bottom of the window
Disk Utility shows basic information like available space, used space, and file system type. It also provides a simple status indicator that may show warnings if there are obvious issues with your drive.
Disk Utility can reveal problems like corrupted files or directory issues that might indicate drive failure.
Running First Aid in Disk Utility
First Aid is a repair tool built into Disk Utility that can fix many common drive problems. It checks the disk for errors and attempts to repair any issues it finds.
To run First Aid:
- Open Disk Utility
- Select your drive in the sidebar
- Click the “First Aid” button in the toolbar
- Click “Run” to begin the checking process
During the scan, First Aid will report any problems it finds. Minor issues can often be fixed automatically. More serious problems might require additional steps.
If First Aid reports “The volume appears to be OK,” your drive has passed the basic check. But this doesn’t guarantee the drive is physically healthy.
For serious issues, First Aid might recommend backing up your data and reformatting the drive. This is a strong sign that your drive may be failing.
Assessing SMART Status via Disk Utility
SMART (Self-Monitoring, Analysis, and Reporting Technology) is a monitoring system built into most modern hard drives. It tracks various indicators of drive health.
- Open Disk Utility
- Select your drive (not a volume) in the sidebar
- Click the “Info” button in the toolbar
- Look for the “SMART Status” field
The SMART status will typically show one of these results:
- Verified: The drive is working properly
- Failing: The drive is having problems and may fail soon
- Not Supported: Your drive doesn’t support SMART monitoring
If you see SMART status is “Failing,” you should immediately back up your data. This is one of the clearest warnings that a drive is about to fail.
Leveraging Command Prompt for System Errors
Terminal (Mac’s command prompt) provides powerful tools for checking drive health that aren’t available in the graphical interface.
To check drive status via Terminal:
- Open Terminal from Applications > Utilities
- Type
diskutil listand press Enter to see all drives - Find your drive’s identifier (like disk0 or disk1)
- Type
diskutil verifyDisk disk0(replacing disk0 with your drive’s identifier)
Terminal will run a verification and report any errors it finds. You can also use the more thorough FSCK (File System Consistency Check) command in recovery mode.
For a deeper check:
- Restart your Mac
- Hold Command+R during startup to enter Recovery Mode
- Open Terminal from the Utilities menu
- Run
fsck -fy /dev/disk0(replacing disk0 with your drive)
Terminal commands can find errors that Disk Utility might miss. Repeated error messages about the same sectors often indicate a failing drive.
Preventive Measures and Regular Maintenance
Taking care of your Mac’s hard drive requires consistent attention and proactive steps. Regular maintenance can extend your drive’s life and help you avoid unexpected failures.
Scheduling Regular Backups with Time Machine
Time Machine is Apple’s built-in backup solution that makes protecting your data simple. To set it up:
- Connect an external drive to your Mac
- Go to System Preferences > Time Machine
- Click “Select Backup Disk” and choose your external drive
- Toggle Time Machine “On”
Once activated, Time Machine automatically creates hourly backups for the past 24 hours, daily backups for the past month, and weekly backups for previous months. This schedule ensures you always have recent copies of your files.
You can customize which folders to exclude from backups if you have limited storage space. Click the “Options” button in Time Machine preferences to select folders you don’t need to back up.
Time Machine also lets you restore individual files or your entire system. If your hard drive fails, you can use these backups during a fresh macOS installation.
Ensuring Data Redundancy with iCloud
iCloud offers an additional layer of protection by storing your important files in the cloud. Apple provides 5GB of free storage, with paid plans for more space.
To maximize iCloud protection:
- Enable iCloud Drive in System Preferences > Apple ID > iCloud
- Choose “Desktop & Documents Folders” to sync these important locations
- Set up Photos to store your entire library online
iCloud automatically syncs your data across all Apple devices. This means even if your Mac’s hard drive fails completely, you can access your files from another device.
For critical files, consider using both Time Machine and iCloud. This dual-backup strategy creates better protection against data loss.
Monitoring Disk Health to Anticipate Issues
Regular health checks can help you spot drive problems before they cause data loss. macOS includes built-in tools to check if a disk is about to fail.
Use Disk Utility monthly:
- Open Disk Utility from Applications > Utilities
- Select your hard drive from the sidebar
- Click “First Aid” and run the diagnostic tool
- Check SMART status by clicking the “Info” button in the toolbar
Third-party apps like Disk Drill offer more advanced monitoring. These tools can track read/write errors and alert you to potential failures.
Watch for warning signs like unusual noises (clicking or grinding), slow performance, or frequent app crashes. These can indicate your drive is developing problems.
External Software and Recovery Solutions
When your Mac hard drive shows signs of failure, external tools can help recover data and fix problems. These specialized programs offer features that go beyond Apple’s built-in utilities.
Using Disk Drill for Data Recovery
Disk Drill is a powerful software that can rescue files from failing Mac hard drives. This tool scans your drive and recovers deleted or lost files even when the disk is damaged.
To use Disk Drill:
- Download and install Disk Drill from the official website
- Launch the application and select your failing drive
- Click “Recover” to begin the scanning process
- Preview recoverable files before saving them
- Save recovered data to a different drive
Disk Drill works with various file types including photos, videos, documents, and music files. It can recover data from corrupted files and partitions that no longer mount properly.
The program offers both quick and deep scan options. Deep scans take longer but find more files on severely damaged drives.
Repairing Bad Sectors with Chkdsk Command
Though primarily a Windows tool, Mac users can run chkdsk through Terminal or Boot Camp to fix bad sectors on external drives or Windows partitions.
Bad sectors are damaged areas on your hard drive that can’t store data reliably. They often cause slow performance and crashes.
To run chkdsk on a Windows partition:
- Boot into Windows using Boot Camp
- Open Command Prompt as administrator
- Type “chkdsk C: /f /r” (replace C: with your drive letter)
- Wait for the scan and repair process to complete
The “/f” flag fixes errors, while “/r” locates bad sectors and recovers readable information. This process can take several hours for large drives.
Partition Management with EaseUS Partition Master
EaseUS Partition Master helps manage disk partitions when your Mac’s drive is failing. This tool can resize, move, merge, and recover partitions without data loss.
When a drive fails, partitions may become inaccessible or corrupted. EaseUS Partition Master can:
- Recover deleted or lost partitions
- Fix partition errors without formatting
- Move data to safer parts of the drive
- Resize partitions to avoid bad sectors
The software includes a “Check Partition” feature that detects and repairs errors. This can sometimes fix drives that appear unreadable in Disk Utility.
For serious hard drive failure, the partition recovery wizard can scan the entire drive and rebuild the partition table. This often makes previously invisible data accessible again.
Understanding the Role of the Startup Disk
Your Mac’s startup disk is the heart of your system, storing macOS and all your essential files. When this disk starts to fail, it can cause serious problems with your computer’s performance and reliability.
Factors Leading to Startup Disk Problems
The startup disk on a Mac can face several issues that might lead to failure. One common problem is when the disk becomes too full. When your startup disk reaches its storage limit, macOS cannot function properly, leading to slow performance or crashes.
Physical damage is another concern. Dropping your Mac or exposing it to extreme temperatures can harm the hard drive components.
Age also matters. Most hard drives have a lifespan of 3-5 years, after which they become more prone to failure.
Software issues like corrupted files or incomplete updates can damage the disk structure. These problems may start small but can grow worse over time.
You might notice warning signs such as:
- Frequent freezing or crashing
- Unusual noises from the computer
- Files becoming corrupted
- Very slow startup times
Optimizing the Startup Disk to Prevent Failures
Regular maintenance can help prevent startup disk failures. Running Disk Utility’s First Aid tool can fix minor issues before they become serious problems. This built-in tool checks for errors and repairs disk permissions.
Checking your disk’s SMART status is crucial for early detection. In Disk Utility, select your disk and look at the SMART status. If it says “Verified,” your disk is healthy. If it shows “Failing,” back up your data immediately.
Keep at least 15% of your startup disk free. Delete unnecessary files, empty the trash, and move large files to external storage when possible.
Install macOS updates promptly. These updates often include fixes for disk-related issues and improve system stability.
Back up your data regularly using Time Machine or another backup solution. This won’t prevent failures, but it protects your information if your disk does fail.
When to Consider Hardware Replacement
Sometimes fixing your Mac’s hard drive isn’t the best option. Knowing when to replace your drive rather than repair it can save you time, money, and future frustration.
Recognizing End-of-Life Symptoms of a Mac Hard Drive
Your Mac will often show clear signs that the hard drive is beyond repair. Unusual noises like clicking, grinding, or whirring sounds from your computer are serious warning signs. These sounds typically indicate physical damage to the drive components.
Frequent system crashes that happen even after software reinstallation point to hardware problems. If your Mac shows a folder with a question mark during startup, your drive may no longer be recognized by the system.
Key indicators it’s time to replace:
- Drive fails multiple disk utility repair attempts
- Data recovery becomes increasingly difficult
- Mac is over 5-7 years old with original hard drive
- Computer performance remains poor after system optimization
Apple’s Hardware Test may not always detect hard drive problems. The test mainly checks sensors and fans, not drive integrity.
Upgrading to an External Hard Drive for Enhanced Performance
Adding an external hard drive offers a smart solution for aging Mac systems. External drives provide immediate storage expansion without complex internal hardware changes.
Modern external drives connect through USB-C or Thunderbolt ports, offering speeds almost matching internal drives. This makes them practical for daily use, not just backups.
Benefits of external drives:
- Easy setup with plug-and-play functionality
- No need to open your Mac’s case
- Can move between different computers
- Available in SSD options for faster performance
- Various capacity options to fit your needs
When choosing an external drive, look for models with at least USB 3.0 compatibility. SSD external drives cost more but deliver significantly better speed than traditional spinning drives.
You can use Disk Utility to format and partition your new external drive according to your needs. Many users find that an external SSD breathes new life into an older Mac system.
Frequently Asked Questions
Mac hard drive issues can show up in various ways. These problems range from strange noises to system slowdowns, and catching them early might save your data.
What are the signs of a failing Mac hard drive?
A failing Mac hard drive often shows several warning signs. Your Mac might freeze, crash, or take longer to start up than normal.
Strange noises like clicking or buzzing from your computer are major red flags. These sounds often mean physical problems with the drive components.
You might also notice your Mac unable to load past the Apple logo screen during startup. This happens when the system can’t read crucial data from the drive.
Which utilities can be used to perform Mac hard drive diagnostics?
Disk Utility is the main built-in tool for checking drive health. To use it, open Applications, then Utilities folder, and select Disk Utility.
Once open, select your disk and click the Info button in the toolbar. This shows details about your drive’s health status.
You can also use Disk Utility to repair disk issues by selecting your internal hard drive and clicking “Repair disk.”
How can I check Mac hard drive health using Terminal commands?
Terminal offers powerful commands for checking drive health. The “diskutil” command provides detailed information about your drives.
Type “diskutil list” to see all drives connected to your Mac. This helps identify which drive you need to check.
For SMART status checking, type “diskutil info disk0 | grep SMART” (replace disk0 with your drive identifier). This quickly shows if your drive is failing.
What does it mean when a Mac’s hard drive SMART status is not supported?
SMART (Self-Monitoring, Analysis, and Reporting Technology) helps track drive health. When it shows “not supported,” your Mac can’t check the drive’s internal sensors.
This often happens with external drives or SSDs from third-party manufacturers. It doesn’t always mean the drive is bad.
However, without SMART data, you’ll need to watch for other warning signs like slow performance or strange noises.
How can the condition of an external hard drive connected to a Mac be assessed?
External drives can be checked using Disk Utility just like internal drives. Connect the drive, open Disk Utility, and select it from the sidebar.
Run First Aid on the external drive to check for and fix errors. This process scans the drive and repairs minor issues.
Pay attention to how the drive performs during file transfers. Slow speeds or disconnections often signal problems with external drives.
What indicators suggest imminent hardware failure in a Mac computer?
System crashes that happen more often point to failing hardware. If your Mac freezes during normal tasks, the hard drive might be failing.
Disk Utility returning error alerts during checks is a serious warning. These errors often mean the drive has bad sectors or other physical problems.
Overheating is another warning sign. A failing hard drive can cause your computer to run hot as it struggles to read data.


