
Getting your hands on a new Mac is thrilling. The sleek design and powerful system opens up a world of possibilities for work and play. Setting up your Mac the right way from the start can save you time and make your computing experience much more enjoyable.
When you first unbox your Mac, you might be tempted to just jump in and start using it. But taking a few minutes to customize settings can make a big difference. Some people like to adjust mouse settings and enable features like “Tap to Click” right away. Others focus on installing essential apps or setting up security measures.
If you’re switching from an old computer, you’ll want to make sure all your data comes with you. Apple makes this simple with built-in tools. Don’t forget the importance of signing out of services like iCloud and iTunes on your old device if you’re making a switch.
Essential Mac Setup Tips to Get Started Right
Your new Mac is ready to go right out of the box—but a few smart setup steps can unlock its full potential from day one. Whether you’re upgrading from another Mac or switching from Windows, these tips will help you tailor your machine to your workflow, boost productivity, and avoid common pitfalls.
1. Configure System Settings the Smart Way
Start by heading to System Settings (formerly System Preferences on older macOS versions). Here’s where you can tweak macOS to suit your preferences.
- Trackpad & Mouse: Enable tap to click, adjust tracking speed, and enable three-finger drag under Accessibility for better multitasking.
- Dock & Menu Bar: Shrink the dock size, enable auto-hide, and customize which icons appear in the menu bar.
- Hot Corners: Use corners of your screen to trigger actions like launching Mission Control or locking your Mac.
| Setting | Recommended Change | Benefit |
|---|---|---|
| Trackpad > Tap to Click | On | Easier clicking experience |
| Displays > Night Shift | Scheduled | Reduces eye strain |
| Control Center > Battery | Show in Menu Bar | Quick battery check |
2. Install These Must-Have Apps First
macOS comes with some solid built-in tools, but third-party apps will supercharge your experience. Here are the essentials for most users:
Productivity
- Notion or Obsidian – Organize notes and tasks
- Microsoft Office / LibreOffice – For document editing
- Spark or Airmail – Better email management
Utilities
- Magnet or Rectangle – Window snapping and layout control
- Alfred – Advanced search and automation (a better Spotlight)
- iStat Menus – System monitoring in your menu bar
Creative Tools
- Pixelmator Pro or Affinity Photo – Alternatives to Photoshop
- DaVinci Resolve or Final Cut Pro – Professional-grade video editors
You can install many of these quickly using Homebrew, a package manager for macOS. After installing Homebrew, run:
brew install --cask rectangle alfred istat-menus
3. Set Up iCloud and Optimize Storage
iCloud integration is one of the biggest benefits of using a Mac, but it’s worth fine-tuning:
- Enable Desktop & Documents syncing if you want access across devices.
- Turn on iCloud Keychain for automatic password management.
- In System Settings > Apple ID > iCloud > Optimize Mac Storage to save space by offloading older files.
If you use external cloud services like Dropbox, Google Drive, or OneDrive, make sure their sync folders are set up correctly so they don’t conflict with iCloud storage locations.
4. Create Custom Keyboard Shortcuts
macOS lets you remap or create app-specific keyboard shortcuts, which can drastically improve speed and workflow.
Go to:System Settings > Keyboard > Keyboard Shortcuts
For example:
| App | Action | Custom Shortcut |
|---|---|---|
| Safari | Show Downloads | ⌘ + Shift + D |
| Finder | New Folder | ⌘ + Shift + N |
| Notes | Start Dictation | Fn (press twice) |
You can even use Karabiner-Elements for deeper key remapping.
5. Use Focus Modes and Do Not Disturb
In macOS Sonoma and newer, you can customize Focus Modes for work, personal time, or sleep:
- Silence notifications during meetings or writing sessions
- Link specific Focus modes with app or website restrictions
- Set Focus mode to auto-enable when using certain apps (like Zoom)
Find these under:System Settings > Focus
Set up multiple modes like:
| Focus Mode | Active Apps | Blocked Apps | Scheduled Time |
|---|---|---|---|
| Work | Safari, Notion | Messages, Slack | Weekdays 9am–5pm |
| Study | Preview, Obsidian | Twitter, YouTube | Weeknights 6pm–8pm |
6. Master Mission Control and Spaces
macOS’s multitasking features are powerful once you learn them:
- Mission Control (F3 or swipe up with three fingers) shows all open windows.
- Spaces let you set up multiple desktops—for example, one for work, one for personal.
- Split View allows you to work in two apps side by side.
Drag a window to the top of the screen or click and hold the green full-screen button to enter Split View.
Tip: Use Control + Arrow keys to switch between desktops quickly.
7. Enable FileVault and Adjust Privacy Settings
Security is key—especially on laptops.
- Turn on FileVault to encrypt your drive (System Settings > Privacy & Security > FileVault)
- Limit app access to your camera, microphone, and location
- Use Lock Screen > Require Password Immediately when waking your Mac
8. Customize Finder for Efficiency
Finder can feel clunky by default—make it work for you.
- Set your preferred default folder (e.g., Downloads or a custom Projects folder)
- Show file extensions:
Finder > Settings > Advanced > Show all filename extensions - Use Tags and Smart Folders for fast organization
You can also add a Quick Action to Finder’s right-click menu—for example, compressing images or converting PDFs.

Most Useful macOS Keyboard Shortcuts
| Shortcut | Action | Notes |
|---|---|---|
| ⌘ + Space | Spotlight Search | Quick app & file access |
| ⌘ + Tab | App Switcher | Cycle through open apps |
| Control + ↑ | Mission Control | View all desktops & windows |
| Control + ↓ | App Exposé | View all windows of current app |
| ⌘ + Shift + 4 | Screenshot Tool | Drag to capture part of the screen |
| ⌘ + Option + Esc | Force Quit | Use if an app becomes unresponsive |
| ⌘ + H | Hide current window | Keeps desktop tidy |
| ⌘ + W | Close current window | Not the same as quitting the app |
| ⌘ + Q | Quit current app | Fully exits the app |
| Control + ⌘ + Q | Lock Screen | Fast way to lock your Mac |
Customize shortcuts or add your own in:System Settings > Keyboard > Keyboard Shortcuts
Recommended Menu Bar Tools
These tools sit quietly in your menu bar and give you control or information at a glance:
| App | What It Does | Free? |
|---|---|---|
| iStat Menus | Real-time CPU, RAM, fan, temp monitoring | No (free trial) |
| Magnet / Rectangle | Drag-and-snap window manager | Rectangle: Yes |
| Bartender | Hides/organizes menu bar clutter | No (free trial) |
| Hidden Bar | Minimalist app to hide icons | Yes |
| Vanilla | Similar to Hidden Bar, very lightweight | Yes |
| Dropzone | Quick access to file actions (FTP, AirDrop, folders) | No |
| Moom | Advanced window management with grids | No |
If you love a tidy workspace or want to monitor system performance, a few of these tools can dramatically change how your Mac feels.
Automation Ideas with Shortcuts App
Apple’s Shortcuts app lets you build custom automations without coding. Here are some powerful examples you can set up:
| Shortcut Name | What It Does | Trigger Type |
|---|---|---|
| Start Work Mode | Opens Mail, Slack, Notion, and enables Focus mode | Manual or Time |
| Resize & Rename Screenshots | Automatically resizes and renames screenshot files | Finder Quick Action |
| Auto-Connect to Work VPN | Connects VPN and launches secure apps | Wi-Fi SSID-based |
| PDF Combiner | Merges selected PDFs in Finder into one file | Finder Services |
| Morning Briefing | Reads you weather, calendar events, and reminders | Scheduled or Siri |
To get started, open the Shortcuts app > Gallery to explore pre-made options, or click the + to create your own.
Key Takeaways
- Customizing your Mac’s settings right away improves your daily computing experience.
- Backing up data and transferring files should be done carefully to avoid losing important information.
- Setting up security measures and learning basic shortcuts will save time and protect your investment.
Setting Up Your New Mac
Getting your new Mac ready involves several key steps from unboxing to connecting your accounts. These simple procedures will help you start using your Mac quickly and make it feel like your own.
Unboxing and Initial Setup
Take your Mac out of the box carefully and place it on a clean desk. Press the power button to turn it on. You’ll hear a startup sound and see the Apple logo.
The setup assistant will guide you through the first steps. Select your country and preferred keyboard layout when prompted.
Connect to your Wi-Fi network by selecting it from the list and entering your password. This lets your Mac download updates and verify your Apple ID.
You’ll need to create or sign in with your Apple ID. This account connects you to the App Store, iMessages, and other Apple services.
Choose whether to enable location services. This helps apps like Maps and Weather provide relevant information.
You can transfer data from another Mac, a Time Machine backup, or set up as new. Using Migration Assistant can save time by moving your files and settings automatically.
Understanding macOS Ventura
macOS Ventura brings new features to make your Mac more powerful. The desktop has a clean look with a customizable dock for your favorite apps.
Stage Manager is a new way to organize open apps. It keeps your current app in the center while others wait on the side. Click any app to bring it forward instantly.
Spotlight search is improved in Ventura. Press Command + Space to search for files, apps, or information from the web. It now shows richer results with photos and quick actions.
Continuity Camera lets you use your iPhone as a webcam. Your Mac recognizes your iPhone automatically when nearby. This gives you better video quality for calls.
Focus modes help you concentrate. Set up different focuses for work, personal time, or sleep. Each mode controls which notifications you receive.
Messages app now lets you edit or unsend recent messages. You can also mark conversations as unread to remember to check them later.
Configuring System Preferences
Open System Preferences from the Apple menu in the top-left corner. This is where you control how your Mac works.
Display settings let you adjust brightness, resolution, and night shift. Night shift reduces blue light in the evening to help you sleep better.
Mouse and trackpad settings can be customized to your liking. Many users prefer to turn off natural scrolling for a more familiar experience.
Sound preferences control volume levels and alert sounds. You can also select output devices here if you use external speakers.
Energy Saver settings help extend battery life. Set your display to sleep after a few minutes of inactivity.
Security & Privacy options protect your data. Enable FileVault to encrypt your disk and set up a strong password.
Software Update checks for the latest macOS version. Keep your system updated for the best performance and security.
Setting Up User Accounts
Create separate user accounts if multiple people use your Mac. Go to System Preferences and select Users & Groups.
Click the lock icon and enter your password to make changes. Then click the + button to add a new user.
Choose between three account types:
- Administrator: Can install apps and change settings
- Standard: Uses apps but can’t change important settings
- Managed: Has limited access, good for children
Each user gets their own Home folder with private documents, photos, and settings. Files in the Shared folder are accessible to everyone.
Set up a strong password for each account. Mix letters, numbers, and symbols for better security.
Enable Fast User Switching from the Users & Groups menu. This lets users switch accounts without closing apps.
Consider setting up Screen Time limits for children’s accounts to manage their computer use.
Connecting to iCloud
iCloud connects all your Apple devices and keeps your data in sync. Sign in with your Apple ID in System Preferences.
Choose which services to enable:
- iCloud Drive stores documents
- Photos syncs your photo library
- Mail connects your Apple email
- Contacts keeps your address book current
- Calendar syncs appointments
- Notes shares your notes across devices
Setup iCloud Keychain to securely store passwords. Your login details will be available on all your Apple devices.
Turn on Find My Mac to locate your computer if it’s lost. This feature can also lock or erase your Mac remotely.
iCloud gives you 5GB of free storage. You can buy more if needed by clicking Manage Storage in iCloud preferences.
Desktop and Documents sync puts these folders in iCloud. This lets you access these files from your iPhone or iPad.
Transferring Data to Your New Mac
Getting all your files, apps, and settings to your new Mac doesn’t have to be stressful. Apple provides several built-in tools that make the transition smooth, while third-party options offer even more flexibility.
Using Migration Assistant
Migration Assistant is Apple’s built-in solution for moving everything from your old Mac to your new one. It transfers documents, apps, user accounts, and settings without deleting anything from your old computer.
To use Migration Assistant:
- Connect both Macs to the same network or use a Thunderbolt cable for faster transfers
- Open Migration Assistant on both computers (found in Applications > Utilities)
- Follow the prompts to select what you want to transfer
You can transfer from a Time Machine backup, another Mac, or even a PC. The process may take several hours depending on how much data you have.
Migration Assistant works anytime—not just during initial setup. You can use it later if you need to move additional information.
Manual Data Transfer Methods
Sometimes a targeted approach works better than moving everything at once. Manual transfers give you control over exactly what moves to your new Mac.
External drives offer a simple solution. Just copy your important files to an external drive, then connect it to your new Mac and copy them over.
Cloud services like iCloud Drive, Dropbox, or Google Drive can also work well. Upload files from your old computer and download them on the new one.
For photos and music, you might use:
- Photos app syncing through iCloud
- Music app with Apple Music subscription
- AirDrop for wireless transfers between Macs
Manual transfers let you be selective and avoid bringing over unnecessary files. This approach works best for people who want a fresh start on their new Mac.
Setting Up Time Machine
Time Machine isn’t just for backups—it’s also a powerful tool for moving to a new Mac. This built-in backup system makes transferring data simple and reliable.
To set up Time Machine:
- Connect an external drive to your old Mac
- Open Time Machine preferences in System Settings
- Select your drive and turn on backup
Once you have a backup, you can use it with Migration Assistant during your new Mac’s setup. Time Machine preserves your folder structure and keeps file versions intact.
The big advantage of Time Machine is that it creates a complete system snapshot. This means you can recover specific files even if you choose not to transfer everything right away.
For ongoing protection, connect your Time Machine drive to your new Mac after the transfer. This ensures your data stays safe as you begin using your new computer.
Cloning Your Drive with Carbon Copy Cloner
For an exact copy of your old Mac, Carbon Copy Cloner creates bootable backups that can transfer everything perfectly. This third-party app offers more control than Apple’s built-in options.
The cloning process creates an exact duplicate of your startup disk. This means your new Mac can look and function exactly like your old one, down to the smallest detail.
Key benefits include:
- Complete system copies with all settings intact
- Bootable backups you can run directly if needed
- Scheduling options for regular updates
Carbon Copy Cloner works especially well for power users with complex setups. The software lets you exclude specific files or folders, which helps avoid transferring unnecessary system files.
After creating your clone, you can use Migration Assistant to transfer from it, or restore specific files as needed. Many users find this combination provides the perfect balance of completeness and control.
Optimizing Your Workspace
Setting up your Mac’s digital workspace efficiently can save you hours of frustration and boost your productivity. A well-organized Mac makes finding files faster and helps you focus on what matters most.
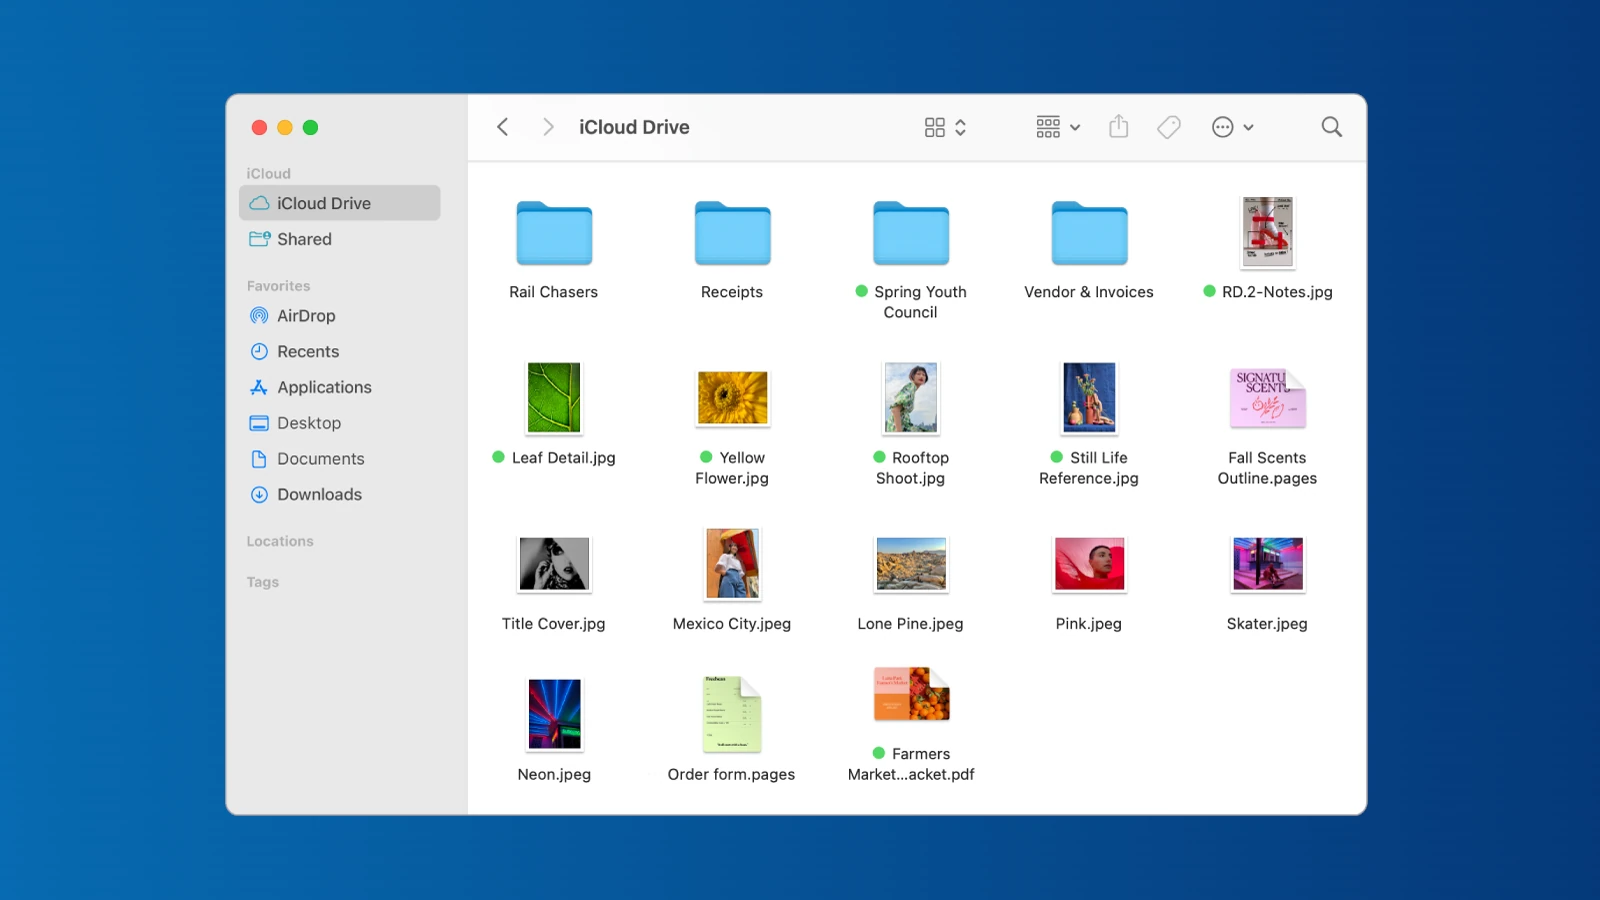
Customizing the Finder
The Finder is your gateway to all files on your Mac. To make it work better for you, customize the sidebar by dragging your most-used folders there. Right-click on the toolbar and select “Customize Toolbar” to add helpful buttons like Path, New Folder, or Delete.
Change the view options by pressing Command+1 for icon view, Command+2 for list view, Command+3 for column view, or Command+4 for gallery view. Column view is great for browsing through nested folders quickly.
Set up smart folders that automatically collect files based on rules you create. For example, create a smart folder that shows all documents modified in the last week.
Make Finder open to your preferred location by going to Finder > Settings > General and choosing a specific folder in the “New Finder windows show:” dropdown.
Organizing Files with Stacks and Tags
Stacks keep your desktop tidy by automatically grouping similar files together. Right-click on your desktop and select “Use Stacks” to turn this feature on. Files will group by type, date, or tags.
Tags add color-coding to your files for quick visual sorting. Add tags by:
- Right-clicking a file
- Selecting a tag color
- Or creating custom tags in Finder preferences
You can search for files by tag in the Finder search bar or sidebar. This works especially well for projects that have different file types but belong together.
Combine tags with smart folders to create powerful automatic organization systems. For instance, tag all tax documents with “Taxes” and filter by year.
Try using the “Favorites” tag for current projects to find them quickly without browsing through folders.
Using Desktop Spaces Efficiently
Desktop Spaces let you create multiple virtual desktops for different tasks or projects. Create a new space by pressing Control+Up Arrow, then clicking the + icon in the top bar.
Assign specific apps to always open in certain spaces. This keeps work apps separate from personal ones. To do this:
- Right-click an app in the Dock
- Go to Options > Assign To
- Choose This Desktop, All Desktops, or None
Switch between spaces with a three-finger swipe left or right on the trackpad or by pressing Control + left/right arrow. You can also use Mission Control (F3) to see all spaces at once.
Name your spaces by Control+clicking the space in Mission Control for better mental organization. Keep related apps grouped in each space to stay focused.
Connecting External Displays
External displays boost productivity by giving you more screen space. Connect monitors using Thunderbolt, USB-C, or HDMI ports, depending on your Mac model.
Arrange displays in System Settings > Displays > Arrangement by dragging the blue rectangles to match your physical setup. The white bar shows which display has the menu bar.
Set display scaling to find the right balance between screen space and readability. “Default for display” usually works best, but you might prefer “More Space” for professional work.
Use different desktop backgrounds for each display to visually distinguish them. This helps your brain quickly identify which screen is which when moving between them.
Try display modes like “Mirror Displays” for presentations or “Extend Display” for maximum workspace. You can toggle these in the Displays settings or by holding Option while clicking the Displays icon in Control Center.
Mastering macOS Shortcuts and Gestures
Learning the right keyboard commands and trackpad moves will make you much faster on your Mac. These time-saving techniques help you work smoothly without constantly reaching for your mouse.
Keyboard Shortcuts
The most important keyboard shortcuts can save you hours of work time. Start with the basics:
- Copy: Command (⌘) + C
- Paste: Command (⌘) + V
- Cut: Command (⌘) + X
- Save: Command (⌘) + S
- Undo: Command (⌘) + Z
For system control, try these:
- Sleep: Option + Command + Power button
- Force quit apps: Option + Command + Esc
- Screenshot: Shift + Command + 3 (full screen) or 4 (selection)
Most Mac apps have their own special shortcuts. Look under the menu items to find them – they appear on the right side of each menu option.
Application switching is super quick with Command + Tab. Hold Command and keep pressing Tab to cycle through open apps.
Trackpad and Mouse Gestures
Mac trackpad gestures make navigation quick and fun. Try these essential moves:
Two-finger gestures:
- Scroll up/down and sideways
- Right-click (tap with two fingers)
- Zoom in/out (pinch with thumb and finger)
Three-finger gestures:
- Swipe up: Show all open windows (Mission Control)
- Swipe left/right: Switch between full-screen apps
- Drag: Move selected items
Four-finger gestures:
- Pinch: Open Launchpad
- Spread: Show desktop
- Swipe left/right: Switch between desktops
You can customize these in System Preferences under Trackpad. Try changing the settings to match your work style.
Using Spotlight for Quick Searches
Spotlight is a powerful search tool built into every Mac. Press Command + Space to open it, then type what you need.
Spotlight finds:
- Files and folders
- Emails and messages
- Calendar events
- Apps
- Web searches
- Math calculations
- Definition lookups
For example, type “2+2” for a quick calculation or “weather” to see the forecast. Type an app name to launch it instantly.
Spotlight also shows file previews. Click the file in search results, then press Space to peek at the content without opening it.
You can narrow searches with keywords like “kind” to find only PDF files, or “date” for today’s items.
Creating Custom Shortcuts
Mac lets you make your own keyboard shortcuts for almost any command. This helps with tasks you do often.
To create custom shortcuts:
- Open System Preferences
- Go to Keyboard > Shortcuts
- Select an app or choose “App Shortcuts”
- Click the “+” button
- Select the app, type the exact menu command name, and set your shortcut
For example, you might create a shortcut for “Export as PDF” in your favorite app.
You can also use apps like Automator or Keyboard Maestro to make more complex shortcuts that run multiple steps with one command.
Custom shortcuts work best for tasks you do many times a day. Start with just a few until they become muscle memory.
Exploring Built-In Applications
Your Mac comes loaded with powerful applications designed to help you work efficiently. These apps offer impressive functionality without requiring additional downloads or purchases.
Using Preview for Documents and Images
Preview is far more than just a simple viewer. This versatile tool lets you open and edit PDFs and images right away.
With Preview, you can:
- Add signatures to documents
- Fill out PDF forms
- Crop and resize images
- Adjust color and brightness
- Merge multiple PDFs into one file
To add a signature, open a PDF in Preview, click the markup icon, and select the signature tool. You can create one using your trackpad or camera.
For basic image editing, open any image in Preview. The toolbar offers options to crop, rotate, or adjust colors. These simple edits often eliminate the need for more complex software.
Preview also excels at converting file formats. Users can easily save images as JPG, PNG, or other formats through the Export option in the File menu.
Navigating with Launchpad
Launchpad provides quick access to all the applications installed on your Mac. Think of it as your app dashboard.
To access Launchpad:
- Press F4 on newer Mac keyboards
- Pinch with thumb and three fingers on the trackpad
- Click the Launchpad icon in the Dock
Once open, you can organize apps into folders by dragging one app onto another. This helps keep similar applications grouped together.
Searching in Launchpad is simple. Just start typing the name of the app you’re looking for, and results appear instantly.
You can also remove apps by clicking and holding until icons begin to wiggle, then clicking the X. This only works for apps downloaded from the App Store.
Launchpad makes finding and launching apps quick and easy, especially for new Mac users who might be unfamiliar with the Applications folder.
Productivity with Microsoft Office for Mac
Microsoft Office provides essential tools for professional work on your Mac. The suite includes Word, Excel, PowerPoint, and Outlook.
Office for Mac offers several advantages:
- Cloud integration with OneDrive
- Real-time collaboration with colleagues
- Mac-specific features like trackpad gestures
- Seamless syncing between devices
Word for Mac includes Focus Mode, which removes distractions for better writing. Excel provides powerful data analysis tools with Mac-friendly interfaces.
PowerPoint takes advantage of Mac’s display capabilities for stunning presentations. The animations run smoothly on macOS.
Users can access Office through a Microsoft 365 subscription or one-time purchase. The subscription model provides regular updates and cloud storage.
Office files work perfectly across platforms, so sharing documents with Windows users won’t cause formatting problems.
Managing Photos and Videos
The Photos app on Mac helps organize and edit your visual memories with powerful yet simple tools.
Photos automatically sorts images by date and location, creating collections called Memories. These smart albums group related photos together without manual work.
Editing in Photos is straightforward:
- Basic adjustments (light, color, crop)
- One-click filters and effects
- Detailed editing with sliders
- Red-eye removal and retouching
The app syncs with iCloud, making photos available across all Apple devices. Changes made on one device appear everywhere.
For videos, QuickTime Player handles playback and basic editing. Users can trim clips, rotate videos, and even record screen activity.
iMovie offers more advanced video editing with themes, transitions, and text effects. The intuitive interface makes it easy for beginners to create impressive videos without professional training.
Enhancing Your Mac’s Performance
A fast Mac makes everything better. You can take several steps to keep your Mac running smoothly, from monitoring what’s using your resources to performing regular maintenance.
Monitoring System Activity
Activity Monitor is your first stop for checking Mac performance. This built-in tool shows you which apps use the most CPU, memory, energy, disk, and network resources.
To open Activity Monitor:
- Go to Applications > Utilities
- Click on Activity Monitor
- Review the different tabs to see what’s using your resources
When your Mac slows down, check which apps are hogging CPU power. If you see an app using a high percentage, consider closing it when not in use.
For Apple Silicon Macs (M4 and others), Activity Monitor shows efficiency core and performance core usage separately. This helps you understand how your M4 Mac balances tasks between high-performance and energy-efficient cores.
You can reduce startup items that automatically launch when you turn on your Mac. Fewer startup items means faster boot times.
Upgrading Hardware Components
Adding RAM and switching to an SSD are two of the most effective ways to speed up older Macs. However, newer M4 Macs and other Apple Silicon models have unified memory that can’t be upgraded after purchase.
For older Intel Macs:
- RAM upgrade: More memory lets you run more apps smoothly
- SSD installation: Much faster than traditional hard drives
For external performance boosts on any Mac:
- Use an external SSD as a boot volume for dramatic speed improvements
- Connect external drives via Thunderbolt for fastest data transfer
- Consider an eGPU for Intel Macs that need graphics processing power
When buying a new M4 Mac, select enough RAM upfront since you can’t upgrade later. The unified memory in Apple Silicon provides faster performance than traditional RAM setups.
Managing Storage Space
A full disk slows down your Mac significantly. macOS needs free space to create temporary files and virtual memory.
Check your storage:
- Click Apple menu > About This Mac > Storage
- Review the colored bar showing what’s using space
- Click “Manage” for optimization options
macOS offers built-in tools to help:
- Store in iCloud: Keeps files in iCloud and downloads them only when needed
- Optimize Storage: Removes already-watched movies and TV shows
- Empty Trash Automatically: Deletes trash items older than 30 days
You should keep at least 10% of your drive free for optimal performance. For a 512GB drive, aim for 50GB free space minimum.
Large files like videos and photos can be moved to external drives. Use Finder’s sort by size feature to find space-hogging files.
Regular Maintenance Tips
Regular maintenance keeps your Mac running at top speed. Schedule these tasks monthly:
- Update macOS: Newer versions often include performance improvements
- Run First Aid: Open Disk Utility and repair disk permissions
- Clear cache files: Remove unnecessary temporary files that build up
- Restart regularly: This clears RAM and refreshes system processes
For M4 Macs and other Apple Silicon models, reduce visual effects like transparency to improve performance. Go to System Settings > Accessibility > Display and enable “Reduce transparency.”
You can also reindex Spotlight if search is slow. Add your main drive to the Privacy tab in Spotlight settings, then remove it. This forces a fresh index.
Check for apps that run in the background. For example, backup software or cloud sync tools might slow your Mac without you noticing.
Securing Your Mac
Your new Mac comes with built-in security features that help protect your data and privacy. Taking a few simple steps now will keep your information safe and your Mac running smoothly for years to come.
Enabling FileVault Encryption
FileVault is Apple’s full-disk encryption feature that protects your data if your Mac is ever lost or stolen. To turn it on, go to System Settings > Privacy & Security > FileVault and click “Turn On.”
When you enable FileVault, you’ll need to choose how to recover your account if you forget your password. You can use your iCloud account or create a recovery key. Write down your recovery key in a safe place if you choose that option.
FileVault encrypts your entire drive with minimal impact on performance on modern Macs. The initial encryption process runs in the background while you use your computer.
Most people won’t notice any slowdown once encryption is complete. This feature is especially important for laptop users who might leave their Mac in a car, coffee shop, or other public places.
Setting Up Firewall and Antivirus
Your Mac’s built-in firewall helps block unwanted connections from other computers. To enable it, go to System Settings > Network > Firewall and click “Turn On.”
For extra protection, click “Firewall Options” and select “Block all incoming connections” to stop all sharing services from receiving incoming connections. You can still allow specific apps through the firewall as needed.
While Macs are generally safer than other computers, adding antivirus software provides another layer of security. Popular options include Malwarebytes, Avast, and Bitdefender.
Set up these additional security measures:
- Enable Find My Mac in System Settings
- Use strong, unique passwords for your accounts
- Turn on content and privacy restrictions with a PIN to prevent changes
- Review app permissions regularly in Privacy & Security settings
Backing Up with Time Machine
Time Machine automatically backs up your entire Mac, including system files, apps, accounts, preferences, music, photos, and documents. If you lose files or need to restore your entire system, Time Machine makes it easy.
To set up Time Machine:
- Connect an external drive to your Mac
- Go to System Settings > General > Time Machine
- Click “Select Backup Disk” and choose your drive
- Toggle Time Machine to “On”
Time Machine keeps hourly backups for the past 24 hours, daily backups for the past month, and weekly backups until your backup drive is full. When the drive fills up, Time Machine deletes the oldest backups to make room for new ones.
For the best protection, keep one backup drive at home and another in a different location. This protects your data even if your home is damaged.
Keeping macOS Updated
Regular updates to macOS Sequoia and other Apple software fix security issues and add new features. Apple releases security updates even for older macOS versions.
To check for updates, go to System Settings > General > Software Update. Click “Update Now” if updates are available. You can also enable automatic updates to install them without your input.
Major macOS updates (like upgrading to Sequoia) can be installed from the Software Update section or the App Store. Before big updates, back up your Mac with Time Machine first.
If your Mac has serious problems, you can reinstall macOS without erasing your data. Restart your Mac and hold Command+R until the Apple logo appears to enter Recovery Mode. Select “Reinstall macOS” and follow the prompts.
Keep your apps updated through the App Store or their built-in update features. Outdated software can have security flaws that put your data at risk.
Troubleshooting Common Issues
Even the best Macs can run into problems sometimes. Knowing how to fix common issues will save you time and frustration when something goes wrong.
Resetting SMC and PRAM/NVRAM
The System Management Controller (SMC) handles many hardware functions on your Mac. If you’re having issues with power, battery, fans, or display, resetting the SMC might help.
For Intel Macs, shut down your computer completely. Then press and hold Shift+Control+Option and the power button together for 10 seconds. Release all keys and turn on your Mac normally.
For M1/M2 Macs, simply shut down your computer. Wait 30 seconds, then restart.
PRAM/NVRAM stores settings like volume, display resolution, and startup disk selection. To reset it, shut down your Mac. Press the power button, then immediately hold Command+Option+P+R for about 20 seconds until you hear the startup sound twice.
These resets often fix weird behavior without needing technical knowledge.
Diagnosing Startup Problems
If your Mac won’t start up properly, try starting in Safe Mode. This loads only essential software and can help identify if an app is causing problems.
To enter Safe Mode on Intel Macs, restart and hold the Shift key until you see the login screen. For M1/M2 Macs, shut down completely, press and hold the power button until “Loading startup options” appears, select your startup disk, then press Shift while clicking “Continue in Safe Mode.”
You can also run Apple’s built-in diagnostic tools. Turn off your Mac, then turn it on while holding the D key (Intel) or power button (M1/M2) until you see the diagnostic screen. Follow the instructions to check for hardware problems.
Write down any error codes that appear. These codes help identify exactly what’s wrong.
Resolving Internet Connectivity Issues
Wi-Fi problems are common but usually easy to fix. First, try turning Wi-Fi off and on again in the menu bar.
If that doesn’t work, open System Settings > Network > Wi-Fi and click the minus (-) button to remove your connection. Then click the plus (+) button to add it back and reconnect.
Sometimes your router needs attention. Unplug it for 30 seconds, then plug it back in. Wait for it to fully restart before trying to connect.
For persistent issues, try these steps:
- Create a new network location in System Settings > Network
- Reset your Mac’s network settings
- Check for interference from microwave ovens or Bluetooth devices
- Move closer to your router for a stronger signal
Internet problems on public Wi-Fi networks often mean the network itself has issues, not your Mac.
Contacting Apple Support
When you can’t solve a problem yourself, Apple’s support team can help. Before calling, find your Mac’s serial number by clicking the Apple menu > About This Mac.
Apple offers several support options:
- Apple Support website: Search the knowledge base for solutions
- Support app: Download from the App Store for guided troubleshooting
- Phone support: Call 1-800-APL-CARE (1-800-275-2273) in the US
- Genius Bar: Make an appointment at an Apple Store
For hardware issues under warranty, Apple might fix or replace your Mac at no cost. AppleCare+ extends your coverage and includes accidental damage protection.
Keep your Mac backed up with Time Machine so you don’t lose data if you need to send your computer in for repairs.
Specialized Use Cases
Macs offer powerful capabilities for specific professions and hobbies. The right setup can transform your Mac into a specialized workstation that meets your exact needs.
Setting Up a Mac for Photography
Photographers benefit from Mac’s color accuracy and powerful image processing. Start by calibrating your display—crucial for accurate photo editing. On a MacBook Pro or iMac, use the built-in Display Calibrator Assistant found in System Preferences > Displays > Color.
Install essential photo editing apps:
- Adobe Lightroom
- Photoshop
- Capture One
- Affinity Photo
Set up external storage solutions for your photo library. Connect external SSDs or set up a NAS system for larger collections.
Create a folder structure that works for your workflow. Many photographers organize by date, client, or project type.
Enable Adobe RGB color profile for wider color gamut. This is especially important on the iMac with its P3 color display.
Customize keyboard shortcuts in your editing apps to speed up your workflow. The MacBook Pro‘s Touch Bar can be customized for photo editing tools too.
Optimizing Audio and Video Editing Workflows
For media creators, Mac setup requires attention to performance and storage. Start by allocating more RAM to your editing applications in Activity Monitor.
Essential software setup:
- Final Cut Pro or Adobe Premiere
- Logic Pro or Pro Tools
- DaVinci Resolve for color grading
Create a dedicated external SSD for project files. This keeps your MacBook Air or Mac mini running smoothly while editing.
Add external monitors to expand your workspace. The MacBook Pro can support multiple displays for timeline editing and preview windows.
Install codec packs for different video formats. Many editors need ProRes, H.265, and various camera-specific codecs.
Set up keyboard shortcuts that match your editing style. Custom shortcuts save hours over long editing sessions.
Consider an eGPU for older Macs to boost rendering performance. This can give new life to an aging MacBook Pro or desktop Mac.
Gaming on a Mac
While not traditional gaming machines, Macs can handle many games well. Start by checking which games are compatible with macOS through Steam or the App Store.
Install Steam, Epic Games Launcher, or Apple Arcade for access to game libraries. Apple Arcade offers 200+ games optimized for Mac.
For better performance:
- Close background apps
- Update graphics drivers
- Connect to power when gaming on MacBook Air or Pro
Consider using Boot Camp to install Windows for wider game compatibility. This works on Intel-based Macs only, not M-series chips.
Add a gaming mouse for better control. Many gaming mice now include Mac drivers for full functionality.
For cloud gaming, services like GeForce NOW and Xbox Cloud Gaming work well on Macs, bypassing hardware limitations.
Adjust display settings in System Preferences to match game requirements. Some games perform better in scaled resolution modes.
Programming and Development Environments
Setting up a Mac for coding starts with essential tools. Install Xcode from the App Store for iOS/macOS development and Command Line Tools.
Use package managers like Homebrew to easily install development tools:
/bin/bash -c "$(curl -fsSL https://raw.githubusercontent.com/Homebrew/install/HEAD/install.sh)"
Choose a terminal replacement like iTerm2 and customize it with Oh My Zsh for better productivity.
Install VSCode, Sublime Text, or JetBrains IDEs based on your programming languages. The MacBook Pro handles multiple IDEs well thanks to its higher RAM options.
Set up virtual environments for Python or Node.js to keep projects isolated. Tools like pyenv, nvm, and Docker are must-haves.
Configure Git and connect to GitHub or other repositories. The MacBook Air is perfect for coding on the go due to its portability and battery life.
Add useful browser extensions for web development like React and Redux DevTools.
Back up your work regularly with Time Machine or Git. This simple habit saves countless hours of rework.
Frequently Asked Questions
Many Mac users have common questions when setting up their new devices. These practical tips will help you get started and make the most of your Mac experience.
What are the first steps to setting up a new MacBook Pro?
When you get a new MacBook Pro, start by transferring data from your old computer. This ensures you don’t lose important files or settings.
Next, set up your Apple ID if you don’t already have one. Your Apple ID connects all your Apple services and enables features like iCloud.
Check for software updates right away. Click the Apple menu and select “System Preferences” then “Software Update” to make sure your Mac has the latest features and security fixes.
How do I customize my Mac for optimal productivity?
Adjust your trackpad settings to match your preferences. Many users find changing the tracking speed and enabling gestures makes navigation faster.
Install a mouse enhancement tool like MOS to improve scrolling if you use an external mouse. This makes the scrolling experience smoother and more natural.
Set up hot corners to quickly access features like Mission Control or the Desktop. Go to System Preferences > Mission Control > Hot Corners to configure this handy feature.
What are some essential apps to install on a new iMac?
A password manager helps secure your online accounts. Apps like 1Password or LastPass keep your login information safe and make signing in easy.
Install productivity tools like Alfred or Magnet. Alfred enhances the Spotlight search feature, while Magnet helps organize your windows efficiently.
Consider adding CleanMyMac or similar utility software. These tools help maintain your Mac’s performance by clearing caches and removing unnecessary files.
Which system preferences should I adjust immediately after getting a new Mac?
Change the default screenshot location if you take many screenshots. Open the Screenshot app and choose “Options” to select where your screenshots are saved.
Adjust your energy settings to match your usage patterns. Set when the display sleeps and whether the computer sleeps automatically to save power.
Configure your Dock preferences by right-clicking the divider line. You can change the size, position, and behavior to make the Dock more useful for your workflow.
How can I discover and use cool keyboard shortcuts on my Mac?
Learn basic shortcuts like Command+Space for Spotlight search and Command+Tab for switching between apps. These save time during everyday tasks.
Hold down the Option key when clicking menu items to discover hidden features. Many menu commands change when Option is pressed, revealing additional functions.
Use Command+Shift+5 for the screenshot and screen recording menu. This powerful tool offers options beyond simple screenshots, including timed captures and recordings.
What creative activities can I explore on my MacBook when I’m feeling bored?
Try digital art with the built-in Preview app or download more advanced options like Pixelmator. These tools let you create and edit images without expensive software.
Record and edit your own podcasts or music with GarageBand. This free app comes with your Mac and provides professional-quality audio production tools.
Make simple videos with iMovie for sharing on social media. The intuitive interface makes it easy to create impressive videos without professional training.


