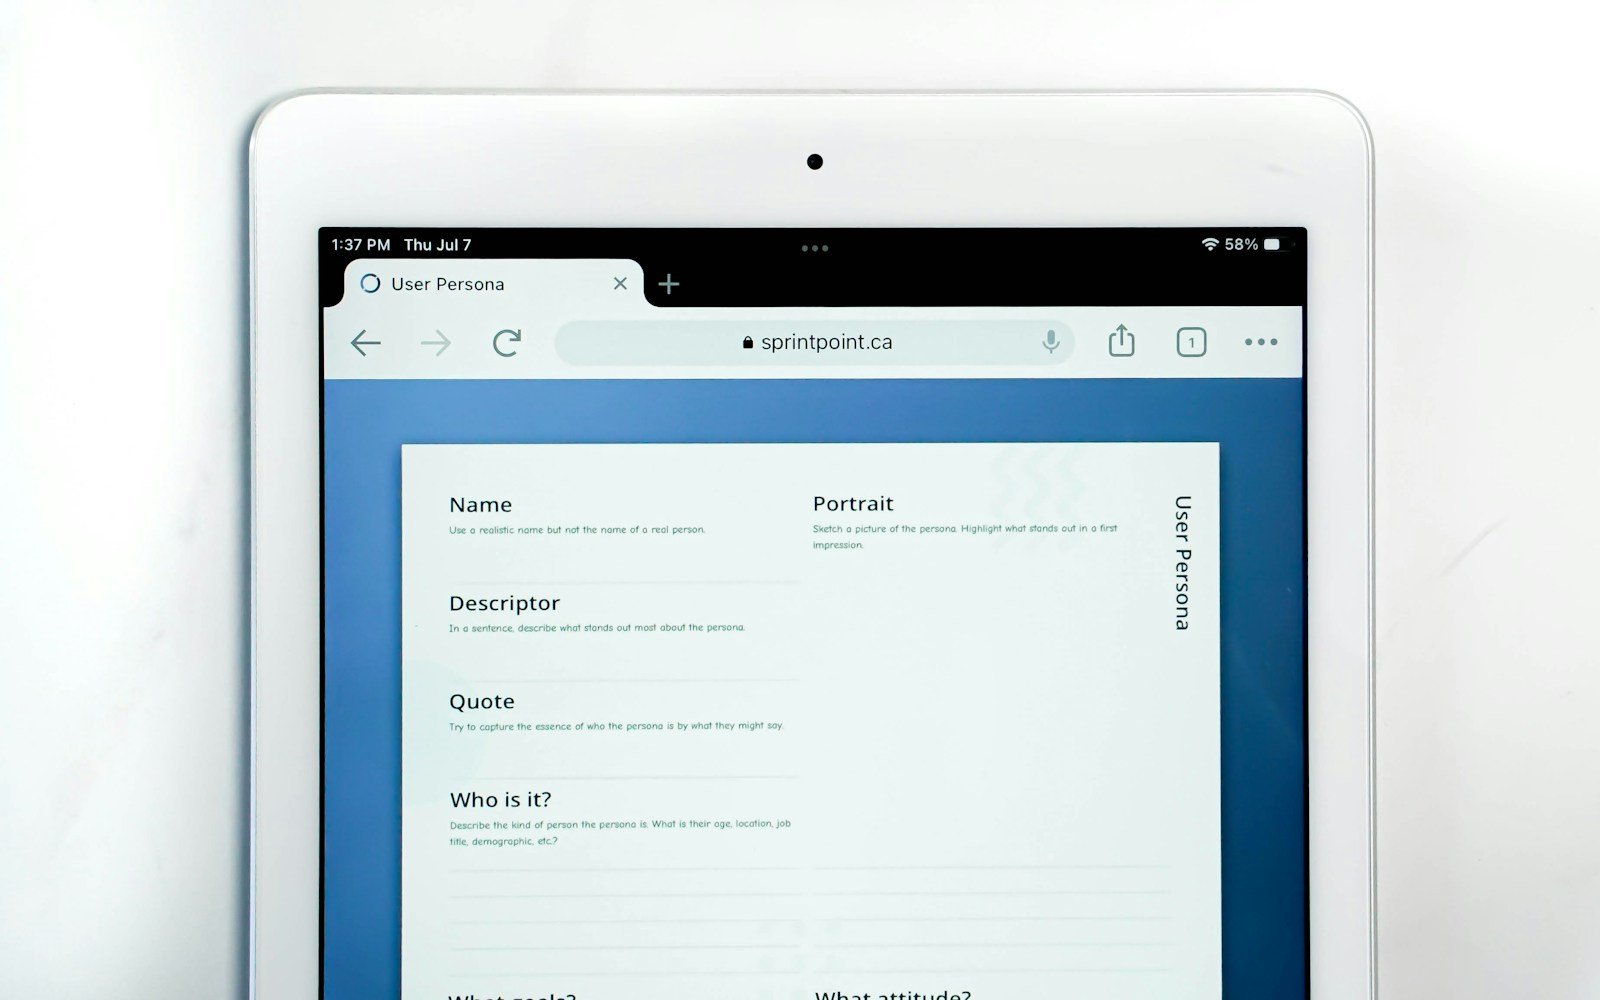
Printing from your iPad is now easier than ever, especially with AirPrint technology. Gone are the days when you needed a computer to print your documents or photos. You can print directly from your iPad by connecting to an AirPrint-enabled printer on the same Wi-Fi network and using the share feature to select the print option.
Setting up your iPad for printing takes just a few simple steps. First, make sure both your iPad and printer are connected to the same Wi-Fi network. Many modern printers support AirPrint, Apple’s technology that makes wireless printing possible without extra apps. If your printer doesn’t have AirPrint, check if the manufacturer offers a printing app in the App Store.
Once connected, printing is as simple as tapping the share button in apps like Photos, Safari, or Mail, then swiping over to find the “Print” option. From there, you can select your printer, set the number of copies, and adjust other print settings before sending your document to the printer.
How to Print from Your iPad: Step-by-Step
Printing from your iPad is simple — you don’t need cables or complicated setups. Apple’s AirPrint technology lets you print wirelessly from most apps in just a few taps.
Here’s how to do it, plus what to do if your printer doesn’t support AirPrint.
🧠 What You’ll Need
Before you start, make sure you have:
- An iPad running iPadOS 15 or later (iPadOS 18 as of 2025 is fully compatible).
- A Wi-Fi printer that supports AirPrint.
- Both your iPad and printer connected to the same Wi-Fi network.
💡 To check if your printer supports AirPrint, visit Apple’s official AirPrint printer list.
🪶 Step 1: Open the App or File You Want to Print
You can print directly from most built-in and third-party apps, including:
- Photos (for pictures)
- Safari (for web pages)
- Mail (for emails)
- Files (for PDFs and documents)
- Notes, Pages, Numbers, and more
Open the item you want to print.
🖱️ Step 2: Tap the Share or More Options Button
Look for the Share icon (a square with an upward arrow) or the three-dot menu (⋯), depending on the app.
Then scroll down and tap Print.
🖨️ Step 3: Select Your Printer
- Tap Select Printer.
- Your iPad will automatically search for nearby AirPrint printers.
- Choose your printer from the list.
If you don’t see your printer:
- Make sure it’s powered on and connected to the same Wi-Fi network.
- Restart your printer and iPad if needed.
📘 Source: WirelessSpark – How to Add Printer to iPad Wirelessly
⚙️ Step 4: Adjust Print Settings
Once your printer is selected, you can customize:
- Number of copies
- Page range
- Color or Black & White
- Double-sided printing (Duplex) (if supported)
- Paper size or orientation
Tap the Options section to adjust these before printing.
🖨️ Step 5: Tap Print
When ready, tap Print in the top-right corner.
Your document or photo will begin printing immediately.
You can view the print queue by:
- Opening the App Switcher (swipe up from the bottom and pause).
- Selecting the Print Center app (it appears while printing).
- From here, you can cancel a print job if needed.
🧩 What If My Printer Doesn’t Support AirPrint?
If your printer isn’t AirPrint-compatible, you still have options:
✅ Option 1: Use the Printer’s App
Most major printer brands offer iOS apps that let you print wirelessly:
- HP Smart
- Canon PRINT Inkjet/SELPHY
- Epson iPrint
- Brother iPrint&Scan
Download the corresponding app from the App Store, connect your printer, and follow the on-screen steps.
✅ Option 2: Use a Printing App or Service
Apps like Printer Pro or PrintCentral Pro can connect non-AirPrint printers to your iPad via Wi-Fi or even USB (with an adapter).
🔌 Option 3: Print via a Computer (No AirPrint)
If your printer is connected to a Mac or PC:
- Enable printer sharing on your computer.
- Use apps like Printopia (Mac) or O’Print (Windows) to make your printer AirPrint-compatible.
- Then print from your iPad as usual.
🧾 Summary: Quick Steps
| Step | Action |
|---|---|
| 1 | Open the file or photo you want to print |
| 2 | Tap Share → Print |
| 3 | Select your AirPrint printer |
| 4 | Adjust print options |
| 5 | Tap Print |
🧠 Bonus Tips
- Check ink and paper levels before printing large documents.
- Restart your printer and router if your iPad can’t find the printer.
- Keep iPadOS updated for the best AirPrint compatibility.
- Use iCloud Drive to print files stored across devices easily.
✅ Final Thoughts
Printing from your iPad is quick and seamless thanks to AirPrint. With just a few taps, you can print photos, documents, or web pages — no cables, drivers, or setup headaches.
If your printer doesn’t support AirPrint, using the manufacturer’s app or a third-party printing tool is a reliable alternative.
Key Takeaways
- iPads can print wirelessly to AirPrint printers connected to the same Wi-Fi network.
- The print function is accessed through the share button in most apps.
- Printer-specific apps offer additional features when AirPrint isn’t available.
Understanding Printer Compatibility with iPad
Not all printers work with iPads right out of the box. The type of printer you have determines how easily you can print from your tablet.
AirPrint Basics
AirPrint is Apple’s built-in printing technology that lets you print wirelessly from your iPad without installing extra software. It comes pre-installed on all iPads.
To use AirPrint, you need:
- An AirPrint-compatible printer
- Both your iPad and printer connected to the same Wi-Fi network
Setting up is simple. When you want to print, just tap the share icon and select “Print.” Your iPad will automatically find nearby AirPrint printers.
Many newer printers from brands like HP support AirPrint. You can check if yours is compatible on Apple’s website or your printer manual.
The main benefit of AirPrint is its ease of use. There’s no setup required – it just works.
Non-AirPrint Printers
If your printer doesn’t support AirPrint, you still have options. Many printer companies offer their own apps.
Popular alternatives include:
- HP Smart App – Works with most HP printers
- Canon Print – Connects iPads to Canon printers
- Printer Pro – A third-party app that works with many printer brands
These apps work by connecting to your printer through your home network. Some older printers might need a computer as a middleman.
Unlike AirPrint, these solutions require downloading and setting up an app. The process might take a few extra minutes but usually provides the same printing functions.
For very old printers, you might need a hardware adapter or printing service that supports iPad connections.
Initial Setup for iPad Printing
Before you can print from your iPad, you need to set up your device correctly. This involves connecting to the same Wi-Fi network as your printer and making sure your iPad recognizes the printer you want to use.
Connecting to a Wi-Fi Network
To print from your iPad, both your device and printer must be on the same Wi-Fi network. Here’s how to connect your iPad:
- Open the Settings app on your iPad
- Tap Wi-Fi and make sure it’s turned on
- Select your network from the list
- Enter the password if prompted
If your printer isn’t already connected to Wi-Fi, check its manual for setup instructions. Most modern printers have a setup button or screen menu to join networks.
Make sure your Wi-Fi connection is stable. A weak signal might cause printing problems. Try moving your iPad closer to your router if you experience connection issues.
Adding Printers to Your iPad
Once you’re on the same network, you can add your printer to your iPad. Most iPads work with AirPrint-enabled printers without extra setup.
To use AirPrint:
- Make sure your printer is turned on
- Check that paper is loaded correctly
- Verify the printer has ink or toner
Your iPad should automatically find AirPrint printers on your network. You don’t need to install special software or drivers for these printers.
For non-AirPrint printers, you might need to install the manufacturer’s app. For example, HP printers often work with the HP Smart App. Simply download the app from the App Store and follow the setup instructions.
Some printers need to be in pairing mode to connect. Check your printer’s manual for specific instructions.
Printing Documents and Images
Your iPad offers easy ways to print documents and photos with just a few taps. You can print web pages, images, and various files to any AirPrint-enabled printer without complicated setup.
Using Safari for Web Pages
To print a web page from Safari, open the page you want to print first. Tap the share button at the top or bottom of your screen (it looks like a square with an up arrow). Scroll down through the sharing options until you see the Print button.
Once you tap Print, your iPad will search for nearby printers. Select your printer from the list. You can then choose your print settings:
- Number of copies
- Page range (all pages or specific ones)
- Double-sided printing (if your printer supports it)
- Color or black and white
Before printing, you can preview the document by tapping the preview image. When ready, tap the Print button in the top corner to send your print job to the printer.
Print Photos from Library
Printing photos from your iPad is simple. Open the Photos app and find the picture you want to print. Tap to open it, then tap the share icon (square with up arrow).
Scroll down in the share menu and tap the Print option. Your iPad will search for nearby AirPrint printers. Select your printer from the list that appears.
You can adjust several print settings before printing:
- Paper size
- Print quality
- Number of copies
- Border options
For multiple photos, select them first by tapping “Select” in the Photos app, then choosing all images you want to print. Tap the share button and follow the same steps. This saves time when printing several photos at once.
Managing Your Print Jobs
When printing from your iPad, you can control many aspects of how your document will appear on paper. You can change the number of copies, adjust paper settings, and set up two-sided printing to save paper.
Selecting Number of Copies
Setting the right number of copies saves you time and paper. After tapping the Share button and selecting Print, you’ll see a print options menu appear.
Look for the Copies option, usually at the top of the menu. Tap the + or – buttons to increase or decrease the number of copies you need.
You can also tap directly on the number and use the on-screen keypad to enter a specific amount. This is faster when you need many copies.
If you’re printing multiple copies of a multi-page document, you might want to check if your printer supports collating. This feature groups pages in the correct order for each set.
Choosing Paper Size and Source
Your iPad lets you select the right paper size and source tray for your needs. Tap on Paper Size in the print menu to see available options.
Common choices include:
- Letter (8.5 × 11 inches)
- Legal (8.5 × 14 inches)
- A4 (210 × 297 mm)
- Photo sizes (4 × 6, 5 × 7 inches)
Some AirPrint-enabled printers also let you choose which paper tray to use. This is helpful if your printer has multiple trays with different paper types or sizes.
If you’re printing photos, selecting the correct photo paper size ensures your images print without unexpected cropping or scaling issues.
Adjusting Settings for 2-Sided Printing
Two-sided printing (also called duplex printing) saves paper and makes documents look more professional. Not all printers support this feature, but many newer models do.
To use 2-sided printing:
- Tap the Options button in the print dialog
- Look for Two-Sided or Duplex printing options
- Toggle the switch to On
You can often choose how pages flip: either along the long edge (like a book) or the short edge (like a notepad). If your printer doesn’t show these options, check that it supports duplex printing.
For long documents, 2-sided printing can cut your paper usage in half. Remember that some printers may print more slowly when using this feature.
Advanced Printing Features
While basic printing from your iPad is straightforward, there are several advanced options that can enhance your printing experience. These features allow for more control over print jobs, specialized printing apps, and solutions to common problems.
Using the App Switcher for Printing
The App Switcher on your iPad provides a quick way to manage print jobs without losing your place. To use this feature, double-click the Home button (or swipe up from the bottom on newer iPads) while printing.
You can check the status of your print job by tapping the Print Center icon that appears in the App Switcher. This lets you:
- View the current print queue
- Cancel printing tasks
- See how many pages remain to be printed
This works for all iOS devices including iPads, iPhones, and iPod Touch. The Print Center only appears when you have active print jobs, so don’t worry if you don’t see it otherwise.
The App Switcher method is especially useful when printing large documents since you can continue using other apps while monitoring progress.
Printing with Third-Party Apps
When AirPrint’s standard options aren’t enough, third-party printing apps offer advanced features. HP Smart is excellent for HP printer owners, providing:
- Custom page sizes
- Print quality adjustments
- Ink level monitoring
- Scanner functions
Other helpful apps include PrinterPro, which allows printing to non-AirPrint printers and offers more layout options.
Mobility Print is another strong option, especially in office settings. It lets you connect to network printers and offers better document handling.
These apps typically provide advanced settings like multiple copies, page ranges, and paper orientation that basic iOS printing lacks.
Troubleshooting Common Printing Issues
When printing problems occur, try these fixes:
Connection issues:
- Make sure your iPad and printer are on the same Wi-Fi network
- Restart both your printer and iPad
- Move closer to your router if signal strength is weak
Printer not found:
- Check if your printer is AirPrint compatible
- Update your iPad to the latest iOS version
- Reset your printer to factory settings if needed
If pages print blank or with poor quality, check ink levels in your printer’s settings or through apps like HP Smart. Paper jams can be avoided by using the correct paper type specified in your printing app.
For persistent issues, trying a different third-party printing app often solves problems that iOS’s built-in printing can’t handle.
Securing Your Print Operations
When printing from your iPad, security matters. Taking steps to protect your print jobs keeps your information safe and controls who can use which printers.
Setting a Username and Password
Adding security credentials to your printing setup creates a personal layer of protection. To set up a username and password:
- Open the document you want to print
- Tap the Share button and select Print
- If using a corporate printer, you may see a login prompt
- Enter your assigned username and password
For AirPrint at home, the security happens at the Wi-Fi level. Make sure your home network has a strong password to keep others from accessing your printer.
Some print apps like PaperCut ask for a PIN or login before releasing your print jobs. This stops papers from sitting in printer trays where anyone might see them.
Managing Access to Available Machines
Controlling which printers your iPad can see helps keep your printing secure and simple. Here’s how to manage printer access:
First, connect only to trusted Wi-Fi networks. Your iPad can only see printers on the same network.
To limit which machines appear:
- In Settings, check for printer-specific options
- Remove any printers you no longer use
- For work environments, use your company’s print management system
Many offices use Mobility Print clients that control which printers show up based on your login permissions.
You can also set up printer groups for different purposes. Keep private documents going to secure printers and everyday items to shared machines.
Frequently Asked Questions
iPad printing can be simple once you know the steps. Here are answers to common questions about how to print from your device using various methods and printer types.
How can I connect my iPad to a printer for printing documents?
To connect your iPad to a printer, make sure both devices are on the same Wi-Fi network. This is the most important step for wireless printing.
For AirPrint-compatible printers, no extra setup is needed. Your iPad will detect the printer automatically when you use the print function.
If you have a non-AirPrint printer, you might need to download the printer’s app from the App Store. These apps help bridge the connection between your iPad and printer.
Is it possible to print from an iPad without using AirPrint technology?
Yes, you can print from an iPad without AirPrint in several ways. Printer-specific apps are a common option that many printer brands offer.
Some users ask if a direct USB connection works. While some websites suggest this is possible, Apple Support states it’s not an official method.
Cloud printing services like Google Cloud Print or Printopia can also help. These services let you send documents to your printer through the internet.
What are the steps to print from an iPad to a wireless printer?
First, open the app with the document, photo, or webpage you want to print. Look for the app’s Share button (usually a square with an arrow pointing up).
Next, scroll down in the sharing options and tap the “Print” button. If you don’t see it, swipe left to view more options.
Tap “Select Printer” and choose your wireless printer from the list. Then set the number of copies and other print options before tapping “Print.”
Can I print from my iPad to an HP printer, and if so, how?
Yes, printing to an HP printer from an iPad is simple, especially since most HP printers support AirPrint. HP printers work with Apple’s built-in print driver in iOS devices.
Make sure your HP printer and iPad are connected to the same Wi-Fi network. Open the document you want to print, tap the share icon, and select “Print.”
For older HP printers without AirPrint, download the HP Smart app from the App Store. This app provides additional features and connection options.
What options do I have for printing from an iPad to a non-AirPrint printer?
For non-AirPrint printers, download the manufacturer’s printing app. Most major brands offer free apps that enable iPad printing.
Print server applications like Printopia (for Mac) or handyPrint create a bridge between your iPad and non-AirPrint printers. These run on your computer to extend printing capabilities.
Some printers work with third-party apps like Printer Pro or PrintCentral. These apps can help establish connections to a wider range of printer models.
Where can I find the print function on the iPad interface?
The print function is found in the Share menu of most apps. Tap the Share button (the square with an up arrow) within the app you’re using.
Scroll down in the share options that appear and look for “Print.” In some apps, you might need to swipe left to see additional sharing options.
If you can’t find the print option, check the app’s menu. Some apps place printing under a menu icon (three dots or lines) or a specific “Print” button within the app’s interface.


