Having two phone numbers on one device can be a game-changer for many iPhone users. Whether you need separate lines for work and personal calls or want local service when traveling abroad, Apple’s Dual SIM feature has you covered. Setting up Dual SIM on your iPhone is straightforward—just go to Settings > Cellular, make sure you have at least two lines listed under SIMs, and tap a line to turn it on.
Most newer iPhones support this feature through a combination of a physical SIM card and an eSIM, which is a digital SIM that doesn’t require a physical card. The eSIM works with plans from many carriers worldwide, giving you flexibility in how you manage your phone service.
With Dual SIM active, you can choose which number to use for calls, texts, and data. You’ll see two signal bars at the top of your screen, making it easy to monitor both connections. Your iPhone even lets you label each line (like “Business” or “Personal”) so you know which is which at a glance.
How Dual SIM Works on iPhone
Apple’s Dual SIM functionality lets you use two cellular plans on a single iPhone. This is incredibly useful for managing personal and work numbers, using a local SIM while traveling, or combining a voice and data plan from different carriers.
There are two types of Dual SIM configurations on iPhones:
- Physical SIM + eSIM (available on iPhone XS, XR, and later)
- Dual eSIM (available on iPhone 13 and newer, including all iPhone 14/15 models sold in the U.S., which no longer include a SIM tray)
With Dual SIM, both lines can receive calls and texts, and you can designate one as your default for voice, SMS, and data.
Step 1: Make Sure Your iPhone Is Compatible
First, confirm that your device supports Dual SIM. All iPhones from the XS, XR, and newer have at least one eSIM slot, and many models support two active lines. For physical SIM support, check if your model includes a SIM tray (U.S. models of iPhone 14 and newer do not).
Go to Settings > General > About, and look for “Digital SIM” to confirm eSIM support.
Step 2: Add an eSIM
You can add an eSIM in a few different ways, depending on your carrier:
Option 1: Use a QR Code
- Go to Settings > Cellular > Add eSIM
- Tap Use QR Code
- Scan the QR code provided by your carrier
- Follow the on-screen steps to activate
Option 2: Use Carrier Activation
Some carriers allow automatic eSIM activation. If supported:
- Your carrier will send you a prompt or instructions
- Go to Settings > Cellular, and follow the activation link
Option 3: Transfer from Another iPhone
- On your new iPhone, go to Settings > Cellular > Add eSIM
- Tap Transfer from Nearby iPhone
- Follow the steps to securely move your eSIM
Once the eSIM is activated, you’ll see a second line appear under your Cellular settings.
Step 3: Insert a Physical SIM (If Applicable)
If your iPhone still has a SIM tray and you’re using a physical SIM as one of your lines:
- Insert your nano-SIM into the tray
- Restart your iPhone if prompted
- Your iPhone should detect the line and show it in Settings > Cellular
Step 4: Label Your Lines
To keep things organized:
- Go to Settings > Cellular
- Tap each line and assign labels (e.g., Personal, Work, Travel)
- These labels will appear when making calls or sending texts, so you always know which line you’re using
Step 5: Choose Default Line for Calls, Messages, and Data
In Settings > Cellular > Default Voice Line, choose which line you want to use by default for:
- Voice calls
- iMessage and FaceTime
- Cellular data (you can change this on the fly)
If you’re traveling, you can choose to use only your local eSIM for data while keeping your home line active for calls and texts.
Step 6: Manage Cellular Settings for Each Line
Each line has independent settings:
- Turn on/off lines as needed
- Set one line for cellular data and the other for calls
- Enable Allow Cellular Data Switching to use data from the non-default line during a call
Step 7: Make and Receive Calls With Dual SIM
When dialing a number:
- Your iPhone will use the default line unless you’ve set a preferred line for a contact
- You can switch lines before placing a call by tapping the line label at the top of the screen
Incoming calls can be received on either line. If you’re on a call using one line and another call comes in on the second line, you may get a missed call notification—unless Wi-Fi Calling and Carrier Forwarding are supported by your carrier.
Step 8: Use iMessage and FaceTime
You can use iMessage and FaceTime with one line at a time:
- Go to Settings > Messages > Send & Receive
- Select which number you want associated with iMessage and FaceTime
Note: You can switch lines, but you can’t use both numbers for iMessage/FaceTime simultaneously.
Step 9: Remove or Switch eSIMs
If you’re switching plans or traveling often:
- Go to Settings > Cellular
- Tap the eSIM you want to remove
- Choose Remove Cellular Plan
You can store multiple eSIM profiles on an iPhone (iPhone 13 and later), though only two lines can be active at once.
Final Tips for Using Dual SIM on iPhone
- Battery Life: Running two active lines may slightly reduce battery life.
- Travel Convenience: Use a local eSIM when abroad and keep your home line active for emergencies.
- Work-Life Balance: Turn off your work line after hours to avoid unwanted calls and texts.
- No SIM Tray? No Problem: Newer iPhones without a physical SIM tray can still handle Dual eSIM with ease.
With Dual SIM functionality, your iPhone becomes even more flexible—letting you keep your personal, professional, and travel communications separate and efficient, all from one device.
Key Takeaways
- Dual SIM setup requires going to Settings > Cellular and turning on both lines on compatible iPhones.
- You can use a physical SIM card alongside an eSIM digital plan without needing two physical cards.
- iPhone lets you choose which number to use for calls, texts, and data with easy switching between lines.
Understanding Dual SIM Technology
Dual SIM technology allows iPhone users to use two phone numbers on a single device. This feature is perfect for keeping work and personal calls separate or managing local and international numbers while traveling.
Difference Between eSIM and Nano-SIM
An eSIM is a digital SIM that’s built into your iPhone. Unlike physical cards, it stores your cellular plan information electronically. You can store multiple eSIMs on newer iPhone models, though only one or two can be active at a time.
A Nano-SIM is the small physical card you insert into your iPhone. It’s the traditional way to connect to cellular networks. Some iPhone models sold in China, Hong Kong, and Macao can use two physical Nano-SIMs together.
Most iPhones with Dual SIM capability use a combination of one physical Nano-SIM and one eSIM. The iPhone XS through iPhone 13 follow this pattern. However, iPhone 14 models sold in the US are eSIM-only.
Benefits of Using Dual SIM
Separate Work and Personal Lines: With Dual SIM, you can keep business calls on one number and personal calls on another, all on the same device. This eliminates the need to carry two phones.
Travel Convenience: When traveling internationally, you can keep your main number active while adding a local SIM for cheaper data and calls. This helps avoid expensive roaming charges.
Carrier Flexibility: Dual SIM lets you take advantage of different plans from different carriers. Use one for better data rates and another for unlimited calls.
Network Coverage: In areas where one carrier has spotty service, your second SIM might have better coverage, ensuring you stay connected.
Compatible iPhone Models
Many iPhone models support dual SIM capabilities, giving you the flexibility to use two phone numbers on one device.
iPhone Models with Dual SIM Support:
- iPhone XS
- iPhone XS Max
- iPhone XR
- iPhone 11 series
- iPhone 12 series
- iPhone 13 series
- iPhone 14 series
- iPhone 15 series
- iPhone 16 series
The dual SIM feature requires iOS 12.1 or later. This functionality works in two different ways depending on your iPhone model and region.
Most iPhones use a combination of one physical nano-SIM and one eSIM. The eSIM is a digital SIM that eliminates the need for a physical card.
Newer iPhone models can store multiple eSIMs and use two active SIMs at the same time. This gives users more flexibility with their carrier choices.
For users in China mainland, Hong Kong, and Macao, some iPhone models support two physical nano-SIM cards instead of the eSIM option.
Starting with the iPhone XS through iPhone 13, these models typically use one physical SIM and one eSIM for dual SIM functionality.
Remember to check your specific iPhone model’s capabilities before setting up dual SIM, as features may vary slightly between models and iOS versions.
Preparations Before Setup
Before setting up dual SIM on your iPhone, you need to make sure everything is ready. This includes checking your phone’s software, making sure your carriers work with dual SIM, and having all the necessary information handy.
Checking iOS Version
Your iPhone needs to run at least iOS 12.1 to use dual SIM functionality. However, iOS 13.0 or higher is recommended for the best experience.
To check your current iOS version:
- Open the Settings app
- Tap General
- Select About
- Look for “Software Version”
If your iOS needs updating:
- Connect to Wi-Fi
- Go to Settings > General > Software Update
- Tap Download and Install if an update is available
Updating over Wi-Fi is faster and doesn’t use your mobile data. A strong internet connection is important during this process to avoid interruptions.
Ensuring Network Compatibility
Not all carriers support eSIM technology. Before proceeding, verify that your carrier offers eSIM service.
Major carriers in the US that support dual SIM include:
- AT&T
- T-Mobile
- Verizon
- Sprint
International travelers should check if their mobile network providers abroad support eSIM. Some carriers may have restrictions on using dual SIM with certain plans.
For physical SIM cards, ensure your iPhone has a SIM tray that can accommodate it. Newer models like the iPhone 14 and later US models only support eSIM (no physical SIM slot).
Gathering Required Information
Before starting setup, collect all necessary information from your carrier. This preparation saves time and prevents setup issues.
You’ll need:
- For eSIM: Activation QR code, activation code, or carrier app
- For physical SIM: The SIM card itself
- Your account details (phone number, account PIN)
- Billing information
- ID verification (sometimes required)
Many carriers provide a QR code to scan with your iPhone for quick eSIM setup. Others may provide an activation code to enter manually.
If you’re transferring a number, have your current account information ready. Your carrier might also provide specific instructions for their setup process.
Installing the Physical SIM Card
Adding a physical SIM card to your iPhone is simple. You’ll need your Nano-SIM card and the SIM ejection tool that came with your iPhone.
First, locate the SIM card slot on your iPhone. On most models, it’s on the right side of the device.
Take the SIM ejection tool and push it gently into the small hole in the SIM slot. Don’t push too hard – just enough to pop out the tray.
When the SIM tray slides out, remove it completely from your iPhone. Be careful not to drop it.
Place your Nano-SIM card in the tray. Make sure the gold contacts face down and the notched corner matches the tray shape.
Important: Ensure the SIM card fits perfectly in the tray. Never force it or trim it yourself.
Slide the SIM tray back into your iPhone until it’s flush with the side. It should go in smoothly without resistance.
Different iPhone models have slightly different SIM tray locations:
- iPhone X and newer: Right side
- iPhone SE (2nd gen): Right side
- Older models: May be on right or left side
Once installed, your iPhone will detect the SIM card automatically. You’ll see signal bars appear if the card is active.
For dual SIM setup, one physical Nano-SIM can work alongside an eSIM. Your iPhone will guide you through additional setup steps once both are installed.
Activating eSIM on Your iPhone
Getting an eSIM working on your iPhone is simple and can be done in just a few minutes. Apple offers multiple ways to set up this digital SIM card that doesn’t require a physical card.
Using a QR Code to Add an eSIM
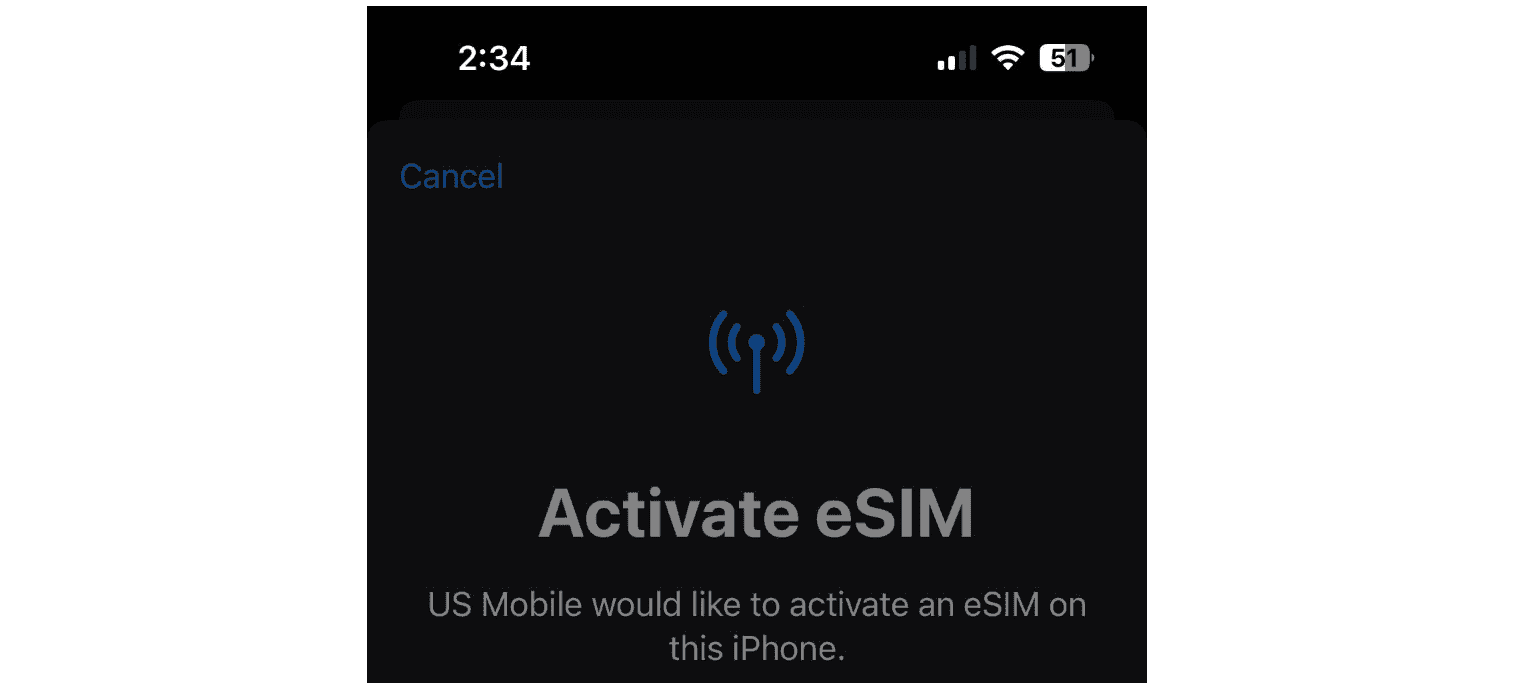
The easiest way to activate an eSIM is by scanning a QR code from your carrier. To get started, go to Settings > Cellular > Add Cellular Plan on your iPhone. Your camera will open automatically, ready to scan the QR code provided by your carrier.
Point your camera at the QR code and hold steady. Your iPhone will detect the code and show a notification. Tap on it to continue the setup process.
Your carrier might ask for a confirmation code to verify your identity. Enter this when prompted. You’ll then see options to label your plans (like “Personal” or “Business”) and set which line to use for calls, texts, and data.
Once confirmed, your eSIM will activate within minutes. You can check if it’s working by looking for signal bars and the carrier name at the top of your screen.
Entering eSIM Details Manually
If you don’t have a QR code, you can add an eSIM manually. Go to Settings > Cellular > Add Cellular Plan > Enter Details Manually.
You’ll need to enter the following information from your carrier:
- SM-DP+ address (a special server address)
- Activation code (sometimes called confirmation code)
These details are usually sent by email or text from your carrier. Type them carefully, as even small mistakes can prevent activation.
After entering the information, tap “Next” and follow the on-screen instructions. Your iPhone will connect to your carrier’s servers to download the eSIM profile.
The activation usually completes in a few minutes. You’ll know it’s successful when you see your new carrier name appear in the status bar and cellular settings.
Setting Up Cellular Plans
Adding and managing cellular plans on your iPhone with Dual SIM capability is straightforward once you understand the basic steps. You can customize how your phone handles calls, texts, and data for each line.
Designating Primary and Secondary Lines
When using two SIM cards on your iPhone, you’ll need to choose which line to use for calls, texts, and data. Go to your phone’s Settings app and tap “Cellular” to view your SIM options. You can set up cellular plans by adding an eSIM alongside your physical SIM card.
For data usage, select one line as your primary data line. This is the line that will use cellular data when both lines are active. To do this:
- Open Settings
- Tap Cellular
- Tap Cellular Data
- Select your preferred line
You can also set default lines for calls and messages. Your iPhone lets you choose which number to use when calling specific contacts or allows you to select before each call.
Managing SIM Labels and Settings
Keeping track of your SIM cards is easier when you label your cellular plans. This helps you quickly identify which line is which, especially helpful for separating work and personal numbers.
To label your SIMs:
- Go to Settings
- Tap Cellular
- Select the number you want to label
- Tap “Cellular Plan Label”
- Choose a preset label or create a custom one
For iPhones without a physical SIM tray, you can use two active eSIMs simultaneously. The process to add an eSIM varies by carrier but typically involves scanning a QR code or using a carrier app.
You can turn either line on or off as needed by toggling the switch in Cellular settings. This is useful for saving battery or when traveling internationally.
Using Dual SIM with iOS Features
iOS offers seamless integration with dual SIM functionality, allowing iPhone users to manage two phone lines efficiently. The system handles calls, messages, and data across both lines with smart features that make switching between personal and work numbers simple.
Handling Calls and Messages on Both Lines
iPhone’s dual SIM capability lets you make and receive calls on either line without switching settings. When a call comes in, iOS clearly shows which line is receiving the call with distinctive labels.
For outgoing calls, you can choose your default line or select which number to use each time. Here’s how:
- Set a default line in Settings > Cellular > Default Voice Line
- Or select a line when making a call by tapping the (i) icon next to a contact
- Use the green call buttons that show both SIMs when dialing
Messages work similarly. The Messages app color-codes conversations based on which SIM they use. This helps you keep track of personal and work texts at a glance.
You can also set a preferred line for specific contacts. This tells your iPhone which number to use automatically when contacting them.
Switching Between SIMs for Cellular Data
Only one SIM can use cellular data at a time, but iOS makes switching between them quick and easy. To change your data line:
- Open Settings
- Tap Cellular or Mobile Data
- Select Cellular Data
- Choose the line you want to use for data
Your iPhone can automatically switch data to your secondary SIM if the primary one loses connection. To enable this feature, turn on “Allow Cellular Data Switching” in settings.
When traveling, you can use an eSIM from a local carrier for data while keeping your main number active for calls. This helps avoid expensive roaming charges.
Managing Contacts and Dual SIM
iOS integrates contacts seamlessly with dual SIM functionality. You can assign preferred lines to specific contacts for both calls and messages.
To set a preferred line for a contact:
- Open the Contacts app
- Select a contact
- Tap “Preferred Cellular Plan”
- Choose which SIM to use with this person
This setting helps maintain boundaries between work and personal communications. Your iPhone will remember these preferences and use the right line automatically.
The iOS contacts app also displays which number was used for recent communications. This helps you maintain consistency in your conversations.
When taking photos with the Camera application, iOS saves information about which SIM is active. This can help organize business versus personal photos if needed.
Troubleshooting Common Dual SIM Issues
When using dual SIM on your iPhone, you might face several issues that can disrupt your phone service. These problems typically involve connectivity failures or your phone not recognizing one of your SIM cards.
Resolving Connectivity Problems
If your dual SIM setup isn’t connecting properly, first check that both plans are active and compatible. Your iPhone must be unlocked or both plans must be from the same carrier for dual SIM to work correctly.
Try these quick fixes:
- Turn on Airplane Mode for 30 seconds, then turn it off
- Restart your iPhone completely
- Check for iOS updates in Settings
- Make sure cellular data is enabled for both SIMs
If one SIM isn’t connecting, try switching your default line. Go to Settings > Cellular > Default Voice Line and change your selection.
Persistent connectivity issues might require you to monitor your data usage closely. Some users find that one SIM drains more data than expected, causing connection problems.
Fixing SIM Recognition Errors
When your iPhone doesn’t recognize one of your SIMs, first check if your eSIM is stuck on “activating”. This common issue often requires resetting your network settings.
- Go to Settings > General > Transfer or Reset iPhone
- Tap Reset > Reset Network Settings
- Enter your passcode and confirm
Some users report needing to repeat this process multiple times before both SIMs work properly.
For physical SIM cards, remove and reinsert the card carefully. Check for any damage or dust on the card or in the SIM tray. Sometimes a factory reset solves stubborn recognition issues, but always back up your data first.
Additional Considerations and Tips
When using Dual SIM on your iPhone, battery life may drain faster. This happens because your device is connecting to two cellular networks at once.
You can still use Wi-Fi connections normally with Dual SIM activated. Wi-Fi calling works with both numbers if your carriers support this feature.
Bluetooth accessories like headphones and car systems may need to be set up to work with both numbers. You’ll need to choose which line to use when making calls through these devices.
Remember that not all carriers worldwide support eSIM technology. If you travel to China or other countries, check carrier compatibility before your trip.
Your iPhone needs to be unlocked to use two different carriers. Phones purchased through the Apple Store directly are typically unlocked.
GSM is the most widely supported cellular technology for Dual SIM. This matters when choosing carriers for your second line.
You can label your SIMs with names like “Work” or “Personal” for easy identification. This helps when choosing which line to use for calls or texts.
Carrier-specific features may work differently with Dual SIM functionality. Services from providers like Virgin plus might have unique settings.
iMessage and FaceTime require you to select a primary number. You can change this in Settings whenever needed.
Note that iPad models with cellular capability can also use eSIM technology, but they don’t support the same Dual SIM functionality as iPhones do.
Dual SIM setup can be done in your phone’s settings menu. If you need visual guidance, Apple Support on YouTube offers helpful tutorials.
Frequently Asked Questions
iPhone users often have questions about using two phone numbers on one device. Here are answers to common questions about setting up and using Dual SIM on iPhones.
How can I set up and manage Dual SIM on my iPhone?
Setting up Dual SIM on an iPhone is simple. First, make sure you have an iPhone that supports eSIM. Go to Settings > Cellular > Add Cellular Plan to set up an eSIM.
For physical SIM cards, insert the SIM tray with your card. Then go to Settings > Cellular to manage both lines. You can label each line (Personal, Business, etc.) to keep them straight.
You can choose which line to use for calls, texts, and data. This makes it easy to keep work and personal life separate.
What models of the iPhone are compatible with Dual SIM technology?
iPhone XR, XS, and newer models support Dual SIM with one physical SIM and one eSIM. The iPhone 13 models and newer can store multiple eSIMs but still use only two active lines at once.
Some newer models like iPhone 14 (US models) are eSIM-only with no physical SIM slot. These phones can store several eSIM profiles but still use only two at a time.
iPhone 15 models also support Dual SIM with eSIM technology. Check your specific model to confirm its Dual SIM capabilities.
What are the steps to install physical SIM cards in Dual SIM-capable iPhones?
To install a physical SIM card, first turn off your iPhone. Locate the SIM tray on the side of your phone.
Use the SIM ejection tool (or a paperclip) to pop open the tray. Place your SIM card in the tray with the gold contacts facing down.
Push the tray back in completely. Turn your phone back on. Go to Settings > Cellular to set up your physical SIM card preferences.
Remember that some newer iPhone models in the US don’t have physical SIM slots and rely entirely on eSIM technology.
Can I use two different carriers simultaneously on a Dual SIM iPhone and how?
Yes, you can use two different carriers at the same time on a Dual SIM iPhone. This is useful for having separate personal and business lines or when traveling.
After setting up both SIMs, go to Settings > Cellular. Here you can choose which line to use for data. Both lines can receive calls and texts at the same time.
You can set a default line for calls and messages or choose which line to use each time. The iPhone will show which line is being used in the status bar.
What should I do if one of the SIMs is not working in my Dual SIM iPhone?
If one SIM isn’t working, first check if it’s activated. Go to Settings > Cellular and make sure the problematic line is turned on.
Try restarting your iPhone. Sometimes a simple reboot fixes connection issues. You can also try toggling Airplane Mode on and off.
If problems continue, contact your carrier to verify the SIM is active. For eSIMs, you might need to delete and set up the eSIM again. For physical SIMs, try removing and reinserting the card.
How do I switch between SIMs once Dual SIM is activated on my iPhone?
Switching between SIMs is easy. For calls, tap the “i” next to a contact and select which line to use. Or tap the current line name when dialing a number.
For messages, tap the line name at the top of a new message before sending. You can set default lines for specific contacts too.
For data, only one line can provide cellular data at a time. Go to Settings > Cellular > Cellular Data to select which line to use for internet. You can also enable “Allow Cellular Data Switching” to let your other line use data when the primary line has poor service.


