Capturing the perfect photo often requires more than just a quick snap. For those moments when you want to be in the shot or need a steady hand, the iPhone camera’s timer feature is an invaluable tool. This function allows users to set a delay before the camera takes a photo, giving them time to join a group picture or stabilize the camera for a clear shot.
Using the timer feature is straightforward. You can easily access this option in the iPhone’s camera app and it gives photographers the choice between a short delay and a longer one, depending on their needs. Setting the timer ensures the photographer has sufficient time to prepare the scene and pose before the shutter clicks, making it a great way to improve photo outcomes without assistance.
How to Set a Timer on iPhone Camera
Using the timer on your iPhone’s camera is a great way to take selfies or group photos without needing someone to press the shutter. Here’s how to do it:
Steps to Set a Timer on the iPhone Camera:
- Open the Camera app
Launch the built-in Camera app on your iPhone. - Select the photo mode
Make sure you’re in Photo or Portrait mode. The timer also works in Square mode, but not in Video or Panorama. - Tap the upward-facing arrow (^) or swipe up
If you’re holding the iPhone vertically, tap the small arrow at the top center of the screen. This reveals additional camera settings. - Tap the timer icon
You’ll see a clock icon in the row of options—tap it. - Choose your timer length
Select either:- 3 seconds
- 10 seconds
- Frame your shot
Position your iPhone (use a tripod or stable surface if needed) and set up the scene. - Tap the shutter button
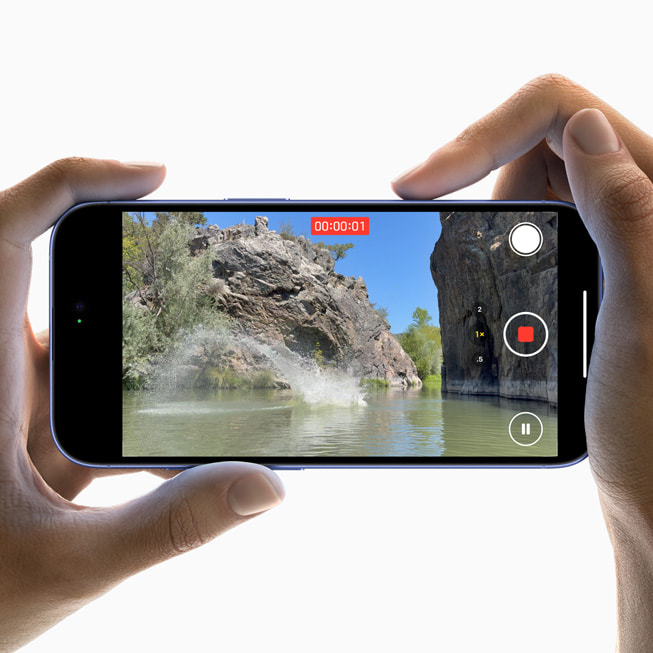
After you tap the shutter, the countdown will begin. Your iPhone will flash briefly with each second to give you a visual cue. - Strike a pose
Get in position! The camera will automatically take the photo after the countdown.
Bonus Tip:
If you’re using Live Photos or Burst Mode, the timer disables burst by default. The iPhone will capture a single high-quality image after the countdown.
Want hands-free control? Pair your iPhone with an Apple Watch or use voice commands with Siri and a Bluetooth shutter remote.
Key Takeaways
- The iPhone camera has a timer feature for delayed photo taking.
- Users can choose a short or long delay based on their needs.
- The timer helps improve photo quality by allowing time to prepare.
Setting Up the Timer on iPhone Camera
Taking photos with a timer on an iPhone is straightforward. The camera app allows for either a 3-second or a 10-second timer, giving users enough time to join the frame.
Accessing the Camera App
To start, open the Camera app on the iPhone. Users with an iPhone X or later must choose either Portrait or Photo mode by tapping on the relevant option.
Selecting the Timer Length
Once the Camera app is up, the user needs to tap the arrow at the top of the screen to display additional options. Here, they will see the timer icon, which usually a resembles a stopwatch. Tapping the timer icon reveals two timer length options:
- 3-second timer for quick shots
- 10-second timer for when more time is needed to get in position
The user then selects the preferred timer length by tapping on it.
Positioning Your iPhone
After setting the timer, the user must ensure their iPhone is stable. A tripod or a flat surface can help keep the phone steady. With the timer set, the user can position themselves and be ready for the shot. The camera will take the photo automatically once the selected timer length has elapsed.
Capturing Photos with Timer
Using the self-timer on an iPhone camera makes taking group photos and self-portraits easy. By setting the timer, you can prepare for the shot without rushing. This feature ensures everyone is in the frame and in focus before the shutter button activates. Let’s walk through the steps to master the timer for capturing that perfect photo.
Preparing for Group Photos
Before taking a group shot, select the self-timer in the Camera app. Tap the clock icon and choose either a 3-second or 10-second countdown. This gives you time to join the group. When everyone is ready, press the shutter button. The countdown will start, allowing everyone to pose.
Adjusting Focus and Exposure
For clear pictures, you must adjust focus and exposure. Tap the screen where you want the camera to focus. Slide your finger up or down next to the focus square to adjust exposure, making the image brighter or darker as needed. This step is vital for shots under varying light conditions.
Exploring Camera Modes and Features
Different modes can enhance your photos. For portraits, use Portrait mode to blur the background while keeping faces sharp. For a standard photo, use Photo mode. Enable Live Photos to capture motion and sound before and after the timer picture. Burst mode can be great for capturing multiple shots in quick succession, just hold down the shutter button after the timer starts if your phone supports this feature. Remember to experiment with these modes to see what works best for the shot you want.