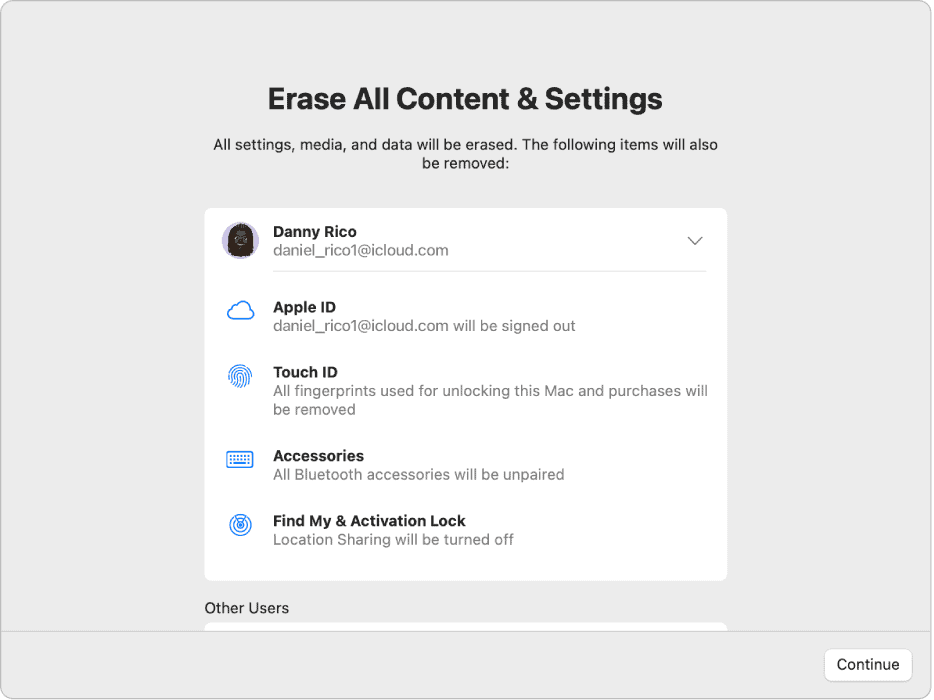
Performing a factory reset on a MacBook Pro is a crucial step in resolving system issues or preparing the device for a new owner. This process involves removing all personal data and restoring the operating system to its original state. Before initiating a factory reset, it’s important to back up all essential data to an external drive or cloud storage to prevent any loss of important documents, photos, and files.
The process itself is straightforward, but it requires careful following of specific steps. It’s essential to sign out of all accounts, including iCloud and iTunes, and to disable Find My Mac to avoid issues after the reset. Additionally, it’s recommended to disconnect any external hardware before initiating the reset process.

Refresh Your Mac with a Factory Reset
Sometimes, giving your MacBook Pro a fresh start is the best solution for stubborn problems or if you’re preparing to sell or give it away. A factory reset erases all your data and settings, returning the computer to its original state. Follow these steps to safely and completely reset your MacBook Pro.
Before You Start: Backup Your Data!
Don’t skip this step! A factory reset erases everything on your Mac, so back up your important files to iCloud, an external hard drive, or another storage solution.
Step-by-Step Instructions
- Sign Out of Everything: Sign out of iCloud, Messages, iTunes, and any other accounts you use on your MacBook Pro.
- Restart in Recovery Mode: Restart your Mac while holding down the Command (⌘) and R keys simultaneously. Keep holding them until you see the Apple logo or a spinning globe.
- Open Disk Utility: When you see the macOS Utilities window, select “Disk Utility” and click “Continue.”
- Erase Your Startup Disk: Choose your startup disk (usually named “Macintosh HD”) from the sidebar and click “Erase.” In the format menu, choose “APFS” (or “Mac OS Extended (Journaled)” on older Macs). Give the disk a name if you’d like, and then click “Erase Volume Group” (or “Erase” on older Macs).
- Reinstall macOS: Quit Disk Utility and return to the macOS Utilities window. Select “Reinstall macOS” and follow the on-screen instructions. This will download and install a fresh copy of macOS on your computer.
Troubleshooting Tips
- If you can’t boot into Recovery Mode: Try starting up while holding down Option-Command-R or Shift-Option-Command-R.
- If you encounter errors during the reset process: Restart your Mac and try again. You can also try using Apple’s online support resources or visiting an Apple Store for help.
- If you’re selling or giving away your Mac: After reinstalling macOS, don’t sign in with your Apple ID or set up any accounts. Leave the computer at the welcome screen for the new owner.
Table: Erasing vs. Reinstalling macOS
| Action | What It Does | When to Use It |
|---|---|---|
| Erasing Your Startup Disk | Removes all data and settings | Before selling or giving away your Mac, or when troubleshooting serious software problems. |
| Reinstalling macOS | Installs a fresh copy of macOS | After erasing your startup disk, or when you want to start with a clean slate. |
Key Takeaways
- A reset removes personal data and restores the MacBook to default settings.
- Backing up data is crucial before resetting to avoid loss of important files.
- Signing out of accounts and disabling Find My Mac is necessary to prepare for reset.
Preparing Your MacBook Pro for Reset
Before resetting your MacBook Pro, it’s crucial to back up your data, sign out of Apple services, and deauthorize your Apple ID. These steps ensure you don’t lose personal information and disconnect your account correctly.
Backup Your Data
First, safeguard your files with a backup. You can use Time Machine, a built-in feature of your MacBook Pro, to create a complete backup of your system on an external drive. Connect the drive to your MacBook, open Time Machine, and click “Back Up Now.” Alternatively, use iCloud to back up important documents, photos, and settings. Go to System Preferences, select iCloud, and choose the data you wish to store in the cloud.
Sign Out of Apple Services
Next, sign out of all Apple services. In the Apple menu, find System Preferences. Click on iCloud and press “Sign Out.” This will remove your personal data from the MacBook Pro. For iTunes and the App Store, open the apps, click “Account” followed by “Authorizations,” and select “Deauthorize This Computer.” Remember to also sign out of Messages by opening the app, choosing “Messages” in the menu, and clicking “Sign Out.”
Deauthorize Apple ID
Lastly, you need to deauthorize your Apple ID on the MacBook Pro. Open iTunes, click “Account” in the menu bar, choose “Authorizations,” and then select “Deauthorize This Computer.” This step ensures that your MacBook Pro is no longer linked to your Apple ID, which is particularly important if you’re planning to sell or give away your device.
Executing the Factory Reset
When it’s time to part with your MacBook Pro, performing a factory reset ensures your personal data does not fall into the wrong hands. The process involves three main steps that will return your Mac to its original state.
Enter macOS Recovery Mode
To start, reboot your MacBook into macOS Recovery. For Macs with Apple Silicon or any with the Apple T2 Security Chip, turn the computer on and immediately press and hold the power button. Release when you see the startup options window. If your MacBook runs on an older macOS before Big Sur, restart and immediately hold down Command-R until you see the Apple logo.
Erase MacBook Pro’s Hard Drive
Once in Recovery Mode, select Disk Utility from the macOS Utilities window. Click on Macintosh HD from the sidebar and choose Erase. Make sure to format the drive as APFS, which is the recommended file system for macOS Ventura and later. If your Mac uses macOS Monterey or earlier, choose Mac OS Extended (Journaled) format. After erasing the disk, exit Disk Utility.
Reinstall macOS
Finally, with the drive erased, you’ll return to the macOS Utilities window and select Reinstall macOS. Follow the prompts to download and install a fresh copy of macOS. This process could take a while, so ensure you have a stable internet connection. When done, the system will restart and display the Setup Assistant for the new user to configure their settings.
FAQs
<h2>Managing Your MacBook Pro: From Resets to Updates</h2>
Resetting Your MacBook Pro
- Factory Reset Without Password: If you’ve forgotten your password, you can still factory reset your MacBook Pro. Boot into Recovery Mode (hold Command + R during startup) and use Disk Utility to erase the hard drive and reinstall macOS. This will wipe all data, so proceed with caution.
- Hard Reset vs. Soft Restart:
- Hard Reset (Force Restart): This is like pulling the plug on your computer. It’s a last resort when your MacBook Pro is completely unresponsive. To perform a hard reset, press and hold the power button for about 10 seconds until the computer shuts down. Then, press the power button again to restart.
- Soft Restart: This is a normal restart where you shut down the computer through the Apple menu and then turn it back on. It’s less abrupt than a hard reset and is the preferred method when your Mac is functioning but needs a refresh.
- Force Restart Shortcut: For a quick force restart, press and hold Control + Command + Power Button (or Eject button) until the screen goes black and then restarts.
Updating Your MacBook Pro
Keeping your macOS up-to-date is crucial for security, performance, and new features. To check for updates, go to Apple menu > System Settings > General > Software Update. Click “Update Now” if an update is available.
Unlocking Without Password or Apple ID
Unlocking a MacBook Pro without the password or Apple ID is tricky and often requires specialized tools or professional assistance. It’s essential to remember your password and keep your Apple ID secure to avoid being locked out of your device.


