Setting up an iPhone for a kid can be a smart move. It helps keep them safe online and lets parents set rules. Parents can use Family Sharing to set up the device with parental controls, content limits, and other safety features. Giving your child an iPhone is a big step, but with careful setup and ongoing communication, you can create a positive and safe digital environment.
The setup process is easy. Parents can use Quick Start on their own iPhone to get the child’s device ready. This lets them choose settings and limits before handing over the phone. They can block certain apps, set screen time rules, and control what content the child can see.
It’s important to talk to kids about phone use. Explain the rules and why they matter. This helps kids understand and follow the limits set on their device.
Setting Up a Safe and Secure iPhone for Your Child
Handing over an iPhone to your child can be both exciting and nerve-wracking. With the right setup, you can ensure they have a fun and safe digital experience. Here’s a step-by-step guide on how to set up an iPhone specifically for a kid.
Creating an Apple ID for Your Child
If your child doesn’t have an Apple ID, you’ll need to create one for them. This will allow them to download apps, use iCloud, and access other Apple services.
| Steps |
|---|
| 1. Open the “Settings” app on your iPhone. |
| 2. Tap on your name at the top. |
| 3. Select “Family Sharing.” |
| 4. Tap “Add Member” and then “Create a Child Account.” |
| 5. Follow the prompts to enter your child’s information and create their Apple ID. |
Setting Up Parental Controls
Once your child has an Apple ID, you can use Screen Time to set parental controls and manage their device usage.
- Downtime: Set specific hours when the iPhone can’t be used, except for allowed apps or phone calls.
- App Limits: Set daily time limits for specific app categories or individual apps.
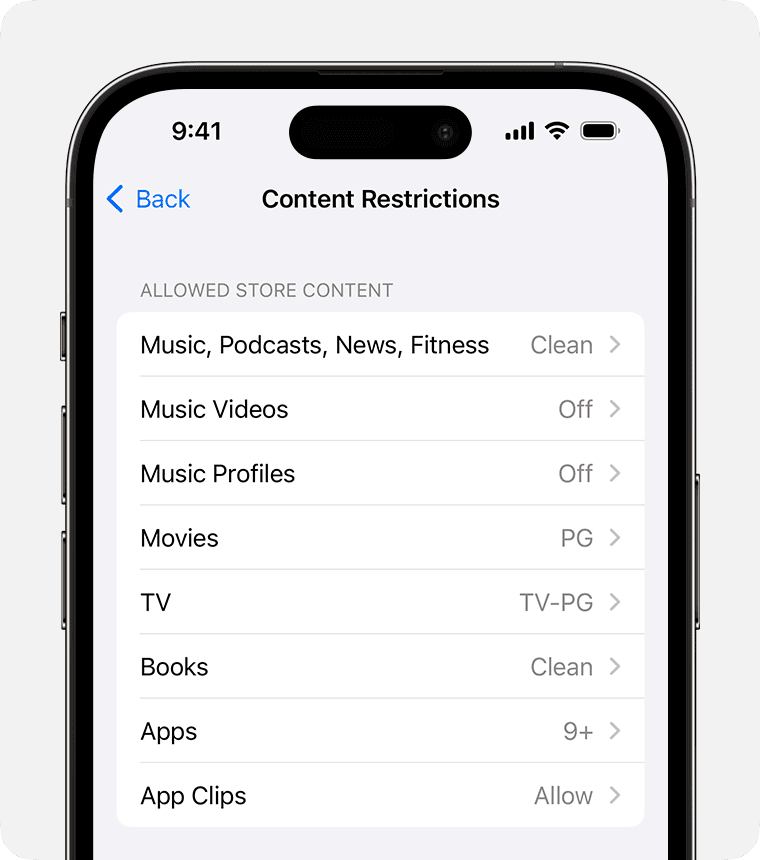
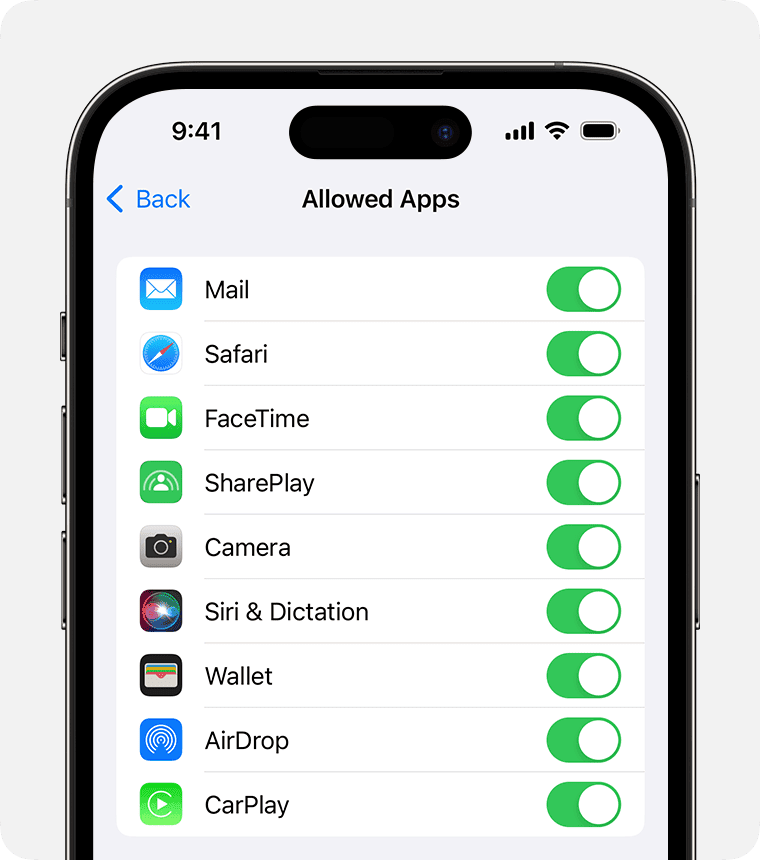
- Content & Privacy Restrictions: Restrict explicit content, purchases, and downloads.
- Communication Limits: Control who your child can communicate with during downtime and at all times.
Additional Tips
- Enable “Ask to Buy”: This requires your approval for any purchases or downloads.
- Set up Find My: This helps you locate your child’s iPhone if it’s lost or stolen.
- Talk to your child: Have open conversations about online safety and responsible device usage.
- Review their activity: Regularly check their Screen Time reports to monitor their app usage and make adjustments as needed.
Other Parental Control Options
Beyond Apple’s built-in Screen Time features, there are additional parental control options you might consider to further safeguard your child’s digital experience.
Third-Party Parental Control Apps
- Qustodio: Offers comprehensive monitoring and filtering capabilities, including app blocking, web filtering, location tracking, and time limits.
- Bark: Focuses on monitoring social media and online activities for signs of cyberbullying, depression, and other potential risks.
- Norton Family: Provides content filtering, time management, location tracking, and app supervision features.
Mobile Carrier Parental Controls
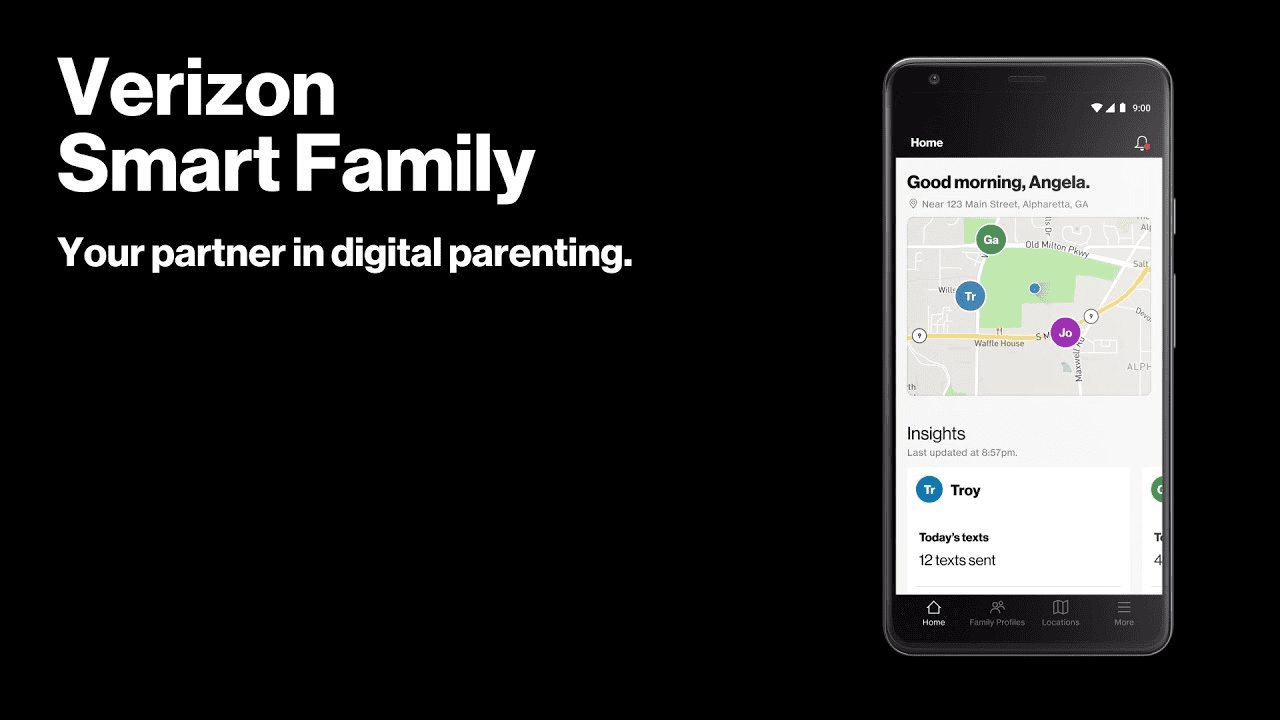
- Verizon Smart Family: Offers content filtering, location tracking, usage limits, and call/text monitoring.
- AT&T Secure Family: Provides similar features to Verizon Smart Family, including app blocking and scheduling.
- T-Mobile FamilyMode: Includes content filtering, app blocking, location tracking, and screen time limits.
Router-Level Parental Controls
- OpenDNS Family Shield: A free DNS service that automatically blocks adult content and provides basic web filtering.
- Circle Home Plus: A hardware device that connects to your home network and allows you to manage internet access and set time limits for all devices.
Additional Tips
- Educate your child: Teach them about online safety, privacy, and responsible internet usage.
- Set a good example: Be mindful of your own screen time and digital habits.
- Have open communication: Encourage your child to come to you if they encounter any inappropriate content or uncomfortable situations online.
Key Takeaways
- Family Sharing lets parents set up a child’s iPhone with safety controls
- Quick Start makes it easy to set up the device before giving it to the kid
- Talk to kids about phone rules to help them understand and follow limits
Setting Up the Device and Apple ID
Setting up an iPhone for a kid involves creating an Apple ID and configuring the device. This process helps parents manage their child’s digital experience safely.
Create a New Apple ID for Your Child
To make an Apple ID for your child, start with Family Sharing. Open Settings on your iPhone. Tap your name at the top. Select “Set Up Family Sharing” if you haven’t done it yet. Choose “Add Member” then “Create an Account for a Child.” Follow the steps to make the account. You’ll need to agree to a privacy policy. The minimum age for an Apple ID varies by country. Some nations require kids to be 13 or older. Once done go back to Family Sharing. Tap “Screen Time” and “Add Child” to link the new account.
Using Quick Start for Device Setup
Quick Start makes setting up a new iPhone easy. Place your phone near your child’s new device. A “Set Up New Device” card will pop up on your screen. Tap “Continue.” An animation will show on the new iPhone. Hold your phone over it to scan the image. Pick who will use the new device. The setup process will begin. You can transfer settings apps and data from your phone if you want. This method works for iPads and iPod touches too.
Enable Touch ID or Face ID
Touch ID and Face ID add security to your child’s device. To set up Touch ID go to Settings then “Touch ID & Passcode.” Follow the prompts to scan your child’s fingerprint. For Face ID open Settings and tap “Face ID & Passcode.” Guide your child through the face scan process. These features help keep the device safe. They also make it easy for your kid to unlock their phone. Touch ID works on iPhone 8 and older models. Face ID is for newer iPhones.
Configuring Controls and Restrictions
Setting up an iPhone for a kid means using built-in tools to keep them safe online. These tools help parents set rules and limits on what kids can do and see.
Implementing Content and Privacy Restrictions
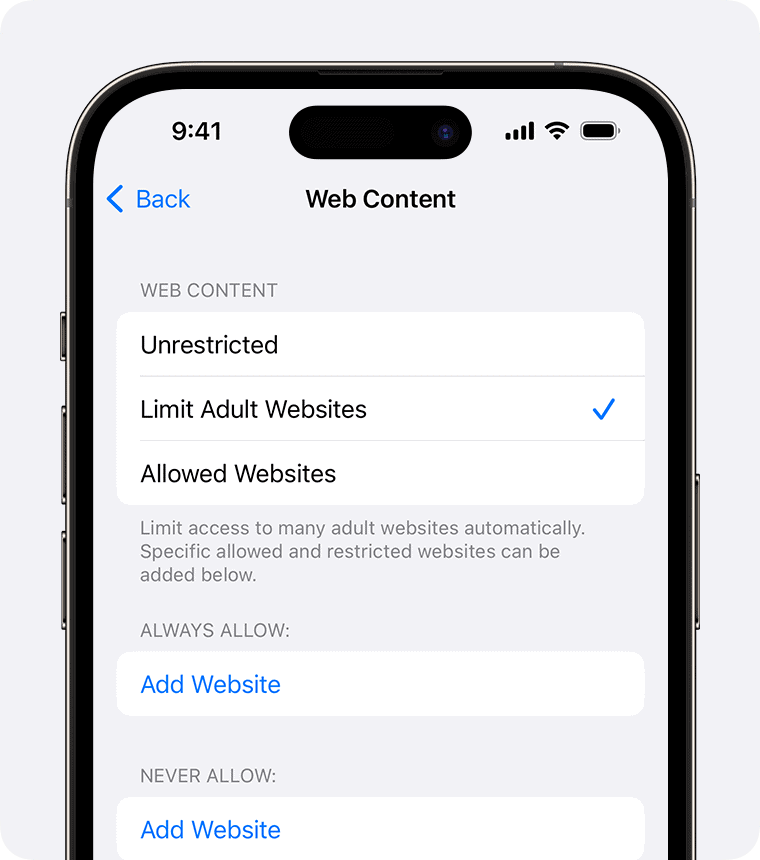
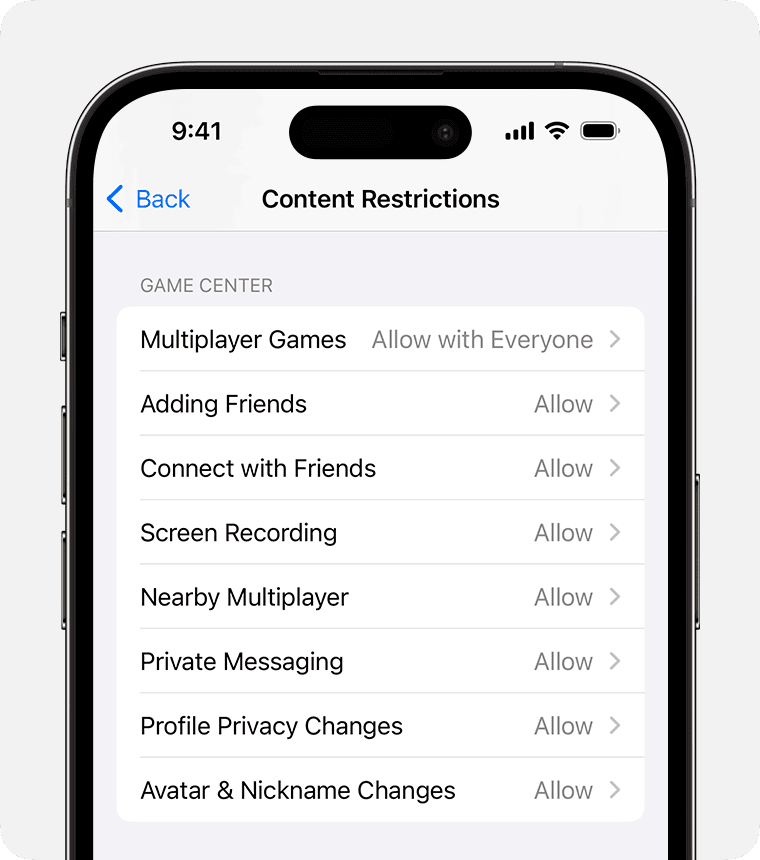
Go to Settings > Screen Time > Content & Privacy Restrictions. Turn on the switch at the top. You can block apps, limit web content, and stop in-app purchases. To block adult sites, tap Content Restrictions > Web Content > Limit Adult Websites. You can also set age ratings for music, movies, and TV shows.
Want to stop kids from changing settings? Tap Privacy and pick which features to lock. This can include location services, contacts, and camera use. You can also block changes to passcodes and accounts.
Setting Up Screen Time and Limits
Screen Time helps track and control device use. Set it up in Settings > Screen Time. Turn on Screen Time for your child’s account.
Set a daily time limit for apps and websites. Tap App Limits > Add Limit. Pick app types or specific apps. Choose how much time to allow each day.
Create a schedule for device-free time with Downtime. Tap Downtime and set start and end times. During this time, only apps you allow will work.
Use Always Allowed to pick apps that work during Downtime. This can include phone calls or educational apps.
Managing Family Sharing and Purchases
Family Sharing lets up to six family members share apps, music, and more. Set it up in Settings > [Your Name] > Set Up Family Sharing.
Turn on Ask to Buy to approve kids’ purchases. Go to Settings > [Your Name] > Family Sharing > [Child’s Name] > Ask to Buy.
Share an iCloud storage plan with your family. In Family Sharing settings, tap iCloud Storage > Share iCloud Storage.
Using Communication Limits and Location Services
Set rules for who kids can talk to. Go to Settings > Screen Time > Communication Limits. Choose allowed contacts during screen time and downtime.
Find My helps keep track of your child’s location. Turn it on in Settings > [Child’s Name] > Find My. You can see their device location in the Find My app.
Set up alerts when your child arrives at or leaves certain places. Open Find My, select your child’s device, and tap Add New Location.
FaceTime Parental Controls
FaceTime is a great way for kids to stay in touch with family and friends. But, as with any online interaction, it’s important to have some safeguards in place. Here’s how to manage FaceTime with parental controls and keep your child’s interactions safe.
Apple offers some built-in features to help you manage your child’s FaceTime use:
- Contacts Only: You can restrict FaceTime to only allow calls with contacts in your child’s contact list. This prevents them from accepting calls from unknown numbers.
- To enable this, go to Settings > Screen Time > Communication Limits > During Screen Time. Choose “Contacts Only.”
- Downtime: Use Screen Time to schedule downtime periods when FaceTime (and other apps) are unavailable. This can help ensure your child isn’t using FaceTime during school hours or late at night.
- Go to Settings > Screen Time > Downtime to set a schedule.
- Communication Limits: You can limit who your child can communicate with during downtime and screen time. This gives you granular control over FaceTime interactions.
- This is also managed in Settings > Screen Time > Communication Limits.
- Monitoring: Regularly check your child’s FaceTime history to see who they’ve been contacting. This can help you identify any potential issues or concerns.
- You can find this information in Settings > Screen Time > See All Activity.
Locking the FaceTime Screen
While you can’t completely lock the FaceTime screen to prevent any interaction, you can use a feature called Guided Access to limit what your child can do during a call. This is helpful for very young children who might accidentally end the call or press other buttons.
Here’s how to use Guided Access with FaceTime:
- Enable Guided Access: Go to Settings > Accessibility > Guided Access and turn it on. Set a passcode.
- Start a FaceTime call: Make or receive a FaceTime call as you normally would.
- Triple-click the side button (or home button on older iPhones): This activates Guided Access.
- Circle any areas of the screen you want to disable: This could include the end call button or other controls.
- Tap “Start” in the top right corner.
Now, your child can only interact with the areas of the screen that you haven’t disabled. To end Guided Access, triple-click the side button again and enter your passcode.
FAQs
How can I set up an iPhone for my child?
To set up an iPhone for your child, you should create a separate Apple ID for them using Family Sharing. This allows you to manage their account and set restrictions using Screen Time. During setup, choose the “Set Up for a Child” option and follow the prompts.
Can you put iPhone in kid mode?
While there’s no dedicated “kid mode,” you can use Screen Time to create a safe and controlled environment. Screen Time lets you set restrictions on app usage, content access, and communication. You can also enable “Ask to Buy” to require your approval for any purchases or downloads.
Should I create a separate Apple ID for my child?
Yes, it’s highly recommended to create a separate Apple ID for your child. This provides them with their own account and allows you to implement parental controls effectively. It also prevents them from accessing your personal data and making unauthorized purchases on your account.
How can a 12 year old make an iPhone safe?
A 12-year-old can make their iPhone safer by following these tips: Use a strong passcode or biometric authentication, be cautious about downloading apps from unknown sources, avoid clicking on suspicious links or attachments, and never share personal information online. They should also talk to a trusted adult if they encounter any inappropriate content or uncomfortable situations online.
Do I use my Apple ID for my child’s phone?
No, you should not use your Apple ID for your child’s phone. It’s best to create a separate Apple ID for them using Family Sharing. This will give you more control over their device usage and protect your personal information.
Is it OK for a 10 year old to have an iPhone?
Whether a 10-year-old should have an iPhone is a personal decision that depends on various factors, including their maturity level, responsibility, and your family’s needs. It’s crucial to establish clear rules and expectations regarding phone usage and implement parental controls to ensure their safety.
Does Apple make a kid friendly phone?
Apple doesn’t make a dedicated “kid-friendly” phone, but the iPhone can be made suitable for children with proper setup and parental controls. Using Family Sharing and Screen Time, you can manage app access, content restrictions, and communication limits to create a safe digital environment for your child.
Should I buy my 11 year old an iPhone?
The decision to buy an 11-year-old an iPhone depends on various factors like their maturity, responsibility, and your family’s needs. Consider whether they need a phone for communication and safety, and be prepared to implement parental controls and have open conversations about responsible phone usage.
Should a 9 year old have an iPhone?
For most 9-year-olds, an iPhone might be too much responsibility. Consider alternative options like a basic phone for calls and texts or a smartwatch with limited features. Focus on open communication and digital literacy education before introducing them to a smartphone.


