Changing your ringtone on an iPhone allows for a more personalized experience. With the range of built-in sounds and the option to purchase new ones, users can customize how their iPhone sounds for calls, texts, and other notifications. The process is simple and can be done within the iPhone’s native Settings app under the ‘Sounds & Haptics’ menu, ensuring that the sound of your device reflects your personal taste or mood.
For those who wish to take a step further in customizing their iPhone, setting a custom ringtone for individual contacts is possible. This means you can easily identify who is calling without having to look at your device. Managing ringtones is straightforward, with changes made effective immediately, helping iPhone users to differentiate between various alerts and calls effectively.
🎵 How to Change Ringtones on iPhone
✅ Step 1: Open Settings
- Unlock your iPhone.
- Go to Settings → Sounds & Haptics (or Sounds, on older iOS versions).
✅ Step 2: Choose a New Ringtone
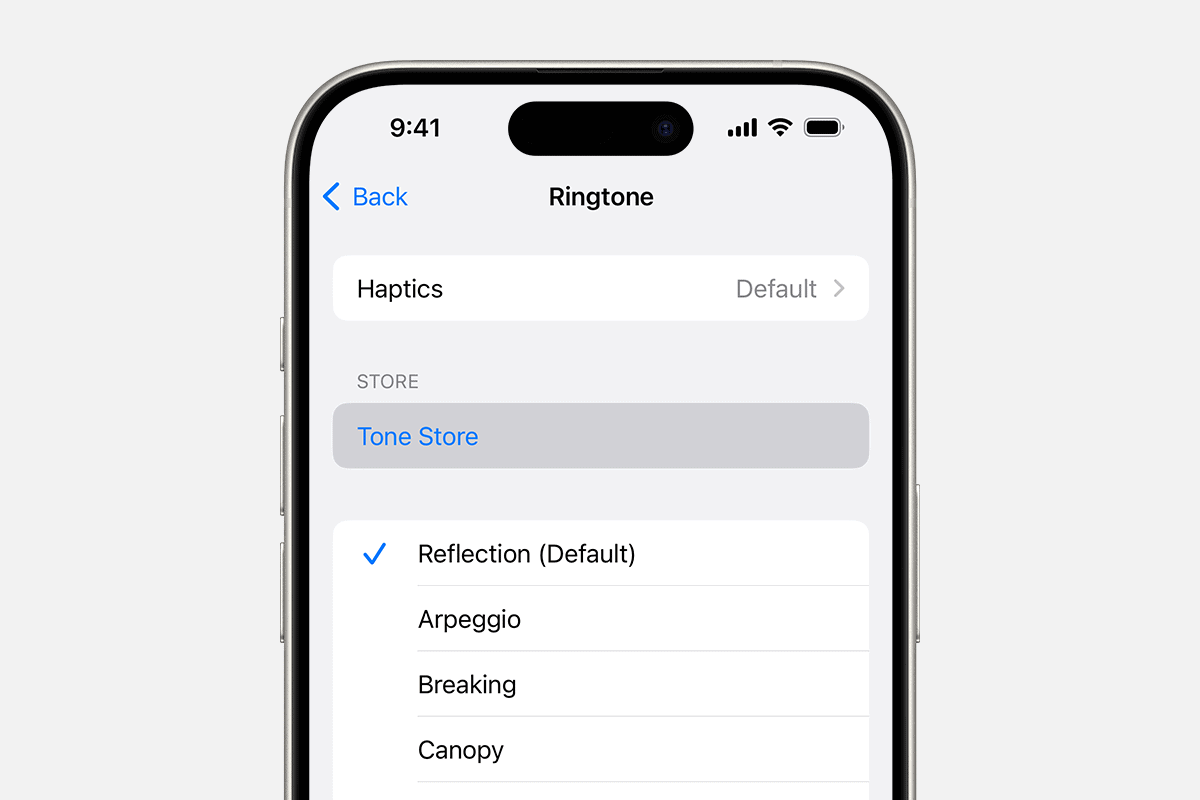
- Under the Sound and Haptic Patterns section, tap Ringtone.
- You’ll see a list of built-in tones.
- Tap any tone to preview it — your iPhone will play the sound.
- Once you find one you like, just tap it — it’s automatically set as your new ringtone.
✅ Step 3: Buy or Download New Ringtones (Optional)
If you want something custom:
- In the Ringtone menu, tap Tone Store (this opens the iTunes Store).
- Browse or search for tones and tap the price to buy one.
- After purchase, it automatically appears in your ringtone list.
Alternatively, you can:
- Use GarageBand to create a custom ringtone from a song or sound file.
- Transfer tones from your computer via Finder (Mac) or iTunes (Windows).
(Source: Apple Support – Select ringtones and vibrations on iPhone, Apple Support – Use tones and ringtones with your iPhone or iPad)
✅ Step 4: Assign a Ringtone to a Specific Contact
You can set unique ringtones for individual contacts:
- Open the Contacts app.
- Select a contact.
- Tap Edit → Ringtone.
- Choose a tone and tap Done.
Now, when that person calls, your iPhone will play their custom ringtone.
✅ Step 5: Set Vibrations or Silent Mode (Optional)
You can also customize vibration patterns:
- In Settings → Sounds & Haptics → Ringtone, tap Vibration.
- Choose a preset pattern or tap Create New Vibration to make your own.
To silence calls entirely, toggle the Ring/Silent switch on the left side of your iPhone.
💡 Pro Tips
- Custom tones must be under 40 seconds long.
- GarageBand is the easiest free way to make your own ringtones.
- Purchased tones are tied to your Apple ID and can be re-downloaded anytime.
Key Takeaways
- Personalizing your iPhone’s ringtone can be done quickly through the Settings app.
- Individual contacts can have different ringtones for easy identification.
- The iPhone provides both built-in options and the ability to upload custom sounds.
Customizing Your Ringtone Settings
Personalizing the sounds on your iPhone ensures you know who’s calling or texting. This part of the article guides you through setting up a ringtone, choosing text tones, and buying new tones.
Accessing Ringtone Settings via the Settings App
To start, open the Settings app on your iPhone. Scroll down and tap ‘Sounds & Haptics.’ This is where you can adjust sound settings including your ringtone and text tone.
Selecting a New Ringtone or Text Tone
Within ‘Sounds & Haptics,’ you can tap ‘Ringtone’ or ‘Text Tone’ to see your options. Your current selection is marked with a check. Choose a new tone to hear it and set it as your default.
Assigning Ringtones to Specific Contacts
For a personal touch, assign different ringtones to people in your contacts. Open a contact in the Contacts app, tap ‘Edit,’ then ‘Ringtone.’ Select the desired tone for that specific contact.
Purchasing Ringtones from the Tone Store
New tones can be bought from the Tone Store. Go to ‘Settings,’ choose ‘Sounds & Haptics,’ and tap ‘Ringtone.’ Here you’ll find a link to the Tone Store where you can browse and buy new ringtones.
Advanced Ringtone Management
Advanced management of ringtones on an iPhone involves creating custom sounds and transferring them onto the device. This section will provide you with precise instructions to customize your iPhone to your liking.
Creating Custom Ringtones Using iTunes or Music App
Create your own ringtones using iTunes on PC or the Music app on Mac. First, select a song and decide which part you want as your ringtone. Right-click the song and choose “Song Info.” Go to the “Options” tab and set the start and stop times for your desired snippet. Remember, ringtones should be under 30 seconds. After setting the times, right-click the song again and select “Create AAC Version” to make a copy of that segment. This creates an AAC file with an .m4a file extension. Change this extension to .m4r by renaming the file.
Transferring Ringtones to Your iPhone via iTunes
To sync the new ringtone to your iPhone, connect the device to your computer and open iTunes. Select your iPhone, click “Tones” under “On My Device,” and drag your .m4r ringtone file to the iTunes window. It will then sync to your iPhone and appear in your ringtone list.
Converting Songs into Ringtones
Converting songs into ringtones is straightforward. Using the steps outlined above, take any song from your library and convert it into an AAC file. Again, keep your clip no longer than 30 seconds. Rename the extension to .m4r, which is the ringtone format compatible with iPhone.
Using Files App and GarageBand for Ringtone Creation
For users without iTunes, utilize GarageBand and the Files app to create ringtones. Open GarageBand on your iPhone and select the instrument to use for the ringtone. Record your tune and share it by tapping the “Share” icon, then “Ringtone.” Export the tune and it will become available in your ringtone options.


