Is your iPhone showing “No Service” instead of signal bars? This can be frustrating when you need to make calls or use mobile data. You can often fix iPhone no service issues by turning airplane mode on and off, restarting your device, checking for carrier setting updates, or resetting network settings. These simple steps solve most connection problems in minutes.
Seeing “No Service,” “Searching,” or “SOS” on your iPhone doesn’t always mean something is broken. Sometimes you’re just in an area with poor cellular coverage, or there might be a temporary network glitch. Before calling your carrier or visiting an Apple Store, try the quick fixes that help most people get back online.
If basic steps don’t work, don’t worry. There are still several advanced troubleshooting options to try, like checking for iOS updates or resetting your phone. Most “No Service” problems can be fixed at home without technical help.
How to Fix “No Service” on iPhone
If your iPhone shows “No Service” or “Searching” in the status bar, it means it’s not connecting to your cellular network. This can happen due to software glitches, network problems, or hardware issues. Follow these steps to troubleshoot and fix it.
1. Check Coverage Area
- Make sure you’re in an area with cellular coverage.
- Move to a different location, preferably outdoors or near a window.
2. Toggle Airplane Mode
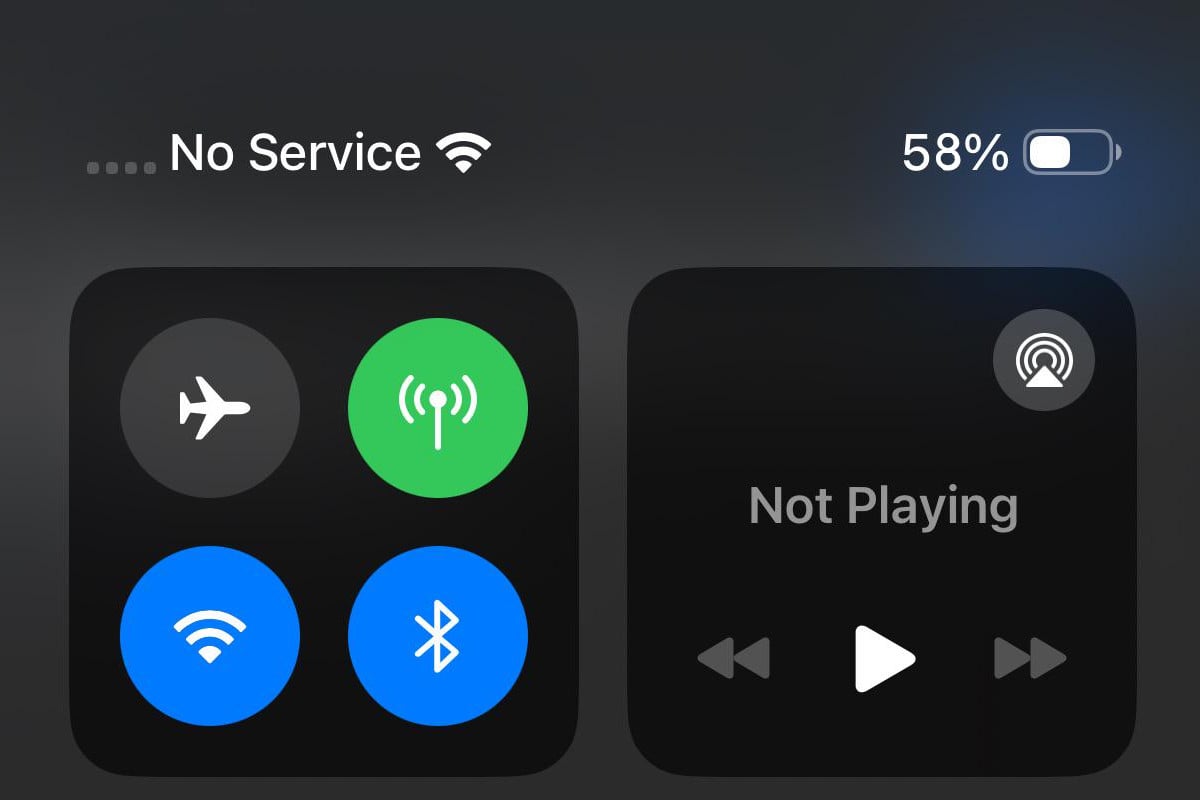
- Open Control Center (swipe down from the top-right corner).
- Tap Airplane Mode to turn it on.
- Wait 10 seconds, then tap again to turn it off.
3. Restart Your iPhone
- Press and hold the power button and either volume button until the slider appears.
- Slide to power off.
- Wait 30 seconds, then turn your iPhone back on.
4. Check for Carrier Settings Update
- Go to Settings > General > About.
- If a carrier update is available, you’ll see a prompt to update.
- Follow the instructions to install the update.
5. Update iOS
- Go to Settings > General > Software Update.
- Download and install any available updates.
6. Remove and Reinsert SIM Card
- Use the SIM eject tool or a paperclip to remove your SIM card.
- Inspect it for damage or dirt.
- Reinsert it carefully and check if service returns.
7. Reset Network Settings
- Go to Settings > General > Transfer or Reset iPhone > Reset > Reset Network Settings.
- Enter your passcode and confirm.
- Note: This will erase saved Wi-Fi passwords and VPN settings.
8. Contact Your Carrier
- Check if there are outages or account issues.
- Confirm your plan is active and supports your device.
9. Restore iPhone (Last Resort)
- Backup your data first.
- Restore your iPhone via Settings > General > Transfer or Reset iPhone > Erase All Content and Settings.
- Set up your iPhone again and check service.
10. Hardware Check
- If none of the above work, your iPhone’s antenna or SIM tray might be damaged.
- Visit an Apple Store or authorized service provider for diagnosis.
Summary Table
| Step | Action |
|---|---|
| Check coverage | Move to an area with signal |
| Toggle Airplane Mode | Turn on/off to reset connection |
| Restart iPhone | Power cycle device |
| Carrier Settings Update | Install updates in Settings |
| Update iOS | Install latest iOS version |
| Reinsert SIM | Remove, inspect, and reinsert |
| Reset Network Settings | Erase network configurations |
| Contact Carrier | Verify account and outages |
| Restore iPhone | Factory reset as last resort |
| Hardware Check | Get professional repair |
For official Apple support, see: If you see SOS, No Service, or Searching on your iPhone or iPad.
Key Takeaways
- Toggle airplane mode or restart your iPhone to quickly fix most “No Service” issues.
- Check if you’re in a coverage area and if your carrier has network outages.
- Reset network settings when simple fixes fail to restore your cellular connection.
Understanding ‘No Service’ on iPhone
When your iPhone displays “No Service,” it means it can’t connect to your carrier’s cellular network. This problem can stem from several sources, from simple software glitches to more complex hardware issues.
Common Causes of No Service Errors
One of the most frequent causes of the “No Service” message is being in an area with poor network coverage. Not all locations have strong cellular signals, especially in rural areas, inside buildings, or underground.
Software issues can also trigger this error. Outdated iOS versions sometimes have bugs that affect network connectivity. Turning Airplane Mode off and on can often reset your connection.
SIM card problems are another common culprit. If your SIM card is:
- Damaged
- Improperly inserted
- Not activated
It won’t connect properly to the network. Try removing and reinserting your SIM card to ensure it’s seated correctly.
Difference Between ‘No Service’ and ‘Searching…’
“No Service” and “Searching…” indicate different connection states. When your iPhone shows “No Service,” it has given up trying to find a cellular signal. This could mean you’re completely out of your carrier’s coverage area.
The “Searching…” message is more hopeful. It means your iPhone is actively trying to locate and connect to a cellular network. This typically appears when you’re in an area with very weak signal or when moving between coverage zones.
“Searching…” often resolves itself when you move to an area with better cellular coverage. “No Service” usually requires troubleshooting steps like restarting your device or checking your SIM card.
Your carrier settings also affect these messages. Outdated carrier settings might cause your phone to display “No Service” even in areas with coverage.
Initial Troubleshooting Steps
When your iPhone displays “No Service,” there are several quick fixes you can try before contacting your carrier or visiting an Apple Store. These simple steps solve most connection problems and only take a few minutes to complete.
Restarting Your iPhone
Restarting your iPhone is often the quickest way to fix network problems. This simple step clears temporary bugs in the software that might be blocking your connection.
For iPhone X and newer models:
- Press and hold the side button and either volume button until the power slider appears
- Drag the slider to turn off your device
- Wait 30 seconds
- Press and hold the side button until the Apple logo appears
For iPhone 8 or earlier:
- Press and hold the top or side button until the power slider appears
- Drag the slider to turn off your device
- Wait 30 seconds
- Press and hold the top or side button until you see the Apple logo
Many iPhone users find that a simple restart fixes connection issues immediately.
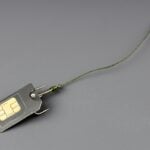
Checking SIM Card Installation
A loose or damaged SIM card can cause “No Service” errors. Properly reinstalling your SIM card often solves the problem quickly.
To check your SIM card:
- Turn off your iPhone completely
- Locate the SIM tray (usually on the right side of your iPhone)
- Insert a SIM ejection tool or paperclip into the small hole
- Gently push until the tray pops out
- Remove the SIM card and check for damage or dirt
- Place the SIM card back in the tray (gold contacts facing down)
- Push the tray back in until it clicks
Make sure the SIM card fits properly in the tray. If it looks damaged or doesn’t fit correctly, you might need a replacement from your carrier like T-Mobile or Verizon.
Toggling Airplane Mode
Toggling Airplane Mode forces your iPhone to reconnect to cellular networks. This refreshes all network connections and often fixes “No Service” issues.
To toggle Airplane Mode:
- Swipe down from the top-right corner (iPhone X or newer) or up from the bottom (iPhone 8 or earlier) to open Control Center
- Tap the airplane icon to turn Airplane Mode ON
- Wait 5-10 seconds
- Tap the airplane icon again to turn it OFF
Your iPhone will search for available networks after Airplane Mode is disabled. This common troubleshooting step works because it resets all wireless connections on your device.
Verifying Cellular Data Settings
Incorrect cellular data settings can cause connection problems. Checking these settings ensures your iPhone can connect properly to your carrier’s network.
To check your cellular data settings:
- Open the Settings app
- Tap Cellular or Mobile Data
- Make sure Cellular Data is turned ON
- If you’re traveling, enable Data Roaming (may incur extra charges)
- Scroll down to check which apps have cellular data access
- Check if you need to update carrier settings (Settings > General > About)
Carrier settings updates are important for network connectivity. If prompted to update these settings, always tap “Update” to ensure your iPhone has the latest configuration from your carrier.
Assessing Network Coverage
Sometimes “No Service” appears simply because you’re in an area with poor cellular coverage. Understanding your coverage area can help solve connection problems.
Ways to check network coverage:
- See if others on the same network (Verizon, T-Mobile, etc.) have service
- Check your carrier’s coverage map on their website
- Move to a different location if possible (higher ground or near windows)
- Try going outdoors if you’re inside a building with thick walls
Cellular signals can be blocked by:
- Thick walls or concrete buildings
- Underground locations
- Remote areas
- Weather conditions like heavy storms
If you still see “No Service,” make sure your account is active and in good standing with your carrier. Unpaid bills can lead to service suspension.
Software Solutions
When your iPhone shows “No Service,” software fixes can often solve the problem quickly. These solutions range from simple settings adjustments to more advanced repair tools.
Updating to the Latest iOS
An outdated iOS version might cause connection problems. Apple regularly releases fixes for network bugs in their updates.
To check for updates, go to Settings > General > Software Update. If an update is available, connect to Wi-Fi and tap “Download and Install.”
Recent iOS updates include specific fixes for cellular connectivity issues. Make sure your phone has enough battery (at least 50%) or keep it plugged in during the update.
Before updating, back up your iPhone data to prevent any loss. The update process usually takes 15-30 minutes depending on your internet speed and iPhone model.
Sometimes, iOS 17 or 18 users may experience “No Service” issues after updating. If this happens, try the other solutions below.
Resetting Network Settings
Network settings issues often cause “No Service” errors. Resetting these settings can fix connection problems without affecting your data.
To reset network settings:
- Go to Settings > General > Transfer or Reset iPhone
- Tap “Reset”
- Select “Reset Network Settings“
- Enter your passcode when prompted
- Confirm by tapping “Reset Network Settings”
Your iPhone will restart, and all network settings will return to factory defaults. This means you’ll need to reconnect to Wi-Fi networks and re-enter passwords.
This reset clears all saved Wi-Fi networks, Bluetooth connections, VPN settings, and cellular settings. Carrier-specific settings will also be restored to defaults.
Many users find this fix works immediately after the restart completes.
Update Carrier Settings
Carriers regularly release settings updates that improve network performance and fix service issues.
To check for carrier updates:
- Connect to Wi-Fi
- Go to Settings > General > About
- Wait a few seconds
- If an update is available, you’ll see a popup asking to update
These updates contain important fixes for how your iPhone connects to your carrier’s network. Carrier settings updates are typically small and install quickly.
If no popup appears, your carrier settings are already current. Some carriers also recommend toggling Airplane Mode on and off to refresh the connection to cellular towers.
You can verify your carrier settings version in Settings > General > About under “Carrier.”
Using iOS Repair Tools
When standard solutions fail, specialized repair tools can fix deeper system issues causing the “No Service” problem.
Several third-party tools like Tenorshare ReiBoot can repair iOS system bugs without data loss. These applications work by refreshing core system files that control network connectivity.
Steps to use repair tools typically include:
- Download and install the repair tool on your computer
- Connect your iPhone via USB cable
- Select “Repair Operating System” or similar option
- Follow the on-screen instructions
These tools offer both standard and deep repair modes. Try the standard mode first, as it preserves your data. Deep repair is more effective but may erase your data.
Some tools provide free basic repairs, while advanced features require payment. Always backup your iPhone before using any third-party repair tool.
Advanced Troubleshooting Techniques
When basic fixes fail to resolve your iPhone’s “No Service” issue, it’s time to try more technical solutions. These methods require careful attention but can often solve persistent network problems.
Entering Recovery Mode
Recovery Mode offers a powerful way to fix stubborn iPhone network issues. To enter Recovery Mode on newer iPhones (8 or later), quickly press and release the volume up button, then volume down button, and finally hold the side button until the recovery screen appears.
For older models like iPhone 7, hold the volume down and power buttons together. On iPhone 6s and earlier, press home and power buttons simultaneously.
Once in Recovery Mode, you can restore your iPhone using iTunes or Finder. This process reinstalls iOS without erasing your data if you choose “Update” instead of “Restore.”
Recovery Mode can fix deeper system issues that cause network problems, especially after iOS updates.
Remember to back up your data before trying this method. The process takes about 15 minutes to complete.
Contacting Tech Support and Verified Experts
When self-help methods don’t work, professional support becomes necessary. Apple Support offers free troubleshooting for network issues through chat, phone, or in-person at Apple Stores.
For carrier-specific problems, contact your network provider’s customer service. They can check if your account has restrictions or if there are outages in your area.
Online platforms like JustAnswer connect you with verified experts who specialize in iPhone network issues. These professionals can provide custom solutions based on your specific situation.
When contacting support, be ready with this information:
- Your iPhone model and iOS version
- When the problem started
- What troubleshooting steps you’ve already tried
- Your carrier name
Good documentation of your issue helps support staff solve your problem faster.
Exploring Carrier-Specific Solutions
Network carriers often have their own fixes for service issues. A Carrier Settings Update might be available to fix connectivity problems. To check, go to Settings > General > About and wait for any update prompts.
Try removing and reinserting your SIM card. Use a paperclip to eject the SIM tray, clean the card with a dry cloth, and reinsert it properly.
Some carriers offer special dialer codes to reset network connections. For example, dialing ##25327# works for some AT&T customers to refresh network settings.
Check if your carrier has a dedicated app that can troubleshoot connection issues. These apps often have automated fixes for common problems.
If you’re traveling, verify your roaming settings are correctly configured for your location. International travel requires specific carrier settings to maintain service.
Considering Hardware Issues
Sometimes “No Service” on your iPhone can stem from actual physical problems with the device. These hardware issues often require different solutions than simple software fixes.
Recognizing Signs of Physical Damage
Look carefully at your iPhone for visible damage. Bent frames, cracked screens, or water damage can cause signal problems. Check if the SIM card tray has debris or damage that might block connections.
If your iPhone was recently dropped or exposed to water, this could explain the service issues. The iPhone 8 and newer models have better water resistance, but they’re not completely waterproof.
Try inspecting the antenna bands (the lines around the edges of your phone). Damage to these areas often leads to connection problems.
Test with another SIM card if possible. If another SIM works, your card might be damaged rather than your phone itself.
Consulting with Professional Repair Services
When basic troubleshooting fails, seek expert help. Apple Stores offer free diagnosis of hardware issues through their Genius Bar. Schedule an appointment online to avoid waiting.
Authorized repair shops can also help identify if your “No Service” problem stems from hardware damage. They have special tools to test internal components.
Be aware that repair costs vary based on your warranty status and the specific problem. Out-of-warranty repairs for signal issues typically range from $300-$500.
For older devices like the iPhone 8, weigh repair costs against replacement. Sometimes system errors that appear to be hardware issues can be fixed with a complete restoration by professionals.
If your phone is still under warranty, Apple might replace it if they confirm a hardware defect is causing the service problem.
Maximizing Cellular Connectivity
Getting better cell service on your iPhone often requires more than just basic troubleshooting. These strategies can help you maintain stronger connections and faster data speeds in various situations.
Upgrading to a Newer iPhone Model
iPhone models differ significantly in their cellular capabilities. Newer iPhones typically have improved antenna designs and better reception quality than older versions.
The iPhone 12 and later models offer enhanced cellular reception. These phones include more advanced modem chips that can maintain connections in areas with weaker signals.
When considering an upgrade, look for:
- Qualcomm modem chips (generally better than Intel)
- Models with additional antenna bands
- Phones that support multiple carrier frequencies
Newer iPhones also handle carrier aggregation better. This technology combines multiple frequency bands for faster data speeds and more reliable connections.
Users in rural or remote areas may see the biggest improvements when upgrading. The difference can be dramatic in places where signal strength is typically poor.
Optimizing Cellular Data Options
Several settings can significantly impact your iPhone’s cellular performance. Properly configuring these options may solve persistent connection problems.
Start by checking your cellular data settings. Go to Settings > Cellular and make sure cellular data is enabled. Sometimes these settings can change accidentally.
For better performance:
- Toggle Data Roaming: Enable when traveling
- Reset Network Settings: Go to Settings > General > Reset > Reset Network Settings
- Update Carrier Settings: Accept when prompted
Voice & Data settings also matter. In Settings > Cellular > Cellular Data Options, you can choose which technology to use. In some areas, switching to LTE or 4G instead of 5G may provide more reliable service.
Turn off unused apps’ cellular access. Many apps use data in the background, potentially slowing your connection when you need it most.
Understanding 4G and 5G Implications
The choice between 4G and 5G can dramatically affect your iPhone’s connectivity and battery life. Each technology has specific advantages and limitations.
5G offers extremely fast speeds but comes with tradeoffs. It may drain battery faster and often has more limited coverage than 4G networks. Many users find that switching to 4G/LTE can provide more consistent service in areas with spotty 5G coverage.
iPhone settings offer three 5G options:
- 5G Auto: Balances performance and battery life
- 5G On: Maximum speed but more battery drain
- LTE/4G: Better battery life and sometimes more reliable
Building materials greatly affect 5G signals. These high-frequency waves have difficulty penetrating concrete, metal, and even energy-efficient window glass. Moving closer to windows or doors may improve 5G reception.
Remember that 5G networks are still expanding. In many areas, 4G LTE remains more reliable and consistent for daily use.
Preventative Measures and Best Practices
Taking steps to prevent the “No Service” issue on your iPhone can save you time and frustration. Regular maintenance and keeping your device updated are key to maintaining reliable cellular connectivity.
Regular Software Updates
Keeping your iPhone’s software up to date is crucial for maintaining proper cellular service. Apple regularly releases updates that fix bugs affecting network connectivity.
To check for updates:
- Go to Settings > General > Software Update
- If an update is available, tap “Download and Install”
- Make sure your phone is charged or plugged in during the update
Carrier settings updates are equally important. These smaller updates improve how your iPhone connects to your carrier’s network. You’ll usually see a notification when these are available, but you can also check manually in Settings.
Don’t ignore update prompts. Even minor updates can contain fixes for cellular issues that might prevent the dreaded “No Service” message from appearing.
Maintaining Device Care
Proper physical maintenance of your iPhone helps prevent service problems. The way you handle and store your device matters for network reception.
Keep your SIM card clean and properly seated in its tray. Remove it occasionally using the SIM ejector tool and gently wipe it with a dry cloth before reinserting it.
Phone cases can sometimes block signal reception. If you notice poor service, try removing your case to see if reception improves. Some thick or metal cases can interfere with cellular signals.
Avoid exposing your iPhone to extreme temperatures. Heat can damage internal components that affect signal reception. Don’t leave it in a hot car or in direct sunlight for extended periods.
Reset your network settings periodically (Settings > General > Reset > Reset Network Settings) to clear any corrupted data that might be affecting your cellular connection.
Frequently Asked Questions
iPhone “No Service” issues can be fixed with some simple troubleshooting steps. Most problems stem from network settings, carrier updates, or physical SIM issues.
How can I resolve the ‘No Service’ message on my iPhone?
When your iPhone shows “No Service,” first try turning Cellular Data off and on. This quick fix often solves the problem right away.
Next, restart your iPhone. A simple reboot clears temporary software issues that might be blocking your connection.
Check if your iPhone needs a carrier settings update. Go to Settings > General > About and wait a few seconds to see if an update appears.
What steps should I take if my iPhone displays no service even with a SIM card inserted?
Check that your SIM card is properly seated. Turn off your iPhone, remove the SIM card, inspect it for damage, and reinsert it correctly.
Make sure you’re in an area with cellular network coverage. Sometimes buildings or remote locations can block signals.
If problems continue, try a network settings reset or consider getting a new physical SIM card from your carrier.
What could cause an iPhone to show a no service status despite being connected to Wi-Fi?
Wi-Fi and cellular connections work independently. Your iPhone can connect to Wi-Fi while still having cellular network problems.
A disabled cellular data setting might cause this issue. Check Settings > Cellular to ensure cellular data is turned on.
Carrier outages in your area may also be responsible. Check your carrier’s website or social media for reported service disruptions.
How do I rectify an iPhone that only shows SOS and does not connect to cellular services?
When your iPhone shows only SOS, it means it can only make emergency calls. First, check your coverage area to ensure you’re within your carrier’s service range.
Toggle Airplane Mode on and off. This refreshes your connection to cellular towers and often fixes SOS-only problems.
Check if your account is active with your carrier. Payment issues or account suspensions can limit your service to emergency calls only.
In what ways can I reset network settings to fix signal issues on my iPhone?
Go to Settings > General > Transfer or Reset iPhone > Reset > Reset Network Settings. This removes all saved Wi-Fi passwords and cellular settings.
After resetting, your iPhone will restart. You’ll need to reconnect to Wi-Fi networks and enter passwords again.
This reset often fixes persistent connection problems by clearing corrupted network settings that might be causing the “No Service” issue.
What should I do if my iPhone continues to indicate no service after a software update?
Check for another iOS update. Sometimes a follow-up update is available that fixes bugs from the previous release.
Contact your carrier to ensure your account and SIM are properly provisioned for your device after the update.
As a last resort, back up your iPhone and perform a factory reset. This completely refreshes the system and often resolves stubborn connection issues.