Backing up your iPhone to your Mac is a crucial step in safeguarding your data. You can easily create a backup using either iCloud or your computer’s storage, ensuring your important information is protected. This process not only secures your data but also simplifies the transfer of content when upgrading to a new device.
Apple offers two main methods for backing up your iPhone to a Mac. The first uses iCloud, which automatically saves your data over Wi-Fi. The second involves connecting your iPhone to your Mac via USB and using Finder or iTunes. Each method has its benefits, depending on your storage needs and preferences.
Choosing the right backup method can save you time and headaches. iCloud backups are convenient but may require a paid subscription for additional storage. Local backups to your Mac offer more control and don’t incur extra costs, but require manual action. Consider your specific needs when deciding which option works best for you.
| Backup Method | Pros | Cons |
|---|---|---|
| iCloud | Automatic, wireless | Limited free storage |
| Mac (Finder/iTunes) | Full control, no extra cost | Manual process, requires connection |
How to Backup iPhone to Mac (2026 Complete Guide)
Backing up your iPhone to your Mac ensures your photos, messages, apps, and settings are safe if your device is lost, damaged, or upgraded.
Whether you want a one-time manual backup or automatic local backups, this step‑by‑step guide will walk you through everything.
Why Backup Your iPhone to a Mac?
Backing up to a Mac gives you:
✅ A full local copy of your data
✅ Faster restore speeds compared to iCloud
✅ Offline access to backups
✅ Extra protection beyond cloud storage
✅ No need to pay for additional iCloud storage
It’s especially useful before:
- Installing a major iOS update
- Upgrading to a new iPhone
- Resetting your device
- Getting repairs
Method 1: Backup iPhone to Mac Using Finder (macOS Catalina or Later)
If your Mac runs macOS Catalina (10.15) or later, you’ll use Finder instead of iTunes.
Step 1: Connect Your iPhone
- Use a USB‑C or Lightning cable
- Unlock your iPhone
- Tap “Trust This Computer” if prompted
Step 2: Open Finder
- Click the Finder icon in your Dock
- Under Locations, select your iPhone
Step 3: Choose Backup Option
Under the “General” tab:
Select:
✅ Back up all of the data on your iPhone to this Mac
Optional (Recommended): Encrypt Your Backup
Check:
🔒 Encrypt local backup
Why encrypt?
- Saves passwords
- Health data
- Wi‑Fi settings
- Website history
Create and remember your encryption password.
Step 4: Click “Back Up Now”
Wait for the process to complete. You’ll see the latest backup date update when finished.
Method 2: Backup Using iTunes (macOS Mojave or Older)
If you’re using macOS Mojave (10.14) or earlier:
- Connect your iPhone
- Open iTunes
- Click the device icon
- Select:Back up all of the data on your iPhone to this Mac
- Click Back Up Now
How to Set Up Automatic Backups to Mac
To enable automatic local backups:
- Connect your iPhone
- Open Finder
- Select your device
- Under “General,” choose:Automatically back up all of the data on your iPhone to this Mac
Now your iPhone will back up whenever it connects.
How to Check Your iPhone Backup on Mac
To verify your backup:
On macOS:
- Open Finder
- Click your iPhone
- Under “General,” check the Latest Backup date
Or:
- Go to System Settings
- Click General
- Click iPhone Storage (or Manage Backups via Finder settings)
How to Restore iPhone from a Mac Backup
If you need to restore:
- Connect your iPhone to your Mac
- Open Finder
- Select your device
- Click Restore Backup
- Choose the backup date
- Enter encryption password (if applicable)
Your phone will restart once complete.
Backup iPhone to Mac Wirelessly (Wi‑Fi Sync)
You can enable wireless backups after first connecting via cable:
Set Up Wi‑Fi Sync:
- Connect iPhone via cable
- Open Finder
- Select your device
- Check:Show this iPhone when on Wi‑Fi
- Click Apply
Now your iPhone can back up wirelessly when:
- It’s on the same Wi‑Fi network
- Plugged into power
- Your Mac is awake
iCloud vs Mac Backup: Which Is Better?
| Feature | Mac Backup | iCloud Backup |
|---|---|---|
| Storage Limit | Limited by Mac storage | 5GB free, paid plans available |
| Speed | Faster (local) | Depends on internet |
| Requires Internet | No | Yes |
| Automatic | Yes (when connected) | Yes (daily) |
| Accessibility | Only on your Mac | Anywhere |
💡 Best practice: Use both for maximum protection.
Troubleshooting: Backup Not Working?
iPhone Not Showing in Finder?
- Try a different cable
- Restart both devices
- Update macOS
- Check USB permissions
Not Enough Storage on Mac?
- Delete old backups
- Move files to external drive
- Check backup size in Finder
Forgot Backup Encryption Password?
Unfortunately, encrypted backups cannot be restored without the password. You’ll need to create a new backup.
How Long Does a Backup Take?
It depends on:
- Storage size on iPhone
- Number of photos/videos
- USB speed
- Mac performance
First backup: 10–45+ minutes
Future backups: Much faster (incremental)
Final Thoughts
Backing up your iPhone to your Mac is one of the smartest things you can do to protect your data. It’s fast, secure, and doesn’t rely on cloud storage limits.
For maximum safety: ✅ Enable encrypted local backups
✅ Keep automatic backups turned on
✅ Maintain an iCloud backup as a secondary copy
Your future self will thank you.
Preparing Your iPhone and Mac for Backup
Before starting the backup process, it’s crucial to ensure your devices are ready. This involves checking compatibility, updating software, and managing iCloud settings.
Check Compatibility and System Requirements
To back up your iPhone to your Mac, you need compatible devices and operating systems. For Macs running macOS Catalina or later, use Finder. For older versions, use iTunes.
Make sure your Mac has enough storage space for the backup. Check available space in “About This Mac” under the Apple menu.
Your iPhone should be running the latest iOS version compatible with your Mac. This ensures all features work correctly during backup.
A USB cable is essential for connecting your iPhone to your Mac. Use the cable that came with your iPhone or a certified replacement.
Update Software on iPhone and Mac
Keeping your devices updated is vital for a smooth backup process.
On your iPhone:
- Go to Settings > General > Software Update
- If an update is available, tap “Download and Install”
On your Mac:
- Click the Apple menu > System Preferences > Software Update
- Install any available updates
Restart both devices after updating to ensure all changes take effect.
Manage Your iCloud Settings
iCloud settings play a crucial role in the backup process.
On your iPhone:
- Go to Settings > [Your Name] > iCloud
- Ensure you’re signed in with your Apple ID
- Toggle on the items you want to back up
Check your iCloud storage:
- In the same iCloud settings, tap “Manage Storage”
- If you’re running low, consider upgrading your plan
| iCloud Plan | Storage | Monthly Cost |
|---|---|---|
| Free | 5GB | $0 |
| Basic | 50GB | $0.99 |
| Standard | 200GB | $2.99 |
| Premium | 2TB | $9.99 |
Remember to enable iCloud Backup if you want automatic daily backups when your iPhone is charging and connected to Wi-Fi.
Using Finder to Backup Your iPhone
Backing up your iPhone to your Mac using Finder is straightforward. This process ensures your data is safe and easily recoverable if needed.
Connect and Trust Computer
Connect your iPhone to your Mac with a USB cable. Unlock your iPhone and tap “Trust” when prompted. Enter your passcode if asked. This step is crucial for your Mac to recognize and access your iPhone.
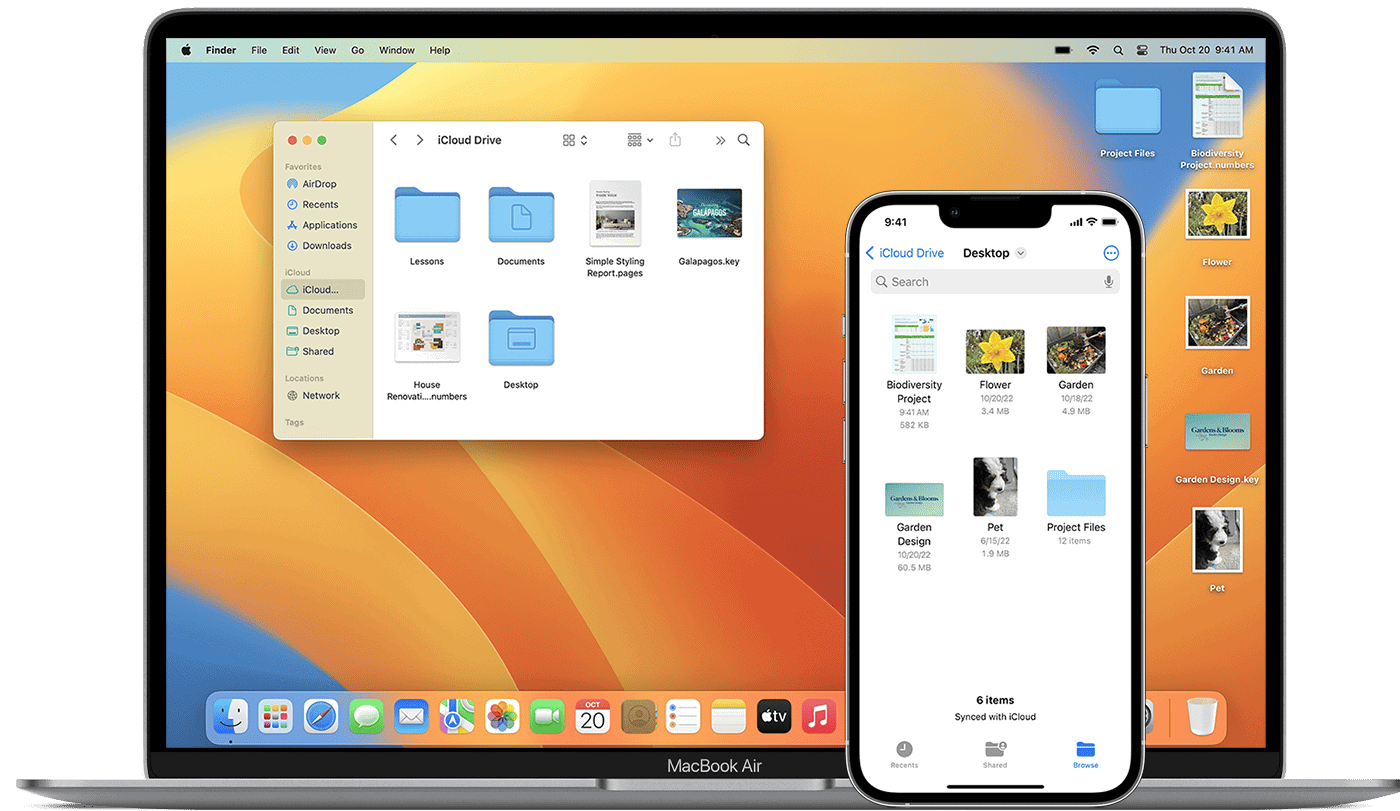
On your Mac, open Finder. You’ll see your iPhone listed under “Locations” in the sidebar. If it doesn’t appear, check your cable connection and ensure your iPhone is unlocked.
Selecting Your iPhone in Finder
Once connected, click on your iPhone in the Finder sidebar. A new window will open showing your device information and backup options.
At the top of this window, click the “General” tab if it’s not already selected. Here you’ll see options for managing your iPhone, including backups.
You can choose to back up your iPhone to iCloud or your Mac. For a local backup, select “Back up all of the data on your iPhone to this Mac.”
Encrypting Your Backups
For added security, encrypt your backups. This protects sensitive information like passwords and health data.
To enable encryption, check the box next to “Encrypt local backup”. Create a strong password and store it safely. You can’t recover your backup without this password.
After setting up encryption, click “Back Up Now” to start the process. The time needed depends on your data amount. Keep your iPhone connected until it’s done.
| Backup Type | Pros | Cons |
|---|---|---|
| Unencrypted | Faster, no password needed | Less secure |
| Encrypted | More secure, includes all data | Requires password, slightly slower |
Alternative Backup Methods
Backing up your iPhone to your Mac isn’t the only option. You can use wireless backups or third-party solutions for added flexibility and features.
Using iCloud for Wireless Backups
iCloud offers a convenient way to back up your iPhone wirelessly. To set it up, go to Settings > [Your Name] > iCloud > iCloud Backup on your iPhone. Toggle on iCloud Backup. Your device will automatically back up when connected to Wi-Fi and a power source.
iCloud backups include app data, photos, messages, and settings. You get 5GB of free storage. For more space, you can upgrade your iCloud plan.
Pros of iCloud backups:
• Automatic and wireless
• Access from any device
• Easy to restore
Cons:
• Limited free storage
• Requires internet connection
• May take longer than local backups
Third-Party Backup Solutions
Several third-party apps offer advanced backup features for your iPhone. iMazing is a popular choice. It allows selective backups, data browsing, and direct file transfers.
Other options include:
• Acronis True Image
• dr.fone
• AnyTrans
| App | Key Features | Price |
|---|---|---|
| iMazing | Selective backups, data browsing | $34.99 |
| Acronis True Image | Cybersecurity, full-image backup | $49.99/year |
| dr.fone | Data recovery, phone transfer | $39.95/year |
| AnyTrans | Cloud backup, media downloader | $39.99/year |
These apps often provide more control over your backups. You can choose what to back up and where to store it. Some allow backups to external drives or NAS devices for extra security.
Restoring a Backup to Your iPhone
Restoring your iPhone from a backup lets you recover your data and settings. You can use either a Finder backup on your Mac or an iCloud backup.
Restore from Finder Backup
To restore your iPhone from a Finder backup on your Mac:
- Connect your iPhone to your Mac with a USB cable
- Open a Finder window and select your iPhone
- Click “Restore Backup”
- Choose the backup you want to use
- Enter your backup password if it’s encrypted
- Click “Restore” and wait for the process to finish
Your iPhone will restart once restored. Keep it connected until the sync completes.
Finder backups are stored locally on your Mac. They’re faster to restore from than iCloud but require your Mac to be available.
Restore from iCloud Backup
To restore your iPhone from an iCloud backup:
- On your iPhone, go to Settings > General > Reset
- Tap “Erase All Content and Settings”
- Follow the setup steps until you reach “Apps & Data”
- Tap “Restore from iCloud Backup”
- Sign in with your Apple ID
- Choose the backup you want to use
The restore process can take a while depending on your internet speed and backup size. Keep your iPhone connected to power and Wi-Fi.
iCloud backups are convenient since you can restore from anywhere. But they may be slower than local backups.
Troubleshooting Backup Restoration Issues
If you encounter problems restoring your backup:
• Check your internet connection for iCloud restores
• Ensure you have enough free space on your iPhone
• Update to the latest iOS version
• Try a different USB cable or port for Finder restores
If your iPhone crashes during restore:
- Force restart your device
- Try the restore process again
- If issues persist, restore to factory settings and set up as new
| Backup Type | Pros | Cons |
|---|---|---|
| Finder | Faster restore, larger capacity | Requires Mac, less convenient |
| iCloud | Restore from anywhere, automatic | Slower, limited by iCloud storage |
Contact Apple Support if you still can’t restore your backup successfully.
Frequently Asked Questions
Backing up your iPhone to a Mac involves several methods and considerations. Let’s address some common queries about the process, timing, and data coverage.
What are the steps to backup an iPhone to a MacBook Air without using iCloud?
You can back up your iPhone to a MacBook Air using Finder. Connect your iPhone to the MacBook with a USB cable. Open Finder and select your device. Click “Back Up Now” under the General tab.
How can I backup my iPhone to my Mac using iTunes?
For Macs running macOS Mojave or earlier, iTunes is used for iPhone backups. Open iTunes and connect your iPhone. Select your device and click “Back Up Now” in the Summary tab.
What is the process for transferring all data from iPhone to a Mac computer?
To transfer all data, use Finder or iTunes depending on your macOS version. Connect your iPhone, select it in Finder or iTunes, and choose “Back Up Now”. This creates a complete backup of your device on your Mac.
Is it possible to backup an iPhone to a Mac without using a cable, and how?
Yes, you can back up wirelessly. Enable Wi-Fi sync in Finder or iTunes. Once set up, your iPhone will back up automatically when connected to the same Wi-Fi network as your Mac.
How long typically does a full iPhone backup take when using a Mac?
Backup time varies based on data amount and connection speed. A full backup can take 20 minutes to 2 hours. Subsequent backups are usually faster as they only save changes since the last backup.
Does backing up an iPhone to a Mac save all the data including Apple Music and app data?
A Mac backup includes most iPhone data, including contacts, messages, and app data. It doesn’t include data already stored in iCloud, like iCloud Photos or Apple Music. Some app data may require separate backups within the apps themselves.
| Backup Method | Pros | Cons |
|---|---|---|
| Finder/iTunes | Full control, free storage | Requires cable (initially), manual process |
| Wi-Fi Sync | Convenient, automatic | Slower than wired, both devices must be on same network |
| iCloud | Automatic, accessible anywhere | Limited free storage, requires internet connection |


