Release Window: A Moving Target
Apple originally penciled in March 2025 for its wall-mountable smart-display hub, but the project slipped when engineering teams realized that the next-gen, on-device version of Siri—now part of the broader “Apple Intelligence” initiative—wouldn’t be ready in time. Supply-chain analysts now expect pilot builds in Q3 2025 and mass production during Q4 2025. If that schedule holds, Command Center could debut alongside the iPhone 17 lineup in September. Internally, however, Apple is telling partners to prepare for a contingency launch in early 2026 if Siri’s new large-language model needs additional tuning.
Why the Delay?
- AI-Enhanced Siri
- The new Siri will run a trimmed, on-device model for privacy-focused tasks—summarizing notifications, adjusting smart-home scenes via natural language, and identifying household members by voice.
- These models require the extra neural-engine cores in Apple’s A18 system-on-chip (SoC), which is only just rolling out across the 2025 iPhone and Apple TV refreshes.
- homeOS Re-architecture
- Command Center runs a fork of tvOS, now branded homeOS, built to surface Matter-, Thread-, and HomeKit-native devices in a dashboard view.
- The software uses Apple’s new “Liquid Glass” design language (also visible in the iOS 26 Control Center), and early betas reportedly struggled with legibility and memory usage—issues now addressed in the second developer beta.
Hardware at a Glance
| Component / Spec | Possible Details |
|---|---|
| Display | 6.8-inch 120 Hz LCD; square aspect; anti-reflective glass |
| Processor | A18 (6-core CPU, 10-core GPU, 16-core Neural Engine) |
| Memory & Storage | 8 GB LPDDR5 RAM, 64 GB flash for system + cache |
| Camera & Audio | 12 MP FaceTime camera; four-mic far-field array; dual force-cancelling woofers |
| Sensors | Ambient light, proximity, UWB for Precision Find and room presence |
| Connectivity | Wi-Fi 7, Thread radio, Bluetooth 5.4, Ultra-Wideband 2 |
| Mount / Power | Magnetic pogo-pin dock with 20 W fast-charge; optional VESA wall plate |
| OS | homeOS 1.0 with native widgets, Control Center side-sheet, and StandBy-style clock when idle |
What Sets Command Center Apart
- Private, on-device AI – All quick-query language tasks run locally; only complex requests roll up to Apple’s secure relay.
- Instant Handoff – Walk up with an iPhone 17 and Home Key, Media Playback, or a FaceTime call automatically expands to the larger screen.
- Adaptive UI – Proximity sensors dim the display when you leave, show an always-on nightstand clock after dark, and open a full dashboard when you return.
- Matter Thread Border Router – Acts as the primary Thread and Matter hub, reducing the need for third-party bridges.
- Apple TV Tight-Coupling – Doubles as a secondary display for the 2025 Apple TV 4K, showing Now Playing info, HomeKit camera feeds, or fitness stats while the TV handles full-screen content.
Competitive Landscape
While Amazon’s Echo Show 15 and Google’s Nest Hub Max lean on cloud-first assistants, Apple is betting on on-device processing and tighter privacy controls as key differentiators. The A18’s power also allows the hub to render high-fps animations and run HomeKit Secure Video analysis locally, keeping footage off Amazon and Google servers entirely.
Looking Ahead: The “J595” Variant
Apple’s advanced prototype—internally code-named J595—adds a small articulated arm that tilts the screen toward users as they enter a room, similar to the motorized Echo Show 10. Engineers are exploring integration with computer-vision algorithms to follow a subject during FaceTime or Apple Fitness+ sessions. J595 is unlikely to ship before 2026.
Quick-Reference Timeline
| Milestone | Status |
|---|---|
| Employee field-testing | Ongoing since January 2025 |
| Engineering validation builds | Complete (March 2025) |
| Pilot production | Targeting August 2025 |
| Mass production | Targeting November 2025 |
| Public unveiling | Most likely September 2025 (iPhone 17 event) |
| Retail availability | Late 2025–Early 2026 depending on software readiness |
TL;DR
Command Center is evolving from a simple “HomePod with a screen” into Apple’s privacy-first smart-home nerve center, powered by an A18 chip and a new on-device Siri. Manufacturing is lining up for late-2025, but the launch could shift to early 2026 if Apple’s AI stack needs more polish. A follow-up model with robotic motion tracking is already on the drawing board.
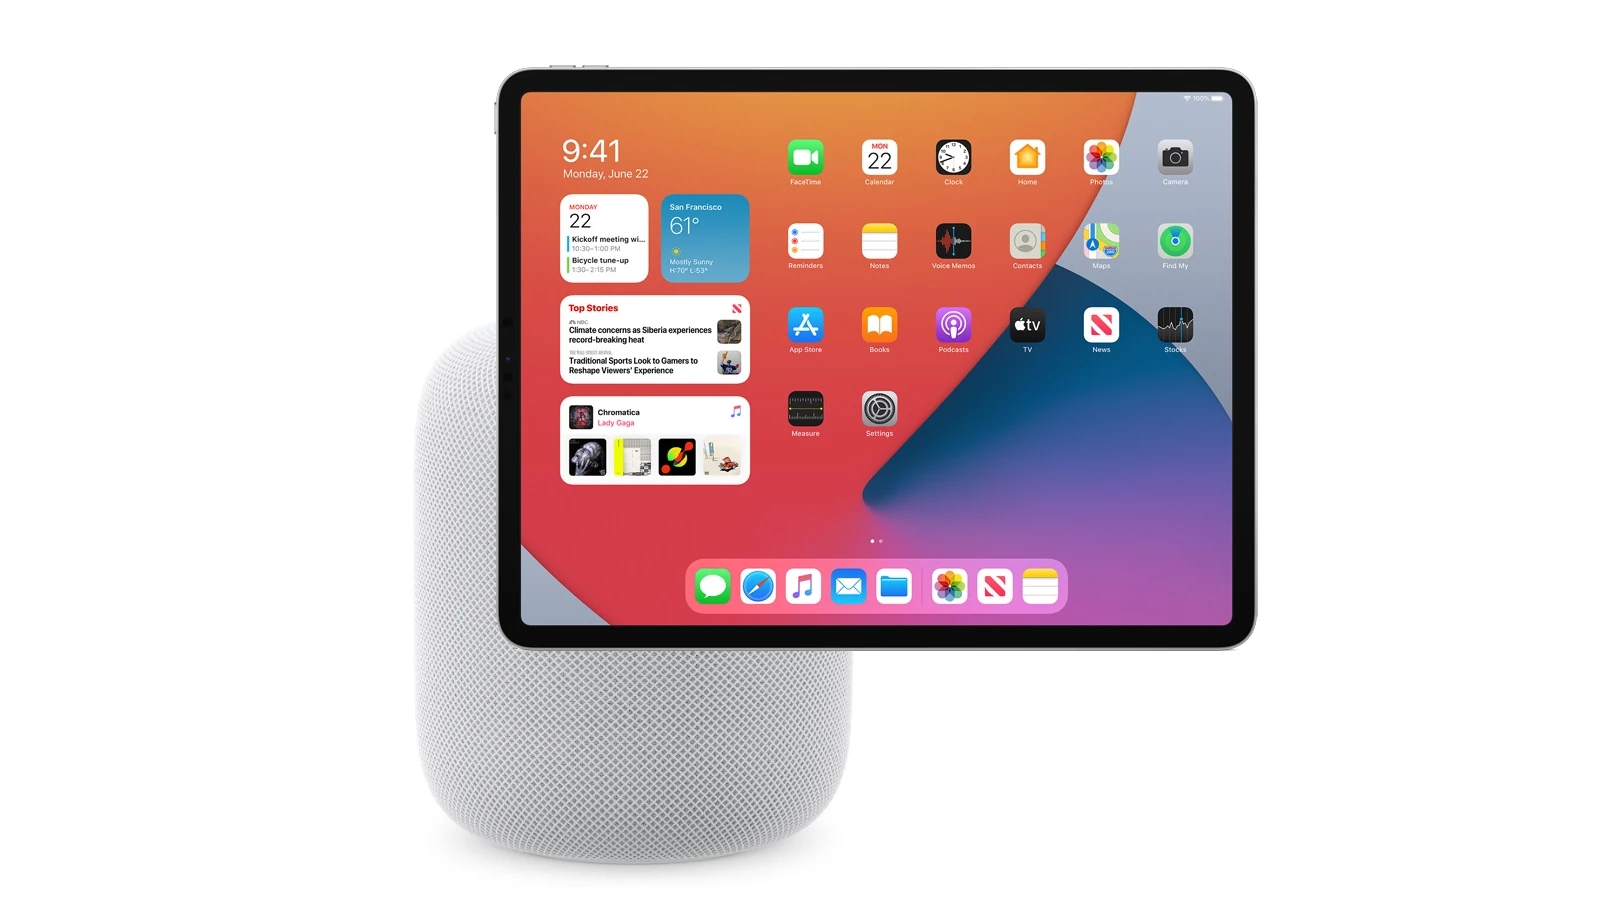
How to Use iPad as Smart Home Hub
Using an iPad as a smart home hub lets you control your lights, locks, and other smart devices from one place. You can set up your iPad to work with HomeKit and manage your entire home with the Apple Home app. While iPads could previously serve as full home hubs, with the new Home architecture upgrade, they now have limited functionality compared to HomePod or Apple TV devices.
Setting up your iPad for smart home control is simple. Connect it to your home Wi-Fi, enable Bluetooth, and make sure you’re signed in with your Apple ID. For wall-mounted setups, many users create a child account specifically for their home control iPad and share their home with this account, giving them a dedicated control center for their smart devices.
Your iPad can still control smart home devices even with the recent changes. You can create automations, control devices when at home, and use your iPad as a central display for your smart home. For full remote access capabilities when away from home, you’ll need a HomePod or Apple TV as your primary hub.
While it was previously possible to use an iPad as a HomeKit hub, Apple no longer supports the iPad as a home hub on the latest Home architecture. This change was implemented to provide a more reliable and efficient smart home experience. Support for the previous version of Apple Home (where iPads could function as hubs) is expected to end in Fall 2025.
What does this mean for using your iPad with smart home devices?
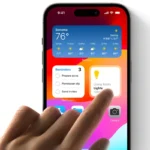
- Control Center: Your iPad can still be used as a control center for your smart home devices through the Home app. This means you can use it to manually turn lights on/off, adjust thermostats, view camera feeds, and trigger scenes.
- Remote Access and Automations: To gain remote access to your smart home (controlling devices when you’re away from home) and enable automations (like lights turning on at sunset or a thermostat adjusting when you leave), you will need a dedicated home hub.
Recommended Home Hubs for Apple HomeKit:
Apple recommends using one of the following devices as a dedicated home hub:
- HomePod
- HomePod mini
- Apple TV (4th generation or later)
When you set up one of these devices, they automatically become a home hub.
Setting up your iPad as a control center (and for previous Home architecture):
If you are using an older iPadOS version or haven’t upgraded your Home architecture, you might still be able to enable your iPad as a home hub. However, it’s important to note the limitations.
Here’s how you would typically set it up:
- Sign in to iCloud: Go to
Settings > [your name] > iCloud, and make sure “Home” is turned on under “Apps Using iCloud.” You need to be signed in with the same Apple ID used to set up your HomeKit accessories. - Enable Home Hub (if available): Go to
Settings > Homeand turn on “Use this iPad as a Home Hub.” - Keep it connected: For the iPad to function as a hub, it must remain in your home, powered on, and connected to your home Wi-Fi network.
Best Smart Home Apps for iPad (beyond the Apple Home app):
While the built-in Apple Home app is your primary interface for HomeKit, several other apps can enhance your smart home experience on iPad, offering more advanced control, customization, and compatibility with various devices:
- Home Assistant: An open-source option that offers extensive customization and supports a wide range of integrations. It has a steeper learning curve but is highly powerful.
- Controller for HomeKit: Provides more granular control and advanced features for HomeKit devices that aren’t available in the standard Home app.
- Home+ 6: A full-featured HomeKit app that allows you to create powerful automations not possible with the standard Home app, access all characteristics of an accessory, and customize your smart home.
- Amazon Alexa / Google Home: If you have devices outside the HomeKit ecosystem, these apps can help you control them and integrate them into a broader smart home setup.
- Specific brand apps: Many smart home device manufacturers have their own apps (e.g., Philips Hue, Eve, Nanoleaf) that offer unique features and deeper control over their specific products.
In summary, while your iPad is excellent for controlling your smart home devices, a dedicated HomePod or Apple TV is now required for full hub functionality, including remote access and automations, with the latest Apple Home architecture.
Key Takeaways
- iPads can control smart home devices using the Apple Home app but have limited hub functionality with the new HomeKit architecture.
- Wall-mounted iPads make excellent control centers when set up with the right account permissions and Wi-Fi connectivity.
- For remote access when away from home, a HomePod or Apple TV is needed as the primary smart home hub.
Understanding the HomeKit Ecosystem
Apple’s HomeKit ecosystem creates a seamless network for controlling smart home devices. It connects your Apple devices to your lights, locks, thermostats, and more for easy management.
What is Apple HomeKit?
HomeKit is Apple’s smart home platform that lets you control compatible devices with your iPhone, iPad, or Mac. It creates a unified system where different products work together smoothly.
HomeKit offers several key benefits:
- Secure Communication: All device connections use end-to-end encryption
- Simple Setup: Add devices by scanning a code with your Apple device
- Scenes & Automations: Create custom actions like “Good Morning” or “I’m Home”
- Voice Control: Use Siri to control devices with simple commands
The Home app serves as the central control point for all your HomeKit devices. You can organize devices by rooms and zones, making it easier to manage larger homes.
HomeKit works with many device types including lights, locks, thermostats, cameras, and speakers. The number of compatible products continues to grow each year.
The Role of iPad in HomeKit
Your iPad can function as a HomeKit UI for controlling smart devices, though recent changes have affected its hub capabilities.
In newer systems, iPads can no longer serve as full home hubs. Instead, you’ll need a HomePod, HomePod mini, or Apple TV to handle that role. These devices automatically become home hubs when set up.
Despite this change, iPads still offer valuable HomeKit features:
- Remote control of your devices when you’re away from home
- Viewing security camera feeds
- Managing automations and scenes
- Serving as a wall-mounted control panel
To use your iPad as a control panel, you can mount it on a wall and keep it powered. This creates a convenient way for everyone in your home to control devices without needing their own Apple device.
Setting Up Your iPad as a Home Hub
Using your iPad as a smart home hub lets you control your devices even when you’re away from home. The setup process is straightforward but requires meeting specific requirements and proper configuration.
Requirements for Using iPad as a Home Hub
To use your iPad as a home hub, you’ll need:
- An iPad running iOS 10 or later
- The Home app installed
- The same Apple ID signed in on all your devices
- iPad connected to your home Wi-Fi network
- iPad powered on and at home (not traveling with you)
Important note: Recent changes to HomeKit have affected iPad functionality as a hub. If you’ve upgraded to the new Home architecture, iPads can no longer serve as hubs. You’ll need an Apple TV or HomePod instead.
For those using older HomeKit versions, the iPad must stay at home, plugged in, and turned on to maintain hub functionality. This ensures your smart devices remain accessible when you’re away.
Configuring Your iPad for HomeKit
Setting up your iPad as a hub takes just a few simple steps:
- Open the Settings app on your iPad
- Scroll down and tap on Home
- Turn on the toggle for “Use this iPad as Home Hub”
After activation, your iPad will appear in the Home app’s hub section. For best results, keep your iPad plugged in and connected to power. This prevents battery drain issues that could interrupt your smart home control.
Your iPad must stay connected to your home Wi-Fi network at all times. Any disconnection will disable remote access to your HomeKit devices.
Connecting to iCloud
A proper iCloud connection forms the backbone of your iPad hub setup:
- Go to Settings on your iPad
- Tap your name at the top
- Select iCloud
- Make sure Home is toggled ON
- Enable Two-Factor Authentication for your Apple ID (required for security)
All devices you want to control must use the same Apple ID. This ensures proper communication between your hub and smart accessories.
If you encounter connection problems, sign out of iCloud and sign back in. This often resolves syncing issues between your iPad hub and smart devices.
Remember that iCloud serves as the bridge between your physical location and remote access to your smart home.
Connecting Smart Devices with iPad
An iPad can serve as a powerful control center for your smart home devices. The process involves pairing compatible devices, ensuring they work with your iPad, and organizing them in the Apple Home app for easy access and control.
Pairing Devices with HomeKit
HomeKit creates a seamless connection between your iPad and smart devices. To start pairing, open the Home app on your iPad and tap the “+” icon in the top right corner. Select “Add Accessory” and follow the on-screen instructions.
Most HomeKit devices include a QR code or an 8-digit setup code. Scan this code with your iPad’s camera when prompted. If your device doesn’t have a code, look for “Don’t Have a Code or Can’t Scan?” option and follow those steps instead.
Once paired, name your device and assign it to a room. This organization helps you find and control devices faster. You can also create device groups to control multiple items at once.
Some devices may need their manufacturer’s app installed first before they can connect to HomeKit. Check the product instructions if you run into troubles during setup.
Managing Smart Device Compatibility
Not all smart home products work with iPad directly. Look for the “Works with Apple HomeKit” label when shopping for new devices. Popular brands like Philips Hue, Ecobee, and Lutron typically offer good iPad compatibility.
For non-HomeKit devices, check if they work with platforms like:
- Amazon Alexa
- Google Home
- Samsung SmartThings
Many manufacturers offer their own apps that let you control devices from your iPad even without HomeKit support.
To expand compatibility, consider adding a home hub like HomePod mini or Apple TV. These devices allow remote access to your smart home and support more connection types like Zigbee through third-party bridges.
Remember that your iPad must remain at home, powered on, and connected to WiFi to function as a hub for some features.
Adding Devices to Apple Home App
The Apple Home app serves as command central for your smart devices. To add devices, ensure your iPad runs the latest iOS version. Open the Home app and tap the “+” icon, then select “Add Accessory.”
You can organize devices by:
- Rooms: Group devices by location
- Scenes: Create custom settings for multiple devices
- Automations: Program devices to respond to triggers
For wall-mounted setups, create a dedicated child account and share your Home with it. This allows anyone to control devices without accessing your personal information.
To add family members as users, tap the Home icon, then “Home Settings,” and select “Invite People.” They’ll receive an invitation to join your smart home network and can control devices from their own Apple devices.
Most settings can be adjusted by tapping and holding a device’s icon in the Home app, giving you quick access to more detailed controls.
Creating Automations with iPad
Automations turn your iPad into a powerful smart home controller that runs tasks automatically based on triggers like time, location, or device status. With the right setup, your smart home can respond to your daily routines without manual input.
Basic Automation Tips
To start creating automations on your iPad, open the Home app and tap the Add button. Select “Add Automation” to see available triggers. Common triggers include:
- Time of day
- When someone arrives/leaves
- When a sensor detects something
- When an accessory is controlled
Your iPad must be turned on, connected to Wi-Fi, and remain in your home to function as a hub. This keeps automations running even when you’re away.
For a simple automation, try setting lights to turn on at sunset. Select the time trigger, choose sunset, pick which lights to control, and set them to turn on. Test your automation by waiting for the trigger or using the test button.
Advanced HomeKit Automations
Multiple conditions make automations truly powerful. You can set lights to turn on only if motion is detected and it’s after sunset. This prevents lights from activating unnecessarily during daylight hours.
Create scenes first to control multiple devices with one automation. A “Movie Night” scene might dim lights, lower blinds, and turn on the TV. Then create an automation that activates this scene at 8 PM on weekends.
For location-based automations, ensure your iPad has:
- Location Services enabled
- Home app permission to use your location
- “Home” address correctly set in Maps
Automations can perform complex sequences like turning on the coffee maker when your morning alarm goes off, or activating security cameras when everyone leaves home.
Troubleshooting Common Automation Issues
If automations fail to run consistently, check that your iPad is properly set up as a home hub. The iPad must remain powered on and connected to your home network.
Common automation problems include:
Issue: Automations run inconsistently
Fix: Keep iPad plugged in and disable auto-sleep in Settings > Display & Brightness > Auto-Lock > Never
Issue: Location triggers don’t work
Fix: Verify Location Services is on and set to “Always” for the Home app
Issue: Devices don’t respond
Fix: Check device battery levels and Wi-Fi connection strength
If automations still fail, try removing and recreating them. Sometimes a fresh setup resolves hidden conflicts. For complex issues, restart your iPad and home network equipment.
Remember that some smart devices require their own hubs or bridges to work with HomeKit, so check compatibility before troubleshooting.
Voice Control and Remote Access
Your iPad offers powerful ways to control your smart home using just your voice and access your devices from anywhere. With proper setup, you can manage lights, locks, thermostats, and other connected devices even when you’re away from home.
Configuring Siri for Smart Home Commands
Setting up Siri to control your smart home devices is straightforward on your iPad. First, make sure your smart devices are added to the Home app. Then open Settings, tap Siri & Search, and ensure “Listen for Hey Siri” is enabled.
You can give Siri specific commands like:
- “Hey Siri, turn off the living room lights”
- “Hey Siri, set the thermostat to 72 degrees”
- “Hey Siri, lock the front door”
For easier access, create custom scenes in the Home app for common activities. For example, set up a “Good Night” scene that turns off lights, locks doors, and adjusts the thermostat. Then simply say “Hey Siri, Good Night” to activate all these actions at once.
Siri also works with smart home routines. You can set up scheduled events that run automatically at specific times or when certain conditions are met.
Remote Access Through Apple Devices
To control your smart home when you’re away, your iPad needs to be set up as a home hub. This allows secure remote access to all your connected devices.
Setting up remote access:
- Go to Settings > [Your Name] > iCloud
- Make sure Home is toggled on
- Go to Settings > Home
- Turn on “Use this iPad as a Home Hub”
However, it’s important to note that Apple has discontinued iPad home hub support in 2025. For continued remote access, you’ll need to use an Apple TV, HomePod, or HomePod mini as your home hub instead.
Once set up, you can control your smart home from any Apple device. Your iPhone, Mac, and Apple Watch can all access your home controls from anywhere with an internet connection.
Using iPad with Other Voice Assistants
While Siri integration is seamless, your iPad can also work with other popular voice assistants. For Google Assistant, download the Google Home app from the App Store and sign in with your Google account.
For Amazon Alexa:
- Install the Alexa app on your iPad
- Sign in to your Amazon account
- Add your smart devices to the Alexa app
- Use the app’s interface to control devices or give voice commands
Some smart home systems allow you to create connections between different platforms. For example, Homebridge can link devices that don’t normally work together, letting you control HomeKit devices with Alexa or Google Assistant.
Many smart home devices now have their own apps with voice control features. You can download these apps to your iPad for additional control options beyond what Apple’s Home app provides.
Integrating with Other Smart Home Systems
Using your iPad as a smart home hub opens up a world of possibilities beyond just Apple’s HomeKit ecosystem. You can connect to various smart devices and systems, giving you control of your entire home from one place.
Cross-Platform Compatibility
iPads work best with HomeKit, but they can also connect to other smart home platforms. This flexibility makes them powerful control centers for mixed-device homes.
The key to cross-platform success is choosing the right apps. Apps like Home+ 5 allow for enhanced HomeKit control. Third-party apps like SmartThings or Hubitat can bridge different systems together.
Since iOS 10, Apple has improved how iPads handle multiple smart home platforms. Users can now switch between different systems without closing apps.
For the best experience, keep your iPad updated with the latest iOS version. This ensures compatibility with the newest smart home protocols and security features.
Some helpful cross-platform apps include:
- Home+
- SmartThings
- Hubitat
- Hoobs
- HomeBridge
Working with Non-HomeKit Devices
Many smart devices don’t work directly with HomeKit, but that doesn’t mean they can’t connect to your iPad hub. There are several workarounds to bring these devices into your system.
Hardware bridges convert signals between different smart home languages. Popular options include:
- Homebridge (software that runs on Raspberry Pi)
- Hoobs (pre-configured Homebridge box)
- Starling Home Hub (for Nest devices)
These bridges let your iPad talk to smart light bulbs, thermostats, and security cameras that wouldn’t normally work with Apple’s system.
Some users report challenges when using iPads with non-HomeKit devices. The setup can be more complex than with native HomeKit products.
For the easiest experience, look for devices labeled “Works with HomeKit” when expanding your smart home. If that’s not possible, these bridge solutions help fill the gaps.
Integration with Google Home and Amazon Alexa
Your iPad can work alongside popular voice assistants like Google Home and Amazon Alexa. This setup gives you touch control through the iPad plus voice control through smart speakers.
To connect these systems:
- Install the Google Home or Alexa app on your iPad
- Sign in with your account credentials
- Follow the setup instructions to link devices
- Set up your wall-mounted iPad as a control panel
Google’s Nest Hub and Amazon’s Echo Show offer dedicated smart displays. However, an iPad provides more flexibility and functionality than these purpose-built devices.
The combination works especially well in larger homes. Put smart speakers in rooms where voice control is handy, and use the iPad as the main control panel in central locations.
Remember that some advanced features might only work within their native ecosystems. But basic controls like lights, thermostats, and music usually work across platforms.
Enhancing Home Security with iPad
Your iPad can transform into a powerful security hub, connecting cameras, locks, and alarms into one easy-to-use system. With the right setup, you can monitor your home, control access, and receive alerts from anywhere.
Utilizing iPad for Surveillance
iPads work well with home security cameras through apps like Apple HomeKit. You can view your security cameras directly from the Home app on your iPad. This lets you check on your home anytime.
Setting up camera zones helps you focus on important areas. In the Home app:
- Tap the camera tile
- Select “Activity Zones”
- Mark specific areas you want to monitor
Your iPad can send alerts when it detects movement. This is useful for watching entrances or checking on pets. You can also save recordings to review later.
Wall-mounting your iPad creates a dedicated security station. However, remember to use Guided Access to lock the screen to just the security app when visitors are present.
Smart Locks and Alarms Control
Your iPad serves as a command center for smart locks and alarm systems. Through the Home app, you can lock or unlock doors with a simple tap.
Key benefits include:
- Checking lock status remotely
- Creating temporary access codes for visitors
- Setting up automated routines (like locking all doors at night)
- Receiving alerts when doors open
iPads can control alarm systems too. You can arm or disarm your security system and get alerts about unusual activity. Some systems even let you see which door or window triggered an alarm.
For best results, keep your iPad connected to Wi-Fi and powered on at all times. This ensures you never miss important security alerts.
Secure Authentication Methods
Protecting your security hub is vital. Your iPad offers several ways to keep your home controls safe.
Face ID and Touch ID provide quick, secure access to your security apps. These features prevent unauthorized users from controlling your smart locks or alarms.
For family access, Apple’s Home app lets you invite trusted people to control devices. You can set different permission levels based on who needs access.
Two-factor authentication adds another security layer. When enabled, any major changes require verification through a second device or method.
When setting up your iPad as a security hub, create a dedicated Apple ID just for home security. This separates your personal accounts from your home system for better protection.
Optimizing iPad for Continuous Home Hub Operation
Setting up your iPad as a smart home hub requires careful attention to several factors that ensure reliable operation. Proper power settings, stable network connections, and strategic placement all play crucial roles in creating a dependable smart home control center.
Power Management for Always-On Functionality
To use an iPad as a home hub, it must remain powered on consistently. Connect your iPad to a power source at all times using the original charging cable and adapter. This prevents unexpected shutdowns that could interrupt your smart home system.
Adjust your iPad’s power settings to maximize uptime:
- Go to Settings > Display & Brightness
- Set Auto-Lock to “Never” to keep the screen active
- Enable Low Power Mode to extend battery life during power outages
Some users wonder whether to keep the iPad constantly charging or let it cycle. While opinions vary, most experts recommend keeping it plugged in for hub functions. Modern iPads have battery management features that prevent overcharging damage.
Network Stability and Connectivity
A stable Wi-Fi connection is essential for your iPad to control smart home accessories reliably. Position your iPad within strong signal range of your router to maintain constant communication.
Tips for optimal connectivity:
- Place your iPad within 15-30 feet of your Wi-Fi router
- Avoid metal objects or thick walls between the iPad and router
- Turn on Bluetooth to connect with nearby accessories
- Use a 5GHz network when possible for faster response times
Consider setting up a fixed IP address for your iPad in your router settings. This prevents connection issues that might occur when IP addresses change.
iPad Placement and Accessibility
Where you put your iPad impacts both its function as a hub and its usefulness as a control panel. Choose a spot that balances visibility with protection from accidents.
Best locations for your hub iPad:
- Wall-mounted near entryways (using specialized mounts)
- On a stable desk or counter away from water and heat
- In a central location that multiple family members can reach
- Near frequently used smart accessories for faster response
Protect your iPad with a case that allows access to the charging port while mounted. Some users install dedicated wall mounts with built-in charging capabilities to create a permanent smart home control station.
Remember that if you’ve upgraded to Apple’s new Home architecture, iPads can no longer function as home hubs. You’ll need to use an Apple TV or HomePod instead as noted in newer system requirements.
Frequently Asked Questions
Setting up an iPad for smart home control requires specific steps and has certain limitations. Many users have common questions about how to best use their iPad to manage their connected devices.
What steps are required to configure an iPad as a control center for smart home devices?
To set up an iPad as a smart home control center, first make sure the device is connected to your home Wi-Fi network. The iPad must stay powered on and remain at home to function properly.
Open the Home app on the iPad and sign in with your Apple ID. Add smart devices by tapping the “+” button and selecting “Add Accessory.” Follow the on-screen instructions to connect each device.
For proper functionality, go to Settings > Home and ensure the iPad is set up correctly. Keep the iPad plugged in for consistent performance as a control center.
What are the limitations when using an iPad as a smart home hub compared to dedicated hubs like HomePod or Apple TV?
With Apple’s new Home architecture update, iPads can no longer function as true Home Hubs. Only Apple TV or HomePod devices can serve as full hubs now.
iPads lack the always-on capability that dedicated hubs provide. They cannot process automations when powered off or away from home, unlike HomePod or Apple TV.
Battery concerns also limit iPad functionality as a hub. Connection stability may be less reliable compared to purpose-built hubs that remain permanently connected to power and networks.
Can an iPad be mounted and used permanently for smart home management?
Yes, an iPad can be wall-mounted using special brackets or stands to create a permanent smart home control panel. This setup works well in central locations like kitchens or entryways.
For permanent installation, the iPad should remain plugged in to a power source. Many users install outlets behind wall-mounted iPads for a cleaner look.
Special apps can lock the iPad into “kiosk mode” to prevent unwanted app access and keep the home control interface always available.
Does the iPad support all HomeKit-compatible devices when set up as a smart home hub?
iPads can control most HomeKit-compatible accessories through the Home app. They support lights, locks, thermostats, cameras, and other common smart devices.
However, some advanced features may require a dedicated hub like Apple TV or HomePod. Remote access and certain automations work better with dedicated hubs.
Device compatibility is the same across all Apple products using the Home app, but performance and reliability differ depending on the hub device used.
What are the best practices for ensuring the iPad maintains a constant connection to home automation devices?
Place the iPad in a central location with strong Wi-Fi coverage to maintain reliable connections. Avoid areas with wireless interference from other electronics.
Keep the iPad powered on and charging to prevent disconnections. Many users connect it to continuous power rather than relying on battery.
Regularly update the iPad’s operating system and the Home app. Updates often include connection improvements and bug fixes that enhance reliability.
How can families share control and access smart home features using an iPad hub?
Family members can share access through Apple’s Family Sharing feature. The primary user needs to invite family members using their Apple IDs.
Each person gets their own personalized access to the Home app and can control devices from their own devices. Different permission levels can be set for each user.
For shared iPad control, create a designated Home account that multiple family members can access. Place the iPad in a common area where everyone can easily use it.