Microsoft has hit the brakes on its next-generation operating system plans. While tech enthusiasts and industry insiders were anticipating a major leap with the debut of Windows 12, the company has instead doubled down on Windows 11 with the announcement of version 25H2, slated for release in fall 2025.
This new update signals a shift in Microsoft’s strategy—focusing on evolutionary improvements rather than launching an entirely new OS. From AI-powered tools to subtle design refinements and enterprise-friendly enhancements, Windows 11 25H2 is shaping up to be a substantial upgrade that keeps the ecosystem moving forward, even as Windows 12 fades into the distance for now.
The Roadmap Shuffle
Microsoft has officially pressed the snooze button on Windows 12, opting instead to pour its next-gen ideas into Windows 11, version 25H2. The company’s own documentation now positions 25H2 as the marquee release for fall 2025 (insiders are already testing Build 26200.5670), and OEM partners have been told to focus on hardware certifications for Windows 11—not a brand-new OS—through at least mid-2026. The takeaway: Windows 11 is becoming the long-term foundation much like Windows 10 was, with yearly “H2” updates standing in for what might once have been full version jumps.
A Tiny Download, A Big Payload
25H2 rides on the same Germanium codebase introduced with 24H2 and arrives as an enablement package. For most users the download is roughly the size of a cumulative security patch, installs in minutes, and simply flips on dormant features that have been shipping quietly for months. That means IT departments can validate apps once for 24H2 and roll straight into 25H2 with minimal retesting.
Headline Features You’ll Actually Notice
| Area | What’s New in 25H2 | Why It Matters |
|---|---|---|
| AI Everywhere | Recall, Click to Do shortcuts, and natural-language Windows Search graduate from preview to general release on Copilot+ PCs. Traditional x86 machines pick up smarter Copilot summaries and Settings search. | Microsoft is betting heavily on on-device NPUs; 25H2 widens the feature gap between AI-capable hardware and older silicon. |
| Start & Taskbar Tweaks | Pin groups can be labeled, the Recommended feed can be hidden entirely, and taskbar clock seconds finally sync with time servers. | Small quality-of-life updates that many power users have requested since Windows 11 launched in 2021. |
| Snap Layouts 2.0 | Snap now suggests grid positions based on window size and your typical workflows, and Snap Groups finally roam between multiple monitors without breaking. | Reduces the “re-dock shuffle” for multi-display setups. |
| Energy Saver for Desktops | The battery-focused power profile is now available on plug-in PCs, capping background activity and GPU bursts when toggled. | Helps gamers and creators rein in power-hungry GPUs during low-demand tasks. |
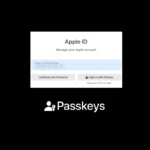
| Passkey Manager | A dedicated hub under Settings > Accounts shows every passkey you’ve created and lets you revoke or move them between devices. | Positions passkeys as a long-term password replacement just as major browsers and banking apps adopt the standard. |
| Developer Candy | Native sudo support, Dev Drive integration in File Explorer, and automatic hot-patching for WSL kernels. | Cuts friction for coders who bounce between Linux and Windows tools. |
| Connectivity & Media | Built-in Wi-Fi 7 stack, USB4 v2 readiness, Auto SR upscaling for more GPUs, and HDR desktop wallpapers that no longer tank SDR color accuracy. | Future-proofs PCs shipping in 2026 while giving current users a few perks today. |
Support Lifecycles and Enterprise Planning
Once 25H2 lands, the clock resets: 24 months of mainstream support for Home/Pro editions and 36 months for Enterprise/Education. Microsoft is strongly nudging organizations still on Windows 10 (whose support ends 14 October 2025) to move first to 24H2, then slide into 25H2 via the enablement package. Because the servicing branch remains identical, app compatibility testing can focus on the new features rather than the core OS.
Why Windows 12 Can Wait
Behind the scenes, Windows 12—often referenced under the “Hudson Valley” and “Next Valley” code names—was shaping up to require stricter hardware baselines such as DDR5-only memory and always-on Pluton security. PC makers reportedly balked at another spec reset so soon after Windows 11’s TPM 2.0 saga. By grafting marquee AI capabilities onto Windows 11 instead, Microsoft buys itself time to let the hardware ecosystem mature and to refine features like Recall amid privacy scrutiny.
Should You Upgrade?
- On Windows 11 23H2 or older: Jumping to 24H2 now will make the 25H2 enablement package a near-frictionless follow-up.
- On Windows 10: You’re inside the one-year warning window before end-of-support; migrating straight to Windows 11 24H2/25H2 will reset your lifecycle and unlock AI tools you’ll never see on Windows 10.
- Waiting for Windows 12: Realistically you’re looking at late 2026 or beyond, and many of the hyped features are arriving in Windows 11 anyway—provided your hardware has an NPU.
25H2 may not carry the “Windows 12” branding, but in practice it delivers the same forward-looking AI and quality-of-life upgrades Microsoft originally planned for a whole new OS—without forcing a disruptive, full-scale migration.
Best Windows 11 Tips and Tricks to Optimize Your PC Performance
Windows 11 brings many helpful features that can make your computer work better for you. Not everyone knows about these hidden tricks and settings. Learning a few key Windows 11 tips can save you time and make your computer easier to use every day.
With Windows 11 now on many computers, it helps to know the best ways to use it. Microsoft added many new tools that aren’t obvious at first glance. From changing how your screen looks to making your work faster, these tips can improve how you use your computer.
1) Utilize Snap Layouts for Better Multitasking
Windows 11 makes organizing your screen easier with Snap Layouts. This feature helps you arrange windows neatly so you can work on multiple tasks at once.
To use Snap Layouts, hover your mouse over the maximize button in the top-right corner of any window. You’ll see different layout options appear. Click on the section where you want your current window to fit.
You can also drag a window to the top center of your screen to launch the Snap layout box. This quick motion saves time when arranging your workspace.
For faster results, try keyboard shortcuts. Press Windows key + Z to display Snap Layouts instantly. This works on any active window and speeds up your workflow.
Another option is to drag windows to the edges or corners of your screen. Windows 11 will suggest where to place them. This “Snap” feature quickly resizes windows to fit your needs.
The newest Windows 11 updates have improved Snap Layouts with more options. You can now choose from six different arrangements depending on your screen size.
Many users find Snap Layouts perfect for comparing documents, taking notes while watching videos, or keeping an eye on social media while working. The system remembers your layout groups too.
If you need to adjust after snapping, you can resize each window by dragging the borders. The other windows will automatically resize to maintain the layout pattern.
2) Personalize Your Taskbar with Pinning Apps
The Windows 11 taskbar is a great place to keep your most-used programs handy. Pinning apps to your taskbar makes them just one click away.
There are several ways to pin apps to your taskbar. The easiest method is to search for an app in the Start menu, right-click on it, and select “Pin to taskbar” from the menu that appears.
You can also pin running applications. When an app is open, its icon shows on the taskbar. Right-click this icon and choose the pin option to keep it there even after closing.
For apps you use daily, like browsers or email clients, pinning saves time. No more searching through the Start menu or File Explorer each time you need them.
Windows 11 lets you organize these taskbar icons too. Simply click and drag pinned icons to change their order. Put your most-used apps first for quicker access.
To remove apps you no longer need, right-click the pinned icon and select “Unpin from taskbar.” This helps keep your workspace clean and focused.
The taskbar also has a system tray on the right side. This area shows background apps and system functions like volume and Wi-Fi settings.
Windows 11 offers various taskbar customization options beyond just pinning. You can adjust these by right-clicking an empty area on the taskbar and selecting “Taskbar settings.”
You can even pin files to the taskbar through their parent applications. First, pin the app, then right-click its taskbar icon and pin frequent files to its jump list.
Smart pinning creates a workspace that matches your needs. Take a few minutes to set up your taskbar with your essential tools for a more efficient computer experience.
3) Explore the New Widgets Feature
Windows 11 comes with a handy widgets feature that keeps important information at your fingertips. This personalized feed shows news, weather, calendar events, and more in one convenient place.
You can access widgets by clicking the widget icon in the taskbar or pressing Win+W on your keyboard. The panel slides in from the left side of your screen with all your widgets ready to use.
Widgets in Windows 11 are an easy way to stay on top of information that matters in your daily life. They update automatically to show the latest data without you needing to open separate apps.
The widgets board can be customized to show only what you care about. You can add, remove, and resize widgets to create your perfect information dashboard.
Popular widgets include weather, calendar, photos, sports scores, and stock trackers. The Tips widget offers helpful advice for getting the most out of Windows 11, including shortcuts and personalization options.
To add new widgets, click the “Add widgets” button at the top of the panel. You’ll see a list of available options to choose from.
Some widgets let you click through to get more detailed information. For example, clicking on a news headline opens the full article in your browser.
Third-party widgets are also becoming available, expanding what you can do with this feature. Check the Microsoft Store for new widget options regularly.
For the best experience, take time to set up your widgets with the content you check most often. This turns the feature into a truly useful tool rather than just a novelty.
4) Enhance Security with Windows Hello
Windows Hello offers a smarter way to sign in to your Windows 11 device. This feature lets you use your face, fingerprint, or a PIN instead of passwords. It’s both faster and safer than typing passwords.
Setting up Windows Hello is simple. Go to Settings, select Accounts, and click on Sign-in options. From there, you can set up the sign-in method that works best for you.
Face recognition is one of the most popular Windows Hello options. Your computer uses special cameras to scan your face when you sit down. This happens in seconds, making login quick and easy.
Fingerprint scanning works well for laptops with built-in readers. Just touch the sensor with your finger, and you’re in. No more typing long, complex passwords.
The PIN option gives users another secure choice. Unlike online passwords, your PIN stays on your device only. This makes it harder for hackers to steal.
Windows Hello is designed for security. It stores biometric data on your device, not in the cloud. This keeps your information safe from online attacks.
For face recognition to work best, good lighting helps a lot. If you have trouble with recognition, try updating your drivers or improving the lighting where you use your computer.
Many companies now use Windows Hello for work computers too. It meets high security standards while making life easier for employees.
Windows 11 has made Hello even better with faster recognition and more device support. Users can log in about 30% faster than with traditional passwords.
5) Use Virtual Desktops to Organize Projects
Windows 11 lets you create multiple virtual desktops to keep your work organized. Think of each desktop as a separate workspace for different projects or tasks.
You can set up one desktop for work files and another for personal stuff. This separation helps you focus on one project at a time without closing applications.
Creating a new desktop is simple. Press Win+Tab to open Task View, then click the “+” button at the top of the screen. You can also use the keyboard shortcut Win+Ctrl+D to make a new desktop instantly.
Switching between desktops is quick. Press Win+Ctrl+Left Arrow or Win+Ctrl+Right Arrow to move between your workspaces. Each desktop can have its own set of open apps and windows.
You can customize each desktop with different wallpapers. This visual cue helps you know which project you’re working on at a glance.
For example, use one desktop for emails and communication tools. Set up another for design work with creative apps. A third might contain research materials and web browsers.
Moving windows between desktops is easy too. Right-click a window’s title bar or taskbar icon, select “Move to,” and choose which desktop you want it on.
Many users find this feature helpful when juggling multiple projects. It keeps everything organized without the need for multiple monitors.
At the end of the day, you can close specific desktops without shutting down all your applications. Windows will move any open apps to your remaining desktop.
6) Leverage Focus Sessions in the Clock App
Windows 11 has a handy tool to help you stay on task. It’s called Focus Sessions, and you can find it in the Clock app.
Focus Sessions lets you set aside time to work without distractions. The feature counts down your chosen time with a shrinking circle, showing how much time is left in your session.
To start using Focus Sessions, open the Clock app on Windows 11. You’ll find the Focus Sessions option in the app’s menu.
Setting up is easy. Pick how long you want to focus – 30 minutes, an hour, or another time span. The app then helps you stick to your plan.
When you start a session, Windows can turn off notifications. This cuts down on interruptions while you work. You can stop the session at any time if needed.
The Clock app also tracks your progress. It shows how many focus sessions you complete each day. This can help you build better work habits.
Some users pair Focus Sessions with music. The feature works with Spotify, letting you create a perfect work environment.
Windows 11 users find this tool helps them boost productivity. It creates a clear start and end time for tasks.
7) Optimize Gaming with Xbox Game Bar
Windows 11 comes with the Xbox Game Bar, a helpful tool for gamers. This feature lets you track performance and record gameplay without leaving your game.
You can open Xbox Game Bar by pressing Win+G on your keyboard. This shortcut works anytime, even in the middle of a game.
Some gamers choose to turn off Xbox Game Bar to free up resources. This can boost performance on older computers.
The Game Bar includes widgets for capturing screenshots and videos. You can also chat with Xbox friends without switching screens.
One useful widget shows your PC’s performance stats. It displays your FPS, CPU usage, and RAM usage while gaming.
The audio controls let gamers adjust volume levels quickly. This helps when you need to hear footsteps or talk to teammates.
For streamers, the Game Bar makes recording clips easy. Just hit the record button to save your best gaming moments.
Windows 11 also has Game Mode, which works with Xbox Game Bar. Game Mode gives more resources to games by pausing background tasks.
New updates have made the Game Bar faster and more reliable. Microsoft keeps improving it based on gamer feedback.
You can customize which widgets appear in your Game Bar. This keeps your screen clean with only the tools you need.
8) Customize Touchpad Gestures for Efficiency
Windows 11 offers powerful ways to make your touchpad work smarter for you. You can set up special finger movements to control your computer faster.
Most laptops come with basic gestures already set up. Three-finger swipes let you switch between open tasks quickly. This saves time compared to clicking the task view button.
To find these settings, right-click the Start menu. Then go to Settings > Bluetooth & devices > Touchpad. Here you’ll see all the options you can change.
Windows lets you customize what happens with different finger movements. You can set four-finger taps to do special tasks like toggling fullscreen mode.
Some users have created amazing custom setups that make work faster. For example, setting a four-finger tap to the F11 key means you can make apps fullscreen without touching the keyboard.
The touchpad settings menu shows pictures of each gesture. This makes it easy to understand what each option does before you try it.
Try setting up gestures for things you do often. Browser navigation with forward and backward swipes can save lots of time.
Windows 11 offers two main types of touchpad gestures you can customize. Each one can make your daily computer use much faster once you learn them.
Take a few minutes to test different options. The best setup depends on how you personally use your computer each day.
9) Take Advantage of Voice Typing
Voice typing in Windows 11 lets you write text without touching your keyboard. It’s a helpful tool when you want to work hands-free or type faster.
To start voice typing, press Windows key + H. Your computer will begin listening for your words. This shortcut works in most text fields and apps.
For the best results, use voice typing in a quiet place. Background noise can cause mistakes in what your computer hears. A good microphone also helps make voice typing more accurate.
You can add punctuation by simply saying “period,” “comma,” or “question mark.” This makes your text look more professional without needing to type the symbols.
Voice typing works in many Microsoft apps including Word, Outlook, and PowerPoint. You can use voice typing to create documents or write emails quickly.
If you make a mistake, you can say “delete” to remove the last word. You can also say “undo” to take back your last change.
Windows voice typing includes several expert tips to boost your productivity. These include setting up your environment and adjusting your microphone settings.
For people with disabilities or injuries, voice typing makes computers more accessible. It’s also useful for anyone who wants to give their hands a break.
Learning the commands for voice typing will help you use it more effectively. Simple phrases like “new line” or “tab” can control how your text appears.
10) Reduce Distractions with Focus Assist
Windows 11 includes a useful feature called Focus assist that helps you stay on task by blocking notifications. This tool is perfect for when you need to concentrate on important work without interruptions.
You can find Focus assist in Windows 11 through the Settings app. Just click Start > Settings > System and then select Focus assist from the options list.
Focus assist offers three main modes. The “Off” setting allows all notifications. “Priority only” lets through notifications you’ve marked as important. “Alarms only” blocks everything except alarm notifications.
Windows 11 also lets you set up automatic rules for Focus assist. These rules can turn on Focus assist during certain times, when playing games, or when using an app in fullscreen mode.
The quick settings panel makes using Focus assist even easier. Just click on the notifications icon in the taskbar or press Win+N to access Focus assist settings quickly.
For deeper concentration, Windows 11 offers Focus Sessions in the Clock app. This feature helps you set aside time for work that needs your full attention.
You can combine Focus assist with Do Not Disturb for maximum productivity. Together, these features create a distraction-free zone for your important tasks.
Custom priority lists give you control over which notifications break through. Add important contacts or apps to your priority list in the Focus assist settings.
Focus assist can show you a summary of what you missed when you turn it off. This means you won’t lose important information while you’re concentrating.
Optimizing Windows 11 Performance
Windows 11 offers many ways to boost your computer’s speed. With a few simple tweaks, you can make your PC run faster without buying new hardware.
Customizing Startup Programs
Too many programs starting when you turn on your computer can slow it down. To fix this, press Ctrl+Shift+Esc to open Task Manager. Click the “Startup” tab to see all programs that launch at startup.
Look at the “Startup impact” column to find programs that slow down your system. Right-click on programs you don’t need immediately and select “Disable.” Focus on items marked as “High impact.”
Disabling programs that run on startup can make your computer boot faster. Keep essential security software enabled, but disable things like game launchers or update checkers.
You can also use efficiency mode in Task Manager. Right-click on resource-heavy applications and select “Efficiency mode” to limit their resource usage.
Managing Virtual Desktops
Virtual desktops help organize your work and reduce system strain. Press Win+Tab to open Task View, then click “New desktop” at the top.
Create separate desktops for different tasks:
- One for work applications
- Another for personal browsing
- A third for gaming
This organization keeps resource-hungry programs separated. To move between desktops, press Win+Ctrl+Left/Right Arrow.
You can drag and drop applications between desktops in Task View. Right-click on an app window and select “Move to” to send it to another desktop.
Windows 11’s Game Mode optimizes performance automatically when gaming. Enable it in Settings > Gaming > Game Mode to prioritize system resources for your games.
Enhancing Security in Windows 11
Windows 11 comes with powerful security features that protect your data and privacy. These tools are easy to set up and use daily without slowing down your computer.
Using Windows Hello
Windows Hello offers a more secure way to log in to your PC than traditional passwords. This feature uses facial recognition, fingerprints, or a PIN code to verify your identity.
To set up Windows Hello:
- Go to Settings > Accounts > Sign-in options
- Select the method you want to use (Face, Fingerprint, or PIN)
- Follow the on-screen instructions
Windows Hello is not just convenient—it’s also more secure. Unlike passwords that can be stolen, your biometric data stays on your device. Many websites now support passkeys instead of passwords, making your online accounts safer too.
For extra security, you can require Windows Hello authentication for all Microsoft accounts on your device.
Configuring Privacy Settings
Windows 11 gives you control over which apps access your data. Taking a few minutes to adjust these settings can greatly improve your privacy.
The main privacy controls are found in Settings > Privacy & Security. Here you can manage:
- Location tracking: Turn off location access for all apps or just specific ones
- Camera and microphone: Control which apps can use these devices
- App permissions: Limit what information apps can access
Windows 11 also includes an Ad ID setting that tracks your interests for targeted ads. Turn this off by going to Privacy & Security > General.
You should also check “Diagnostics & feedback” settings to limit data sent to Microsoft. The Privacy & Security section lets you customize exactly what information Windows collects about your usage.
Frequently Asked Questions
Windows 11 offers many useful features that can help you work faster and better. These tips answer common questions to help you get the most from your system.
How can I optimize Windows 11 for the best performance?
Turn off visual effects by typing “performance” in the search bar and selecting “Adjust the appearance and performance of Windows.” Choose “Adjust for best performance” to disable animations.
Clean up your startup programs through Task Manager. Press Ctrl+Shift+Esc, click the “Startup” tab, and disable programs you don’t need at startup.
Regular disk cleanup can free up valuable space. Type “disk cleanup” in the search bar and run the tool to remove temporary files.
Keep your drivers updated through Device Manager or the manufacturer’s websites for optimal hardware performance.
What are advanced setup tips for professional users in Windows 11?
Enable Dynamic Refresh Rate for compatible displays to save battery while maintaining smooth visuals when needed. Find this in Settings > System > Display > Advanced display.
Set up custom power plans for different work scenarios. Type “power plan” in search and create profiles for battery life, performance, or balanced use.
Use Windows Terminal for a unified command-line experience that combines PowerShell, Command Prompt, and WSL in one window.
Create custom keyboard shortcuts for your most-used programs through right-clicking on the app > Properties > Shortcut tab > Shortcut key.
Which hidden features of Windows 11 can enhance user experience?
The hidden God Mode folder provides access to all Windows settings in one place. Create a new folder and name it: GodMode.{ED7BA470-8E54-465E-825C-99712043E01C}
Focus assist helps block distractions during important work. Right-click the notification icon in the taskbar and select Focus assist to customize.
Windows 11 has a built-in screen recorder through the Xbox Game Bar. Press Win+G to open it, even for non-gaming applications.
The hidden clipboard history stores multiple copied items. Press Win+V to access your clipboard history instead of just the last copied item.
What are the essential Windows 11 tips for beginners?
Learn to use Snap Layouts by hovering over the maximize button or pressing Win+Z to arrange windows neatly on your screen.
Pin your favorite apps to the taskbar for quick access. Right-click any app icon and select “Pin to taskbar” to keep it always available.
Set up Windows Hello for faster, more secure sign-ins using facial recognition or fingerprints if your device supports it.
Use the new Widgets panel by pressing Win+W to quickly check weather, news, and calendar without opening separate apps.
How do I access and use the ‘God Mode’ in Windows 11?
Create a new folder anywhere on your desktop by right-clicking and selecting “New > Folder.”
Rename this folder to: GodMode.{ED7BA470-8E54-465E-825C-99712043E01C}
The folder icon will change, and opening it will reveal a complete list of all Windows settings and controls in one organized location.
Use the search function within God Mode to quickly find specific settings instead of browsing through all categories.
Can you provide some helpful keyboard shortcuts for navigating Windows 11?
Win+A opens Quick Settings for fast access to Wi-Fi, Bluetooth, and other common settings.
Win+Tab shows all open windows and virtual desktops for easy switching between tasks and workspaces.
Alt+Tab lets you quickly switch between open windows, and holding Alt while repeatedly pressing Tab cycles through them all.
Windows key combinations like Win+Arrow keys snap windows to different positions on your screen without using the mouse.
Win+Ctrl+D creates a new virtual desktop, while Win+Ctrl+F4 closes the current one, helping organize different projects.