Keeping your iPhone up-to-date isn’t just about getting the newest features—it’s also essential for maintaining performance, security, and app compatibility. Whether you’re installing a fresh iOS update or moving to a brand-new device, upgrading your iPhone can breathe new life into your everyday experience. Here’s a complete guide to make sure you do it the right way, without risking your data or wasting time.
Back Up Your iPhone Before Upgrading
Before you update your software or switch to a new model, backing up your iPhone is critical. A backup ensures that if anything goes wrong, you won’t lose important photos, messages, contacts, or app data.
How to Back Up Using iCloud:
- Connect your iPhone to Wi-Fi.
- Go to Settings > Tap your name > iCloud > iCloud Backup.
- Tap Back Up Now.
- Stay connected to Wi-Fi until the process completes.
How to Back Up Using a Computer:
- Mac (macOS Catalina or later):
- Connect your iPhone to your Mac.
- Open Finder.
- Select your device > Click Back Up Now.
- Windows PC or older Mac (using iTunes):
- Connect your iPhone and open iTunes.
- Click the device icon > Back Up Now.
| Backup Method | Pros | Cons |
|---|---|---|
| iCloud | Wireless, automatic backups | Limited free storage (5 GB) |
| Finder/iTunes | Full control, local storage option | Requires a computer and cable |
How to Update Your iPhone’s Software
Apple regularly releases iOS updates that deliver new features, security patches, and bug fixes.
Steps to Update:
- Open Settings > General > Software Update.
- If an update is available, tap Download and Install.
- Plug your iPhone into power and connect to Wi-Fi.
- Follow the on-screen instructions.
Tip: Enable Automatic Updates (in Software Update settings) to have your iPhone download updates overnight while charging.
| Update Type | What It Brings | Examples |
|---|---|---|
| Major iOS Update | New features, interface changes | iOS 17 introducing StandBy mode |
| Security Patch | Fixes vulnerabilities | Emergency patches for threats |
| Bug Fix Update | Performance and stability | Fixing app crashes, battery drain |
Upgrading to a New iPhone Model
If you’re ready to upgrade your hardware instead of just the software, Apple offers several options to make the process seamless.
Apple’s iPhone Upgrade Program:
- Get a new iPhone every year with monthly payments.
- Includes AppleCare+ coverage.
- Available through Apple retail stores and online.
Steps for Upgrading Through Apple:
- Check your eligibility on the Apple website or Apple Store app.
- Choose your new model and complete a new loan agreement.
- Transfer your data to the new iPhone (using Quick Start or a backup).
- Return your old iPhone to Apple.
Alternative options:
You can also upgrade through your carrier (AT&T, Verizon, T-Mobile, etc.) or buy unlocked directly from Apple.
Transferring Your Data to a New iPhone
Apple’s Quick Start feature makes transferring your data almost effortless.
How to Use Quick Start:
- Place your new iPhone near your current one.
- A pop-up will appear on your old device—tap Continue.
- Follow the prompts to pair the devices.
- Choose to transfer data wirelessly or from an iCloud backup.
| Transfer Method | Speed | Requirements |
|---|---|---|
| Quick Start (wireless) | Fast | Both devices nearby |
| iCloud Backup | Moderate | Wi-Fi connection |
| Finder/iTunes Backup | Fast | USB cable and computer |
Things to Check Before Upgrading
Before diving into an upgrade, make sure you’ve considered these factors:
- Battery Health:
If your battery health is below 80%, consider replacing the battery to prolong the device’s life if you’re keeping your iPhone. - Storage Space:
Clear out large apps or offload unused files to make room for the update. - Apple ID and Password:
Know your Apple ID credentials—you’ll need them for setup and activation. - Carrier Compatibility:
If you’re switching carriers, make sure your new iPhone is unlocked or compatible. - Accessories:
Newer iPhone models may not support old accessories (like Lightning cables or older AirPods without updates).
Signs It Might Be Time to Upgrade Your iPhone
If you’re wondering whether it’s time to upgrade your actual device instead of just updating the software, here are common signs:
| Sign | What It Means |
|---|---|
| Frequent crashes or slowdowns | Hardware may be outdated for new apps |
| Battery drains quickly | Battery degradation beyond normal |
| No longer receives iOS updates | Security vulnerabilities risk |
| Poor camera quality compared to newer models | Missed opportunities for better media capture |
| Physical damage | Might cost more to repair than replace |
Key Takeaways
- Check your upgrade eligibility before getting a new iPhone or turn on automatic updates to keep your current device current.
- Always back up your iPhone to iCloud or computer before updating to protect your personal data.
- Connect to Wi-Fi and keep your iPhone charged when installing updates to avoid interruptions or data usage.
Preparing to Upgrade Your iPhone
Before getting a new iPhone, it’s important to take a few steps to ensure a smooth transition. Backing up your data, checking if your device can run the latest iOS, and making sure you have enough storage will help avoid problems during the upgrade process.
Checking Device Compatibility
Not all iPhone models can run the newest iOS versions. To check if your current iPhone is compatible with the latest iOS:
- Go to Apple’s website to see which models support the newest iOS
- Check your current model by going to Settings > General > About
- Compare your model with the compatibility list
If your iPhone is too old for the newest iOS, it might be time for an upgrade. Apple typically supports iPhones with software updates for 5-7 years after release. The iPhone Upgrade Program lets you get a new iPhone after making 12 payments on your current device.
Newer models offer better cameras, faster processors, and longer battery life. They also include security updates that older phones may not receive.
Ensuring Sufficient iPhone Storage
Before upgrading, check and free up storage on your current iPhone. This helps with both the backup process and the setup of your new device.
- Open Settings > General > iPhone Storage
- Review what’s using the most space
Some quick ways to free up space:
- Delete unused apps
- Remove unwanted photos and videos
- Clear browser cache
- Delete old messages with large attachments
Many users prepare for upgrading by removing unwanted apps and clearing excess photos. You should aim to have at least 5GB free for a smooth backup process.
Consider using iCloud or your computer to back up large media files, then delete them from your phone.
Updating to the Latest iOS Version
Running the latest iOS version before upgrading helps ensure your data transfers correctly to your new iPhone.
To update your iOS:
- Connect to Wi-Fi and plug into a power source
- Go to Settings > General > Software Update
- If an update is available, tap “Download and Install”
- Enter your passcode if prompted
Updates can take 30-60 minutes to complete. Don’t interrupt the process once it starts. Learn how to check for iOS updates on Apple’s official support channel.
After updating, back up your iPhone using iCloud before making the switch. This ensures all your apps, settings, and data will transfer to your new device.
Backing Up Your iPhone
Before upgrading to a new iPhone, backing up your current device is essential. This process preserves your photos, messages, apps and settings so nothing gets lost during the switch.
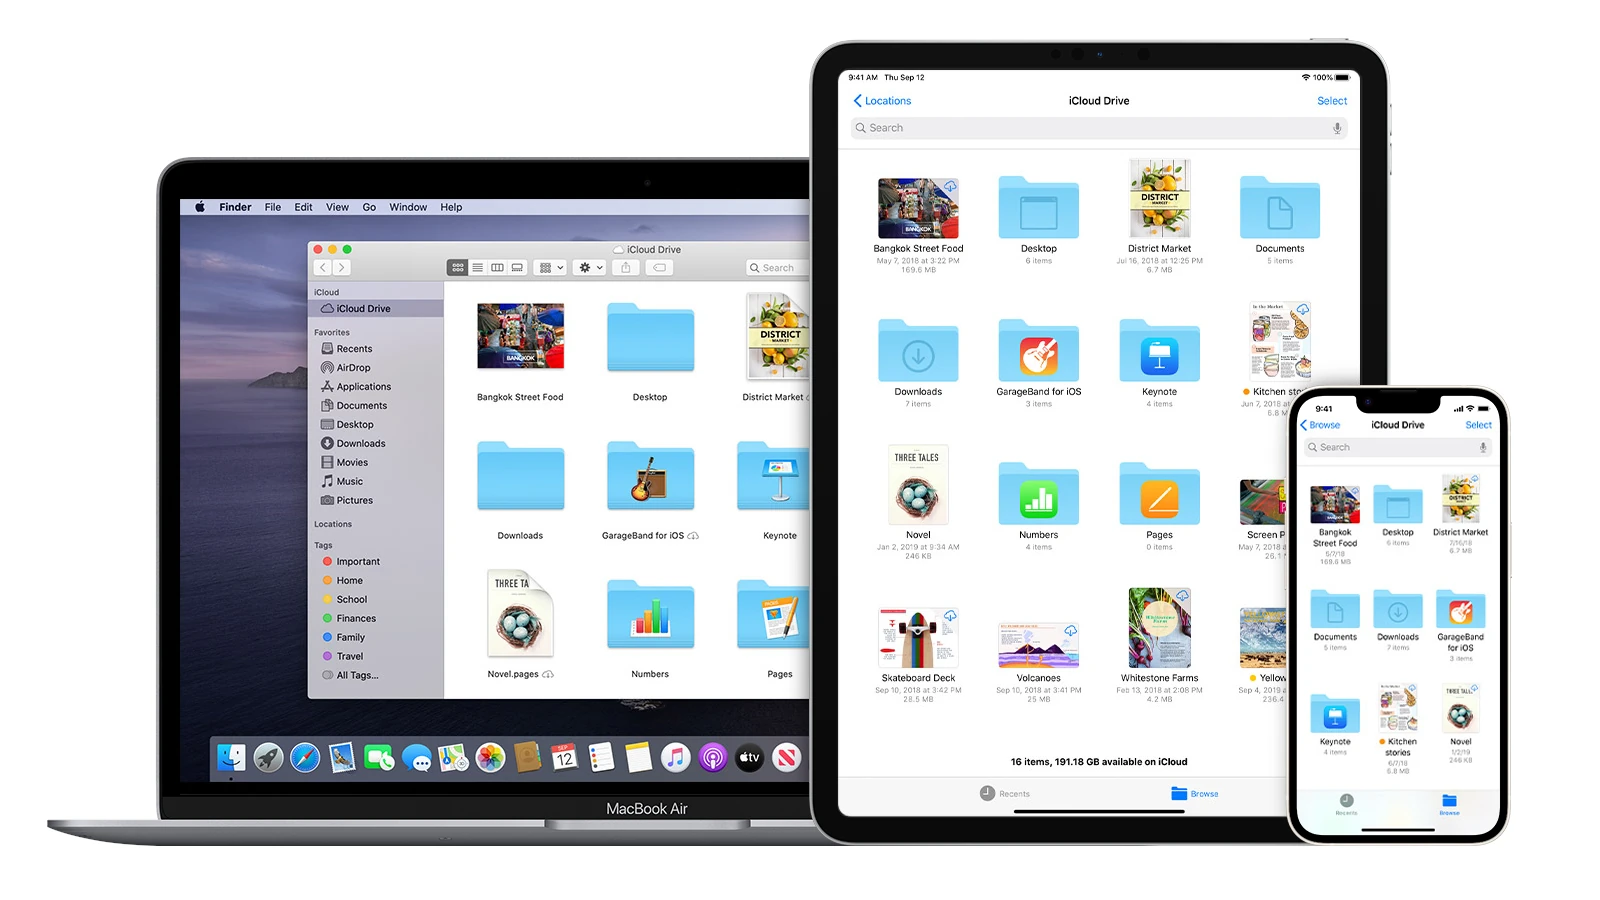
Using iCloud for Backup
iCloud offers a simple way to back up your iPhone without connecting to a computer. To start, make sure you’re connected to Wi-Fi.
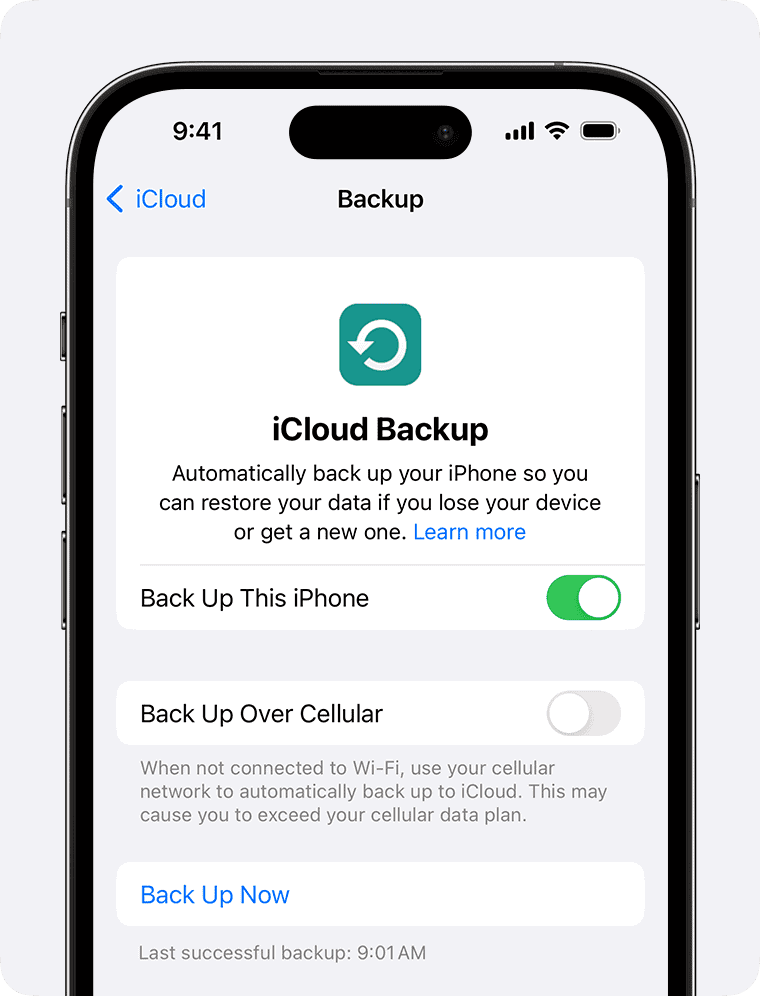
Go to Settings, tap your name at the top, then select iCloud > iCloud Backup. Turn on the toggle for iCloud Backup if it’s not already on.
To start a backup right away:
- Tap Back Up Now while connected to Wi-Fi
- Stay connected until the process finishes
Your iPhone backs up automatically each night when locked, charging, and on Wi-Fi. iCloud gives you 5GB of free storage, but photos and messages can quickly fill this space.
If you get a “Not Enough Storage” message, you can:
- Buy more iCloud storage
- Choose which apps to back up under iCloud > Manage Account Storage
iCloud keeps your backup for 20 days when switching to a new iPhone.
Backing Up on a Computer
Backing up to a computer provides another option, especially if you have limited iCloud storage. This method uses either iTunes (on Windows) or Finder (on Mac).
First, connect your iPhone to your computer with the charging cable. If asked, tap “Trust This Computer” on your iPhone.
For Windows users:
- Open iTunes
- Click the iPhone button near the top left
- Select Summary
- Click Back Up Now
For Mac users with macOS Catalina or newer:
- Open Finder
- Select your iPhone from the sidebar
- Click General tab
- Click Back Up Now
For added security, check the box to encrypt your backup and create a password. This saves your passwords and health data too.
Initiating the iOS Update
Updating your iPhone’s operating system is a straightforward process that can be done wirelessly or with a computer. Both methods ensure your device gets the latest features and security patches.
Over-the-Air Software Update
The easiest way to update your iPhone is directly through the device settings. This method requires no cables or computers.
First, make sure your iPhone is connected to a stable Wi-Fi connection as updates can be large files. Cellular data may not be fast enough and could use up your data plan.
Before starting, back up your iPhone to iCloud or your computer. This protects your data if anything goes wrong.
To begin the update:
- Open the Settings app on your iPhone
- Tap General
- Select Software Update
- If an update is available, tap Download and Install
You may need to enter your passcode. Your iPhone will download iOS updates and install them automatically.
For a hands-free experience, turn on Automatic Updates. This setting lets your iPhone update itself overnight while charging.
Manual iOS Update Using a Computer
Sometimes updating through a computer is better, especially with slow internet or limited storage space on your iPhone.
You’ll need:
- A computer (Mac or PC)
- The latest version of iTunes (PC) or Finder (Mac)
- A USB cable to connect your iPhone
- Enough free space on your computer
First, connect your iPhone to your computer using the cable. On a Mac running macOS Catalina or newer, open Finder. For older Macs or PCs, launch iTunes.
Your device should appear in the sidebar. Select it and click the Check for Update button. If a software update is available, click Download and Update.
The computer will handle downloading the update file. Keep your iPhone connected throughout the process. This method often works better for older iPhones or when facing update errors.
Troubleshooting Update Issues
Sometimes iPhone updates don’t go as planned. When your update gets stuck or fails, there are several proven solutions you can try before seeking professional help.
Recovery Mode and Restoring Your iPhone
If your iPhone won’t update normally, you might need to use recovery mode. This special state allows your computer to reinstall iOS when regular updates fail.
To put your iPhone in recovery mode:
- For iPhone 8 or newer: Press and quickly release the volume up button, then volume down button, then hold the side button until you see the recovery screen
- For iPhone 7: Hold the side and volume down buttons together until the recovery screen appears
- For older models: Hold the home and side buttons together
Once in recovery mode, connect to a computer with iTunes or Finder. You’ll see an option to update or restore your device. Try updating first, as this keeps your data. If updating fails, you’ll need to restore, which erases your iPhone but fixes stubborn software issues.
Make sure you have:
- The latest version of iTunes or macOS
- A stable internet connection
- Enough storage space on your iPhone
Contacting Apple Support
When troubleshooting doesn’t solve your update problems, it’s time to get help from Apple’s experts.
Before contacting Apple Support, try these quick fixes:
- Check Apple’s System Status page to see if servers are down
- Make sure you have enough battery (at least 50%)
- Free up storage space
- Reset network settings
You can reach Apple Support through multiple channels:
- Phone: Call 1-800-MY-APPLE
- Online chat: Visit support.apple.com
- Apple Support app: Download from App Store
- Visit an Apple Store: Make a Genius Bar appointment first
Take screenshots of any error messages you see during the update process. These help support staff diagnose your specific issue faster. Be ready to provide details about what steps you’ve already tried and when the problem started.
Post-Upgrade Considerations
After upgrading your iPhone, a few important steps will help you make the most of your new device or system. Taking time to verify everything works properly and setting up your data correctly ensures a smooth transition.
Verifying the iOS Upgrade
Once your iPhone finishes upgrading, check that everything installed correctly. Go to Settings > General > About to confirm you’re running the latest iOS version. The version number should match what Apple released most recently.
Look for any error messages or apps that aren’t working properly. Some apps may need updates to work with new iOS versions.
Check core functions like:
- Making phone calls
- Sending text messages
- Taking photos
- Using Wi-Fi and cellular data
If something isn’t working right, restart your iPhone by holding the side button and volume button together. Most minor issues fix themselves after a restart.
Battery life might be poor for the first day or two after an upgrade. This is normal as iOS does background tasks to optimize the system.
Restoring Data from Backup
If you set up your iPhone as new during the upgrade, you’ll need to restore your data. The easiest method is using an iCloud backup that you made before upgrading.
Go to Settings > Your Name > iCloud > iCloud Backup to check when your last backup happened. If it’s recent, great! If not, you might be missing some data.
To restore apps and data:
- Sign in with your Apple ID
- Select “Restore from iCloud Backup” when prompted
- Choose your most recent backup
Photos, contacts, messages, and app data should return to your iPhone. This process can take time depending on your internet speed.
Some apps may need you to log in again after the restore. Keep your passwords handy.
Exploring New Features
Each iOS update brings new features worth checking out. Open the Tips app that comes with your iPhone to see tutorials on the latest additions.
Privacy settings often change with updates. Go to Settings > Privacy to review and adjust what apps can access your data. New iOS versions typically add more control options.
Try out the new features like:
- Updated control center options
- New camera modes or filters
- Changes to messaging features
- Improved Siri capabilities
Customize your experience by going to Settings > General > Control Center to add new controls. Many users miss helpful shortcuts by not exploring this area.
Notification settings might need adjustments too. The upgrade process sometimes resets preferences for how apps can alert you.
Frequently Asked Questions
Upgrading your iPhone involves several key steps, from checking eligibility to ensuring your data transfers smoothly. These common questions address the most important aspects of the iPhone upgrade process.
What are the steps to manually update my iPhone to the latest iOS version?
Updating your iPhone software is simple. First, connect to Wi-Fi and plug your device into a power source.
Go to Settings, then tap General, and select Software Update. If an update is available, tap Download and Install.
You may need to enter your passcode and agree to the terms. The update will begin automatically after downloading.
Where can I download the latest iPhone Software Update?
The latest iOS updates are available directly on your iPhone. You don’t need to download them separately from a website.
Simply go to Settings > General > Software Update on your device. Your iPhone will check for updates automatically.
If you prefer managing updates through your computer, you can use iTunes or Finder (on newer Macs) by connecting your iPhone and selecting the update option.
What is the process for checking iPhone Upgrade eligibility?
To check if you’re eligible for an upgrade, visit the Apple Store app or website. Sign in with your Apple ID that’s linked to your current iPhone.
If you’re on the iPhone Upgrade Program, you become eligible after making 12 monthly payments on your current device.
For carrier upgrades, check your eligibility through your carrier’s website or app by logging into your account.
How do I participate in the iPhone Upgrade Program and trade in my device?
The iPhone Upgrade Program lets you get a new iPhone every year. Sign up online, through the Apple Store app, or at an Apple Store with a valid US credit card.
When upgrading, you’ll need to trade in your current iPhone in good condition. The device must power on, hold a charge, and have an intact screen.
After making 12 payments, you can trade in your current iPhone and start a new plan with the latest model.
What are the requirements for the Free iPhone Upgrade Program?
Apple does not offer a “Free iPhone Upgrade Program,” but their standard Upgrade Program has specific requirements.
You must make at least 12 monthly installment payments before becoming eligible to upgrade. Your current iPhone must be in good working condition.
You’ll need to trade in your existing device and sign a new 24-month installment loan agreement for the new iPhone.
How can I ensure a smooth transition when swapping to a new iPhone?
Back up your current iPhone before upgrading. Use iCloud or your computer to create a complete backup of your data.
Make sure your Apple ID and password are current and that you know them. These credentials are essential for restoring your backup.
Transfer your SIM card to the new device unless you’re using eSIM. Once set up, restore your backup to transfer photos, apps, and settings to your new iPhone.