Is your iPad Pro camera not working right? This can be frustrating when you need to capture important moments or use apps that require the camera. Most iPad camera problems can be fixed with some simple steps at home without visiting a repair shop. If your iPad Pro camera shows a black screen or isn’t functioning, first try closing all apps, restarting your device, and checking for iOS updates to solve the most common camera issues.
Camera problems might happen because of software glitches, physical damage, or app conflicts. Sometimes the camera won’t open, shows a black screen, or produces blurry images. These issues can often be fixed by removing any case or screen protector that might be blocking the camera, checking if the camera lens is clean, or making sure no apps have restricted camera access in your settings.
Before trying complex fixes, start with basic troubleshooting like closing and reopening the camera app, restarting your iPad, or checking for system updates. If the front camera works but the back camera doesn’t, try resetting your iPad settings or updating to the latest iPadOS version.
Common iPad Pro Camera Problems (and What They Mean)
If your iPad Pro camera isn’t working the way it should, the first step is to identify what kind of issue you’re dealing with. Some symptoms point to software glitches, while others might suggest hardware failure. Here are the most common problems users report:
| Problem | Description |
|---|---|
| Black screen | Opening the Camera app only shows a black screen with no image. |
| Blurry photos | Images lack sharpness or focus. |
| Camera app freezing | The app becomes unresponsive or crashes. |
| No camera available | An error message appears, saying no camera is detected. |
| Flash not working | Flash doesn’t trigger when needed, even in low light. |
| Overheating | Device gets unusually warm when using the camera. |
| Green or pink tint | Photos or video have odd color casts. |
Knowing the symptoms helps narrow down whether you’re dealing with a software bug, a blocked lens, or a more serious hardware issue.
Quick Fixes You Should Try First
Before diving into more advanced troubleshooting, try these simple solutions:
1. Force Quit and Restart the Camera App
- Double tap the Home button (or swipe up from the bottom on Face ID models).
- Swipe up on the Camera app to close it.
- Reopen it to see if the issue is resolved.
2. Restart Your iPad Pro
- Press and hold the Power button and Volume Up until the power slider appears.
- Slide to power off, wait a few seconds, then turn it back on.
3. Check for iOS Updates
- Go to Settings > General > Software Update.
- Install any available updates. Apple often patches camera bugs in new releases.
4. Clean the Camera Lenses
- Use a soft, lint-free microfiber cloth.
- Make sure the lens isn’t obstructed by a case or dirt buildup.
Software Fixes for Camera Glitches
If the camera issue is tied to software corruption or a glitch, these fixes can often restore functionality without a visit to the Genius Bar.
Reset All Settings
This won’t delete your data, but it resets system settings to default.
- Go to: Settings > General > Transfer or Reset iPad > Reset > Reset All Settings
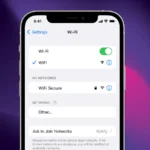
- You’ll need to re-enter Wi-Fi passwords and adjust preferences again.
Try in Safe Mode (Guided Access)
While iPads don’t have a traditional safe mode, using Guided Access can help isolate third-party interference:
- Go to Settings > Accessibility > Guided Access.
- Turn it on and set a passcode.
- Launch the Camera app, triple-click the side button to enter Guided Access.
- Use the app without interference from other running background apps.
Restore Using Finder or iTunes
If problems persist, a full restore may help:
- Back up your iPad via iCloud or your computer.
- Connect your iPad to your Mac or PC.
- Use Finder (macOS Catalina or later) or iTunes (older versions) to select Restore iPad.
- Set it up as new to test the camera before restoring your backup.
Hardware Troubleshooting: When It’s Not Just Software
If your iPad Pro camera still doesn’t work, it could be a hardware failure. This is especially likely if:
- The lens is cracked or fogged internally.
- The device was dropped or exposed to moisture.
- The flash is dead or triggering incorrectly.
Here’s a table to help identify potential hardware faults:
| Symptom | Possible Hardware Cause | Action |
|---|---|---|
| Camera doesn’t launch | Damaged camera sensor | Book a Genius Bar appointment |
| Photos are blurry no matter what | Auto-focus motor malfunction | Needs professional repair |
| Flash doesn’t work | Faulty LED module | Replace via service |
| Pink/green tint | Sensor or image processor issue | Contact Apple Support |
Apple Diagnostics and Support Options
If none of the above steps resolve the issue, Apple has tools and programs to help.
Use Apple’s Online Diagnostics
- Visit getsupport.apple.com and follow prompts to run a diagnostic test. (Requires iPad serial number and internet access.)
Check Warranty or AppleCare+
- Go to Settings > General > About and tap Coverage.
- You’ll see your warranty or AppleCare+ status. Hardware camera issues are often covered.
Visit an Apple Store or Authorized Service Provider
Apple technicians can open the device and test individual components like the rear camera module or Face ID sensor.
Preventing Future Camera Issues
Once your camera is working again, here are some best practices to keep it that way:
- Avoid using the camera in extreme heat or cold, which can stress components.
- Don’t store the iPad face-down on rough surfaces.
- Update your iPad regularly to get camera performance enhancements and bug fixes.
- Avoid third-party apps that take control of the camera in the background—they can cause conflicts.
Key Takeaways
- Restart your iPad and update iPadOS to fix most common camera problems.
- Check for physical obstructions like cases or dirt covering the camera lens.
- Reset camera settings or perform a factory reset if simpler fixes don’t work.
Understanding the iPad Pro Camera System
The iPad Pro camera system combines advanced hardware components with sophisticated firmware to deliver high-quality photos and videos. The integration of these elements enables features like portrait mode, center stage, and low-light photography.
Components of the Camera Hardware
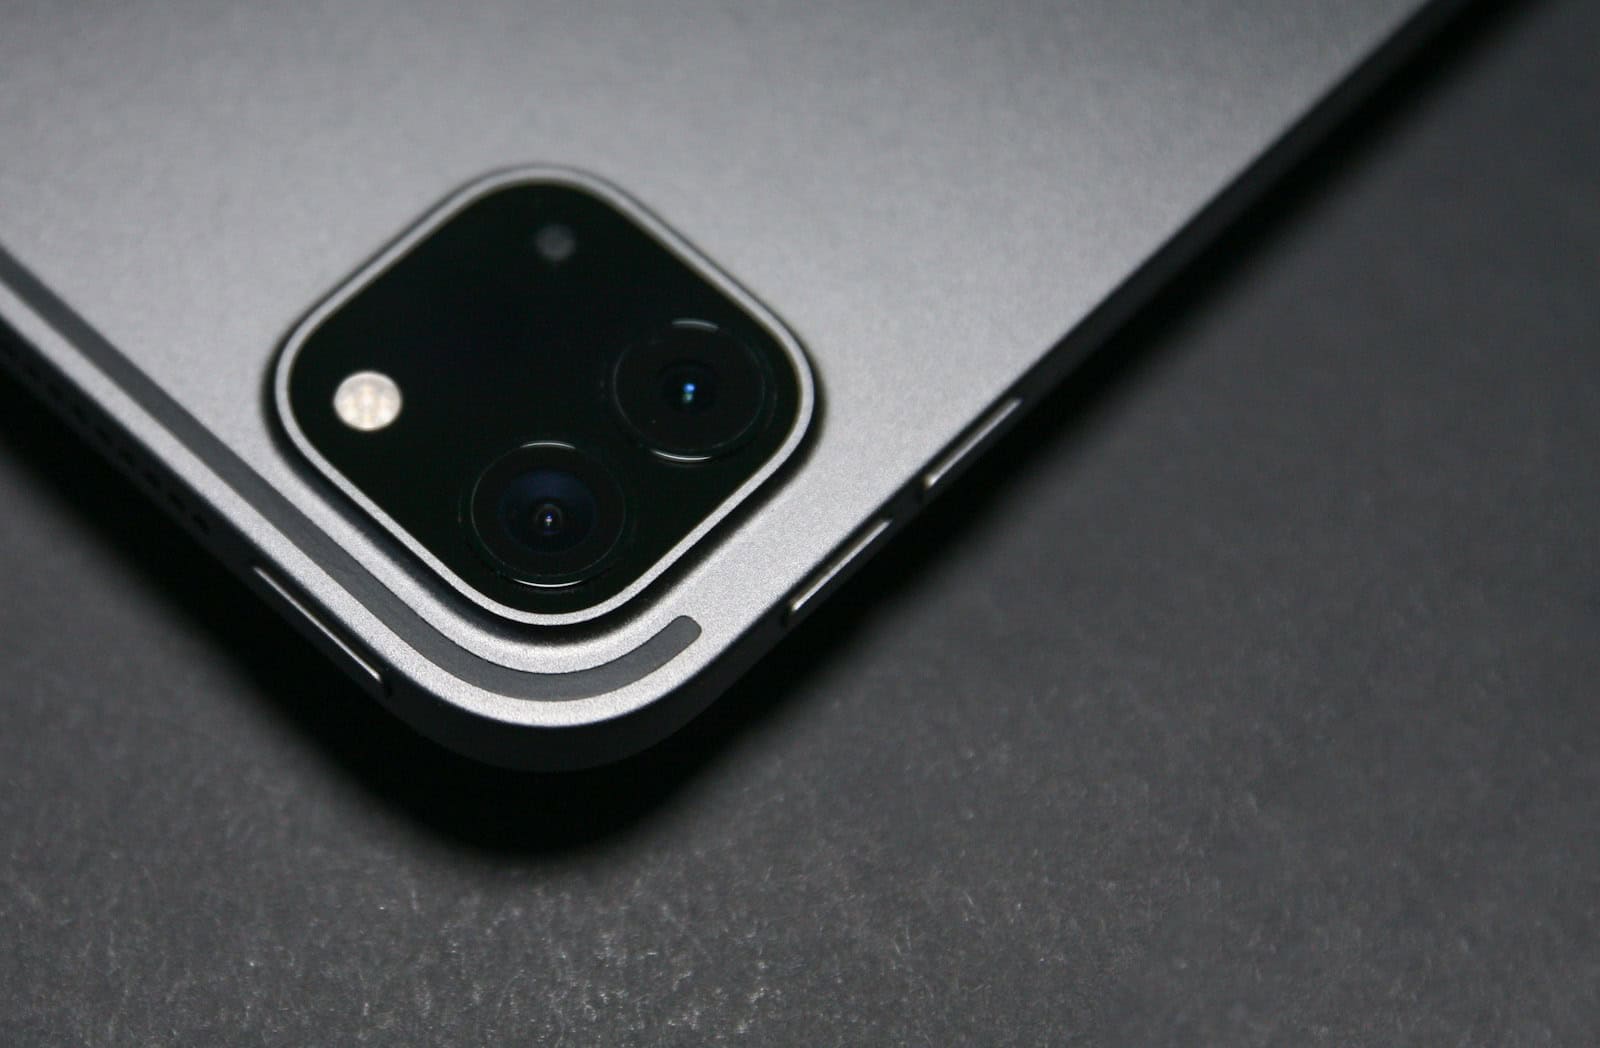
The iPad Pro features both front and rear cameras with distinct capabilities. Recent models include a 12MP Ultra Wide front camera that supports Center Stage, which keeps you in frame during video calls. This front camera uses a 122-degree field of view to capture more of your surroundings.
The rear camera system typically includes a Wide camera and an Ultra Wide camera, though some newer M4 models have removed the second camera. The Wide camera offers higher resolution for standard photos, while the Ultra Wide lens captures more of the scene.
The hardware also includes:
- True Tone flash
- LiDAR Scanner (on Pro models)
- Image signal processor
- Sapphire crystal lens cover for protection
Functionality of the Camera Firmware
The iPad Pro’s camera firmware acts as the brain behind the hardware, processing images and enabling special features. This software allows users to manually adjust focus and exposure for more control over their shots.
The firmware processes raw image data and applies computational photography techniques. It handles noise reduction, color correction, and HDR processing to produce better images in challenging lighting conditions.
When camera issues occur, such as a black screen or grainy images, the problem often lies in the firmware rather than the hardware. Apple regularly updates the firmware to fix bugs and add new capabilities.
Key firmware features include:
- Smart HDR for balanced exposure
- Night mode for low-light photography
- Portrait mode with depth control
- QuickTake video
Common Issues with iPad Pro Camera
iPad Pro cameras can experience several problems that affect photo quality and usability. These issues range from display problems to app performance and image quality concerns.
Black Screen on Camera App
One of the most common issues iPad Pro users face is a black screen when opening the camera app. This problem prevents you from seeing anything through the viewfinder, making the camera unusable.
The black screen issue often happens due to software glitches. A simple fix is to force close the camera app and restart it. Double-click the home button (or swipe up from the bottom on newer models) and swipe the camera app away.
If that doesn’t work, try restarting your iPad. Hold the power button until “slide to power off” appears, then slide to turn off your device. Wait 30 seconds before turning it back on.
Sometimes the camera permission settings cause black screens. Check your privacy settings by going to Settings > Privacy > Camera and make sure the camera access is enabled for the apps you’re using.
Camera App Freezes or Crashes
The iPad Pro camera app may freeze or crash unexpectedly during use. This frustrating problem can make taking photos impossible.
App crashes often relate to memory issues. Close background apps to free up RAM. Double-tap the home button (or swipe up and hold on newer models) to see all open apps, then swipe them away.
Outdated software frequently causes stability problems. Check if your iPad needs an update by going to Settings > General > Software Update. Installing the latest iPadOS version can fix many camera bugs.
If crashes persist, try performing a soft reset. Press and hold both the home button and power button for about 10 seconds until you see the Apple logo.
Storage problems can also cause camera crashes. Check your available storage in Settings > General > iPad Storage and delete unnecessary files if you’re running low on space.
Poor Image Quality in Photos
Many users report grainy, noisy images from their iPad Pro cameras, especially in low light conditions. This issue affects both the front and back cameras.
Dirty lenses often cause blurry or poor-quality photos. Clean your camera lenses with a soft, lint-free cloth. Be gentle to avoid scratching the glass.
Check for any protective case or film that might be blocking the camera. Remove them to see if image quality improves.
Lighting plays a crucial role in photo quality. iPad cameras perform best in well-lit environments. In low light, try using the flash or switching to a room with better lighting.
If your front-facing camera produces grainy images, try adjusting the exposure. Tap on the screen when the camera is open and slide your finger up or down to adjust brightness.
Some image quality issues stem from damaged camera hardware. If you’ve tried all software fixes without success, your camera module might need professional repair.
Troubleshooting Steps
When your iPad Pro camera stops working, you can try several effective fixes before seeking professional help. These methods address common problems that cause camera malfunctions.
Forcing the Camera App to Close and Restart
If your iPad Pro camera shows a black screen or freezes, closing and restarting the app might fix the issue. This simple step often resolves camera problems caused by temporary glitches.
To force close the Camera app:
- Swipe up from the bottom of your screen and pause in the middle
- Find the Camera app preview
- Swipe up on the Camera app to close it completely
After closing the app, wait about 10 seconds before reopening it. This gives your iPad time to clear any temporary issues.
If the Camera app still doesn’t work properly, try restarting your iPad Pro. Hold the top button and either volume button until the power off slider appears. Drag the slider, wait 30 seconds, then press and hold the top button until the Apple logo appears.
Reset All Settings on Your iPad Pro
When basic troubleshooting doesn’t work, resetting your iPad Pro settings might solve camera issues. This option keeps your data but returns all settings to factory defaults.
Before resetting, back up your important data through iCloud or iTunes. Then follow these steps:
- Open the Settings app
- Tap General
- Scroll down and tap Reset (or Transfer or Reset iPad)
- Select Reset All Settings
- Enter your passcode if prompted
- Confirm your choice
Your iPad will restart during this process. After it completes, check if the camera works properly.
This step is particularly helpful when software conflicts cause camera problems. Many users report success after performing this reset.
Updating Firmware and iOS Version
Outdated iOS versions can cause camera malfunctions on your iPad Pro. Apple regularly releases updates that fix bugs and improve camera performance.
To update your iPad Pro:
- Connect to a stable Wi-Fi network
- Plug your device into a power source
- Go to Settings > General > Software Update
- If an update is available, tap Download and Install
- Enter your passcode if requested
The update may take several minutes to complete. Your iPad will restart automatically when finished.
If your camera still doesn’t work after updating, check if any apps have pending updates. Some third-party camera apps need their own updates to function properly with the latest iOS version.
Advanced Repair Solutions
When basic fixes don’t solve your iPad Pro camera issues, more complex solutions may be necessary. These options involve either consulting with technical experts or replacing hardware components entirely.
Seeking Professional Assistance via JustAnswer
JustAnswer provides a convenient way to get expert help without visiting a physical repair shop. This online platform connects users with certified technicians who specialize in Apple devices.
The process is straightforward:
- Create an account and describe your camera issue
- Upload photos or videos showing the problem
- Get personalized troubleshooting advice within minutes
Experts can diagnose whether your issue is software-related or a hardware failure. They’ll suggest specific fixes based on your iPad Pro model and iPadOS version.
The service costs less than typical repair shop consultations. Many users report fixing their camera problems through guided troubleshooting without needing physical repairs.
Camera Module Replacement Options
When the camera hardware itself is damaged, replacement becomes necessary. The iPad Pro uses high-quality camera modules that can be replaced by:
Apple Store or Authorized Service Provider
- Official parts guarantee compatibility
- Maintains device warranty
- Higher cost ($129-$249 depending on model)
- Typically takes 3-5 business days
Third-Party Repair Shops
- Lower cost (often 30-50% less than Apple)
- Faster turnaround (sometimes same-day service)
- May use aftermarket parts
- Could void remaining warranty
For the technically skilled, self-repair kits are available online. These include the camera module and necessary tools, but require careful handling of delicate components. The process involves heating the display adhesive, removing the screen, disconnecting several ribbon cables, and installing the new camera.
Optimizing Camera Use and Settings
Your iPad Pro camera can produce much better photos with the right adjustments. Getting familiar with the settings helps you take advantage of all camera features in different shooting scenarios.
Adjusting Settings for Portrait and Landscape Mode
The iPad Pro camera works differently depending on how you hold your device. When using portrait mode (vertical), the camera’s physical image sensor is positioned vertically, which affects your photo’s aspect ratio. In landscape mode (horizontal), the sensor adjusts accordingly.
To get the best results in either orientation:
- Check your framing before taking photos
- Clean your lens regularly with a microfiber cloth
- Tap to focus on your subject for sharper images
You can manually adjust focus and exposure by tapping and holding on your screen until the AE/AF Lock appears. This prevents the camera from changing focus when you move.
For landscape shots, hold your iPad with two hands to reduce camera shake. Grid lines can help with composition—turn them on in Settings > Camera.
Tips for Taking Selfies with the Front Camera
The front camera on iPad Pro sometimes appears pixelated despite its capabilities. To improve selfie quality:
- Check your lighting – natural light works best
- Enable HDR in camera settings for more balanced photos
- Hold steady or use a tripod for clearer shots
For video calls using the front camera, position your iPad at eye level. This angle is more flattering and professional for Zoom or Teams meetings.
Using the volume buttons as shutter controls can help reduce movement when taking selfies. You can turn the shutter sound on or off in your settings if needed.
Third-Party Camera Apps and Accessories
Your iPad Pro camera can be enhanced with specialized apps and physical add-ons that take your photography to new levels. These tools help fix common camera issues while adding extra features not available in the standard Camera app.
Enhancing Camera Functionality with Amcrest View Pro
Amcrest View Pro offers advanced control over your iPad Pro camera settings. This app provides manual focus adjustments, exposure controls, and specialized shooting modes that the default camera app lacks.
Some users find this helpful when their regular iPad camera app freezes or shows a black screen. The app can sometimes bypass software glitches that affect the native camera application.
If your camera works in third-party apps but not in the default Camera app, Amcrest View Pro might be your solution. The app includes these helpful features:
- Grid lines for better composition
- Custom filter options
- Improved low-light performance
- Burst mode with higher frame rates
Using External Lens Attachments and Tripods
Physical accessories can dramatically improve iPad Pro camera quality and fix common issues. Clip-on lenses attach to your iPad and expand its photography capabilities beyond software limitations.
Popular lens types include:
- Wide-angle (for landscapes and group photos)
- Macro (for extreme close-ups)
- Telephoto (for distant subjects)
A stable tripod mount prevents camera shake that often causes blurry photos. This is especially helpful in low light when the camera needs longer exposure times.
For video calls or conference meetings, a dedicated stand positions the iPad at eye level. This creates more flattering angles than hand-holding the device.
Remember to check compatibility between accessories and your specific iPad Pro model before purchasing. Most attachments connect via universal clamps that work with protective cases.
Frequently Asked Questions
iPad Pro camera problems frustrate many users. Here are answers to the most common camera issues and their fixes that work for most iPad models.
What steps can be taken to address a black screen issue on the iPad Pro camera?
When your iPad Pro shows a black screen instead of the camera view, try closing all apps running in the background. This often solves the problem.
Restarting your iPad can fix many camera glitches. Hold the power button, slide to power off, then turn it back on after 30 seconds.
If the issue persists, try resetting your iPad settings. Go to Settings > General > Reset > Reset All Settings. This won’t delete your data but will return settings to factory defaults.
Check if your camera lens is covered by a case or your fingers. Sometimes the black screen problem happens due to simple physical obstructions.
Is it possible to reset the camera settings on an iPad, and if so, how?
Yes, you can reset camera settings on your iPad Pro. Go to Settings > Camera and you’ll find options to reset specific features.
For a complete camera reset, go to Settings > General > Reset > Reset All Settings. This will return all camera settings to default without erasing photos.
If you use third-party camera apps, you might need to clear their cache or reinstall them. Go to Settings > General > iPad Storage > select the app and tap “Offload App” then reinstall it.
What could be causing poor camera quality on my iPad, and how can it be improved?
Poor lighting is a common cause of bad iPad camera quality. Try taking photos in well-lit areas or use additional lighting.
Dirty lenses can make photos look blurry or pixelated. Clean your iPad camera lens gently with a microfiber cloth.
Check if any apps are running in the background that might affect camera performance. Close unused apps to free up system resources.
Make sure you’re using the highest resolution settings. Go to Settings > Camera > Record Video and select the highest quality option available.
How can one resolve a malfunctioning front camera or disabled flash on an iPad?
For a malfunctioning front camera that appears pixelated or unclear, restart your iPad first.
Check if the front camera works in different apps. If it works in one app but not another, the problem might be app-specific rather than hardware-related.
Update your iPad to the latest iOS version. Go to Settings > General > Software Update to check for updates.
For flash issues, go to Settings > Camera and ensure the flash option isn’t set to “Off.” Some iPad models don’t have flash, so check your specific model’s features.
Are iPad cameras serviceable, and what are the repair options?
Yes, iPad cameras can be serviced by Apple or authorized repair centers. Contact Apple Support or visit an Apple Store for professional diagnosis.
If your iPad is under warranty or covered by AppleCare+, camera repairs might be free or available at a reduced cost. Check your coverage status in Settings > General > About.
Third-party repair shops may offer cheaper options, but this could void your warranty. Apple’s repair service typically costs around $59 for camera issues not covered by warranty.
Self-repair is not recommended for camera problems as they usually involve internal components that require special tools and expertise.
What are the recommended solutions for an Apple camera glitch affecting iPad devices?
Update your iPad’s software regularly. Many camera glitches are fixed in iOS updates.
Force restart your iPad if the camera app freezes. For models with Face ID, press and quickly release the volume up button, press and quickly release volume down, then press and hold the top button until restart.
Reset the camera app by double-clicking the home button (or swiping up from bottom on newer models), then swipe up on the camera app to close it. Reopen and test again.
If all else fails and your back camera isn’t working despite trying these fixes, a factory reset might help. Back up your data first, then go to Settings > General > Reset > Erase All Content and Settings.