Portrait Mode on iPhone is more than just a blur effect—it’s your gateway to creating studio-quality photos with the tap of a button. By artfully separating the subject from the background using depth-sensing technology, Portrait Mode creates that classic “bokeh” effect typically reserved for DSLR cameras. But there’s more to this feature than meets the eye. With a few tips and tricks, you can elevate your shots and make the most of Portrait Mode, not only in photos but also across video calls and social media.
How Portrait Mode Works
Portrait Mode leverages the iPhone’s dual or triple-lens system (or LiDAR scanner on Pro models) to analyze depth and isolate the subject, applying a soft blur (bokeh) to the background. Starting with the iPhone X, this feature became available for both the rear and front-facing cameras, enabling high-quality selfies with a professional touch.
In newer models like the iPhone 15 series, Apple has further enhanced Portrait Mode with features like auto-detection of subjects and post-shot depth editing, allowing users to adjust the focus even after taking the picture.
Where You Can Use Portrait Mode Beyond Photos
Portrait Mode isn’t limited to the Camera app. It extends to popular third-party applications, enhancing your experience in:
- FaceTime – Enable Portrait Mode during calls for a clean, blurred background, keeping the focus on you.
- Instagram & Snapchat – Snap stunning selfies or stories with a soft-focus background.
- Zoom & Microsoft Teams – Maintain a professional look during virtual meetings by blurring out distracting backgrounds.
Pro Tips for Capturing Stunning Portraits
- Perfect the Lighting:
Natural lighting is Portrait Mode’s best friend. Position your subject so the light falls evenly across their face. Use Apple’s built-in Portrait Lighting options (like Studio Light or Contour Light) to refine shadows and highlights. Pro tip: Experiment with Stage Light for dramatic blacked-out backgrounds. - Mind the Distance:
Stand about 2 to 8 feet from your subject. The iPhone prompts you if you’re too close or too far, but optimal distance ensures the sharpest focus and smoothest background blur. - Use Depth Control & Lighting Effects (Post-Shoot):
After taking a photo, tap “Edit” and adjust the Depth Control slider to fine-tune the background blur. Play with lighting effects like Contour Light or Stage Light Mono to change the mood of the portrait. - Pick the Right Background:
Busy, textured backgrounds—like foliage, cityscapes, or patterned walls—enhance the bokeh effect. Avoid plain backdrops, as the depth separation might look flat. - Portrait Mode for Pets, Objects, and Food:
While originally designed for people, newer iPhones recognize pets, objects, and even food. Capture your dog against a park backdrop or highlight a dish at your favorite restaurant with a creamy background blur. - Use the Telephoto Lens (if available):
On models like the iPhone 15 Pro, switching to the Telephoto lens (3x or 5x zoom) provides tighter framing and a more pronounced background blur, perfect for headshots or close-ups. - Get Creative with Foreground Elements:
Adding objects in the foreground, like leaves or glass, creates an extra layer of depth. The iPhone’s Portrait Mode handles these layers well, giving your photo a more dynamic feel.
Quick Tips for Using Portrait Mode in Video Calls:
- Enable Portrait Mode before joining a call in FaceTime, Zoom, or Teams for a seamless blurred background.
- In Zoom, head to Settings > Background & Effects to enable the feature if it’s not active by default.
- Keep consistent lighting; Portrait Mode can struggle in low-light video calls, leading to blurred edges.
Final Thoughts
Portrait Mode has evolved from a simple photo effect into a versatile tool for both photography and everyday video communication. Whether you’re snapping a selfie, capturing a pet portrait, or hopping on a virtual meeting, mastering the nuances of Portrait Mode can significantly enhance the quality of your content.
With the right techniques and a little creativity, you can turn everyday moments into eye-catching masterpieces—all with just your iPhone.
Key Takeaways
- Portrait Mode creates professional-looking photos by automatically blurring backgrounds
- The feature works with both front and rear cameras on supported iPhone models
- Portrait Mode extends beyond the Camera app to popular social media and video calling apps
Mastering Portrait Mode on iPhone
Portrait Mode transforms regular photos into professional-looking portraits with depth and artistic background blur. The feature uses advanced camera technology and machine learning to separate subjects from their backgrounds.
Understanding Portrait Mode
Portrait Mode creates a depth-of-field effect that keeps the subject sharp while blurring the background. This effect mimics what professional DSLR cameras achieve with large aperture lenses.
The feature works best when subjects are 2-8 feet from the camera. It requires good lighting conditions and a clear separation between the subject and background.
Portrait Mode is available on iPhone 7 Plus and newer models, with each generation bringing improvements to edge detection and blur quality.
Optimizing Camera Settings for Different iPhone Models
Different iPhone models offer varying Portrait Mode capabilities. The iPhone 14 Pro features enhanced depth mapping and better low-light performance.
- Enable HDR for better highlight and shadow detail
- Turn on Smart HDR for improved dynamic range
- Adjust exposure by sliding up or down after tapping to focus
Model-Specific Features:
- iPhone 13/14: Cinematic Mode for video portraits
- iPhone 12+: Night mode portraits
- iPhone XR: Single-lens portrait mode
Leveraging Portrait Lighting and Effects
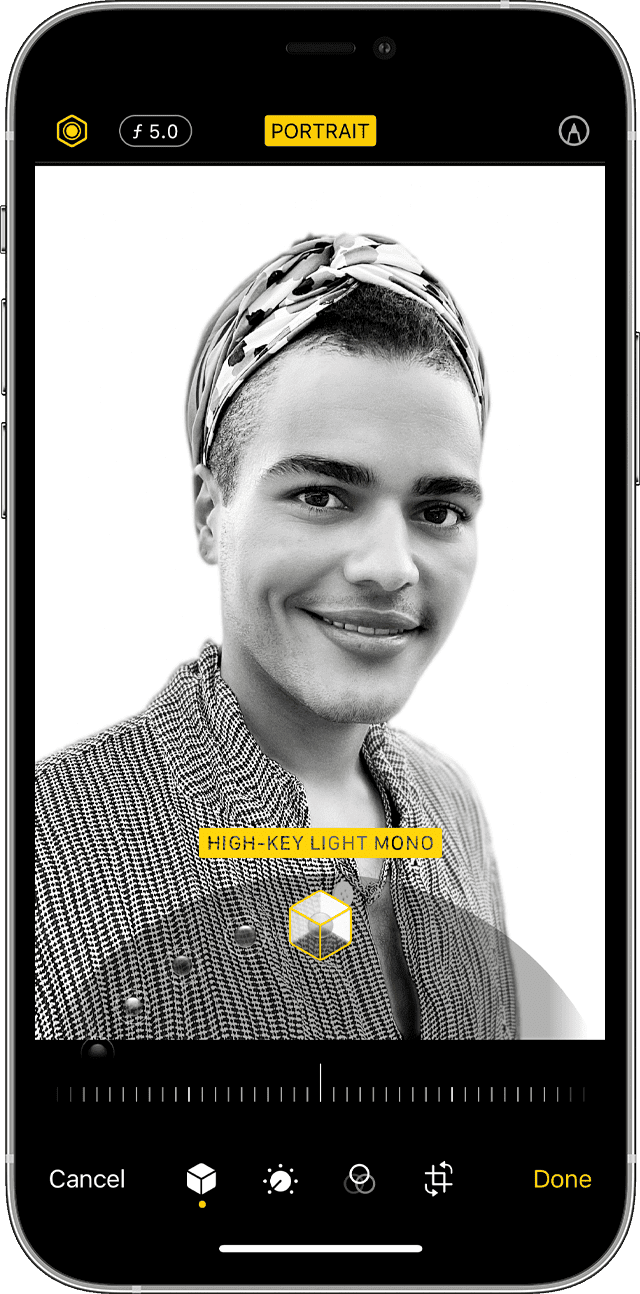
Portrait Lighting adds studio-quality effects to photos. Users can select from six lighting options:
- Natural Light – No additional effects
- Studio Light – Brightens facial features
- Contour Light – Adds dramatic shadows
- Stage Light – Black background with spotlight effect
- Stage Light Mono – Black and white with spotlight
- High-Key Light Mono – White background
Effects can be adjusted before or after taking the photo. The intensity slider helps fine-tune the lighting effect.
Enhancing Portrait Photos with Creative Composition
Good composition elevates portrait photos from basic to extraordinary. The rule of thirds grid helps place subjects effectively.
Composition Tips:
- Position subjects slightly off-center
- Leave space in the direction they’re looking
- Keep backgrounds simple and uncluttered
Eye level shots create connection, while shooting from slightly above can be flattering for most subjects.
Tips for Capturing Stunning Portraits
Best Practices:
- Maintain 2-8 feet distance from subject
- Ensure good lighting conditions
- Keep backgrounds simple
- Tap subject’s face to set focus
Clean the camera lens regularly for sharp images. Ask subjects to stay still during capture to prevent blur.
Navigating the iOS Camera App for Portrait Mode
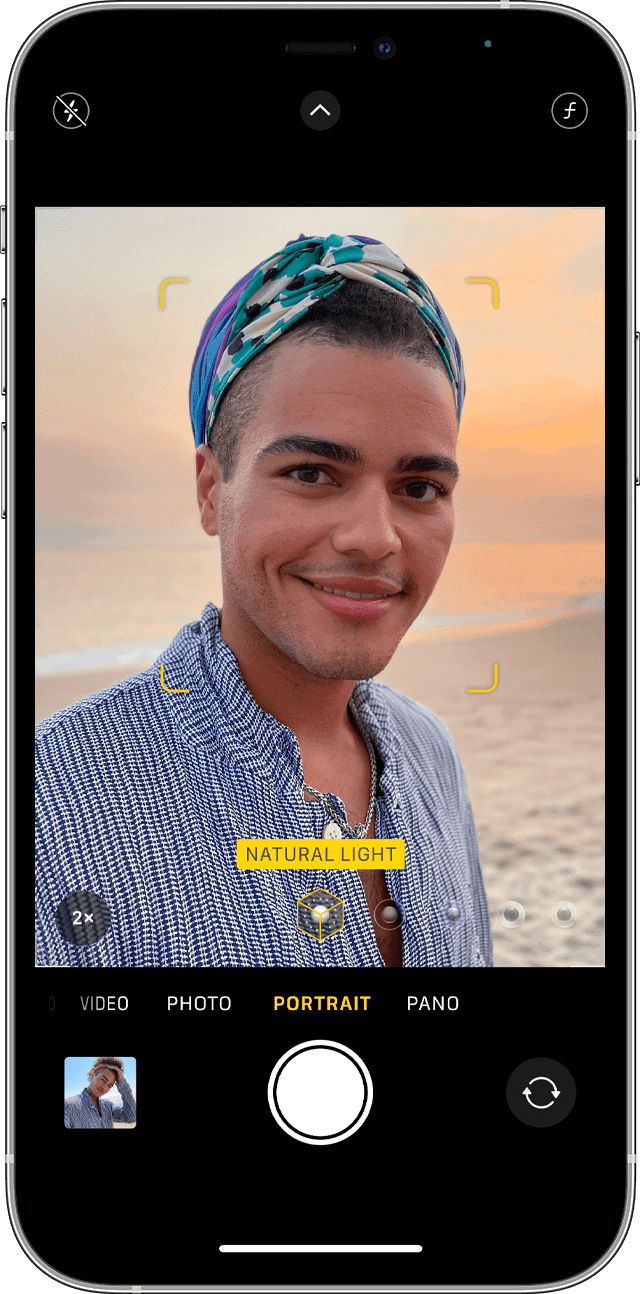
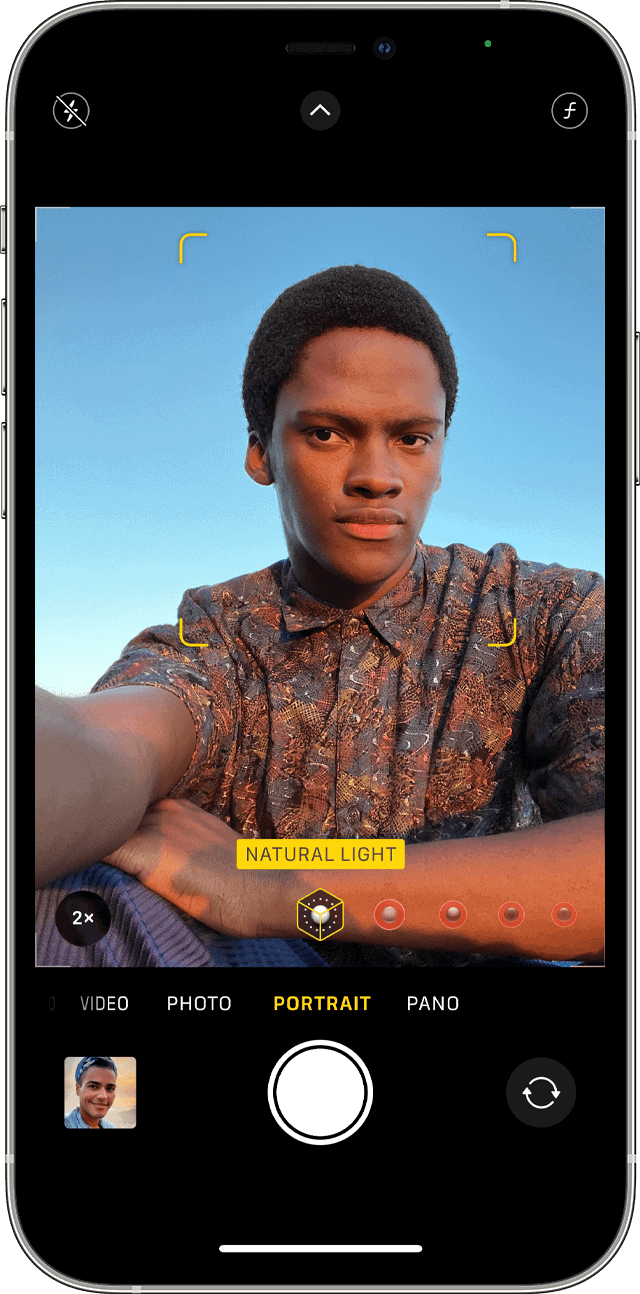
Select Portrait mode by swiping in the camera app. Yellow boxes indicate face detection and proper distance.
The depth control slider adjusts background blur intensity. Portrait mode works with both front and rear cameras on supported models.
A depth effect indicator appears when conditions are optimal for Portrait mode shots.
Understanding the Role of Depth and Focus
Depth information creates the portrait effect. The camera system builds a depth map to separate foreground and background.
Tap to focus on the main subject. The yellow box shows the focus point, while depth information appears as vertical bars.
Keep subjects within the recommended distance range for optimal depth mapping.
Achieving Professional-Looking Portraits on iPad
Recent iPad Pro models support Portrait mode through their TrueDepth camera system. The larger screen helps with composition.
iPads excel at self-portraits and group shots due to their wide field of view. The Center Stage feature automatically keeps subjects in frame during video calls.
Use the iPad in landscape orientation for wider portraits. The Apple Pencil can help with precise adjustments in post-processing.
Frequently Asked Questions
Portrait mode settings and techniques require specific adjustments and troubleshooting steps to capture professional-quality photos with the desired depth-of-field effect.
What are the optimal settings for iPhone portrait mode to achieve the best results?
Set the distance between 2-8 feet from the subject. Natural lighting works best, with the sun behind the photographer.
Keep the subject centered in the frame until the yellow “Portrait” box appears. The background should be at least 3 feet behind the subject.
How can one effectively use portrait mode on Android devices?
Android portrait mode works best with good lighting and a clear separation between subject and background. Most Android phones require the subject to be 1.5-5 feet away.
The camera should remain steady, and the subject should minimize movement during capture.
What steps should be taken if portrait mode is not functioning on an iPhone?
Check if Portrait mode is available for the current iPhone model and iOS version. Clean the camera lenses thoroughly.
Ensure adequate lighting conditions exist. Reset the camera app by closing and reopening it.
Are there any specific applications recommended for enhancing portrait mode photography?
Snapseed offers powerful tools for adjusting blur and lighting after capture. VSCO provides excellent presets for portrait photos.
Lightroom Mobile includes selective editing tools to enhance depth effects. Focos allows users to adjust the focal point after taking the photo.
How does the ‘f-stop’ setting affect photos taken in portrait mode?
Lower f-stop numbers (f/1.4 – f/2.8) create stronger background blur. Higher f-stop numbers (f/4 – f/8) keep more of the scene in focus.
The f-stop setting controls the intensity of the artificial bokeh effect in computational photography.
Can you provide tips for capturing high-quality images in portrait mode?
Focus on the subject’s eyes to maintain sharp facial details. Avoid busy or cluttered backgrounds that can confuse the depth sensors.
Keep the phone stable during capture to prevent blur. Use tap-to-focus to ensure the camera locks onto the intended subject.
Natural or diffused lighting produces the most flattering results. Position subjects away from walls to create depth in the image.


