A wired Ethernet link can turbo-charge an iPad—delivering gigabit-class (or even multi-gig) speeds, rock-solid latency for gaming or live-streaming, and complete immunity from congested office or hotel Wi-Fi. Apple quietly embraced wired networking in iPadOS years ago, but the arrival of Thunderbolt/USB 4 iPad Pro and iPad Air models—and the expansion of 2.5 GbE and 10 GbE adapters—means it’s easier (and faster) than ever.
Why Go Wired in 2025?
- Consistent throughput: Real-world tests show Wi-Fi 6E on the latest iPads still averages 40–60 % of a wired gigabit link.
- Lower latency: FaceTime, Zoom, and cloud-gaming apps regularly shave 20–40 ms off round-trip times on Ethernet.
- Security: In enterprise or hospital settings, disabling Wi-Fi eliminates rogue AP and packet-sniffing risks.
- Crowded venues: Trade shows, hotels, and classrooms often throttle public Wi-Fi; a pocket-sized hub sidesteps the bottleneck.
What You’ll Need
| iPad generation | Port | Adapter stack | Max practical speed |
|---|---|---|---|
| iPad Pro/Air/mini/10 with USB-C or Thunderbolt 4 (2018 – 2025) | USB-C / TB4 | Single USB-C hub or dongle with RJ-45 (Gigabit, 2.5 GbE, or 10 GbE) | 1 Gb – 10 Gb, limited only by adapter and network |
| Legacy Lightning models (2012 – 2021) | Lightning | Lightning-to-USB 3 Camera Adapter plus USB-to-Ethernet dongle or a one-piece Lightning-Ethernet adapter | 100 Mb – 480 Mb (USB 2 ceiling) |
Pro tip: The newest iPad Pro M4 happily negotiates 2.5 GbE and 5 GbE with Thunderbolt-rated adapters; a handful of users have confirmed full 9–10 Gb/s on TB3/4 10 GbE adapters when paired with Cat 6A cabling and a 10 GbE switch.
Step-by-Step: USB-C & Thunderbolt iPads
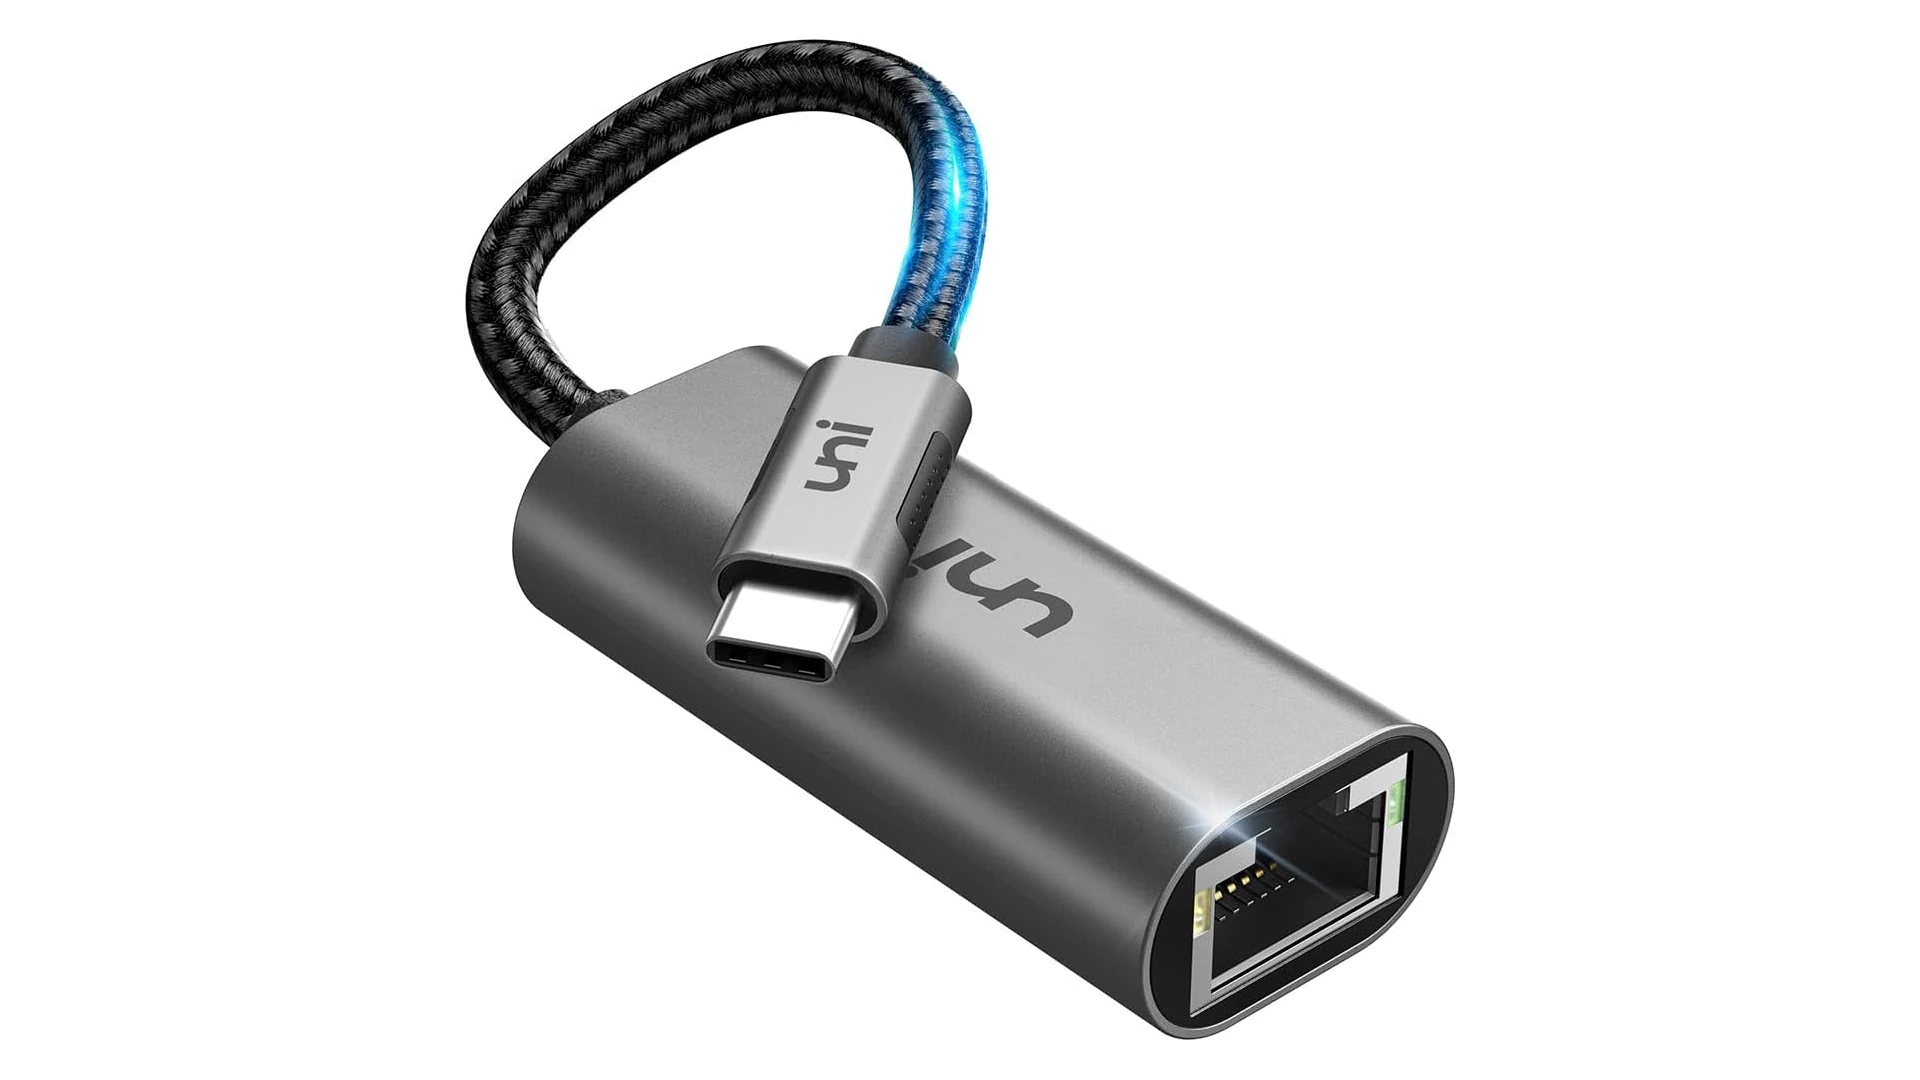
- Pick a hub or dongle. A compact Gigabit hub (Anker 341, CalDigit SOHO) is fine for most users; Belkin’s USB-C-to-2.5 GbE boosts speeds on fiber or multigig home routers.
- Connect Ethernet first. Plug your RJ-45 cable into the hub, then attach the hub to the iPad.
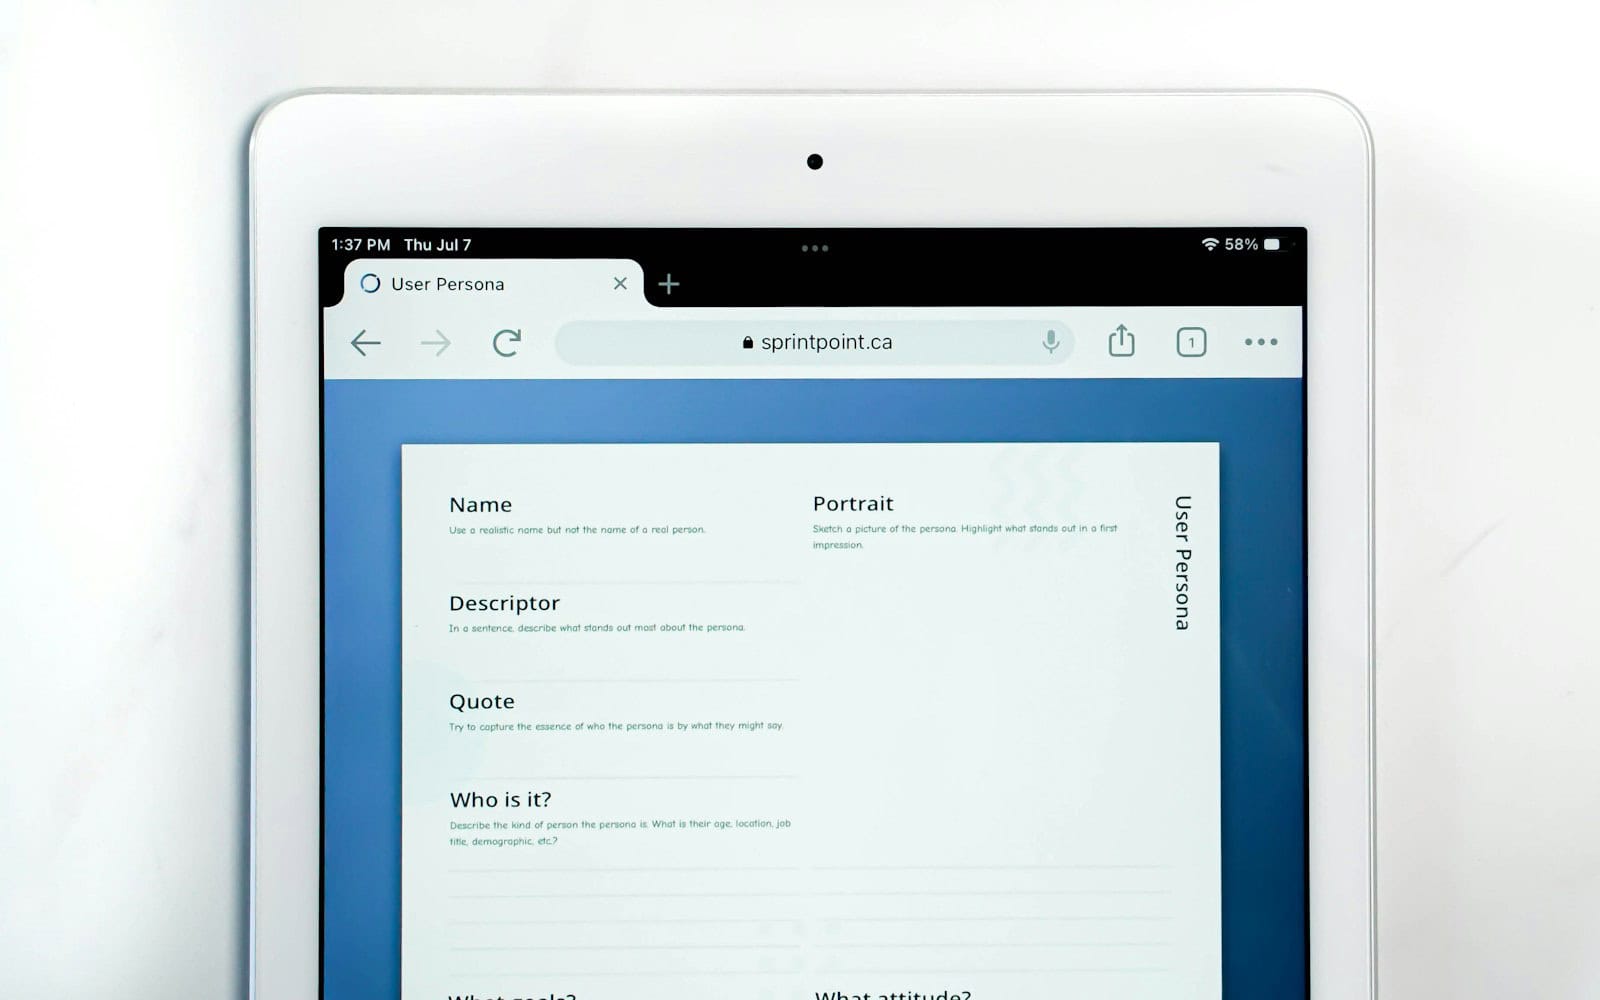
- Check the status. Open Settings → Ethernet. iPadOS 18 now shows link speed (e.g., “2.5 Gb/s”) and allows DHCP, static IP, or VLAN tags.
- Optionally disable Wi-Fi. iPad will prefer wired automatically, but toggling Wi-Fi off guarantees every packet travels over Ethernet.
- Power pass-through. If you’re working for hours, connect USB-C power to the hub so the iPad charges while wired.
Step-by-Step: Lightning iPads
- Assemble the chain.
- Option A (most reliable): Apple Lightning-to-USB 3 Camera Adapter → Apple/TP-Link USB Gigabit dongle → Ethernet.
- Option B (all-in-one): Belkin Power + Ethernet Adapter for Lightning.
- Add power. The Camera Adapter’s female Lightning port can take a regular charger; without it, the iPad may refuse to power hungry USB dongles.
- Connect and confirm. Plug everything in, wait a few seconds, then look under Settings → Ethernet (or Settings → General → About on very old iPadOS versions).
- Troubleshoot. If Ethernet never appears, reseat each connector or try a certified MFi dongle—a common culprit is an out-of-spec USB-Ethernet adapter.
Advanced Tips & Tricks
- Multi-gig on the go: A Thunderbolt 3/4 10 GbE adapter plus a short Cat 6A patch cable lets the iPad pull full NAS or SAN speeds in pro video workflows.
- Power over Ethernet (PoE): Some USB-C docks accept PoE from 802.3at/af injectors—handy for kiosk setups that need a single cable for data and power.
- Static IP & DNS: In iPadOS 18’s Ethernet pane you can now set static addresses, custom DNS, or disable IPv6—useful on segmented corporate LANs.
- VLAN tagging: A few enterprise USB-C docks (CalDigit TS4, OWC Thunderbolt Go) expose VLAN IDs that iPadOS can recognize, letting IT drop the tablet onto the right subnet without extra hardware.
- Test your link: Free apps like iPerf 3 Dashboard or Speedtest by Ookla confirm you’re actually saturating the wire.
Recommended Adapters (2025 Shortlist)
- Everyday Gigabit: Anker 341 7-in-1 Hub – pocket-size, 100 W passthrough, reliable link LEDs.
- 2.5 GbE Boost: Belkin USB-C to 2.5 GbE – draws negligible power, stays cool during long transfers.
- Mobile Thunderbolt Dock: CalDigit SOHO – HDMI 2.0, SD UHS-II, Gigabit, and 100 W PD in a palm-sized brick.
- 10 GbE Pro: OWC Thunderbolt 3 10G Adapter – aluminum shell, active cooling; pairs nicely with iPad Pro M4 for raw 8K video ingest.
With the right dongle, your iPad gains desktop-class speeds, glitch-free streaming, and the kind of reliability that Wi-Fi can’t match. Plug in, flip Wi-Fi off, and enjoy a rock-solid, multi-gig connection wherever there’s an Ethernet jack.
How to Connect iPad to TV
Watching videos, sharing photos, or playing games on a bigger screen can make your iPad experience even better. Connecting your iPad to your TV opens up a world of possibilities for entertainment and sharing content with friends and family. You can connect your iPad to a TV using either a physical cable with an adapter or wirelessly through AirPlay to compatible smart TVs and devices.
The process is simple and takes just a few minutes to set up. With a wired connection, you’ll need the right adapter for your iPad model and an HDMI cable. For wireless connections, both your iPad and TV need to be on the same Wi-Fi network to use AirPlay. Once connected, you can mirror your entire screen or just stream specific content like movies or presentations.
Connecting your iPad to your TV can be done in a few ways, depending on your TV’s capabilities and your preferences (wired vs. wireless). Here’s a breakdown of the most common methods:
Wireless Connection (Recommended for convenience)
1. AirPlay (Best for Apple TV or AirPlay 2-compatible Smart TVs)
This is the most seamless way to connect your iPad to your TV if you have an Apple TV box or a smart TV that supports AirPlay 2 (many newer Samsungs, LGs, Sonys, etc., do).
- Requirements:
- iPad and TV must be on the same Wi-Fi network.
- Apple TV or AirPlay 2-compatible smart TV.
- Steps for Screen Mirroring (showing your entire iPad screen):
- Open Control Center on your iPad: Swipe down from the top-right corner of the screen (for iPads with Face ID) or swipe up from the bottom edge (for iPads with a Home button).
- Tap the Screen Mirroring icon: It looks like two overlapping rectangles.
- Select your TV or Apple TV from the list of available devices.
- If a passcode appears on your TV screen, enter it on your iPad.
- To stop mirroring, open Control Center again, tap the Screen Mirroring icon, and then tap “Stop Mirroring.”
- Steps for Streaming Video/Photos (from specific apps):
- Open the app (e.g., Photos, Apple TV app, YouTube).
- Find the content you want to stream.
- Look for the AirPlay icon (a rectangle with a triangle at the bottom) within the app’s playback controls.
- Tap it and select your TV from the list.
2. Chromecast (for Google Chromecast devices or compatible Smart TVs)
If you have a Google Chromecast or a TV with Chromecast built-in, you can use the Google Home app to mirror your iPad’s screen or cast content from compatible apps.
- Requirements:
- iPad and Chromecast/TV must be on the same Wi-Fi network.
- Google Home app installed on your iPad.
- Steps:
- Open the Google Home app on your iPad.
- Tap on your Chromecast device.
- Select “Cast screen” to mirror your iPad.
- Alternatively, within Chromecast-enabled apps (like YouTube, Netflix, Disney+), tap the Cast icon (a rectangle with a Wi-Fi signal) and select your Chromecast.
3. Roku, Fire TV Stick, and Third-Party Apps
- Roku/Fire TV: Many Roku and Amazon Fire TV devices have their own mirroring capabilities. You’ll typically enable screen mirroring on the Roku/Fire TV settings, then use your iPad’s Control Center (Screen Mirroring) to select the device. Some also have dedicated apps that allow casting.
- Third-Party Mirroring Apps: If your smart TV doesn’t have AirPlay or Chromecast, you might find third-party apps in the App Store (like DoCast, Replica, AirBeam, TV Mirror) that can mirror your iPad’s screen to your TV over Wi-Fi. These often require installing a companion app on your smart TV as well.
Wired Connection (for reliability and older TVs)
This method ensures a stable connection and is great if you don’t have a smart TV or prefer not to rely on Wi-Fi.
- Requirements:
- Adapter: You’ll need an Apple Digital AV Adapter. The type of adapter depends on your iPad’s charging port:
- Lightning Digital AV Adapter: For iPads with a Lightning port.
- USB-C Digital AV Multiport Adapter: For newer iPads with a USB-C port (like many iPad Pro, iPad Air, and recent iPad mini models).
- HDMI Cable: A standard HDMI cable to connect the adapter to your TV.
- Adapter: You’ll need an Apple Digital AV Adapter. The type of adapter depends on your iPad’s charging port:
- Steps:
- Plug the Digital AV Adapter into the charging port of your iPad.
- Connect one end of the HDMI cable to the adapter.
- Connect the other end of the HDMI cable to an available HDMI input on your TV.
- On your TV, use your TV remote to switch the input source (sometimes labeled “Input,” “Source,” or “HDMI”) to the HDMI port where you connected the iPad.
- Your iPad’s screen should now be mirrored on your TV. The adapter also usually has an extra port to plug in your iPad’s charging cable, allowing you to charge it while connected to the TV.
Considerations:
- Resolution: Wired connections generally offer better resolution and less latency, especially for fast-paced content like games.
- Content Restrictions: Some streaming apps (e.g., Netflix, Hulu) might restrict mirroring or casting of certain content due to licensing agreements.
- Charging: When using a wired adapter, consider an adapter that allows you to charge your iPad simultaneously, especially for longer viewing sessions.
Key Takeaways
- Connect your iPad to a TV using either an HDMI adapter cable or wirelessly through AirPlay screen mirroring.
- Make sure both devices are on the same Wi-Fi network when using wireless connections.
- Use the Control Center on your iPad to quickly access screen mirroring options for streaming videos, photos, and music.
Different Methods of Connecting an iPad to a TV
You can connect your iPad to a TV using several methods, each with its own advantages depending on your setup and needs. These options range from wireless connections to cables and adapters.
Wireless Connection through AirPlay
AirPlay is Apple’s wireless streaming technology that lets you mirror your iPad screen to compatible TVs. To use this method:
- Make sure your iPad and Apple TV or AirPlay 2-compatible smart TV are on the same Wi-Fi network.
- Open Control Center on your iPad by swiping down from the top-right corner.
- Tap Screen Mirroring.
- Select your Apple TV or AirPlay 2-compatible TV from the list.
Your iPad screen will now appear on your TV. This works with newer iPad models running recent iOS versions. Many Samsung TVs and other smart TVs now support AirPlay 2 without needing extra devices.
For best results, keep your iPad within 30 feet of your TV. If you experience lag, try moving closer to your router or reducing Wi-Fi interference.
Using HDMI and Adapters for Wired Connection
A wired connection using HDMI provides the most reliable way to connect your iPad to a TV. Here’s how:
Purchase the correct adapter for your iPad:
- Lightning Digital AV Adapter for iPads with Lightning ports
- USB-C Digital AV Adapter for newer iPad Pro or iPad Air models with USB-C
Connect one end of an HDMI cable to the adapter and the other to your TV’s HDMI port.
Plug the adapter into your iPad’s charging port.
Your TV should automatically detect the input signal. If not, use your TV remote to select the correct HDMI input.
This method offers zero lag and doesn’t require Wi-Fi. It’s perfect for presentations, gaming, or watching videos. The adapter also includes a power port so you can charge your iPad while connected.
Utilizing Third-Party Apps for Screen Mirroring
If your TV doesn’t support AirPlay, third-party apps can bridge the connection gap. Popular options include:
- Chromecast: Use the Google Home app to cast your iPad screen to a TV with Chromecast.
- Roku: The Roku app allows screen mirroring from iPads to Roku devices.
- Fire TV: Apps like AirScreen enable iPad mirroring to Amazon Fire TV.
To use these methods, first download the appropriate app on your iPad. Open the app and follow the instructions to connect to your streaming device.
Most third-party solutions require both devices to be on the same Wi-Fi network. The quality varies by app and network speed. Some apps offer free basic features with premium options for enhanced performance.
Connecting via a Streaming Device or Projector
Many modern projectors and streaming devices can receive content from an iPad. Here are some options:
Streaming Devices:
- Apple TV: The easiest option for iPad users
- Chromecast: Affordable alternative that works well with iPads
- Roku: Supports iPad connections through its mobile app
Projectors:
- Many newer projectors have built-in AirPlay or Chromecast support.
- For projectors without wireless capabilities, use an HDMI adapter as described earlier.
Some projectors offer USB ports that can connect directly to newer iPad models. Check if your projector supports USB display functionality before trying this method.
For business presentations, many conference rooms now feature systems like AirMedia or ClickShare that allow iPad connections through dedicated apps.
Preparation Prior to Connection
Before connecting your iPad to your TV, you need to make sure your devices are compatible and properly set up. This ensures a smooth connection process and helps avoid technical issues.
Checking Compatibility of iPad and TV
Different iPad models connect to TVs in various ways. Newer iPad models with USB-C ports can connect directly with a USB-C to HDMI cable or adapter. Older iPads with Lightning ports need a Lightning Digital AV Adapter to connect via HDMI.
For wireless connections, check if your TV supports AirPlay 2. Many smart TVs, including Samsung TVs and Apple TV devices, have built-in AirPlay 2 support. Look for the AirPlay icon in your TV’s settings or manual.
Your iPad needs to run a recent version of iPadOS for the best compatibility. Update your iPad by going to Settings > General > Software Update.
TV Requirements:
- HDMI port (for wired connections)
- AirPlay 2 support (for wireless connections)
- Smart TV capabilities (for wireless)
Ensuring All Devices Are on the Same Wi-Fi Network
For wireless connections using AirPlay, both your iPad and TV must be on the same Wi-Fi network. This is essential for them to find and communicate with each other.
To check your iPad’s network:
- Open Settings
- Tap Wi-Fi
- Look at the connected network name
For your smart TV or Apple TV, check the network settings in the device menu. The network name should match your iPad’s connection.
If your devices are on different networks, reconnect one or both to the same network. Some homes have multiple networks (2.4GHz and 5GHz), so make sure both devices connect to the exact same one.
Wi-Fi signal strength affects connection quality. Place your router in a central location for the best results.
Step-by-Step Connection Guides
Connecting your iPad to a TV gives you a bigger screen for movies, games, and presentations. You can choose wireless or wired methods depending on your equipment and needs.
Wirelessly Connecting iPad to a TV
The easiest way to connect wirelessly is through AirPlay. Make sure both your iPad and TV device are on the same Wi-Fi network first.
For Apple TV or AirPlay-compatible smart TVs:
- Swipe down from the top-right corner of your iPad to open Control Center
- Tap the Screen Mirroring button
- Select your Apple TV or compatible smart TV from the list
- Enter the AirPlay code if prompted on your TV
Your iPad screen will now display on your TV. To stop mirroring, open Control Center again, tap Screen Mirroring, and select “Stop Mirroring.”
For non-Apple TVs, Chromecast offers an alternative solution. Download the Google Home app on your iPad, set up your Chromecast, and cast your screen following the app instructions.
Establishing a Wired Connection with HDMI
A wired connection provides the most reliable picture quality without Wi-Fi dependency.
What you’ll need:
- Lightning Digital AV Adapter (for newer iPads) or Apple Digital AV Adapter
- HDMI cable
- TV with HDMI port
Connection steps:
- Find an available HDMI port on your TV
- Connect one end of the HDMI cable to your TV
- Connect the other end to your adapter
- Plug the adapter into your iPad’s Lightning or USB-C port
- Use your TV remote to switch to the correct HDMI input
Your iPad screen will automatically appear on the TV. No setup or pairing is needed. The wired method works with any app and lets you charge your iPad while connected if your adapter has a charging port.
Streaming Content from iPad to TV via Apps
Many apps offer built-in TV streaming features that are often easier than full screen mirroring.
Popular streaming apps:
- Netflix
- Hulu
- Disney+
- YouTube
- HBO Max
When using these apps, look for the cast icon (usually in the corner of the video). Tap it and select your TV device. This method uses less battery than full screen mirroring.
For presentation apps like Keynote or PowerPoint, use their specific AirPlay features for best results. Open your presentation, tap the share button, and select your TV device.
Some games also support external displays, giving you controls on the iPad while the main action appears on TV. This turns your iPad into a sophisticated controller for a bigger gaming experience.
Troubleshooting Common Issues
Connection problems can happen when linking your iPad to your TV. Knowing how to fix these common issues will save you time and frustration.
Resolving Wi-Fi and AirPlay Connectivity Problems
When your iPad won’t connect to your TV via AirPlay, start by checking that both devices are on the same Wi-Fi network. Sometimes simply restarting your Wi-Fi router can fix connection issues.
Make sure your TV supports AirPlay or AirPlay 2. Not all TVs have this feature built-in. You can check if your TV is updated to the latest software since outdated firmware can cause connection problems.
If your iPad still won’t connect, try these steps:
- Turn off and restart both your iPad and TV
- Check that AirPlay is enabled in your TV settings
- Move your iPad closer to your TV to improve the signal
- Disable other Bluetooth devices that might cause interference
Sometimes your iPad needs an update too. Go to Settings > General > Software Update to check if a new version is available.
Fixing HDMI and Adapter Connection Obstacles
HDMI connections should be simple, but they often cause headaches. If your screen shows “No Signal,” first check that your HDMI cable is properly connected at both ends. Loose connections are a common problem.
Try these fixes for HDMI issues:
- Use only Apple-certified adapters (third-party ones can be unreliable)
- Test your HDMI cable with another device to rule out a faulty cable
- Make sure you’ve selected the correct HDMI input on your TV using your TV remote
- Check your Lightning port for lint or damage
Some older TVs may not support the resolution your iPad outputs. Try changing your TV’s display settings to 1080p instead of 4K. Also, remove any HDMI hub or splitter in the connection path as these can sometimes block the signal.
Addressing Issues with Third-Party Screen Mirroring Apps
When using apps like Chromecast or other screen mirroring solutions, compatibility issues can occur. Make sure your app is updated to the latest version through the App Store.
Network problems are the most common issue with mirroring apps. Try these solutions:
- Connect both devices to the 5GHz band of your Wi-Fi (if available) for faster streaming
- Close background apps on your iPad to free up memory
- Disable VPN services which can interfere with local network connections
- Restart the app if the screen freezes or lags
Some apps have specific requirements. For example, certain streaming services may block screen mirroring for copyright reasons. In these cases, you’ll need to use their supported app directly on your smart TV instead of mirroring.
If all else fails, try uninstalling and reinstalling the mirroring app. This often clears up persistent connection issues.
Optimizing the Viewing Experience
Once you’ve connected your iPad to your TV, a few simple adjustments can transform your viewing quality. The right settings make movies sharper, games more immersive, and presentations more professional.
Adjusting TV Settings for the Best Display and Sound
Start by checking your TV’s picture mode. For movies and shows, choose “Movie” or “Cinema” mode for the most accurate colors. “Game” mode reduces lag when playing games from your iPad. If text looks fuzzy during presentations, switch to “PC” or “Computer” mode.
For the best picture when using AirPlay, adjust brightness based on your room’s lighting. In bright rooms, increase TV brightness for better visibility. In dark rooms, lower it to prevent eye strain.
Sound settings matter too. Most TVs have preset sound modes like “Standard,” “Movie,” or “Music.” Pick the one that matches what you’re watching. For clearer dialogue, look for a “Voice Enhancement” or “Clear Voice” option in your TV’s audio settings.
Using iPad Features to Control Playback
Your iPad can work as a smart remote for your TV content. When mirroring or streaming, use the iPad’s volume buttons to adjust sound without getting up.
For video apps like Netflix or YouTube, the playback controls on your iPad offer better options than most TV remotes. You can easily:
- Rewind 10 seconds to catch missed dialogue
- Skip intros
- Change subtitle settings
- Adjust video quality
Open Control Center by swiping down from the top-right corner of your iPad to quickly access screen mirroring controls. This lets you disconnect or reconnect without interrupting what you’re watching for too long.
Many streaming apps include picture-in-picture mode, letting you check other apps while still keeping an eye on your video. Just tap the PiP icon or swipe up while watching.
Frequently Asked Questions
Connecting your iPad to your TV offers many options depending on your device and preferences. Here are the most common questions people ask about this process.
What are the steps to wirelessly connect an iPad to a TV?
To connect your iPad to a TV wirelessly, you’ll need both devices on the same Wi-Fi network.
Open the Control Center on your iPad by swiping down from the top-right corner. Then tap on Screen Mirroring and select your TV from the list that appears.
This works with Apple TV or AirPlay 2-compatible smart TVs. Your iPad screen will then display on your television.
Can I use USB to connect my iPad to a television?
USB alone cannot directly connect an iPad to a TV for display purposes.
You’ll need an adapter that converts from your iPad’s port (Lightning or USB-C) to HDMI. These adapters often have a USB port for charging while you’re connected to the TV.
What is the procedure for screen mirroring my iPad on a TV?
Make sure your iPad and TV (Apple TV or AirPlay 2-compatible smart TV) are connected to the same Wi-Fi network.
Swipe down from the top-right corner to open Control Center. Tap Screen Mirroring and select your TV from the list.
Your iPad’s screen will now appear on your TV, showing everything you do on the iPad in real-time.
How do I use HDMI to display my iPad screen on a TV?
To connect using HDMI, you’ll need an Apple adapter compatible with your iPad, such as a Lightning Digital AV Adapter or USB-C to HDMI adapter.
Connect one end of an HDMI cable to your TV. Plug the adapter into your iPad and connect the other end of the HDMI cable to the adapter.
Your TV should automatically detect the connection and display your iPad screen.
Is it possible to connect my iPad to a TV without using WiFi?
Yes, you can connect without WiFi using a wired connection.
The most reliable method is using an HDMI adapter and cable to create a direct physical connection between your iPad and TV. This works even when no WiFi is available.
Some streaming devices also allow direct connections without needing a WiFi network.
What alternatives are available for connecting an iPad to a TV without an HDMI port?
If your TV lacks an HDMI port, consider using a wireless display adapter that plugs into other ports like USB.
You can also use devices like Chromecast, Roku, or Amazon Fire Stick that connect to your wireless network and allow screen sharing.
Another option is using component or composite adapters for older TVs, though the quality won’t match HDMI connections.


