When your iPod displays “iPod is disabled, connect to iTunes,” it’s not the end of the world. This common issue occurs when too many incorrect passcode attempts are made. To fix a disabled iPod, you’ll need to restore it using iTunes or Finder on a computer.
Don’t worry if you’ve forgotten your passcode. You can still recover your device and get it working again. The process involves putting your iPod into recovery mode and then restoring it. This will erase all data on the device, but if you have a recent backup, you can restore your content afterward.
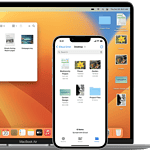
Before starting, make sure you have access to a computer with the latest version of iTunes or macOS Catalina or later for Finder. You’ll also need the USB cable that came with your iPod. If you’re using a Mac with macOS Catalina or later, you’ll use Finder instead of iTunes.
| Step | Action |
|---|---|
| 1 | Connect your iPod to the computer |
| 2 | Put iPod in recovery mode |
| 3 | Restore iPod using iTunes/Finder |
| 4 | Set up iPod as new or restore from backup |
Understanding iPod Disabled Errors
iPod disabled errors can be frustrating to deal with. These issues often stem from incorrect passcode entries or security measures designed to protect your device.
Causes of ‘iPod is Disabled’ Message
Your iPod may become disabled after multiple incorrect passcode attempts. This security feature prevents unauthorized access to your device. The number of allowed attempts varies:
- 6 incorrect tries: 1-minute lockout
- 7 incorrect tries: 5-minute lockout
- 8 incorrect tries: 15-minute lockout
- 9 incorrect tries: 60-minute lockout
- 10 incorrect tries: iPod is disabled
Once disabled, you’ll see a message to connect to iTunes. This is your only option to regain access to the device.
Difference Between iPod Disabled and Lock Screen
The lock screen and disabled state are distinct:
| Feature | Lock Screen | Disabled State |
|---|---|---|
| Access | Unlockable with passcode | Requires iTunes connection |
| Function | Protects device | Indicates security breach |
| Duration | Temporary | Permanent until resolved |
Your lock screen appears when you turn on your iPod. It’s a normal security measure you can bypass with your passcode, Touch ID, or Face ID. The disabled state is more serious. It means your iPod needs intervention through iTunes to function again.
Remember, a disabled iPod can’t be unlocked on the device itself. You must use a computer with iTunes to restore it.
Resolving ‘iPod is Disabled, Connect to iTunes’ Issue
When your iPod becomes disabled, you can use iTunes, Recovery Mode, or DFU Mode to regain access. These methods help restore your device’s functionality and retrieve your data.
Using iTunes to Restore Disabled iPod
Connect your disabled iPod to a computer with iTunes installed. iTunes should detect your device and display a message about a disabled iPod. Click “Restore iPod” to begin the restore process.
Before restoring, iTunes will ask if you want to back up your device. Choose “Back Up Now” to save your data. After backing up, click “Restore iPod” again.
The restore process will erase all content and settings on your iPod. Once complete, you can set up your device as new or restore from the backup you just created.
Recovery Mode to Address Disabled iPod
If iTunes doesn’t recognize your disabled iPod, try Recovery Mode. Turn off your iPod and disconnect it from your computer. Press and hold the Home button (or Top button for iPod touch without a Home button) while connecting it to your computer.
Keep holding the button until you see the Connect to iTunes screen. iTunes will detect a device in Recovery Mode and prompt you to restore it.
Click “Restore” in iTunes to reinstall the iPod software. This process will erase all data on your device, but you can restore from a backup afterward.
DFU Mode for Restoring iPod’s Functionality
DFU (Device Firmware Update) Mode is useful when Recovery Mode doesn’t work. To enter DFU Mode, connect your iPod to your computer and open iTunes. Press and hold both the Power and Home buttons for 10 seconds.
Release the Power button but keep holding the Home button until iTunes recognizes a device in recovery mode. Your iPod’s screen will remain black in DFU Mode.
Follow the prompts in iTunes to restore your iPod. This method is particularly helpful for addressing severe software issues that prevent normal restoration.
| Restore Method | When to Use | Difficulty |
|---|---|---|
| iTunes | iPod recognized | Easy |
| Recovery Mode | iTunes doesn’t detect iPod | Medium |
| DFU Mode | Recovery Mode fails | Advanced |
Preventing Future iPod Disablement
Protecting your iPod from disablement requires proactive steps. These measures ensure continued access and safeguard your data.
Setting a Memorable Passcode
Choose a passcode you can easily remember but others can’t guess. Avoid common numbers like birthdays or sequential digits. Instead, use a combination of numbers meaningful to you.
Consider using a longer passcode for extra security. iPods allow 4-digit or 6-digit options. The 6-digit code offers more protection against unauthorized access.
Enable Touch ID if your iPod model supports it. This feature adds a layer of security while keeping access quick and convenient.
Remember to change your passcode periodically. This habit reduces the risk of others figuring it out over time.
Regular Backups to Prevent Data Loss
Frequent backups are crucial for preserving your iPod’s content. Set up automatic backups to iCloud or iTunes.
For iCloud backups:
- Connect to Wi-Fi
- Go to Settings > [your name] > iCloud > iCloud Backup
- Turn on iCloud Backup
- Tap “Back Up Now”
For iTunes backups:
- Connect your iPod to your computer
- Open iTunes
- Select your device
- Click “Back Up Now”
| Backup Method | Pros | Cons |
|---|---|---|
| iCloud | Automatic, wireless | Requires Wi-Fi, limited free storage |
| iTunes | Local storage, faster | Requires computer connection |
Choose the method that fits your routine best. Aim to back up at least weekly.
Using ‘Find My’ to Locate Lost iPod Touch
The Find My app helps locate misplaced iPods. It can prevent disablement by allowing you to find or lock your device remotely.
To set up Find My:
- Go to Settings > [your name] > Find My
- Turn on Find My iPod
- Enable “Send Last Location” for better tracking
If your iPod is lost:
- Visit icloud.com/find or use the Find My app on another device
- Sign in with your Apple ID
- Select your iPod from the list of devices
You can play a sound, put it in Lost Mode, or erase it remotely. Lost Mode locks the device and displays a custom message with your contact info.
Remember to keep your iPod’s location services on for this feature to work effectively.
Alternative Solutions and Support
When faced with a disabled iPod, you have options beyond iTunes. These include using Finder on newer macOS versions and reaching out to Apple Support for expert assistance.
Using Finder for macOS Catalina and Later
If you’re using macOS Catalina or a later version, Finder replaces iTunes for managing your iPod. To use Finder:
- Connect your iPod to your Mac with a USB cable.
- Open Finder and select your iPod from the sidebar.
- Click “Restore iPod” to erase all content and settings.
- Follow the on-screen instructions to set up your iPod as new.
This process will remove the disabled state and allow you to use your iPod again. Remember to back up your data regularly to avoid losing important information.
Seeking Help from Apple Support
If you’re still struggling, Apple Support can provide personalized help. You can:
- Visit the Apple Support website for troubleshooting guides.
- Contact Apple Support via phone, chat, or email.
- Schedule an appointment at an Apple Store or Authorized Service Provider.
Apple Support can guide you through advanced recovery options or offer alternatives if your iPod can’t be restored. They may also help with Apple ID or iCloud issues that could be causing the disabled state.
| Support Option | Pros | Cons |
|---|---|---|
| Online guides | Free, available 24/7 | May not cover all scenarios |
| Phone/chat support | Personalized help | May involve wait times |
| In-store appointment | Hands-on assistance | Requires travel, limited availability |
Remember to have your iPod’s serial number ready when contacting support for faster service.
Frequently Asked Questions
Resolving a disabled iPod issue involves various methods depending on your specific situation and available resources. Here are some common questions and solutions to help you regain access to your device.
How can I fix my disabled iPod if I cannot connect to iTunes?
If you can’t connect to iTunes, try using recovery mode to restore your iPod. Turn off your device, then press and hold the Home or Top button while connecting it to a computer. Keep holding until the recovery mode screen appears.
What steps should I take to reset a disabled iPod without using iTunes?
Without iTunes, you can attempt a force restart. Press and hold the Top button and either Volume button until the power off slider appears. Swipe to turn off, then press and hold the Top button to restart.
Is it possible to unlock a disabled iPod without a computer, and if so, how?
Unlocking a disabled iPod without a computer is challenging. Your best option is to use iCloud’s Find My feature if enabled. Sign in to iCloud.com, select Find iPhone, and choose Erase iPod to remove the passcode.
How do I restore iPod access when ‘iPod is disabled connect to iTunes’ message appears?
When you see this message, connect your iPod to a computer with iTunes installed. iTunes should detect your device in recovery mode. Choose the Restore option to erase and reset your iPod.
What are the methods to bypass the ‘iPod is disabled connect to iTunes’ screen?
To bypass this screen, you can use DFU mode if recovery mode doesn’t work. This method involves a specific button sequence to put your iPod in a state where it can be restored even with serious software issues.
Can ‘Find My iPhone’ feature help in unlocking a disabled iPod, and how would it work?
Yes, Find My iPhone can help. Log into iCloud.com, select Find iPhone, choose your disabled iPod, and click Erase iPod. This removes the passcode and all data, allowing you to set up the device as new.
| Method | Requirements | Data Preservation |
|---|---|---|
| Recovery Mode | Computer with iTunes | No |
| DFU Mode | Computer with iTunes | No |
| Find My iPhone | iCloud account, internet | No |
| Force Restart | No additional tools | Yes, if successful |


