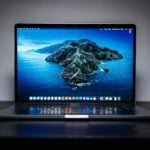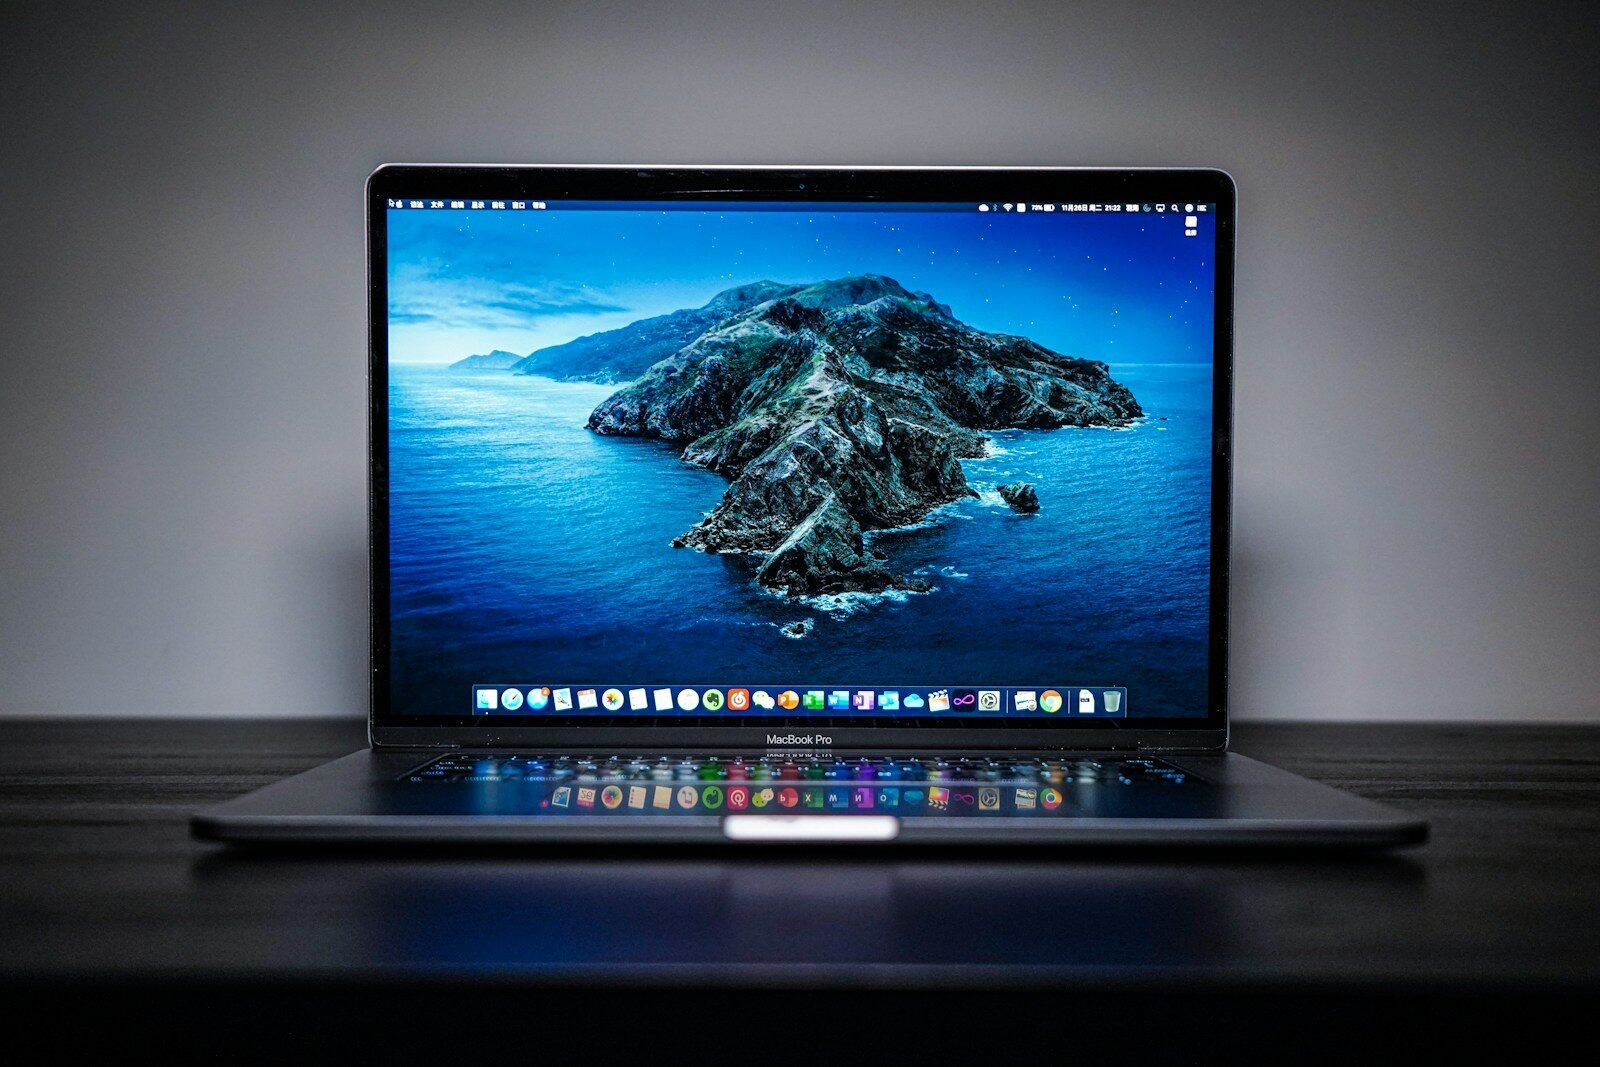
When Apple introduced the MacBook Pro with a notch design, it grabbed attention for its sleek display and improved screen real estate. But that same notch, home to the device’s camera and an essential part of the Face ID technology, has drawn mixed feelings from users. Some enjoy the extra screen space, while others find the notch intrusive, particularly when it overlaps with menu bar items or during full-screen activities.
Efficient solutions exist for those preferring an uninterrupted display on their MacBook Pro. Adjusting the screen settings can hide the notch, allowing users to customize their visual experience. This typically involves changes within specific applications or system preferences that tailor how the MacBook interacts with its distinctive hardware feature.
How to Remove (or Hide) the Notch on MacBooks
Apple introduced the notch starting with the 2021 MacBook Pro models and later MacBook Air models. While you can’t physically remove the notch, you can hide it or minimize its impact in several ways.
Here’s a complete guide to the best methods.
✅ 1. Use macOS “Scale to Fit Below Built‑in Camera” (Built-in Method)
Apple includes a per-app setting that prevents apps from extending into the notch area.
How to enable it:
- Open Finder
- Go to Applications
- Right-click the app you want to adjust
- Click Get Info
- Check “Scale to fit below built-in camera”
- Close the window and reopen the app
What it does:
- Moves the app content below the notch
- Adds a black menu bar area at the top
- Works on a per-app basis
✅ Best for: Apps where menus or UI elements are hidden behind the notch.
✅ 2. Use a Black Menu Bar (System Appearance Trick)
If you use Dark Mode, the notch becomes nearly invisible.
Enable Dark Mode:
- Go to System Settings
- Click Appearance
- Select Dark
Because the menu bar turns black, the notch blends in seamlessly.
✅ Best for: Users who don’t want extra software
✅ Easiest solution
❌ Doesn’t remove notch space, just hides it visually
✅ 3. Set a Custom Wallpaper with a Black Top Bar
You can design (or download) a wallpaper that includes a black strip across the top.
How:
- Create an image the same resolution as your display
- Add a black bar across the top (height of the menu bar)
- Save and set as wallpaper:
- System Settings → Wallpaper
This makes the top area appear uniform and hides the notch visually.
✅ Best for: Clean aesthetic
✅ Works in Light Mode too
✅ 4. Use Third-Party Apps to Hide the Notch
Several apps automatically black out the menu bar area.
Popular Options:
- TopNotch
- Forehead
- De-Notch-ifier
- Notchmeister
These apps:
- Add a black bar across the top
- Automatically adjust to resolution
- Work across all apps
Some are free, some paid.
✅ Best for: Automatic, system-wide solution
✅ No manual per-app settings
✅ 5. Change Display Resolution (Advanced Option)
You can adjust scaling settings to reduce how noticeable the notch feels.
Steps:
- Open System Settings
- Go to Displays
- Choose Scaled
- Select a resolution that gives more vertical space
This doesn’t remove the notch but can make layout spacing more comfortable.
✅ 6. Fullscreen Mode (Temporary Workaround)
Most apps in fullscreen mode use the entire screen while keeping menus hidden until needed.
- Click the green fullscreen button
- The notch becomes less intrusive in many apps
What You Can’t Do
- ❌ You cannot physically remove the notch
- ❌ You cannot disable the camera housing
- ❌ You cannot reclaim the notch area as usable pixels
The notch area is permanently reserved by macOS.
Best Method Overall
If you want the simplest solution:
👉 Use Dark Mode + a notch-hiding app like TopNotch
This makes the notch virtually disappear.
Final Thoughts
Most users stop noticing the notch after a few weeks. If it bothers you:
- Use Dark Mode for a seamless look
- Enable “Scale to fit below built-in camera” for problematic apps
- Or install a lightweight notch-hiding app
Key Takeaways
- Apple’s MacBook Pro features a notch that houses the camera and supports Face ID.
- Users have options to hide the notch if they prefer a continuous display.
- Settings adjustments are available within apps and the system preferences to manage the notch’s visibility.
Understanding the MacBook Pro Notch
The MacBook Pro Notch has been the subject of both interest and debate among Mac users. This section explores its design and functionality along with its impact on the screen display.
Design and Functionality
The Notch is a distinct design feature located at the top center of the MacBook Pro’s display. It houses the FaceTime camera and allows for a larger display without increasing the overall size of the Mac. This design means the device maintains an edge-to-edge screen real estate, making the most of the MacBook Pro’s mini-LED display. Apple integrates the notch smoothly into macOS Monterey, so it often blends into the user’s experience.
Display Characteristics
With a notch design, the MacBook Pro provides a more expansive viewable area. This results in additional screen real estate, giving users more workspace without the loss of visual content. The mini-LED display ensures high-quality images with vibrant colors and deep blacks. The notch may reduce the full-screen mode of certain apps but macOS Monterey includes features to manage how content is displayed. Users can adjust their settings to prevent the app windows from overlapping with the notch.
Methods to Hide the Notch
The notch on MacBook Pro models has received mixed reactions from users. However, you can hide it using system settings, third-party apps, or customized wallpapers.
Using System Preferences
Users can hide the notch in some applications by tweaking a setting labeled Scale to fit below built-in camera found in the Get Info section of the app. To use this feature, right-click on the app in Finder, select Get Info, and then check the box for the scaling option. This makes the menu bar thicker and moves the window content below the camera.
Leveraging Third-Party Apps
Third-party applications like TopNotch, CleanShot, and Notchmeister offer more control over how the notch is displayed. For example, TopNotch can make the notch area blend with the menu bar. CleanShot offers additional screenshot and recording options while effectively hiding the notch. To use these, users need to download and install the corresponding app and follow its specific instructions.
Creative Wallpaper Solutions
A simple yet effective way to mask the notch is to use dark or strategically designed wallpapers. These wallpapers blend the notch with the bezel, making it less visible. While static wallpapers can be custom-made, dynamic wallpapers adjust based on the time of the day, which can also contribute to hiding the notch subtly. Users can find such wallpapers online or design their own.