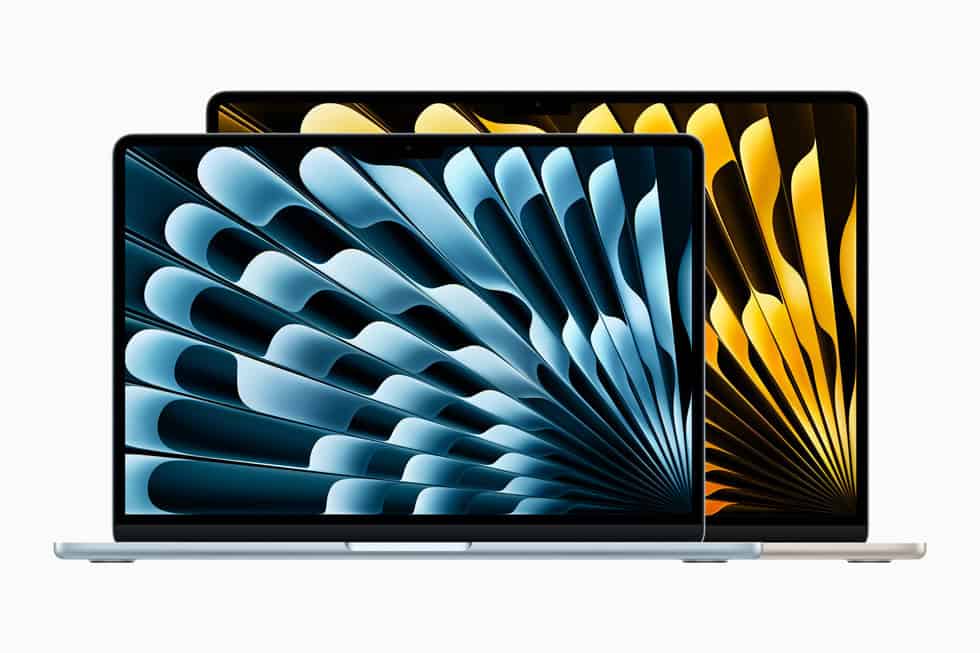
Taking a selfie on your MacBook is much easier than you might think. Most MacBook models come with a built-in camera near the top edge of the screen that works with various apps. You can quickly take a selfie on your MacBook using the Photo Booth app that comes pre-installed on all Mac computers.
The Photo Booth app offers a simple way to capture selfies with fun effects and filters. When you open the app, you’ll see yourself on the screen, and all you need to do is click the red camera button or press the spacebar to snap a picture. Your MacBook camera turns on automatically when you open apps that use the camera, so there’s no need to manually activate it.
How To Take a Selfie on a MacBook
All MacBooks come with a built-in FaceTime HD camera, which you can use to take selfies, profile pictures, or quick snapshots. The easiest way is by using the Photo Booth app.
🧭 Method 1: Using Photo Booth (Built-in App)
Photo Booth is Apple’s native camera app for taking photos and videos.
Step-by-Step:
- Open Photo Booth
- Click the Launchpad (the rocket icon on your Dock).
- Search for Photo Booth and open it.
- Alternatively, go to Applications → Photo Booth.
- Allow Camera Access
- If prompted, click OK to allow Photo Booth to use your camera.
- Choose Photo Mode
- At the bottom-left, click the photo icon (a single rectangle) to take a still photo.
- You can also choose four-photo burst mode (four rectangles) for multiple shots.
- Position Yourself
- Sit in front of your MacBook, adjust the angle, and make sure you have good lighting.
- Take the Selfie
- Click the red camera button at the bottom center.
- You’ll see a 3-second countdown before the photo is taken.
- View and Save
- Your selfie appears in the filmstrip at the bottom.
- Drag it to your desktop or click File → Export to save it.
✅ Tip: You can add fun effects by clicking the Effects button before taking the photo — choose filters like Sepia, Comic Book, or Thermal Camera.
(Source: Apple Support – Photo Booth User Guide)
📱 Method 2: Use Your iPhone Camera via Continuity Camera (macOS Ventura or Later)
If you want higher-quality selfies, you can use your iPhone as a webcam.
Steps:
- Make sure your MacBook and iPhone are signed into the same Apple ID and have Bluetooth and Wi-Fi turned on.
- Mount your iPhone near your MacBook.
- Open an app that uses the camera (like Photo Booth, FaceTime, or QuickTime).
- In the camera menu, select your iPhone as the camera source.
- Take your selfie using the Mac app interface.
(Source: iMyMac Guide)
💻 Method 3: Using QuickTime Player
If you prefer to record a short video or freeze a frame from it:
- Open QuickTime Player.
- Go to File → New Movie Recording.
- Click the Record button to start, then stop when done.
- Use Command + Shift + 4 to take a screenshot of your favorite frame.
✨ Bonus Tips for Great Selfies
- Use natural light from a window for better quality.
- Clean your camera lens with a microfiber cloth.
- Adjust your screen brightness — too bright can wash out your face.
- Use Photo Booth effects for fun or creative shots.
🧾 Summary
| Method | App | Best For | Notes |
|---|---|---|---|
| Photo Booth | Built-in | Quick selfies | Includes filters and countdown |
| Continuity Camera | iPhone + Mac | High-quality selfies | Requires macOS Ventura+ |
| QuickTime Player | Built-in | Video selfies or snapshots | Manual frame capture |
Key Takeaways
- MacBooks have a built-in camera at the top of the screen that works with the pre-installed Photo Booth app for taking selfies
- Simply open Photo Booth, position yourself in the frame, and press the spacebar or click the camera button to capture your selfie
- Your MacBook offers various effects and editing options to enhance your selfies before sharing them online
Understanding Your MacBook’s Camera Capabilities
Most MacBooks have a built-in camera at the top of the screen. This camera turns on automatically when you open apps like FaceTime or Photo Booth.
The built-in camera on your MacBook is designed for front-facing photos only. Unlike iPhones, MacBooks don’t have rear-facing cameras.
To take a selfie on your MacBook, use the Photo Booth app. It comes pre-installed on all MacBooks and is easy to find in Launchpad.
Photo Booth offers several options:
- Single photos
- Four quick shots in a row
- Video recording
- Fun effects and filters
Want to take a picture? Simply click the camera icon at the bottom of the Photo Booth window. The app will count down before taking your photo.
For those needing more camera options, consider connecting an external camera to your MacBook. External cameras offer better resolution and more angles for photography.
Some users enhance their MacBook photos with apps like Camera360. These apps add filters and editing tools beyond what Photo Booth offers.
Need to flip the view? MacBooks can’t physically flip their cameras, but some apps let you rotate images after taking them.
Remember that good lighting makes a big difference. Sit facing a light source rather than having it behind you for the best selfie results.
Accessing the Camera and Photo Booth Application
Taking selfies on your MacBook is simple with the built-in Photo Booth app. This handy tool gives you quick access to your camera and offers several options for capturing photos.
Launching Photo Booth
You can open Photo Booth in several ways on your MacBook. The fastest method is to use Spotlight Search. Press Command + Space on your keyboard and type “Photo Booth,” then press Enter when it appears.
Another way is to find Photo Booth in your Applications folder. Click on the Finder icon in your dock, select “Applications” from the sidebar, and look for the Photo Booth icon. It looks like a camera with colorful stripes.
You can also add Photo Booth to your Dock for easy access. Just drag the Photo Booth icon from the Applications folder to your Dock. This creates a shortcut you can click anytime.
When you open Photo Booth, your MacBook’s camera turns on automatically. You’ll see yourself on screen right away.
Navigating the Photo Booth Interface
The Photo Booth interface is simple and user-friendly. At the bottom of the screen, you’ll see the main controls. The large red button in the center is your Take Photo button. Click it once to take a picture.
To switch between photo and video mode, look for the camera and video camera icons near the bottom left. Click the video camera icon to change to video recording mode.
Photo Booth offers fun effects you can apply to your selfies. Click the Effects button to see options like:
- Color filters
- Distortion effects
- Background replacements
Your photos appear at the bottom of the screen after you take them. Click any thumbnail to view the full-size image. Right-click a photo to see options for sharing, saving, or deleting it.
To access all your Photo Booth pictures later, go to your Pictures folder and find the Photo Booth Library.
Setting Up the Scene for Your Selfie
Creating the perfect selfie on your MacBook requires good lighting and proper positioning. These elements make a big difference in how your final photo looks.
Adjusting Lighting and Background
Good lighting is key for a quality MacBook selfie. Natural light works best, so try to sit facing a window during daytime. Avoid sitting with bright light behind you, as this creates shadows on your face.
If natural light isn’t an option, use a desk lamp positioned at eye level. Don’t place the light directly above you, as this creates unflattering shadows.
Your background matters too. Choose a clean, simple background without distractions. A plain wall or neat bookshelf works well. Take time to clear away clutter that might appear in the frame.
Some quick tips for better backgrounds:
- Remove messy items from view
- Avoid busy patterns that distract from you
- Check what appears in the frame before taking the photo
- Consider your clothing color against the background
Positioning Your MacBook
The right angle makes a huge difference in how you look in your selfie. Place your MacBook on a stable surface at eye level or slightly higher. This angle is more flattering than looking down at the camera.
You can use books or a laptop stand to raise your MacBook to the ideal height. Aim to have the camera lens at or just above eye level.
Distance matters too. Sit about arm’s length away from your screen. This allows the camera to capture you properly without distortion.
Check your position in the preview before taking the photo. Make sure you’re centered in the frame with some space above your head. Your face should take up about a third of the frame for a well-balanced selfie.
Utilizing MacBook Camera Features
MacBook cameras offer various features to enhance your selfies and video recordings. These tools can transform basic photos into creative expressions with just a few clicks.
Applying Filters and Effects
Photo Booth on MacBook comes with fun filters and effects to make selfies more interesting. Users can choose from options like sepia, black and white, glow, and comic book effects.
To access these filters:
- Open Photo Booth app
- Click the Effects button at the bottom right
- Browse through the grid of filter options
- Click any filter to preview it in real-time
- Take your photo with the effect applied
Some effects distort facial features for funny results, while others add artistic touches. Users can even create custom backgrounds by selecting the backdrop option.
Photo Booth remembers the last used filter, making it easy to create a series of photos with the same look. The app automatically saves all photos to the Photo Booth library.
Using Timers and Burst Mode
The timer function helps users set up perfect selfies without rushing. To use the timer in Photo Booth, click the timer icon at the bottom of the screen before taking a photo.
Timer options include:
- 3-second countdown
- 5-second countdown
For group photos, the timer proves especially useful. It gives everyone time to get in position before the camera snaps the picture.
To take photos without the countdown, press and hold the Option and Shift keys while clicking the Take Photo button. This also disables the flash effect.
Burst mode captures multiple frames in quick succession. This works well for action shots or when trying to capture the perfect expression.
Managing Screen Recorder Options
MacBooks include built-in screen recording capabilities useful for tutorials or demonstrations. The screen recorder captures both video and system audio.
To access the screen recorder:
- Press Shift + Command + 5
- Choose between recording the entire screen or just a portion
- Click Options to customize settings
The Options menu offers several important choices:
- Microphone selection
- Timer delay settings
- Show mouse clicks (highlights clicks during recording)
- Save location preferences
- System audio recording toggle
The camera automatically activates when using apps like FaceTime or Photo Booth. This feature integrates smoothly with screen recording to create picture-in-picture style videos.
Recordings save directly to the desktop by default, but users can change this location in the Options menu.
Taking the Selfie
Taking a selfie on your MacBook is easy once you know which app to use. The built-in camera on your Mac makes it simple to capture clear self-portraits without needing extra equipment.
Capturing the Image
The fastest way to take a selfie on your MacBook is using the Photo Booth app. To start, open Photo Booth from the Applications folder or using Spotlight search.
When Photo Booth opens, you’ll see yourself on screen. The app offers several image options:
- Single Photo: Click the red camera button at the bottom to take one picture
- Four Quick Photos: Click the four-square icon for a photo strip
- Special Effects: Choose from various filters before shooting
A countdown will appear before the photo is taken. The Mac makes a camera shutter sound when the image is captured.
For more control, users can also use QuickTime Player by selecting File > New Movie Recording. Unlike Photo Booth, QuickTime allows pausing and more advanced options.
If needed, an external video camera can connect to the Mac for better quality or different angles.
Editing Your Selfie
After taking a selfie on your MacBook, you can enhance it to look its best. Apple provides several easy-to-use tools that help improve your photos without requiring professional skills.
Adjusting with Built-in Editing Tools
The Photos app on your Mac offers simple yet powerful editing features. To begin editing, double-click your selfie and click Edit in the toolbar. This opens a range of basic tools for quick improvements.
You can adjust brightness, contrast, and color with simple sliders. The Auto button fixes common issues with one click. For more control, try these options:
- Light adjustments: Brighten shadows or tone down highlights
- Color tools: Make colors more vibrant or change the warmth
- Cropping: Remove unwanted areas or straighten the image
Adding text or annotations is easy with the markup tool. Click the “More” button (three dots) and select Markup to draw, add text, or highlight areas of your selfie.
Utilizing Advanced Photo Editors
When you need more editing power than the built-in tools provide, third-party apps can help. These programs offer features for serious photo enhancement.
GIMP is a free alternative to Photoshop that works well on Mac. It handles complex edits like removing blemishes or changing backgrounds. Pixelmator is another Mac-friendly option with a simpler interface but powerful tools.
For quick edits with professional results, try:
- Lightroom: Perfect for color correction and overall image quality
- Affinity Photo: Offers layer-based editing at a one-time cost
- Fotor: A simple online editor accessible through your browser
Cloud-based services like Adobe Creative Cloud provide the most features but require a subscription. Many users find that free or low-cost options meet their selfie editing needs perfectly.
Using Your Selfie for Video Projects
Your MacBook selfies can be powerful tools for creating video content. They offer a quick way to add personal touches to videos without needing extra equipment.
Creating Video Tutorials
Taking selfies on your MacBook makes tutorial creation simpler and more personal. You can use Photo Booth to snap quick headshots that introduce your tutorials or show reactions.
For step-by-step tutorials, consider these approaches:
- Record short selfie clips explaining complex steps
- Use picture-in-picture format with your selfie in one corner
- Add selfie frames to highlight important points
Many teachers and content creators include their face in tutorials to build trust with viewers. This personal touch helps viewers connect with the content.
iMovie works well for adding these selfies to tutorials. Simply drag your Photo Booth images into your project and position them where needed. The software makes it easy to create professional-looking results with minimal editing experience.
Engaging with Live Streaming
MacBook cameras are perfect for live streaming sessions on platforms like YouTube, Twitch, or Facebook. The built-in camera provides good quality without extra hardware.
To improve your live streams:
- Find good lighting – face a window or use a desk lamp
- Position your MacBook at eye level for the most flattering angle
- Test your camera before going live
- Use background effects when appropriate
Streaming software like OBS works well with MacBook cameras. It lets users create custom layouts and add graphics around their selfie view.
For interactive sessions, selfie mode helps viewers see reactions and builds stronger connections. This face-to-face element makes educational content more engaging and personal than voice-only presentations.
Sharing and Exporting
After taking the perfect selfie on your MacBook, you’ll want to save and share it. These steps will help you get your photo where it needs to go.
Saving Your Selfie
When you take a photo in Photo Booth, it automatically saves to the Photo Booth library. To save it elsewhere:
- Click on the thumbnail of your selfie at the bottom of the screen
- Drag and drop it to your desktop or a folder
- Right-click on the image and select “Export”
- Choose your preferred format (JPEG, PNG, etc.)
You can also save multiple photos at once. Select several thumbnails by holding Command while clicking each one. Then drag them all to your destination folder.
For better organization, create a dedicated folder for your selfies. This makes them easier to find later when you need them.
Sharing to Social Media
MacBooks make sharing selfies to social media simple. Here are some quick methods:
Direct from Photo Booth:
- Click the thumbnail of your selfie
- Click the Share button (square with arrow)
- Select your preferred platform (Messages, AirDrop, Mail)
Using the Photos app:
- Import your selfie to Photos
- Select the image
- Click the Share button
- Choose a social media platform
For platforms without direct sharing options, save the photo first and upload it through the website or app. You can also use AirDrop to quickly send photos to your iPhone for posting on mobile apps.
Exporting for Professional Use
When you need higher quality images for work or portfolios, consider these export options:
For maximum quality:
- Open the selfie in Preview app
- Go to File > Export
- Choose TIFF or PNG format for lossless quality
- Adjust resolution as needed
For size optimization:
- Use the Export dialog in Preview
- Select JPEG format
- Adjust the quality slider based on your needs
You can also export photos to your iPhone for mobile editing. Connect your devices to the same WiFi network and use AirDrop or iCloud Photos for seamless transfers.
For professional editing, export in the highest resolution possible. This gives you more flexibility when adjusting the image later in editing software.
Frequently Asked Questions
Taking selfies on your MacBook is easy once you know the right tools and steps. Here are answers to common questions about using your MacBook’s camera.
What are the steps to take a photo with Photo Booth on a MacBook?
To take a photo using Photo Booth, first open the app from your Applications folder. The camera will activate automatically, showing your face on screen.
When you’re ready to snap a picture, click the red Take Photo button in the bottom center of the window. Photo Booth will count down from 3 before capturing the image.
Your photo will appear in the strip at the bottom of the window. Click it to view, and right-click to save or share it.
How can one access the front camera to take a photo on a MacBook?
The front camera on a MacBook can be accessed through several built-in applications. The simplest way is through Photo Booth, which comes pre-installed on all Macs.
FaceTime and QuickTime Player also allow camera access. In QuickTime, select File > New Movie Recording to activate the camera.
Camera access permissions may need to be enabled in System Preferences > Security & Privacy > Privacy > Camera.
What methods can be employed to capture an image on a MacBook Air screen?
To capture what’s on your MacBook Air screen, press Command + Shift + 3 to take a screenshot of the entire screen. The image saves to your desktop by default.
For a portion of the screen, press Command + Shift + 4, then drag the cursor across the area you want to capture. Let go to take the screenshot.
Press Command + Shift + 5 to open the screenshot toolbar with more options, including screen recording.
How is video recording implemented on a MacBook Air?
Video recording on a MacBook Air is simple using the Photo Booth app. Open Photo Booth and click the Record Video button (looks like a movie camera) at the bottom of the screen.
Click the button again to stop recording. Your video will appear in the strip at the bottom of the window.
QuickTime Player offers more advanced recording features. Open it and select File > New Movie Recording to start.
Where can you locate the camera application on a MacBook?
The main camera application on a MacBook is Photo Booth. You can find it in your Applications folder.
A quick way to open it is by pressing Command + Space to open Spotlight Search, then typing “Photo Booth” and pressing Enter.
You can also find Photo Booth in Launchpad, which you can open by pinching with your thumb and three fingers on the trackpad or clicking the Launchpad icon in the Dock.
Is it possible to take selfies on a MacBook using VLC media player, and if so, how?
Yes, VLC media player can take selfies on a MacBook. First, download and install VLC from the official website if you don’t have it.
Open VLC and select Media > Open Capture Device. In the window that appears, select “Video camera” as the capture mode and click “Open.”
Once your camera feed appears, go to Video > Snapshot to take a selfie. The image saves to your Pictures folder by default, but you can change this location in VLC’s preferences.

