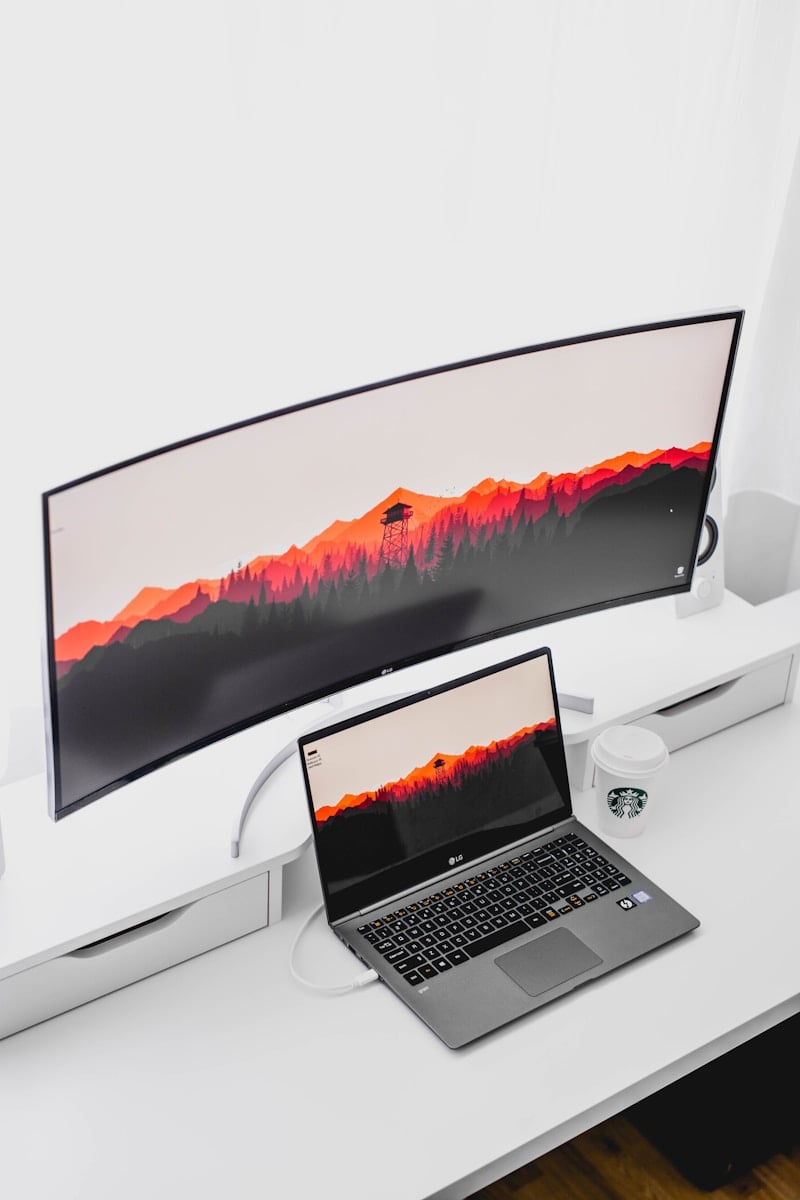
Connecting an external monitor to your MacBook Pro can vastly improve your workflow and productivity. You can connect one or more external displays to your MacBook Pro, depending on your specific model and chip type. This setup allows you to extend your desktop, mirror your screen, or use the external monitor as your main display.
The process is straightforward. You’ll need to identify the right ports on your MacBook Pro and choose the appropriate cable or adapter. Most recent MacBook Pro models use USB-C or Thunderbolt ports, which can handle video output alongside data transfer and charging. Older models may have HDMI or Mini DisplayPort connections.
Once connected, you can adjust display settings to optimize your setup. You can change resolutions, arrange multiple displays, and even use your MacBook Pro in clamshell mode with just the external monitor. This flexibility lets you create a workspace that suits your needs, whether you’re coding, designing, or simply need more screen real estate.
| MacBook Pro Model | Maximum External Displays | Connection Type |
|---|---|---|
| M1 (2020-2021) | 1 | USB-C/Thunderbolt |
| M2 (2022-2023) | 1 | USB-C/Thunderbolt |
| M3 (2024) | 2 | USB-C/Thunderbolt |
| Intel (pre-2020) | Up to 4 | Varies by model |
MacBook Pro External Monitor: Best Options for Enhanced Productivity (2025 Guide)
Whether you’re a creative professional, programmer, or business multitasker, connecting your MacBook Pro to an external monitor can dramatically boost productivity. Apple’s Retina displays are stunning, but when you need more screen real estate or color accuracy, a high-quality external monitor is essential.
This guide covers the best external monitors for MacBook Pro in 2025, what to look for, and how to choose the right one for your workflow.
🧩 Why Use an External Monitor with Your MacBook Pro?
Here are the key benefits of adding an external display:
- Expanded workspace: Perfect for multitasking and managing multiple windows.
- Improved ergonomics: Position your screen at eye level for better posture.
- Enhanced color accuracy: Ideal for designers, photographers, and video editors.
- Higher refresh rates: Smoother visuals for gaming or motion design.
- Better connectivity: Some monitors double as docking stations via Thunderbolt or USB-C.
⚙️ What to Consider Before Buying
When choosing an external monitor for your MacBook Pro, keep these specs in mind:
| Feature | Why It Matters |
|---|---|
| Resolution | 4K or higher ensures sharp text and detailed visuals. |
| Panel Type | IPS panels offer better color and viewing angles than TN panels. |
| Refresh Rate | 60Hz is standard; 120Hz+ is great for smooth motion. |
| Color Accuracy | Look for 99% sRGB or DCI-P3 coverage for creative work. |
| Connectivity | USB-C/Thunderbolt 4 ensures single-cable power and data transfer. |
| Size | 27–34 inches is the sweet spot for productivity setups. |
🖥️ Best External Monitors for MacBook Pro (2025)
Here’s a comparison of the top-rated monitors compatible with MacBook Pro, balancing performance, design, and value.
| Monitor | Display Size | Resolution | Panel Type | Connectivity | Ideal For | Approx. Price (USD) |
|---|---|---|---|---|---|---|
| Apple Studio Display | 27” | 5K (5120×2880) | Retina IPS | Thunderbolt 3 | Designers, video editors | $1,599 |
| LG UltraFine 5K | 27” | 5K (5120×2880) | IPS | Thunderbolt 3, USB-C | Mac users needing color accuracy | $1,299 |
| Dell UltraSharp U3223QE | 32” | 4K (3840×2160) | IPS Black | USB-C (90W PD), HDMI | Office multitasking, coding | $999 |
| Samsung ViewFinity S9 | 27” | 5K (5120×2880) | IPS | Thunderbolt 4, DisplayPort | Creative professionals | $1,599 |
| BenQ PD3220U | 32” | 4K (3840×2160) | IPS | Thunderbolt 3, HDMI | Designers, editors | $1,099 |
| Gigabyte M34WQ | 34” Ultrawide | 3440×1440 | IPS | USB-C, DisplayPort | Productivity, gaming | $499 |
| ASUS ProArt PA279CV | 27” | 4K (3840×2160) | IPS | USB-C (65W PD) | Budget-friendly creative work | $399 |
(Sources: The Tech Screens, Apple, Dell, LG, Samsung official specs)
🔌 How to Connect Your MacBook Pro to an External Monitor
1. Using USB-C or Thunderbolt
Most modern monitors connect directly via USB-C or Thunderbolt 3/4, transmitting video, audio, and power through one cable.
Steps:
- Plug the monitor’s USB-C/Thunderbolt cable into your MacBook Pro.
- Go to System Settings → Displays.
- Click “Arrange” to configure your display layout.
2. Using HDMI or DisplayPort
If your monitor doesn’t support USB-C, use an adapter or dock:
- USB-C to HDMI
- USB-C to DisplayPort
🧠 Tips for the Best Setup
- Enable True Tone for natural color temperature adjustment.
- Use Night Shift to reduce blue light exposure at night.
- Calibrate your monitor using macOS Display Preferences for accurate color.
- Mount your monitor on an ergonomic arm for optimal comfort.
- Consider dual displays for maximum productivity — macOS handles extended screens beautifully.
🚀 Final Thoughts
The right external monitor for your MacBook Pro can transform your workflow — whether you’re editing 4K videos, coding, designing, or managing multiple projects.
For best overall performance, the Apple Studio Display and LG UltraFine 5K remain top picks. If you want value and versatility, the Dell UltraSharp U3223QE or BenQ PD3220U are excellent alternatives.
Choose based on your needs, workspace, and budget — and enjoy a more powerful, productive Mac setup.
Related Reading:
- Best Budget Monitor for MacBook Pro (Tech Screens)
- How to Use Dual Displays on Mac
- The Tech Screens: Best External Monitor for MacBook Pro
Compatibility and Connectors
MacBook Pro models offer various options for connecting external displays. The specific ports and capabilities depend on the MacBook’s generation and chip type.
USB-C and Thunderbolt Interfaces
MacBook Pro laptops feature USB-C ports that support Thunderbolt. Thunderbolt 3 and 4 provide high-speed data transfer and video output. These versatile ports allow you to connect monitors directly or through docks.
Thunderbolt 4 supports up to two 4K displays at 60Hz or one 8K display at 60Hz. It’s backward compatible with earlier versions and USB standards. This flexibility lets you use a wide range of monitors and accessories.
When choosing a display, check its resolution and refresh rate compatibility with your MacBook Pro model. Some high-end displays may require specific Thunderbolt versions for full functionality.
HDMI, DisplayPort, and Adapters
Recent MacBook Pro models include an HDMI port for easy monitor connections. The HDMI port supports 4K resolution on most models.
For DisplayPort monitors, you’ll need a USB-C to DisplayPort adapter or cable. These adapters maintain high resolutions and refresh rates, ideal for gaming or professional work.
VGA displays require a USB-C VGA Multiport Adapter. While functional, VGA offers lower quality than modern digital connections.
| Connector Type | Max Resolution | Adapter Needed |
|---|---|---|
| HDMI | 4K | No |
| DisplayPort | 5K | Yes |
| VGA | 1080p | Yes |
MacBook Model Specifics
MacBook Pro models with M1 chips natively support one external display. M2 Pro and M3 Pro chip models can drive up to two external displays. These newer models offer more flexibility for multi-monitor setups.
For M1 MacBooks needing multiple displays, third-party solutions exist. DisplayLink adapters allow connection of additional monitors beyond the native limit.
To set up your displays, connect them to your MacBook Pro using appropriate cables or adapters. Then adjust display settings in System Settings for optimal performance.
Configuring Display Settings
Properly configuring your MacBook Pro’s display settings enhances your external monitor experience. Adjusting resolution, managing multiple displays, and calibrating colors optimize your setup for productivity and visual quality.
Adjusting Resolution and Refresh Rate
To adjust your external display’s resolution and refresh rate, open System Settings and click Displays. You’ll see options for both your MacBook Pro screen and connected monitors.
Choose a resolution that balances clarity and screen space. Higher resolutions offer more detail but may make text smaller. Lower resolutions increase text size but reduce overall space.
For refresh rate, select the highest option your monitor supports. Higher rates reduce motion blur and eye strain, especially for fast-moving content.
Some monitors may offer additional settings like HDR or variable refresh rates. Enable these if available for improved visual quality.
Managing Multiple Displays
With multiple displays connected, you can arrange their positions to match your physical setup. Drag the display icons in System Settings to align them correctly.
Choose a main display where your menu bar and Dock will appear. Right-click the desired display and select “Set as Main Display.”
You can use displays in extended or mirrored mode:
- Extended: Spreads your desktop across all screens
- Mirrored: Shows the same content on all displays
To switch modes, check or uncheck “Mirror Displays” in System Settings.
| Mode | Pros | Cons |
|---|---|---|
| Extended | More screen space | Can be disorienting |
| Mirrored | Easy presentation setup | Limited to one screen’s resolution |
Color Calibration and Profiles
Proper color calibration ensures consistent colors across your displays. MacOS includes built-in calibration tools to help match your external monitor to your MacBook Pro’s screen.
To calibrate:
- Open System Settings > Displays
- Click “Color” tab
- Select “Calibrate…”
- Follow the on-screen instructions
You can create custom color profiles or choose from preset options. For creative work, consider using a hardware colorimeter for more precise calibration.
If your monitors have different color temperatures, adjust the white point to match. This reduces eye strain when moving between displays.
Remember to recalibrate periodically, as display colors can shift over time.
Optimizing Your Workspace
Connecting an external monitor to your MacBook Pro expands your digital workspace. This setup enhances productivity and comfort when used correctly.
Choosing the Right Monitor
When selecting an external monitor for your MacBook Pro, consider resolution and size. 4K and 8K displays offer crisp visuals but may strain older MacBook models. Match the monitor’s resolution to your MacBook’s capabilities for optimal performance.
Screen size impacts your workflow. Larger screens provide more space but require more desk room. A 27-inch monitor often balances visibility and practicality for most users.
Consider color accuracy if you work with graphics or video. Look for monitors with wide color gamuts and factory calibration.
Connectivity is crucial. Newer MacBooks use Thunderbolt/USB-C ports. Ensure your chosen monitor is compatible or buy an appropriate adapter.
Setting Up a Primary and Secondary Display
MacOS makes it easy to arrange multiple monitors. Open System Preferences and click Displays. In the Arrangement tab, drag the display icons to match your physical setup.
Choose which screen serves as your primary display. Drag the white bar to the desired screen. This determines where your dock and menu bar appear.
Adjust your displays’ relative positions. Align them properly to avoid cursor “jumps” when moving between screens.
Consider using your MacBook’s screen as a secondary display. This works well for reference materials or communication apps.
Ergonomics and Practical Setup Tips
Position your monitors at eye level to reduce neck strain. Use monitor stands or adjustable arms to achieve the right height.
Place your primary screen directly in front of you. Position secondary displays at comfortable viewing angles.
Maintain proper distance from your screens. A good rule is to sit an arm’s length away from your primary monitor.
| Tip | Benefit |
|---|---|
| Use a keyboard and mouse | Reduces laptop hunching |
| Adjust screen brightness | Prevents eye strain |
| Take regular breaks | Improves overall comfort |
Manage cables for a cleaner workspace. Use cable clips or a cable management system to reduce clutter.
Ensure proper lighting. Avoid glare on your screens by positioning monitors away from direct light sources.
Troubleshooting Common Issues
External monitor problems can be frustrating but often have simple solutions. These troubleshooting steps will help you resolve connection issues, improve display quality, and address compatibility errors.
Resolving Connection Problems
Start by checking all cable connections. Ensure cables are firmly plugged in at both ends. Try different ports on your MacBook Pro and monitor. USB-C ports are versatile but can be finicky.
If using an adapter, verify it’s compatible with your MacBook Pro model. Some adapters only work with specific MacBook versions or video outputs.
Restart your MacBook Pro with the monitor connected. This can reset the connection and solve many issues. Hold the power button for 10 seconds then turn it back on.
Use the Detect Displays function in System Settings > Displays. Hold the Option key to reveal this button.
Fixing Display and Image Quality
Adjust your display settings for optimal performance. Go to System Settings > Displays and experiment with different resolutions and refresh rates.
| Setting | Recommendation |
|---|---|
| Resolution | Match monitor’s native resolution |
| Refresh Rate | Highest available (typically 60Hz) |
| Color Profile | Select your monitor model if available |
If text appears blurry, try enabling font smoothing. Open Terminal and enter:
defaults write -g CGFontRenderingFontSmoothingDisabled -bool NO
Restart your MacBook Pro for changes to take effect.
For flickering issues, try reducing the refresh rate slightly. This can sometimes stabilize the image.
Addressing Compatibility Errors
Older monitors may have trouble with newer MacBook Pro models, especially those with M3 Pro or M3 Max chips. Check if your monitor’s firmware needs updating.
For VGA monitors, ensure you’re using a high-quality adapter. VGA is analog and can suffer from signal degradation.
Try using AirPlay as a wireless alternative if your TV or secondary display supports it. This bypasses physical connection issues.
If problems persist, consider using DisplayLink software. It can improve compatibility with a wide range of monitors and docking stations.
Frequently Asked Questions
Connecting external monitors to MacBook Pro models involves various considerations. Different MacBook Pro versions support different numbers and types of displays.
How can I connect an external monitor to my MacBook Pro?
You can connect an external monitor to your MacBook Pro using Thunderbolt or HDMI ports. For USB-C displays, plug the cable into a Thunderbolt port. HDMI displays connect directly to the HDMI port if available.
For older VGA displays, you’ll need a USB-C VGA Multiport Adapter. This connects to a Thunderbolt port on your MacBook Pro.
What are the best external monitors compatible with the MacBook Pro?
The best monitors for MacBook Pro depend on your needs and budget. 4K or 5K displays offer sharp images for design work. For general use, 1080p monitors work well.
Look for monitors with USB-C connectivity for a single-cable solution. This can charge your MacBook Pro and transmit video simultaneously.
What steps are needed for a MacBook Pro to recognize an external monitor?
Usually, MacBook Pros automatically detect external monitors when connected. If not, try these steps:
- Check cable connections
- Restart your MacBook Pro
- Open System Preferences > Displays
- Click “Detect Displays”
If issues persist, try a different cable or port on your MacBook Pro.
Is it possible to connect a MacBook Pro to two monitors simultaneously?
Yes, but it depends on your MacBook Pro model. M2 Pro and M3 Pro chip models support up to two external displays. M1 Pro and M1 Max models also support multiple displays.
Older Intel-based MacBook Pros can often support two or more external displays. Check your specific model‘s specifications for exact capabilities.
What types of monitors can the Mac Pro connect to?
MacBook Pro models can connect to a wide range of monitors. These include:
- 4K and 5K displays
- USB-C/Thunderbolt monitors
- HDMI monitors
- DisplayPort monitors (with an adapter)
- VGA monitors (with an adapter)
Resolution support varies by MacBook Pro model. Some support up to 6K displays at 60Hz refresh rates.
Are there budget-friendly monitors well-suited for MacBook Pro users?
Yes, several budget-friendly monitors work well with MacBook Pros. Look for:
- 1080p resolution (minimum)
- IPS panel for better color accuracy
- HDMI or USB-C connectivity
Many 24-inch monitors under $200 meet these criteria. For slightly more, you can find 27-inch 1440p displays that offer a good balance of screen space and sharpness.
| Monitor Size | Resolution | Typical Price Range |
|---|---|---|
| 24-inch | 1080p | $100-$200 |
| 27-inch | 1440p | $200-$350 |
| 32-inch | 4K | $300-$500 |
Choose based on your needs and desk space. Remember, pricier doesn’t always mean better for your specific use case.